.

Showing posts with label coconut oil. Show all posts

Spelt & Oat Pancakes + Blueberry Compote

Spelt & Oat Pancakes + Blueberry  Compote

I saw this recipe from the Minimalist Baker and decided I had to veganize it. In a word...Delicious! My pictures do not do it justice, I almost didn't post it but decided what the heck. Take a look at the original recipe and you'll understand why I just had to attempt this recipe. And is so happened, I had just received a whole bag full of oranges & lemons that needed to be used and also had a bag of frozen organic blueberries in the freezer from summer ready to go. I'd say this recipe appeared at the perfect time. I love synchronicity like that, don't you! I was all set and ready to go....away I went, off to the kitchen....my kitchen of love. :)

Spelt & Oat Pancakes + Blueberry  Compote
Sometimes it's good to change things up and this blueberry compote with the addition of oats to the batter was a welcome change!

Spelt & Oat Pancakes + Blueberry  Compote

Spelt & Oat Pancakes + Blueberry Compote

Ingredients
  • 1 cup spelt flour
  • 1/2 cup oats (old fashioned or quick oats)*
  • 1 tablespoon sugar (coconut, raw or pure cane sugar)
  • 2 teaspoons baking powder
  • pinch of salt
  • 1 cup vegan buttermilk (1 cup non-dairy milk + 1 tablespoon lemon juice or apple cider vinegar)
  • 1 flax egg (1 tablespoon flax meal + 3 tablespoons water), optional
  • 1 teaspoon vanilla
  • 1 1/2 tablespoon coconut oil, melted or grapeseed oil
 Compote
  • 1 cup blueberries (frozen or fresh)
  • zest of one lemon or orange
  • 2 - 3 tablespoons lemon or orange juice
  • 2 teaspoons sugar (coconut, raw or pure cane sugar)

If using a flax egg, place ingredients in small bowl and set aside for about 10 minutes to set. This is optional. I have made pancakes many times without the need for an egg replacement but you can think of it as added nutrition as flax meal is very good for you!

Place small saucepan over medium heat. Add blueberries, sugar, lemon/orange juice and zest, bring to a simmer, mashing the berries with the back of a spoon. Once warm, bubbly and thickened, remove from heat and set aside, about 10 minutes.

Preheat griddle or pan to medium heat. Combine the flour, oats, sugar, baking powder, baking soda and salt in a large bowl. In a small bowl, whisk together the buttermilk, flax egg, vanilla and coconut oil. Add wet ingredients into the dry mixture and blend until just combined.

Using a 1/4 cup measuring cup, scoop and pour pancake mix onto a lightly greased griddle or skillet. Cook until bubbles form along the top and edges, about 2 to 3 minutes...bottom should be golden brown. Carefully flip and cook for another 2 minutes or so until golden brown underneath. Makes about 8 small pancakes.

Serve warm with blueberry compote and pure maple syrup.

Serves two generously.

Notes:

If you don't care for whole oats in your pancakes (like my daughter), you can process them to be a finer consistency or use the quick oats since they are a bit smaller.

I have made the compote with lemon and orange juice and zest. Both ways were equally delicious!

Enjoy!


Salted Chocolate Pecan Sandies (Gluten Free)


I love anything pecans, and when you add some chocolate to the mix you've really got a winner! These are a welcome addition to the recipe list and my go to baked cookie. The recipe consists of an almond flour/meal and has a nice lightly sweet flavor, especially from the coconut sugar which gives it a nice caramel flavor. And the salt adds to the delightfulness of these cookies bringing an added touch that will leave you wanting another bite, and another. Pair with a nice glass of your favorite non-dairy milk, or tall glass of water, and enjoy this chocolate chip style cookie...not too crisp, not too soft...just right. They are kid tested and most definitely mother approved! When the craving for a baked cookie comes around this will be the one!


I made this batch with half chocolate chips and half without. The above picture will be what the dough should roughly look like after blending well and before adding in the chocolate chips. I used almond meal in this recipe as I like to make my own. If using almond flour, your dough will be much lighter in color since the skin will have been removed by the manufacturer before processing. I scooped out rounded tablespoons, rolled into about a one inch ball, placed on the cookie sheet and flattened slightly. They will puff up a little when cooking so leave at least a half an inch or so between cookies. 

Also, I'm looking into a silicon mat to use instead of parchment paper. Coconut oil works great too but having a silicon mat handy will be welcome. It may interest you also...you can find out more about them by looking at the reviews in the following link: Silpat Non-Stick Baking Mat


Salted Chocolate Pecan Sandies

Ingredients
  • 2 cups packed almond flour or almond meal*
  • 1/4 cup coconut palm sugar, turbinado sugar or pure cane brown or white sugar
  • 1/2 teaspoon cinnamon
  • 1/4 teaspoon baking soda
  • 1/4 teaspoon sea salt
  • 1/4 cup coconut oil, melted
  • 1/4 cup pure maple syrup, warmed
  • 2 teaspoons vanilla
  • 1/2 cup pecan pieces (raw or roasted)
  • 1/4 or so cup semi-sweet chocolate or dark chocolate chunk pieces, you can place some strategically on top as well
  • sea salt to garnish

Preheat oven to 325 degrees.

Combine the first five dry ingredients in medium sized bowl. In a small bowl, add the coconut oil and maple syrup together, heat until warmed and coconut oil is melted. Add in all three wet ingredients to the dry mixture and blend well. Mix in the pecans and chocolate chips. 

Prepare a baking sheet with coconut oil, parchment paper or use a non-stick mat. Scoop out rounded tablespoons full and roll dough into balls about an 1 inch or so in size, place on cookie sheet and flatten slightly with your fingers. Leave about a half inch to an inch between cookies as they will expand when cooking. Sprinkle entire batch with sea salt. Bake for 20 minutes. They may look like they need to cook more but don't worry once they cool they will darken slightly, harden a little and be a perfect cookie. Let cool and enjoy!

Makes about 16 to 18 cookies.

* I make my own almond meal in a food processor. 1 1/2 cups of almonds will easily get you 2 cups of flour/meal. It's super easy...just process for about 4 minutes, depending on your processor. Store any leftover flour in a mason jar or sealed container of choice for later use.

Happy Baking!


Inspired by this recipe from Comfy Belly

Oat Jam Thumbprint Cookies


Finally, a baked cookie to add to my recipes. This one is really a tasty little treat. It doesn't contain any butters or wheat flours...just oats, a few nice spices, raw or coconut sugar, coconut oil and lot's of love. This recipe even uses the food processor for easy mixing. These really remind me of a breakfast bar of sorts. They would be great in the morning, as well as after lunch, dinner or any time you just want a cookie that hits the spot with lots of wholesome goodness.


Oat Jam Thumbprint Cookies

Ingredients
  • 1 tablespoon chia seeds or flax seed meal
  • 3 tablespoons almond milk
  • 1 cup rolled oats (I used GF)
  • 1/4 cup coconut sugar, turbinado or pure cane sugar
  • 1 teaspoon cinnamon
  • 1/2 teaspoon baking soda
  • 1/2 teaspoon baking powder
  • 1/8 teaspoon himalayan salt
  • 3 tablespoons coconut oil (in it's melted state)
  • 1 tablespoon pure maple syrup
  • 2 tablespoons almond butter, optional
  • 1 teaspoon vanilla extract
  • 100% fruit jam for filling (I used strawberry & blueberry)


Preheat oven to 350 degrees.

Combine chia seeds or flax seed meal with the almond milk in a small bowl, set aside for at least 10 min.

In food processor, add oats and blend until you have a rough oat flour. Add the sugar, cinnamon, baking soda, baking powder and salt. Pulse a few times until combined. Add melted coconut oil, maple syrup, optional nut butter, chia/flax mixture and vanilla, blend until it comes together and forms a ball.

Scoop 1 tablespoon of the dough onto an ungreased cookie sheet, you should get 12 cookies. Bake for 15 minutes. 

Once removed from the oven, using a small spoon....I used the back of a teaspoon....press down gently creating a small thumb sized dent in the center of the cookie.  

Once cookies have cooled, using the same teaspoon, scoop a dollop of jam into the center.

Store in an air-tight container. In the container they will soften a bit so I suggest eating within a few days or store in the refrigerator for up to a week. 

Enjoy !

Adapted from this recipe

ORANGE-FRENCH TOAST

Orange French Toast
Orange French Toast
Orange French Toast

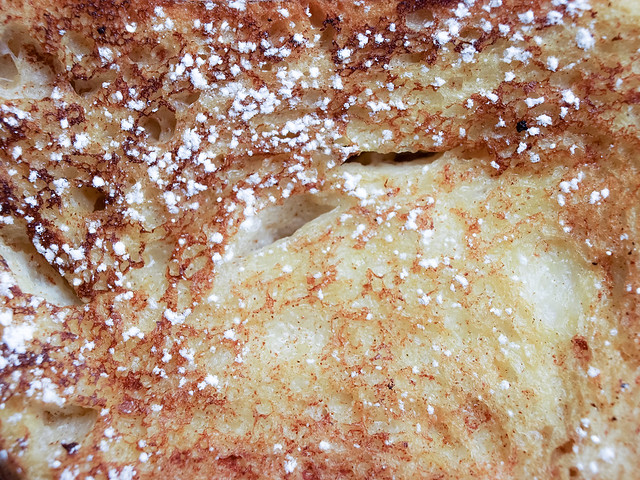
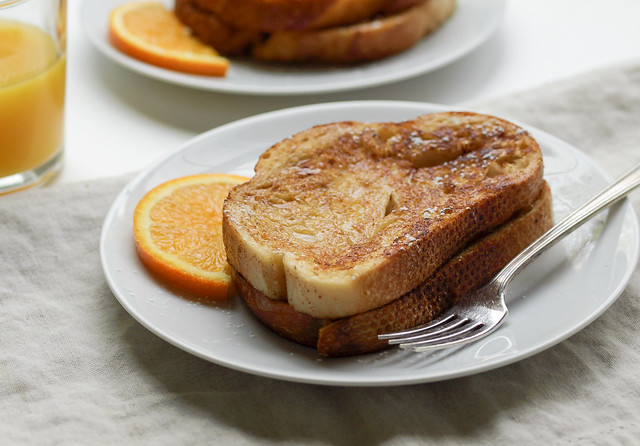
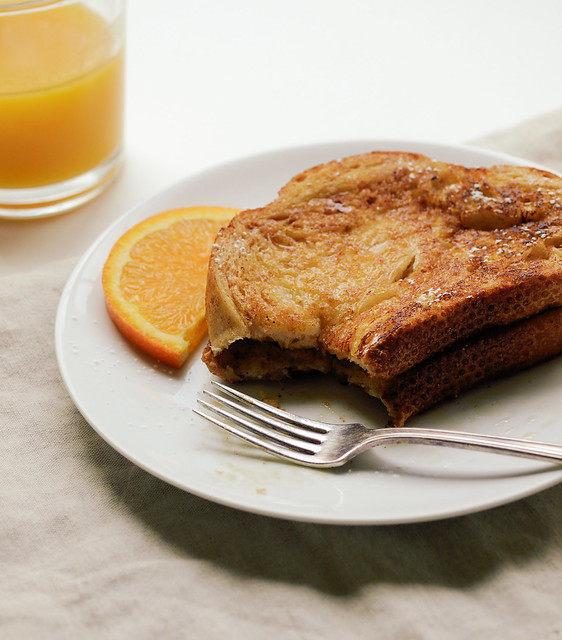
I LOVE french toast! This version is so simple and delightful. It came out perfectly soft and moist in the center with subtle flavors of orange and cinnamon all around. Adding a nice glass of pure organic orange juice along side completed this any time of day meal. This would be great to serve when you have over night company. You can impress them with this easy breakfast/brunch they will surely want the recipe. This recipe is adapted from a very fun recipe blog called Vegan Stoner, you can find the original recipe here.

Orange-French Toast

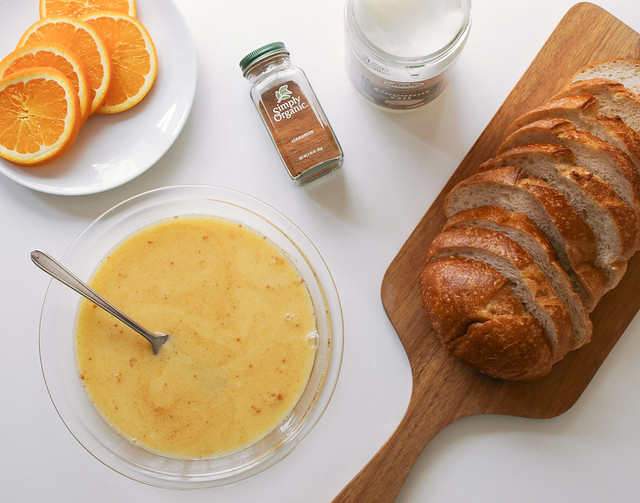
So easy to put together, simply mix your ingredients, dip the bread and cook on the griddle or skillet. Simple, straight forward and fast!

Orange French Toast

Orange-French Toast

Ingredients
  • 1 loaf french or sourdough bread, sliced 
  • 1/2 cup almond milk, or non-dairy milk of choice
  • 1/2 cup fresh squeezed or pure organic orange juice
  • 2 tablespoon pure cane sugar, maple syrup or coconut palm sugar
  • a few dashes of cinnamon
  • 1 teaspoon vanilla extract, optional
  • 1 to 2 tablespoons coconut oil, for griddle/skillet
  • pure maple syrup to serve
  • pure cane powdered sugar to garnish

In medium size, flat bottom, shallow bowl, mix milk and orange juice. Add choice of sweetener, cinnamon and optional vanilla extract, mix well.

Melt coconut oil on griddle/skillet at about a medium high heat, lightly dip both sides of toast in mixture and cook until golden brown on each side, approx 2-3 minutes per side. After dipping 3 or 4 toasts you may want to add a few more dashes of cinnamon to the mixture, it floats on top and will most likely be gone after the first few dips.

Serve with pure maple syrup and garnish of choice. Serves about 3 - 4, depending on how thick you slice your bread.

Enjoy!

CLASSIC PUMPKIN LOAF

Pumpkin Loaf
Pumpkin Loafpumpkin puree
Pumpkin Loaf

Fall is here and it's time to get the oven going and the house smelling like autumn. No better way to bring in the fall than with a nice loaf of pumpkin bread wafting through the air. This recipe is adapted from my Banana Tea Bread. It's a very simple recipe and worked well here using a can of pumpkin puree instead of just the standard 1 cup. I tried using the whole can because I hate to waste or have to use up the rest of the puree. I figured if I use almost 2 cups of banana in my banana tea bread recipe, I can use 1 1/2 cups of pumpkin puree here and add a little extra liquid in the form of water or maple syrup. By all means if you feel this is too much and you're going to ruin a loaf, than stick with the 1 cup puree instead and omit the water/maple syrup. But you can see here that it worked, baking up beautifully without sinking in the center like you might expect. It came out moist and perfectly dense with a nice soft crumb. There is no need for butters or egg substitutes in this recipe either...just simple ingredients from your pantry that come together easily and beautifully. And believe me, it tastes just as good as it smells while baking!

The flour of choice in this recipe is spelt. It's a wonderful flour that when used in baked goods, cooks up tender and soft. I use it as my flour of choice when not baking gluten free. Use it in cookies, pancakes, breads, cakes, waffles and muffins...anywhere flour is called for.

Here is a little more info on spelt from The Spelt Bakers

'Spelt is by nature a whole-food. Unlike wheat, where vital nutritional bran and germ are usually removed during milling, the vital substances of spelt are found in the inner kernel of the grain. However this does not mean that spelt makes a heavy loaf. In fact the exact opposite is true. The real beauty of spelt is in its ability to make a really light, highly nutritious loaf with an appealing nutty flavour. The protein in spelt is such that when the flour is turned into bread it bakes well and results in a very light, soft textured loaf with good keeping qualities which doesn’t shed crumbs when sliced.'

I'll abide to all of that...this loaf came out speltiful!

Read more about the beauty of spelt here and source it in your local area, or look online. I know you will LOVE what this flour can do for your baked goods. Seriously!

Now on to the recipe...

Pumpkin Loaf

Pumpkin Loaf

Ingredients
  • 2 cups spelt flour, or flour of choice*
  • 1/2 - 3/4 cup coconut, turbinado or organic pure cane sugar
  • 2 teaspoons baking powder
  • 1/2 teaspoon baking soda
  • 2 teaspoons pumpkin pie spice mix or 1 tsp each cinnamon & ginger and 1/2 tsp each nutmeg & allspice and a pinch of clove
  • pinch of mineral salt
  • 1- 2 teaspoons vanilla extract
  • 1/3 cup water or unsweetened almond milk (at room temp)
  • 1/3 cup coconut oil (melted), or vegetable oil of choice 
  • 1 can (15oz) 100% pumpkin puree or 1 1/2 cups fresh pumpkin puree

Preheat oven to 350 degrees F.

In a medium size bowl, combine flour, baking powder, baking soda, spices and salt. In a small bowl, combine oil, sugar, water/milk and vanilla. Add the wet mixture to the dry mixture along with the pumpkin puree and mix well. Don't over mix but be sure there is no flour clumps. Taste batter adjusting flavor or sweetness to your liking. Pour batter into a lightly greased loaf pan. Bake for 55 - 60 minutes. Once done, remove from oven, let cool slightly before serving. Let cool completely before storing.

Notes:

If you must substitute the flour (I highly recommend sticking with the spelt, it's my favorite), use unbleached all-purpose and/or fine whole wheat flour. If you try using a regular whole wheat flour, increase the water to 1/2 cups (you may have a denser loaf, but still tasty!).

I've made this loaf using less oil, anywhere from  2 - 4 tablespoons, while substituting the remaining amount called for with almond milk/water...turned out fabulous while cutting some fat out of the recipe.

For the spices, I used the pumpkin pie spice mix plus some extra cinnamon. I like all the flavors. If using the individual spices adjust the measurement up to suit your taste. Use less spice if you want to taste more of the pumpkin. Remember to always start with the smaller amount and work your way up. You cannot take away but you can always add.

Since there are no flaxeggs here, if you wish you can add two flaxeggs in place of the water + add 3 extra tablespoons water or you can simply add two tablespoons of flaxseed meal to the batter with the dry ingredients. Ground flax seeds have great nutritional benefits and can be added to boost the nutritional profile of this recipe. If you have some on hand, go for it!

Adjust the sugar up a little if you like it a bit sweeter. Because this batter is on the thicker side, you can also add in up to 1/4 cup, or replace dry sugar with, warmed or room temp pure maple syrup. Chilled maple syrup needs to be warmed or it will clump up the coconut oil.

Add chopped pepitas, walnuts or whole sesame seeds or oats to the top for added texture and visual appeal. I've also lightly sprinkled the top with raw sugar before baking (this is my daughters preferred topping).

Enjoy the taste of fall!


Coconut Lemon Bombs

Coconut Lemon Bombs

Coconut + Lemon = Flavor Explosion! 


I love lemony desserts, especially when they are raw and so healthy. The ingredient list is full of whole foods so you can be sure that you are feeding yourself a nourishing and healthy treat any time of day. This one is a nice combination of lemon and coconut with just the right amount of sweetness. Both flavors come through for a bright lemon flavor with a hint of coconut in this no bake cookie ball. I hope you enjoy them as much as I did.

Coconut Lemon Bombs

Ingredients
  • 1 cup cashews
  • 1/3 cup buckwheat groats/Kasha*
  • 1/3 cup rolled oats (I use GF)
  • 1/4 cup unsweetened shredded coconut flakes, optional
  • zest of 2 lemons, medium sized
  • juice of one lemon
  • 6 - 7 medjool dates, softened and pitted
  • 1/4-1/2 cup shredded coconut flakes for rolling

Place cashews, buckwheat groats and/or oats in food processor and blend until a medium to fine grind (doesn't have to be perfect). The buckwheat may stay a bit chunky so if your looking for a smooth center use all oats. Add rest of ingredients and blend until combined and you have a doughy consistency. If you find your dough is a bit too dry try adding fresh squeezed lemon juice, 1 tablespoon at a time. Chill dough for about 20-30 minutes. Roll into 1 inch balls then roll in coconut flakes. Makes apprx. 12 - 14. Store in air tight container in refrigerator for up to two weeks.

* If you don't have buckwheat grouts, replace with oats or nuts. I love to include buckwheat wherever I can since it is a 'superfood' and packs a lot of protein and fiber per serving, they also have a nice nutty flavor. Per 1/4 cup serving you are getting 6 grams of protein and 5 grams of fiber, more so than oats per serving, 1/2 cup yields 5 grams of protein and 4 grams of fiber.

Some of my favorite raw dessert blogs:


BANANA TEA BREAD

BANANA TEA BREAD

I've been making this banana bread for years and years with the original recipe, long before becoming vegan. This recipe comes from the very first cook book I ever received from my parents when I first moved out on my own...it's 'The New Doubleday Cookbook' by Jean Anderson & Elaine Hanna. I've also adapted my basic pancake, or best friend forever pancakes as I like to call them, recipe from this book. By no means is it a vegan cookbook, but fortunately, this recipe has made a fantastic transformation with my new lifestyle and is as good, if not better, than the original. It's moist, fluffy and delicious just as it has always been! I'm happy to share with you this wonderful banana tea bread that I have loved for many years and look forward to loving for many more to come. It's simple, straightforward and has not disappointed me yet!

Banana Tea Bread

This recipe was easy to veganize. It works great without eggs because we're adding extra banana. Bananas act as a binding ingredient which is what the eggs are used of here. The extra banana also helps to lessen the sugar called for in the original recipe, another plus. The riper your bananas are, the less sugar you'll find you need. Instead of using butter or vegetable shortening, I opt for oil. You can use coconut oil (in liquid form) or grapeseed or light olive oil (I tend to use light olive oil or coconut oil the most). Everything else from the original recipe has stayed the same. I also used coconut sugar in the bread you see here which will slightly darken the batter, keep in mind if using 100% pure cane sugar your batter will be a bit lighter.

Banana Tea BreadBanana Tea BreadBanana Tea Bread

Here is a before...I topped this one with some crumbled walnuts...even the batter is delish! I could sit and eat that all day...

Banana Tea Bread

And the after, so perfect and golden brown...beautiful vegan banana bread! ♥

Banana Tea BreadBanana Tea Bread

BANANA TEA BREAD

Ingredients
  • 1 3/4 cups spelt flour, or flour of choice
  • 2 teaspoons baking powder
  • 1/2 teaspoon baking soda
  • 1/4 teaspoon salt
  • 1/3 cup neutral flavored or warmed coconut oil 
  • 1 teaspoon vanilla extract
  • 1/3 cup organic pure cane sugar or finely chopped dates
  • 4 small or 3 large bananas (preferably overripe), mashed

Preheat oven to 350 degrees. Combine flour, baking powder, baking soda and salt in a medium/large size bowl and set aside. In a small bowl mix oil, sugar and vanilla. Combine wet ingredients with dry ingredients and mix briefly, set aside. Mash bananas, you should have approx. 1 3/4 cups, add to batter and mix until combined. Pour or spoon into a well greased loaf pan...I used coconut oil to grease mine. I don't use vegan butters, margarine's or sprays as I don't care for them. Bake for about 50 min to an hour. With my oven it only goes for 50 min. You can also do the toothpick test in the center of the loaf, if it comes out clean it's about ready. Remove from oven and let cool for 10 min.

Notes:

To make gluten free use gluten free all purpose flour or gluten free flour of choice.

I have made this replacing the oil with unsweetened apple sauce I purchase from Trader Joe's. It was just as good, a little denser and didn't rise as much but the flavor was still pretty good. I've also played around with using half oil and half unsweetened almond milk (equally 1/3 cup) with excellent results!

If using coconut oil, be sure it's warmed and in its liquid state.

Add 1 teaspoon of cinnamon to the batch for a different flavor.

Others toppings you may like are sesame seeds, rolled oats, sunflower seeds and pecans just to name a few.

FYI: I have just recently come across spelt flour and love it ! Here is more info on the nutritional aspect and history of spelt flour from Whole Foods: Spelt if you're not familiar with it. It's my new favorite and pantry staple, or fridge since that is where I keep my flours.

 Enjoy!
I'd love to see your masterpieces!  #thesimpleveganista


PEANUT BUTTER & BANANA GRANOLA SNACK CLUSTERS

PEANUT BUTTER & BANANA GRANOLA SNACK CLUSTERS

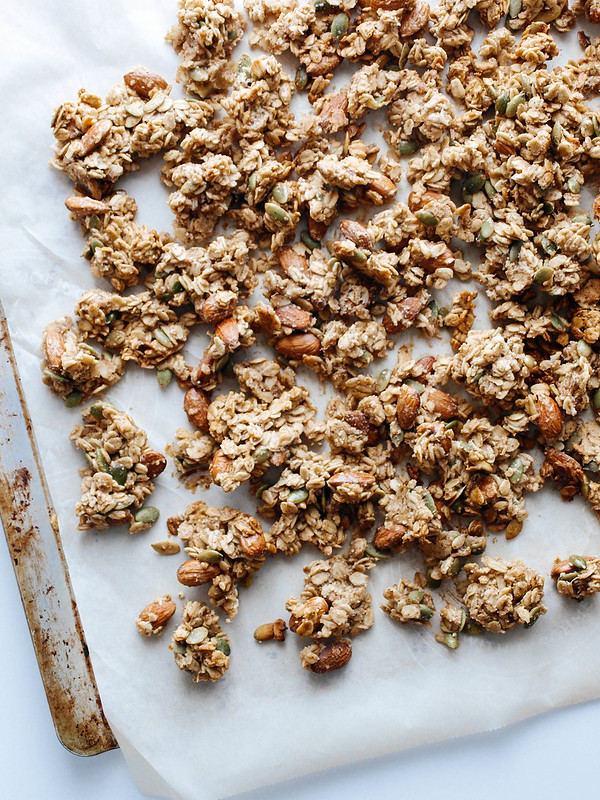
I have some granola inspiration to share with you today! While at the store a few weeks ago, I saw a package of granola from La Brea Bakery and loved that it had big chunks. I set out to recreate that in my kitchen. Initially I wanted to make a mixed fruit granola, but seeing that I had some very ripe bananas that needed to be used up I thought I'd put them into a granola with a nut butter instead. We'll save the fruit granola for another time. This combination turned out great. Not too sweet, chunky like I wanted and the nut butter will add a good amount of protein. This is a perfect snacking granola! Great to have on hand at home or pack some up and take it with on the go. You can also break it up a bit more and top it on non-dairy ice cream or yogurt. You may even like to fill a bowl full, add some milk and enjoy. However you like your granola, this will be a great addition to your granola addiction!

PEANUT BUTTER & BANANA GRANOLA SNACK CLUSTERSPEANUT BUTTER & BANANA GRANOLA SNACK CLUSTERSPEANUT BUTTER & BANANA GRANOLA SNACK CLUSTERS

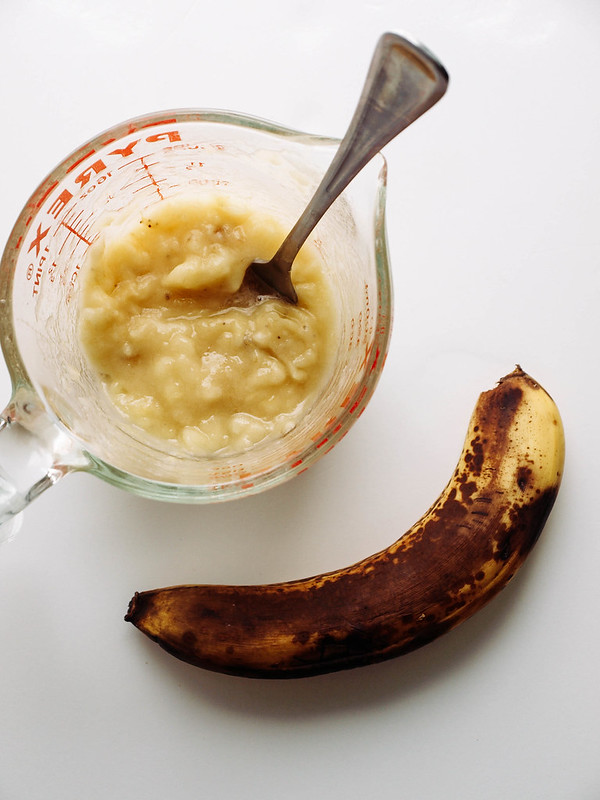
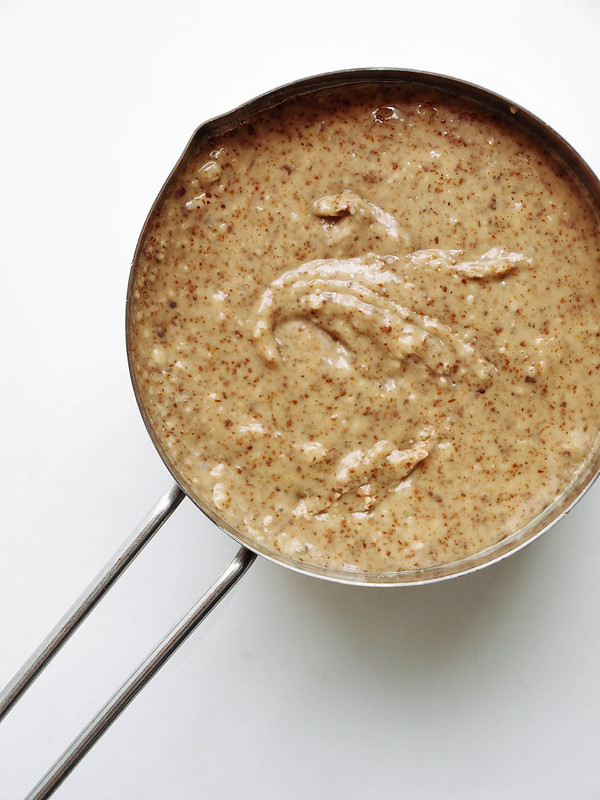
I used almond butter here but you can use any natural nut butter you like. The bananas, the riper the better...the more ripe they are the sweeter they'll be.

PEANUT BUTTER & BANANA GRANOLA SNACK CLUSTERS

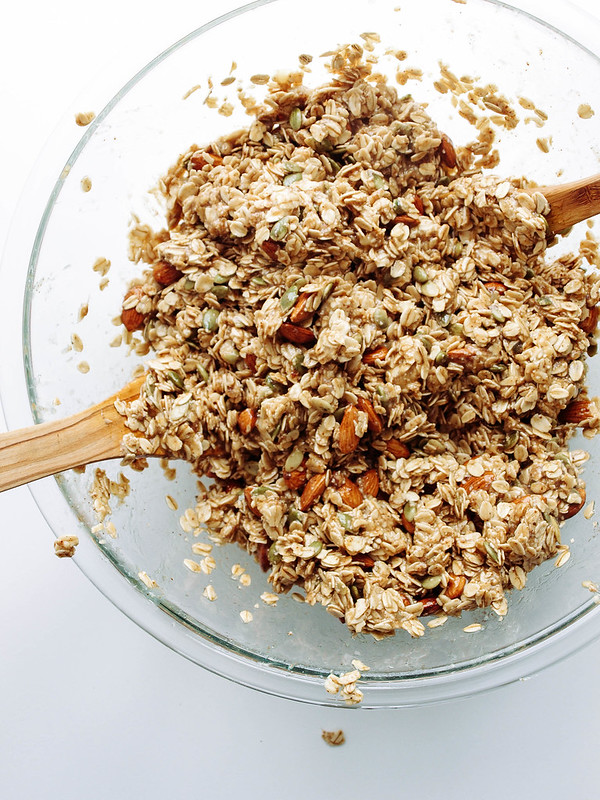
Mix your wet and dry ingredients...

PEANUT BUTTER & BANANA GRANOLA SNACK CLUSTERS

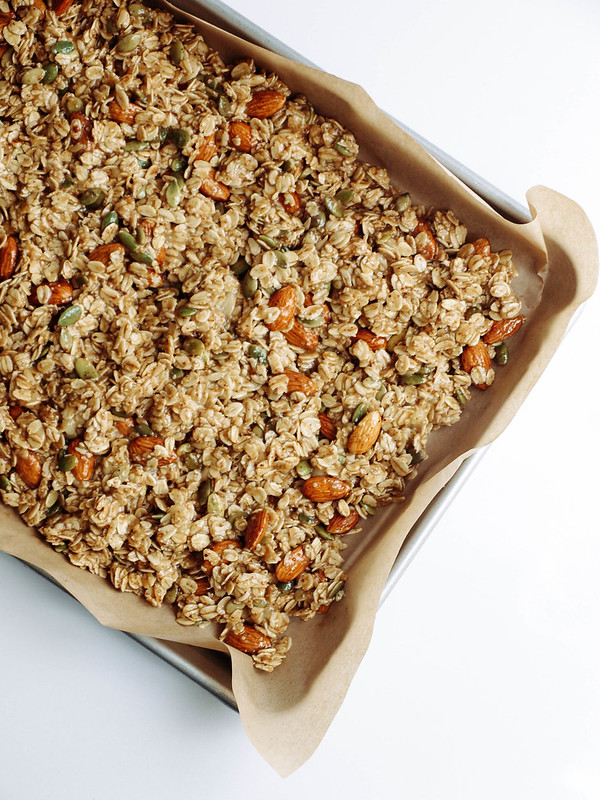
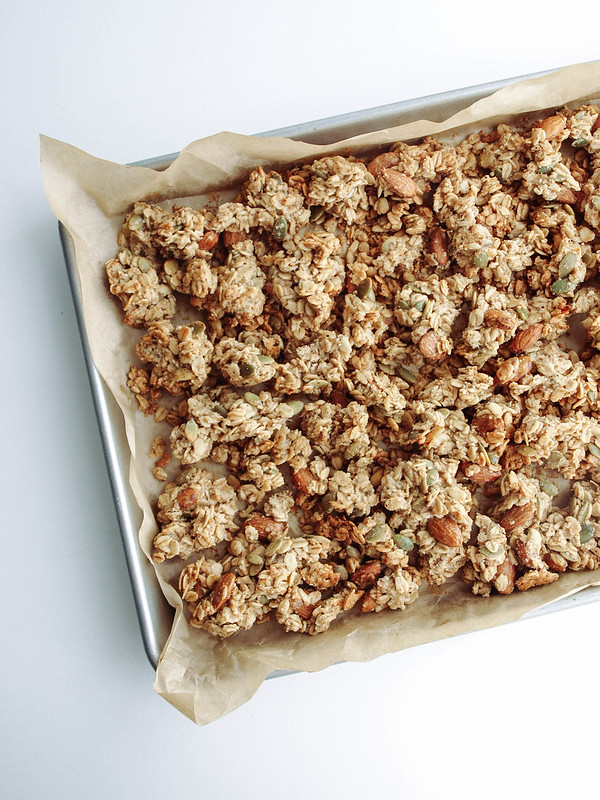
Spread on 1 extra large baking sheet or 2 smaller ones. In the picture above I spread the granola close together. I did one sheet this way and another loosely spread out (first photo). Both batches worked great but the loosely spread granola baked a little faster.

PEANUT BUTTER & BANANA GRANOLA SNACK CLUSTERS

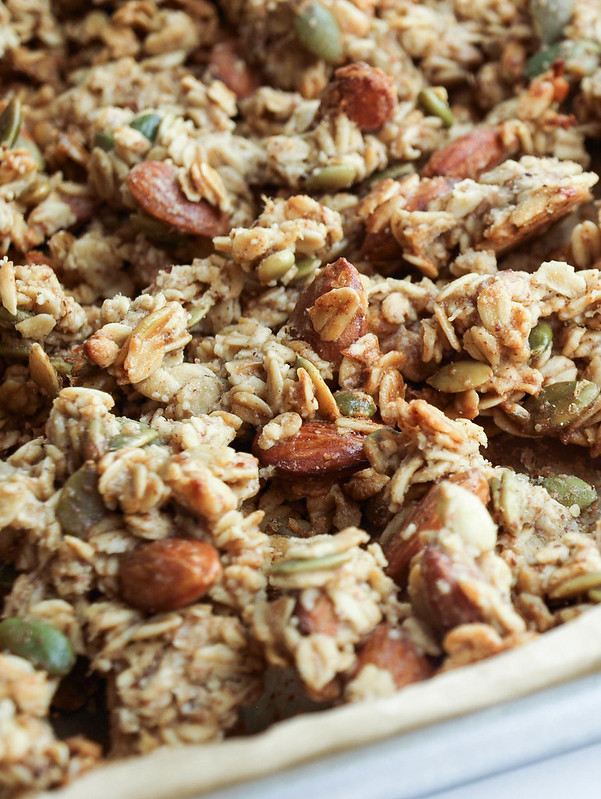
Once cooled and broken up, you're ready to enjoy!
PEANUT BUTTER & BANANA GRANOLA SNACK CLUSTERS

PEANUT BUTTER & BANANA GRANOLA SNACK CLUSTERS

Ingredients
  • 4 cups rolled oats
  • 1 cup almonds
  • 1/2 cup pepitas (pumpkin seeds)
  • 1/2 teaspoon cinnamon
  • pinch of salt
  • 3/4 cup almond or peanut butter (I used crunchy almond butter)
  • 2 small ripe bananas, mashed (about 1 cup)
  • 2/3 cup pure maple syrup
  • 1/4 cup coconut oil, optional
  • 2 teaspoons vanilla extract

Preheat oven to 300 degrees F.

In a large bowl, mix together the oats, almonds, pepitas, cinnamon and salt.

Warm your coconut oil and maple syrup, combine with vanilla extract. Mash your bananas and measure your nut butter. Combine the wet ingredients with the oat mixture. Toss and mix to coat well.

Spread mixture evenly on a lined or lightly greased baking sheet (I used two baking sheets). You can either lightly compact the mixture or loosely spread it out a bit. If compacting, you'll want to mix the granola when rotating after 30 minutes.

Bake for 30 minutes. Turn and rotate sheet/sheets, bake an additional 25 - 30 minutes. Keep an eye towards the end so it doesn't over brown (ovens run differently). Remove from oven, granola will be somewhat soft at first. Let cool for 15 minutes, break up into chunks, especially the center part if you've compacted the mixture. Let granola cool completely to harden.

Notes:

Change up the nuts using peanuts, walnuts or pecan pieces. Use sunflower seeds in place of the pepitas.

You will most likely do just as well without any oil. If you'd like to reduce the oil, try using only 2 tablespoons. I like the flavor and addition of the coconut oil for myself.

Once cooled, if you still find your granola to not be as crunchy as you might like, bake again at 300 degrees for about 10 minutes, keep an eye so it doesn't over brown.

This granola needs to cook low and slow. My first batch I baked at 325 degrees F. for 40 minutes but it still needed extra baking time after cooling to become crunchy. I lowered the temp and added a bit more time. Be sure to watch it towards the end so it doesn't become burnt, especially if you've spread it loosely on the baking sheet.

The 1/2 teaspoon of cinnamon gives a very subtle flavor, add another 1/2 teaspoon for a more enhanced cinnamon flavor.

If you happen to have both rolled and quick oats on hand, try using 2 - 3 cups rolled oats and 1 -2 cups of quick oats (use whatever combo equals 4 cups with at least 2 cups rolled oats). This will also help to make nice clusters.

Enjoy!

    RAW HEMP BITES

    RAW HEMP BITES

    It's over 100 degrees today and humid here in So Cal. I'm so glad to be doing these raw cookies today because I sure don't want to turn on the oven, stove or use a griddle in this heat. It's salads, these cookies and water today. Keeping with this raw cookie mood I'm in, I'm doing another one using hemp hearts. They are a superfood ! I ♥ hemp seeds...they are soft and oh so good. Even my twelve year old daughter will grab a bowl and eat them by the fingersful. They were fantastic...this was a nice mellow flavored cookie compared to my last, Chocolate, Pistachio, Oatmeal Cookie which is a bit more intensely flavored and chunky . These tasted well on their own and also paired superbly with all the different coatings making for lots of fun flavor variations. It's a good basic recipe. I can't say that I have a favorite coating, they were all very good but if I had to chose one I think the cacao was it.

    RAW HEMP BITES

     Hemp seeds are a great source of omega 3 & 6 and are a high quality complete protein. Four tablespoons, or 1/4 cup, of hemp seeds contain 11 grams of protein, and they're also a good source of fiber at 2.5 grams per quarter cup. This is great for vegans especially, adding hemp seeds to your lifestyle will ensure your packing in some goodness here and there. They also contain high concentrations of vitamins and minerals such as iron, vitamin E, thiamine, riboflavin, folic acid, and many other micro-nutrients that your body needs. Sprinkle them on salads, quinoa dishes or almost any main dish, cereals, use in cookies, breads, smoothies, or eaten as is. I always keep the bag I'm using in the fridge. Here is a great article on hemp seeds if your interested on learning just how good they are,
    'Hemp Seeds: The Most Nutritionally Complete Food Source In The World'.

    Here's the last paragraph in part 2 of the above article...

    'Plants have created the perfect container to safely store the EFAs and protect them from light and oxygen damage. It is the seed. And as long as we get our essential fatty acids by eating whole seeds the lifeforce within us is charged with vitality. Hemp Seeds contain the perfect balance of the essential fatty acids required by the human body. Hemp seed oil is indeed the oil of life.'

    Get your healthy, happy hempy on!

    So without further ado, let's make some hemp cookies...

    RAW HEMP BITESRAW HEMP BITESRAW HEMP BITESRAW HEMP BITESRAW HEMP BITES

    RAW HEMP BITES

    Ingredients
    • 1 cup oats, rolled or quick (I used GF)
    • 1/2 cup hemp hearts
    • 6 dates, pitted and chopped
    • 3 tablespoons maple syrup (agave is fine too)
    • 1/2 teaspoon vanilla extract
    • 1/2 teaspoon cinnamon, optional
    • pinch of salt
    • 1/4 cup water, as needed

    Place all ingredients in food processor, except for the water, and blend until combined. Use the water one tablespoon at time if needed if mixture isn't clumping up. I used about 1 tablespoon, use at your discretion. Don't worry if it's seems a little too sticky, it will become a bit stiffer once refrigerated. And if it's a little sticky it will help when you roll the balls in a coating. If the mixture is too wet, try adding a pinch or two of oats. The dryer they are the more they will be a stiffer but chewy cookie, the moister they are they will be more like cookie dough...both ways are good. :)

    Next, roll bits of dough into one inch balls. If dough seems too sticky to roll, refrigerate the dough for about 20 minutes before rolling. I got 11 out of this batch, plus the little taste testing I was doing. You should expect about 12 balls. You can roll them in a variety of ingredients. I rolled some in hemp seeds, coconut, cinnamon and cacao powder. I wanted to experiment with different coatings. If rolling in powders be sure to gently lift and drop your coated balls a few times an inch or two above a hard surface to let any excess powder fall off.

    Store in the refrigerator and eat within a couple weeks or so, or you can also freeze them and they will last even longer.

    Notes: 

    Don't worry about getting all the ingredients exact. If you add/subtract something they will still be great. You almost always can't go wrong with these.

    These are great for special occasions and can be made well in advance to keep life a little simpler.

    I always seem to add oats to my raw cookie bites. I use oats to cut down on the fat content. Feel free to adjust the oats using less and replacing the unused portion with hemp seeds.

    Enjoy!


    Chocolate Waffles Two Ways: Buckwheat w/ Maple Nut Butter Syrup & Whole Wheat w/ Strawberries

    Chocolate Waffles Two Ways

    Sinfully delicious and oh so healthy! Something came over me and I had an urge for creating a great chocolate waffle for us health nuts, and I did it not one way...but two. These recipes can also double as a pancake mix too.

    Let's begin with the buckwheat waffle. Adding buckwheat is a healthy option to pack in some added nutrition to your meal with while adding a nice nutty flavor as well. Buckwheat is also gluten free. To make these pancakes gluten free use GF all purpose flour in place of the WW pastry flour. The chocolate is subtle and the buckwheat comes through creating a nice balance, especially with the nut butter syrup....such a great combination! I think this nut butter would be decadent on non-dairy ice cream or chocolate cake too.

    Chocolate Buckwheat Waffles w/ Maple Nut Butter Syrup

     Chocolate Buckwheat Waffles w/ Maple Nut Butter Syrup

    Waffles
    • 1 cup whole wheat pastry flour, or flour of choice
    • 1/2 cup buckwheat flour
    • 1/2 cup organic raw cocoa powder
    • 1/3 cup organic pure cane sugar
    • 1 tablespoon baking powder
    • 1/2 teaspoon mineral salt
    • 2 tablespoons flax seed meal, optional for extra nutrition
    • 1 2/3 cup unsweetened almond milk, or milk of choice
    • 1 teaspoon vanilla, optional
    • 1/4 cup coconut oil warmed, or oil of choice, optional*
    • extra oil for greasing the griddle if needed

    Maple Nut Butter Syrup
    • 2 tablespoons nut butter of choice
    • 1 tablespoon pure maple syrup
    • 2 tablespoons water

    First mix your nut butter syrup: Combine ingredients in a small bowl mix until smooth. For thinner syrup use more water. This was great without the added syrup too. Makes about one serving. Set aside.

    Preheat waffle maker/griddle to manufacturer's instructions. 

    In medium size bowl, combine the flours, cocoa, sugar, baking powder, salt and flax meal. Add nut milk, vanilla and warmed oil to dry ingredients, mix until combined. (If using the warmed coconut oil, be sure to warm your milk as well or once the oil and chilled milk combine the coconut oil will harden again creating tiny  hardened oil pieces.)

    Pour batter onto waffle iron and cook for three to five minutes. You may or may not need to oil the waffle maker in between batches, I didn't but you may find otherwise. I used the George Forman waffel iron for mine. Makes appr. 6 - 8 waffles depending on size.

    Serve with  the nut butter syrup and sliced bananas & enjoy...

    *You can make a great waffle without the added oil as well, try both ways to see which you like best. I like both.

    • • •

    Now onto number two which is a whole wheat waffle with fresh strawberries...so sweet are the strawberries of the season...add some to this chocolate waffle with some pure maple syrup and a little coconut and life is sweet as can be!

    Whole Wheat Chocolate Waffles

    Whole Wheat Chocolate Waffles

    Ingredients
    • 1 1/2 cup whole wheat pastry flour, or flour of choice
    • 1/2 cup organic raw cocoa powder
    • 1/3 cup organic pure cane sugar
    • 1 tablespoon baking powder
    • 1/2 teaspoon mineral salt
    • 2 tablespoons flax seed meal, optional for extra nutrition
    • 1 2/3 cup unsweetened almond milk, or milk of choice
    • 1 teaspoon vanilla, optional
    • 1/4 cup coconut oil warmed or baking oil of choice, optional...extra oil for greasing the griddle if needed

    Directions for waffles same as above...

    Serve with pure maple syrup, organic strawberries and a sprinkle of coconut flakes...you could use confectioner's sugar but we are trying to stay away from refined sugars here. ;)

    Store any leftovers in the refrigerator or freezer. If freezing, when ready to use let thaw. Toast your waffle and voila...it's waffle time again.

    To make these gluten free, use gluten free all purpose flour in place of the whole wheat.


    Whatever style you choose...Enjoy ! 

    • • •

    On a side note, today I received my new book in the mail, The Flavor Bible...can't wait to dig in and see what inspirations come about. I heard about this through a post from 'Rawified'...it was mentioned and peeked my curiosity. I know this is for real chef's, but I think it's a cool book and will come in handy.


    Happy everything !

    Raw Pad Thai

    Raw Pad Thai

    A few weeks ago I was given a package of kelp noodles and finally found a nice dish to feature them in. I really enjoy Thai food and I've been interested in putting together a raw Pad Thai dish. I came across Ani Phyo's version using kelp noodles and that was it..inspiration hit. And I must say it came out very well considering at first I was having trouble getting the sauce to my liking. I actually had two inspirations to work with and tried them both coming up with my final version. The first was too salty, the other too oily and finally got it in the middle. Well worth the trial and errors of making the sauce. They're all simple ingredients, just tons of them. Although I prefer the minimalist approach, I felt this was to be a special dish and it was!


    Raw Pad Thai

    Kelp noodles are pretty interesting, I had no idea what to expect. They are a raw food with a neutral flavor and have a firm crunchy texture like a bean sprout. Reminds of plastic bands with their slight stretchiness. They are rich in 70 minerals and a healthy alternative to noodles containing no gluten, wheat or sugar. As an added benefit they are low in carbohydrates and calories. They can be eaten warm or cold. Find kelp noodles online and at asian grocery stores.

    Raw Pad Thai

    Ingredients
    • 1 package of kelp noodles
    • 1/2 head purple cabbage, shredded
    • 1 large carrot, julliened
    • 1 zucchini, julliened
    • 1 cup cauliflower florets
    • 4 scallions, sliced
    • 1 cup bean sprouts
    • 1/2 cup cilantro, roughly chopped
    • 1 jalapeno, sliced (optional)
    • cashews or peanuts, garnish
    • lime & orange wedges, garnish
    Sauce
    • 1/4 cup raw almond butter, I used crunchy
    • 1/4 cup tahini
    • 1/4 cup water
    • 3 tablespoons tamari, Bragg Liquid Aminos or Nama Shoyu
    • 3 tablespoon pure maple syrup or raw agave
    • 1 teaspoon garlic, minced
    • 1 teaspoon ginger, minced
    • 1/2 lime, squeezed
    • 1 orange, squeezed, optional (I just had some really sweet juicy oranges on hand and threw it in)
    Directions
    1. Place all sauce ingredients into a small/medium bowl and mix together until blended. Set aside for 30 min to let the flavors mingle. Add extra ingredients to your taste. 
    2. While sauce is setting, prepare your veggies. You could cut your kelp noodles into smaller pieces or leave as is (I left mine as is). Put kelp noodles and other vegetables in a large bowl (saving a few veggies to garnish) and add half of the sauce mixture . Toss the ingredients together until thoroughly coated. I found this was a lot of sauce and it is better to add half to see if that is enough for your liking, if not add more. I personally do not like my food drowning in sauces so I had the other half left over to use with the rest of the kelp noodles later. (See notes below.)
    3. Serve with garnishments and any extras on the side. Serves 2 - 3. 

    Notes: 
    1. If you find your left over sauce is not enough just add a small amount of water to the mixture, about 1/4 cup water, more or less should help. Or if you find you like a more thinner sauce you could add 1/2 cup or so to the starting batch as Ani Phyo calls for (she uses 3/4 cup). Or better yet, you could squeeze more oranges.
    2. If not using kelp noodles add a couple extra carrots and zucchini, or extra sprouts and cauliflower. Even add whatever veggies you may prefer. The sauce is mellow and will go with just about any vegetable.
    3. You could easily make this without the kelp noodles if you like but I do encourage trying the kelp noodles if you can, it's an experience. And a really good one at that! But there are plenty of other vegetables in this dish that will fill you up. They all add vibrant color, texture and flavor...
    Adapted from Vegangela (This sauce was too salty my taste, but I love her using all the veggies she used.) & Ani Phyo....(This was too oily so I cut out the coconut oil. Next time I will use the coriander she calls for.) You may find your own adaptations to all of ours. 

     Enjoy !