.

Showing posts with label cashews. Show all posts

Winner! Mac & Cheese Bake

Vegan Mac & Cheese Bake

Winner, Winner....Mac & Cheese Dinner!

Vegan Mac & Cheese Bake

First off, let me say that this was a supreme hit with my 12 year old daughter who usually turns her nose up at almost everything I make! As a matter of fact, I hear her in the kitchen right now nibbling on the left overs...this is a good day. We have a winner here...this mac & cheese bake will hit the spot for the kids, just don't say a word about what's in it. ;) Now had I added veggies in the bake, it would not have passed which is why this is just a simple recipe. Feel free to add in veggies like broccoli, kale, etc...whatever you may usually add into a mac & cheese bake! 

Vegan Mac & Cheese Bake

As for myself, I seriously could have sat there and ate this whole thing myself. I haven't had a mac & cheese bake in I don't know how long. The cheese is just great! I especially love the bread crumbs and the light dusting of smoked paprika I added on top of my portion. I paired mine with some sauteed Tuscan kale which was terrific! 

Vegan Mac & Cheese Bake

Vegan Mac & Cheese Bake

Ingredients
  • 16 oz. package pasta of choice (I used rice penne pasta) (works with an 8oz package too)
  • paprika, garnish

For the bread crumb topping
  • two pieces of bread or 1 cup bread crumbs 
  • tablespoon olive oil
  • twist or two of the salt grinder

Cheese Sauce
  • 1 1/2 cup raw cashews, preferably soaked for a 2 -3 hours (aides in digestion)
  • 1 3/4 cups water or unsweetened almond milk, or combo like I did
  • 1/3 cup nutritional yeast
  • juice of one large lemon or 1 tablespoon vinegar
  • 1 clove garlic
  • 2 tablespoons of extra virgin olive oil
  • 1 tablespoon white miso
  • 1 teaspoon onion powder
  • 1 teaspoon sea salt, or to taste
  • 1/4 to 1/2 teaspoon chili powder, to taste*
  • 1/8 teaspoon turmeric
  • dash of cayenne powder 

    Preheat oven to 350 degrees.

    Bring a large pot of water to a boil, cook your noodles al dente and set aside.

    While waiting for the water to boil, start with your bread topping first. I toasted two pieces of bread we had on hand really well and processed them in the food processor until crumbly, a high speed blender will work too. Place the crumbs in a small bowl, drizzle with olive oil and a twist or two of the salt grinder, mix well and set aside. Quickly rinse the processor/blender bowl and move on to the cheese sauce.

    For the cheese sauce: In food processor/blender, combine all of the cheese sauce ingredients except for about 1/2 of the water/milk and blend until creamy. Add remaining water/milk and blend again. Taste for flavor adding anything extra to suit your taste.

    Once pasta is cooked and drained. Add pasta back to the pot it was cooked in, add the cheese sauce and combine well. It may seem like too much liquid but the pasta will take care of most of it.

    In baking dish, pour mac & cheese and top with bread crumbs. Bake for 25 - 30 minutes, check after 15 minutes if crumbs are darkening too much for your liking, cover with foil.

    When done, let cool about 10 minutes and serve. The sauce will thicken upon standing.

    * The chili pepper adds a really nice flavor without being too powerful. If your worried about the spiciness, especially for the little ones, I would suggest using the smaller amount, taste and add more if desired.

    Notes: If you use a smaller baking dish or use ramekins, lessen the cooking time to 10 - 20 minutes depending on the size of dish you use.


    Enjoy!

    Why I ♥ this cheese so much is not only does it taste fantastic and its easy to make, but also because not one cow was harmed, or had their baby taken away, or just simply had to live a life of misery in order to satisfy a taste we have come accustomed to without even realizing how these animals are handled, especially through factory farming. That in itself makes all dairy products undesirable to me. I began my vegan journey for health reasons and soon found out just how unpleasant the meat and dairy industry really is. It is not a question of whether it's wrong or right to consume animals and their products...that depends on your circumstances. But I do believe that in this day and age we live in we simply do not need them to survive, and we definitely do not need to factory farm them the way it is being done.

    Veganism for me is liberation for ALL sentient beings! And it most certainly starts with my fork. :)

    To find out more about the life of factory farmed animals and animal rights you can visit PETA.org for more information.
    Raw Creamy Miso Soup with Mushrooms

    Raw Creamy Miso Soup with Mushrooms

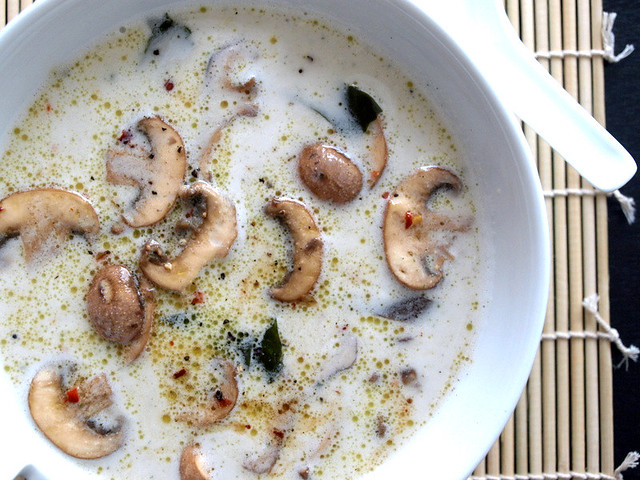
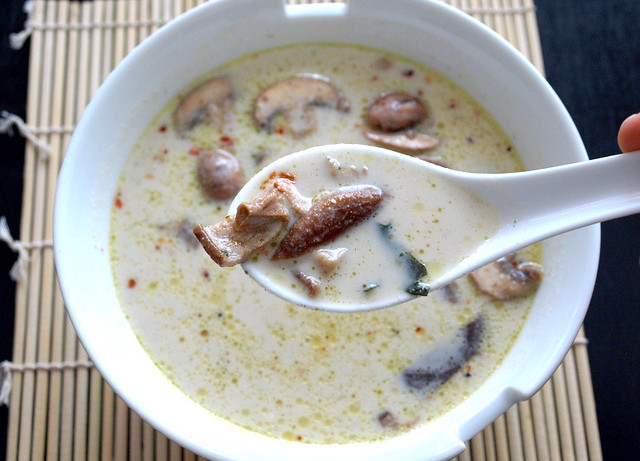
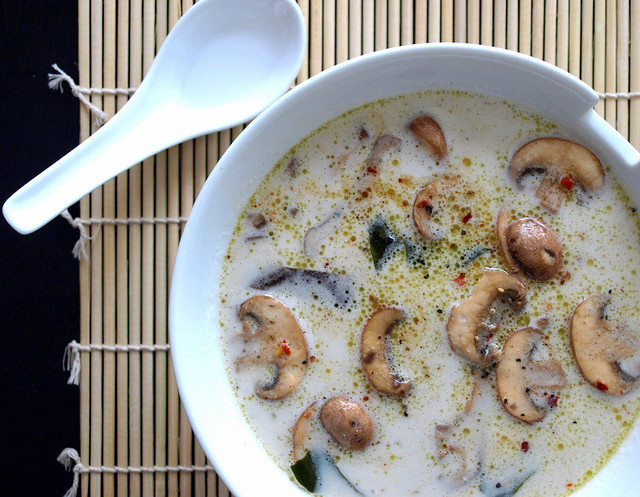
    Where to begin with this soup except to start by saying how incredibly good it was. I've been wanting to do a raw miso soup and came across this recipe in my Matthew Kenney, Everyday Raw Express, recipe book. The only changes I made were adding red pepper flakes & baby bella mushrooms to the mushroom mix, as well as using hemp hearts instead of pine nuts in the soup base. It was delicious! I was a bit skeptical at first but the combination of  the broth and the mushrooms mixture blended for an incredible sensation. I enjoyed every last drop! For me this soup was very filling as is, I didn't need any breads or other grains in addition...although a nice crispy whole grain bread or cracker of sorts would be great to dip capturing the creamy goodness and great flavors of this soup. 

    Miso is very good for you...it contains all essential amino acids, making it a complete protein. It stimulates the secretion of digestive fluids in the stomach, restores beneficial probiotics to the intestines, it's also a quality source of B-12, high in antioxidants to fight free radicals, strengthens the immune system and so much more. It is highly beneficial and I recommend getting to know your miso. I have both yellow and white on hand, each one having their own flavor. The yellow is more sweet and the white more earthy and hearty. It lasts up to a year+ in the fridge. I also use miso to make a nice cup of warm miso broth in place of tea or coffee, as well as using it in recipes here and there. In fact, its called for in one of my recent recipes in the tofu ricotta: White Flatbread-Pizza with Zucchini. It's handy and welcome in my kitchen essentials. 

    And now let's make some beneficial miso soup...

    Raw Creamy Miso Soup with Mushrooms

    Raw Creamy Miso Soup with Mushrooms

    Ingredients

    Soup Base
    • 6 cups water
    • 1/4 cup organic miso, yellow or white
    • 1/2 cup hemp hearts (or pine nuts)
    • 1/2 cup cashews
    • 1 tablespoon pure maple syrup or agave
    • 1 tablespoon dulse flakes or crushed dried wakame, optional*
    • himalayan salt & pepper to taste
    Mushroom Mixture
    • 1 cup shitakes, sliced (I used dried, but fresh is best)
    • 1/2 cup baby bella mushrooms or mushrooms of choice, sliced
    • 2 tablespoons extra virgin olive oil
    • 2 tablespoons tamari, soy sauce, nama shoyu or Bragg's (I used tamari)
    • juice of 1-2 medium lemons or 2-3 small limes 
    • 1 or 2 teaspoons red pepper flakes, adjust to your liking
    Optional Garnish
    • 1/4 cup wakame, rehydrated and drained, chopped**
    • scallions, sliced 
    • shallots, finely diced

    Start with the mushroom mixture by combining the mushrooms with olive oil, tamari, lemon/lime juice and red pepper flakes. Allow to marinate for at least 30 minutes, stirring occasionally. 

    Blend soup ingredients in blender until smooth. Taste for flavor, adding salt & pepper as needed. It will have some froth on top, you can either leave it or scoop it off. I scooped most of it off. 

    Before serving, stir mushroom mix and wakame into blended soup. Serve as is or garnish with scallions or shallots if you like. Also, feel free to warm slightly before serving, place soup in medium/large pot over medium heat, heat until just warm. Serves six. 


    **The wakame was given to me by a friend and was on hand. Because of it's many health benefits I will purchase again when it runs out. If you don't have it stocked or it's hard to find, don't worry about it...the soup will still be great! It's a sea vegetable (sea weed), you may consider stocking a package. It's comes dried and will last a long time in the pantry. It contains omega 3, and also has high levels of calcium, iodine, thiamine and niacin along with many other health benefits. Use it sparingly here and there...maybe in a nice warm cup of miso broth with some silken soft tofu cubes. Mmm mmm :)

    Raw Creamy Miso Soup with Mushrooms

    There's those shitake's...so delicious...

    Enjoy !

    Adapted from Matthew Kenney cookbook, Everyday Raw Express


    Coconut Lemon Bombs

    Coconut Lemon Bombs

    Coconut + Lemon = Flavor Explosion! 


    I love lemony desserts, especially when they are raw and so healthy. The ingredient list is full of whole foods so you can be sure that you are feeding yourself a nourishing and healthy treat any time of day. This one is a nice combination of lemon and coconut with just the right amount of sweetness. Both flavors come through for a bright lemon flavor with a hint of coconut in this no bake cookie ball. I hope you enjoy them as much as I did.

    Coconut Lemon Bombs

    Ingredients
    • 1 cup cashews
    • 1/3 cup buckwheat groats/Kasha*
    • 1/3 cup rolled oats (I use GF)
    • 1/4 cup unsweetened shredded coconut flakes, optional
    • zest of 2 lemons, medium sized
    • juice of one lemon
    • 6 - 7 medjool dates, softened and pitted
    • 1/4-1/2 cup shredded coconut flakes for rolling

    Place cashews, buckwheat groats and/or oats in food processor and blend until a medium to fine grind (doesn't have to be perfect). The buckwheat may stay a bit chunky so if your looking for a smooth center use all oats. Add rest of ingredients and blend until combined and you have a doughy consistency. If you find your dough is a bit too dry try adding fresh squeezed lemon juice, 1 tablespoon at a time. Chill dough for about 20-30 minutes. Roll into 1 inch balls then roll in coconut flakes. Makes apprx. 12 - 14. Store in air tight container in refrigerator for up to two weeks.

    * If you don't have buckwheat grouts, replace with oats or nuts. I love to include buckwheat wherever I can since it is a 'superfood' and packs a lot of protein and fiber per serving, they also have a nice nutty flavor. Per 1/4 cup serving you are getting 6 grams of protein and 5 grams of fiber, more so than oats per serving, 1/2 cup yields 5 grams of protein and 4 grams of fiber.

    Some of my favorite raw dessert blogs:


    Zucchini + Mint + Cashew Ricotta + Pasta

    Zucchini + Mint + Cashew Ricotta + Pasta

    Today it's a celebration of zucchini & mint...and lots of it!

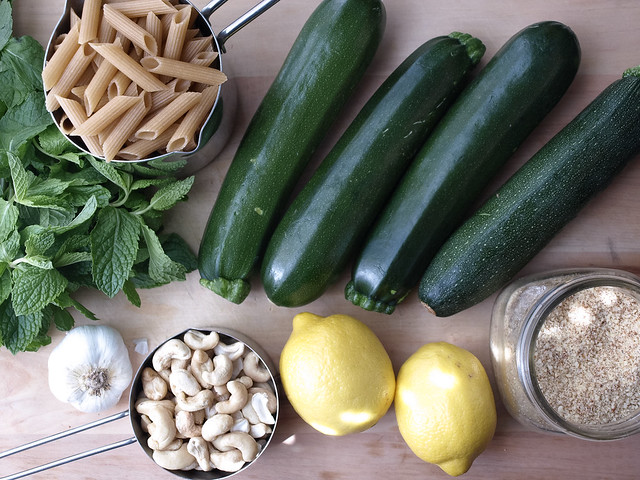
    Zucchini + Mint + Cashew Ricotta + Pasta Ingredients

    A fresh combination paired with lemon, pasta, cashew ricotta cheese, garlic and a dusting of almond parmesan to top it off. A simple, wholesome and flavorful meal that can be enjoyed warm or chilled.

    Zucchini + Mint + Cashew Ricotta + Pasta 1Zucchini + Mint + Cashew Ricotta + Pasta 2
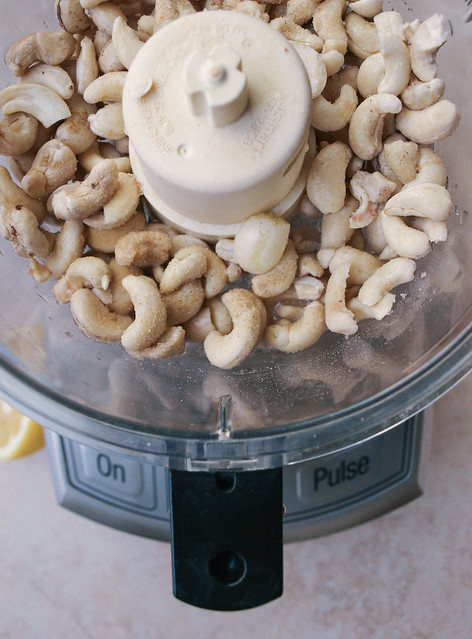
    The cashew ricotta is so easy to make. Soak your cashews for 3+ hours in purified water. The soaking will increase enzyme activity, offer greater absorption of the food's nutrients by the body and help to increase digestibility. Once done, place all ingredients in blender/food processor and process for 3-5 minutes. So simple and good! Once you make it a few times you'll adjust the flavoring to your liking. Some like it very salty while others may not. You may like to use apple cider vinegar in place of the lemon. You may even prefer to add a tablespoon of nutritional yeast or a 1/2 teaspoon of mellow miso for an extra layer of flavor. Whatever you have on hand is good...from the simplest of ingredients listed to the addition of the extras mentioned will give you great results. 

    Zucchini + Mint + Cashew Ricotta + PastaZucchini + Mint + Cashew Ricotta + Pasta

    I used a gluten free penne pasta here but feel free to use whatever pasta you like. I've also made this with a quinoa linguini pasta that was fabulous as well. For the zucchini I used my wok. I love using my carbon steel wok for tender vegetables like zucchini that can overcook quickly. The carbon steel wok is perfect in that it heats up quickly and cools down quickly once removed from the heat so your tender vegetables will not overcook. 

    Zucchini + Mint + Cashew Ricotta + Pasta Mixed

    Mix everything together making sure to season to taste with mineral salt & cracked pepper, and serve with a good dusting of almond parmesan, it makes all the difference in the world...trust me!

    Zucchini + Mint+ Cashew Ricotta + Pasta Serve


    Zucchini + Mint + Cashew Ricotta + Pasta 

    Ingredients
    • 4 zucchini, thinly sliced and cut in half
    • 6 cloves garlic, chopped
    • 1 cup mint (loosely packed), julienned
    • 1 - 2 lemons
    • 8 oz. penne pasta (about 2 cups)
    • olive oil
    • mineral salt & cracked pepper to taste
    • lemon wedges, to serve
    • almond parmesan, to serve

    Cashew Ricotta
    • 1/2 cup raw cashews, soaked for 3+ hours 
    • 3 tablespoons water
    • 1 small garlic clove
    • juice of 1/2 lemon or 1 teaspoon apple cider vinegar
    • mineral salt & cracked pepper to taste
    • dash or two of onion powder, optional

    Start by preparing your cashew ricotta. Soak your cashews for 3+ hours in a jar with at least 1 cup water. Once ready, drain and rinse your cashews. Place the cashews and remaining ingredients into your food processor/blender and process until smooth, about 4 minutes or so, scrapping down the sides as needed to make sure everything comes together nicely. Add an extra tablespoon of water if needed, you may need to if you didn't soak the cashews longer than 3 hours. Set aside. This can be made in advance, a day or two, and kept in the fridge until ready to use. When ready, let set at room temp for an hour or so.

    In a large pot, cook your pasta according to package directions. Drain, rinse and place back in the pot you cooked your pasta in. Using the strainer you strained the pasta in (if the holes aren't too big to catch the lemon seeds), place strainer over pasta and add the juice of one lemon along with a small glug of olive oil. Mix well, let set until ready to add the zucchini and ricotta. 

    In large wok/skillet, heat 1 tablespoon of olive oil over medium heat and cook your zucchini and garlic to your liking. I like mine al dente and only cook for about four minutes at most, depending on how thick the slices are.

    Add your cashew ricotta to the pasta and mix well. Add in the zucchini, garlic and mint, gently toss to coat. Taste for flavor and serve. Serve with lemon wedges and a good dusting of almond parmesan...it's simply delicious!

    Serves four generously. 

    Enjoy!


    Plum Carpaccio + Lemon Ginger Cream

    Plum Carpaccio + Lemon Ginger Cream

    Plums are in season and this is a great way to enjoy them, other than just eating them as is. This plum carpaccio is inspired by Matthew Kenney. He has a wonderful flair for raw eats of all kinds. You can find the original recipe in his book called Entertaining in the Raw. (be sure to check around for the best book price...this link is the best price I found but that could change)

    Plum Carpaccio + Lemon Ginger CreamPlum Carpaccio + Lemon Ginger Cream

    For this recipe we will be making a simple syrup using either dates + water or pure maple syrup. To this we will add either vanilla bean or vanilla extract...both if your feeling like a good dose of vanilla with your plums and cream! You can probably guess want I did. :) I used dates for the syrup you see here. This batch came out a bit frothier than previous batches as I didn't let it rest very long. If you look closely enough you can see some of those little vanilla bean seeds in the smear above right...such delicious little speckles they are!

    Plum Carpaccio + Lemon Ginger Cream

    This simple syrup along with the lemon ginger cream will be added on top of your thinly sliced plums. I used a sharp knife to slice my plums. I didn't bother removing the seeds and simply started at the outer edge slicing inward until I came to the seed and then repeated on the other side. I found this to be the easiest way. For me, removing the seed meant squishiness on parts of the plum and I just didn't care for that. The best part of doing it this way was having a little extra plum on the sides for nibbling on. If your like me and like to nibble before the plate is served, you can go ahead and dip the extra plum flesh left around the seeds into the cream or syrup and start enjoying this as soon as possible. Or you can cut the small remaining amount off and place it in a sealed container to be eaten later with the leftover cream and syrup. Either way it's a win, win! But certainly if you wish, you can slice your plums in half, remove the seed and slice thinly using a sharp knife or mandolin and still dip in a few pieces here and there, just to be sure it tastes good. :)


     Plum Carpaccio + Lemon Ginger Cream

    Carpacicio
    • 8 plums (any color)
    Lemon Ginger Cream
    • 1/2 cup cashews, soaked for 2-3 hours
    • 3 tablespoons water
    • 2 tablespoons lemon juice
    • 1 tablespoon pure maple syrup
    • 1 heaping teaspoon grated ginger (I used a microplane to grate)
    Simple Syrup
    • 2 medjool dates, pitted (fresh is best)
    • 1/3 cup water
    OR...
    • 1/3 cup pure maple syrup (in place of dates and water)
    • 1/2 vanilla bean, scraped or 1/2 teaspoon vanilla (or both if you like)

    For the cream, combine ingredients in a small blender (I used the magic bullet) and blend until smooth. You will want it to be on the thick side and shouldn't need any additional water. But if you forgo the soaking process you may need to add a bit more...I suggest adding in 1 tablespoon of lemon juice or water at a time. If you find your cream is a bit too runny, add in a few cashews and blend. You can serve at room temp or refrigerate a bit before serving. Can be made a day or two ahead of time.

    For the simple syrup, combine either the dates, water and vanilla OR maple syrup and vanilla into a small blender (I used the magic bullet) and blend until smooth. Feel free to add a tad bit more water as needed to thin. You can serve at room temp or refrigerate a bit before serving. Can be made a day or two in advance.

    Slice your plums thinly just before serving. I have given a more detailed way of slicing above. Here is the simple version: I placed my plums on a flat surface with the stem side up and sliced as thinly as I could by hand with a sharp knife starting from the outside and slicing in until I came to the seed in the middle. Do this for both sides.

    Place you plums however you like on your plate. Serve with a nice drizzle of the simple syrup and a dollop of the lemon ginger cream. Garnish with some mint leaves. Serves 2 - 3.

    Enjoy!


    Cucumber Salad + Peanut Citrus Dressing

    Cucumber Salad + Peanut Citrus Dressing

    As we head into summer and the temperatures begin to rise here in Southern California, I find myself craving salads more and more. This is a refreshing salad of cucumbers and fresh vegetables with a wonderful peanut citrus dressing that will have you tipping the bowl for every drop (I know I say that about all the salad dressings but it's true...you'll see!)

    Originally I wanted to create cucumber noodle salad for this recipe but quickly decided that I would rather keep this as easy as possible without having to use too many tools. The only tool I do recommend for this recipe is a microplane for grating your ginger and garlic. It's a great tool for any kitchen and will come in handy over and over again.

    Bring on the warmer weather and let's beat the heat with this easy and flavorful Thai inspired salad!

    Cucumber Salad + Peanut Citrus Dressing
    Cucumber Salad + Peanut Citrus Dressing
    Cucumber Salad + Peanut Citrus Dressing
    Cucumber Salad + Peanut Citrus Dressing

    Cucumber Salad + Peanut Citrus Dressing

    Salad 
    • 2 1/2 cups English cucumbers, sliced and quartered
    • 1 cup carrots, sliced
    • 1/2 red bell pepper, diced
    • 2 scallions, thinly sliced
    • 1/4 head of purple cabbage, sliced
    • handful cilantro, roughly chopped
    • handful cashews, for garnish
    • red pepper flakes, for garnish (optional)

    Peanut Citrus Dressing
    • 3 tablespoons orange juice, lime juice or lemon juice, + more as needed
    • 3 tablespoons raw or natural peanut butter (almond or cashew butter is great too)
    • 1 tablespoon tamari, bragg's liquid aminos or soy sauce
    • 1 tablespoon pure maple syrup
    • 1/2 garlic clove, grated
    • 1/4 - 1/2 teaspoon fresh ginger, grated
    • pinch of red pepper flakes or 1/2 teaspoon sriracha hot sauce (optional)

    In a small bowl, whisk together the ingredients for the peanut citrus dressing, set aside allowing the flavors to come together. Then before adding the dressing to the salad, taste for flavor adding anything extra you might like. For a thinner dressing add 1 or 2 tablespoons citrus juice or water. To make it thicker add a tad bit more nut butter.

    Prepare your salad ingredients. Check your dressing for flavor. In a large bowl combine the salad mix with the dressing, toss well and serve. Top with cashews and red pepper flakes. Serves two.

    Notes for the dressing: Use the orange juice for a less tangy dressing. I used orange for this recipe and have also used lemon as well. Both were great, and I know the lime will be wonderful too! You can also lessen the amount of juice replacing it with water. Add in some citrus zest of choice if desired. And if you're a vinegar lover, try adding a splash or two of rice vinegar!

    Notes for the salad: Try tossing in a cup of cooked quinoa after mixing for a more nutritionally balanced profile.

    Recommended tool for grating as mentioned above: Microplane

    Enjoy!


      White Chocolate Goji Berry Truffles

      White Chocolate Goji Berry Truffles

      Soft and subtle is a great way to describe this White Chocolate Goji Berry Truffle. These little gems have a nice mellow white chocolate flavor with a speck of color and light flavor from the goji berries. They went over so well with everyone I shared them with. So make a batch for you and a batch to share with your loved ones and friends. They will love you for it!

      White Chocolate Goji Berry Truffles

      Ingredients
      • 4 oz or 1/2 cup raw cacao butter, melted
      • 1/3 cup goji berries
      • 1 1/4 cup cashews, soaked 2 hours and drained
      • 7 medjool dates, pitted 
      • 2 tablespoons pure maple syrup, coconut nectar or agave*
      • 1 vanilla bean, seeds scraped
      • 1 tablespoon vanilla extract
      • dash of himalayan salt
      • 1/4 -1/3 cup shaved cacao butter or unsweetened shredded coconut, for rolling

      Start by placing the raw cacao butter in a small saucepan and heat on the lowest setting. Keep an eye on it while you start putting the rest of the truffles together, swish it around every once in a while. At this low temperature it won't burn and should melt completely within five minutes or so. Once melted, turn off heat and set aside until ready to use.

      Place the goji berries in a small bowl and add about 1/2 cup water, let soak a few minutes and drain. This will help soften them.

      Combine the cashews, dates, sweetener, vanilla bean seeds, vanilla extract and salt into your food processor/blender and blend until completely combined and you have a smooth consistency. With equipment turned off, slowly add the melted cacao butter and blend again until combined. Transfer truffle mixture into a small/medium bowl, mix in the goji berries. Place mixture in the refrigerator for about 20-30 min. Scoop out rounded tablespoons full and roll into balls. Makes about 14.

      Roll in shaved cacao butter or shredded coconut. For shaving the cacao bar I used a vegetable peeler and broke up the shaved pieces with my fingers. It flakes nicely like you see in the pictures.

      Store in an air tight container on the counter for up to one week, refrigerator for up to three weeks or so, or freeze for much longer storage. 

      Notes:

      If you like you can use 3/4 cup cashews and 1/2 cup oats. Just be sure to process the oats first creating an oat flour of sorts before adding in the cashews and the rest of the ingredients. 

      I prefer to use maple syrup. I have seen good and bad for agave and have decided because of the conflicts to only use pure maple syrup as my sweetener of choice. I personally feel that they don't taste that much different. I understand that some do not like the maple flavor and agave will be the choice for them. I suggest doing your own research to see for yourself whether agave is the right choice for you. You can also start using coconut nectar as a sweetener of choice.

      Enjoy!

      P.S. Don't forget to share the love. :)

      Winter Salad with Creamy Orange-Ginger Dressing

      Winter Salad with Creamy Orange-Ginger Dressing

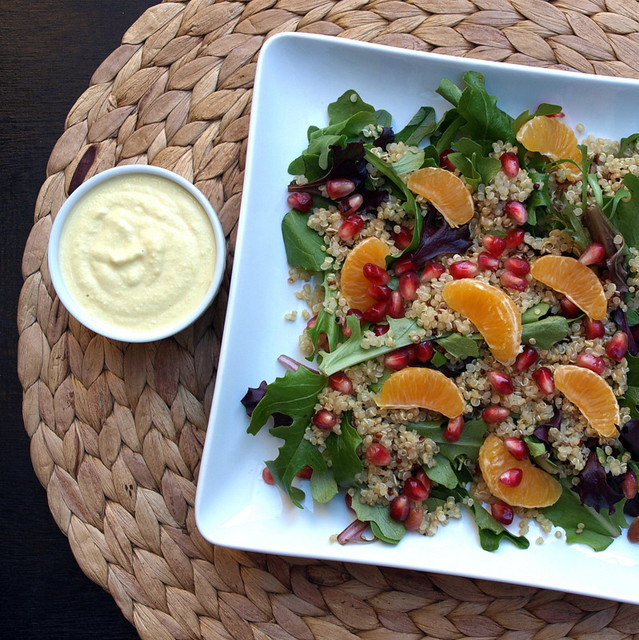
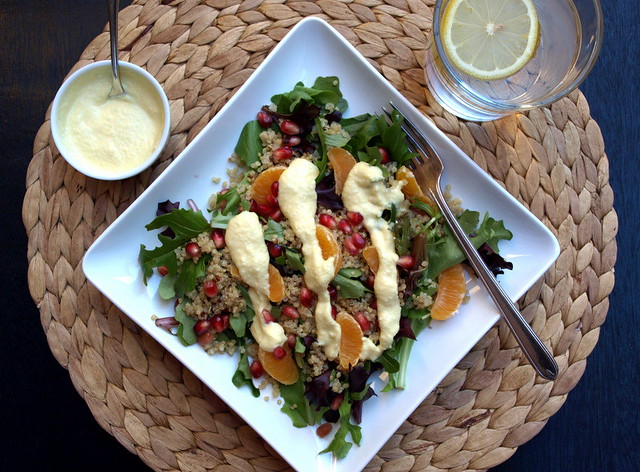
      With winter abound, this is a great way to enjoy some of the winter fruits while they are in season. Colorful, flavorful and filling, this salad will be sure to brighten your winter days. The creamy orange-ginger dressing is so light and refreshing. It's like eating an orange creamsicle with ginger added, just delicious. The flavors of the fruits along with the quinoa and bed of greens all mingle together creating a truly fantastic winter salad. So fresh, vibrant and healthy! 

      Winter Salad with Creamy Orange-Ginger Dressing (2)

      Winter Salad with Creamy Orange-Ginger Dressing

      Ingredients
      • greens of choice (I used a spring mix)
      • 1/4 cup cooked quinoa
      • 1 or 2 tablespoons pomegranate seeds
      • 1 tangerine or cuties (mandarins), slices

      Orange-Ginger Dressing
      • 1 cup oranges, peeled, navel or Valencia...mandarins would be great too (about 2 small or 1 large)
      • 1/2 cup cashews, soaked for 2-3 hours
      • 1/2 cup water
      • 1 - 2 tablespoons apple cider vinegar, to taste
      • 2 - 3 tablespoons fresh ginger, chopped
      • 1/2 clove garlic
      • himalayan salt to taste

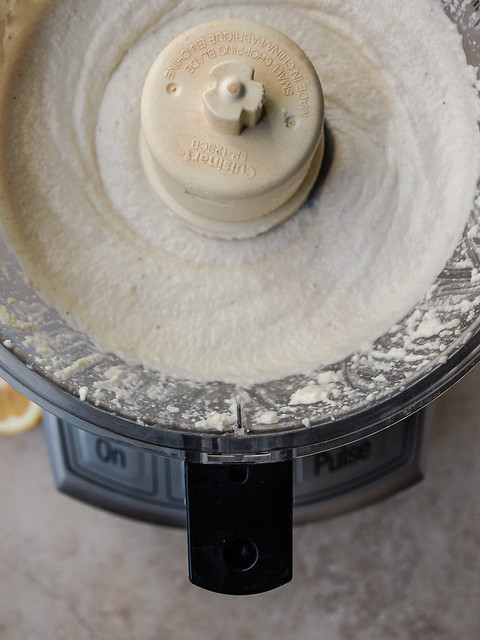
      For the dressing, place all ingredients into food processor/blender and process until creamy, about 3 - 5 minutes depending on your equipment. For a thinner dressing add 1 tablespoon water at a time until desired consistency. Makes about 3/4 cup. Store leftovers in airtight container in refrigerator for up to a week.

      For a simple single serving dressing, use the juice of two squeezed oranges and add a tablespoons of fresh minced ginger, mix and top on your salad.


      Enjoy!


      CURRIED CHICKPEA SALAD

      Curried Chickpea Salad

      I love, Love, LOVE creamy chickpea salads! They are so addicting that I can literally sit and eat the whole bowl within a day. If you're familiar with my blog you already know about the Mashed Chickpea Salad and Cranberry Walnut Chickpea Salad. Now we are delightfully adding this curried chickpea salad to the collection. I honestly can't say that I love one more than the other. They each have a different flavor and are equally delicious in my book. But if you're a curry lover, you will be smitten over this salad! Inspired by a recent trip to Trader Joe's and saw their Curry Chicken Salad and knew it was time to make a vegan version. The ingredients are inspired by their ingredient list and it did not disappoint. I love the combination of curry with the sweetness of the raisins, along with the crunch from the carrots and cashews. It's a perfect blend of flavor and textures. The ingredients are simple so you can pull this together easily. It can be made ahead and stored in the refrigerator for up to a week making it easy to pull together to-go lunches or simply to have on hand for snacking. I can almost guarantee this will not be in your fridge for that long...it will be gone almost as soon as you make it! This salad can be served alone, with sliced red bell peppers as scoopers, on a bed of leafy greens or made into a sandwich. I encourage you to gather your ingredients and give this salad a try. I think you will find it to be as good as the others. In fact, it may just become your new favorite!

      currycurryCurried Chickpea Salad
      Curried Chickpea Salad

      Curried Chickpea Salad

      Ingredients
      • 3 cups cooked or 2 cans (15 oz.) chickpeas (garbanzo beans), drained and rinsed
      • 2 - 3 carrots (about 1 cup), diced
      • 4 - 5 scallions/green onions (about 1 cup), sliced
      • 1/2 cup raisins, dried currants or chopped dates
      • 1/2 cup raw or toasted cashews
      • 1/2 - 2/3 cup thinned hummus or tahini, vegan mayo would work too (see notes)
      • juice of one lemon
      • 1 tablespoon curry powder
      • 3/4 teaspoon garlic powder
      • mineral salt & cracked pepper to taste

      In a small bowl, combine hummus with lemon juice, curry & garlic powder and a generous pinch of salt. Blend until combined. Set aside. (If adding vinegar or maple syrup as per the notes below, add to the hummus at this time.)

      In a medium mixing bowl, add chickpeas and roughly mash about 1/2 of the beans with the back of a sturdy fork or potato masher. Add in the carrots, scallions, raisins, cashews and hummus, mix well to combine. Taste for flavor adding mineral salt and cracked pepper to taste.

      Serve as is, with sliced red bell peppers as scoopers, on a bed of leafy greens, with crackers or made into a sandwich with bread of choice.

      Serves 4-6.

      Notes:

      I love the sweetness that the dried fruit gives and could use up to 3/4 cup so each bite has a little sweetness to it. Feel free to add extra raisins, currants or dates.

      If your hummus is on the thick side, thin it out with water until desired thinness. Using a small bowl add a couple rounded tablespoons of hummus with 1 tablespoon of water. Adding more of each as you go until you have a thinner hummus. Do the same if using tahini. Feel free to use more for a super creamy salad. If your measuring by tablespoons...8 tablespoons = 1/2 cup and about 11 tablespoons = 2/3 cups (technically 10 T + 2t).

      You can try tweaking this recipe by adding a tablespoon or so of apple cider or white wine vinegar to the wet mixture. It will give it a slight tang. You may also like to try adding a tablespoon of pure maple syrup or other liquid sweetener of choice to add a little sweetness all around. Adjust curry, adding more or less, to suit your taste.

      Try replacing the carrots with diced red bell peppers for color variation.

      Enjoy!


        Portobello & Kale Calzone with Garlic Miso Cream

        portobello & kale calzone with garlic miso cream

        I can't remember the last time I had a calzone. They are delicious! This recipe was inspired from Leafy Greens and Me...I could barely wait to get this one underway. I've had a few of these the last few days trying to get good pictures...what a tough job right! :) What I really loved about this is the roasted garlic cream sauce....roasted garlic is amazing and actually mellows out after roasting leaving wonderful mild flavors, a little nutty, sweet, almost caramel like. I added some miso to the garlic sauce, giving it that little extra something. Miso is a staple in my refrigerator and lasts up to a year, you can find more uses for miso by searching my site in the box on the right or by scrolling down to the ingredients list. I have a couple recipes that you might enjoy. Be sure to pick up some miso and get this calzone into your life, and if you don't have miso this will still be a great roasted garlic cream sauce!

        There is quite a bit of high heat oven time going on so this is definitely a great meal during the cooler months....perfect for this time of year. You don't want the oven on like this in the summer, especially in the hotter regions....400 & 500 degrees for an hour or two and someone is bound to get slapped upside the head. ;) This is also not an energy saving recipe for those ultra conservatives, but we do a bit here and a bit there so I think we'll be alright to enjoy this scrumptious calzone every now and then. As a matter of fact while were on the subject of the environment, did you know the global warming we are experiencing is a natural part of the earth's cycle. Yes indeed, it would happen no matter what...with us or without us...just ask and I will forward you some interesting information! Of course, it definitely doesn't help creating new canister hairsprays, or having herds of cars, or herds of factory farmed animals contributing to the already warming trend, but what are we going to do...little by little, step by step everything will come to light...in the meantime let's relax & eat...

        Portobello & Kale Calzone with Garlic Miso Cream

        Ingredients (makes 4)
        • 1 1b. whole wheat/grain pizza dough (I used Trader Joe's), divided into 4 sections
        • 1/2 onion, diced
        • 2 -3 garlic cloves, minced
        • 1 tablespoon thyme
        • 2 portobello mushrooms, sliced
        • 1 1/2 cups broccoli florets, cut somewhat small
        • four large leaves of kale, stems removed and roughly chopped or left somewhat whole (I used curly kale) or a bundle of spinach
        • large handful cherry or grape tomatoes, sliced in half
        • olive oil, to brush on top of calzone
        • himalayan salt and cracked pepper to taste
        • cornmeal for dusting the pizza wheel

        Garlic Cream Sauce
        • 1 cup cashews, soaked for at least two hours or over night
        • 1/2 cup to 1 cup water, if you soaked the cashew for two hours use 1 cup, if soaked overnight use 1/2 cup water
        • 1 head garlic
        • 1 tablespoon olive oil
        • 2 teaspoons white miso
        • juice of 1 lemon
        • himalayan salt & pepper to taste

        Preheat oven to 400 degrees.

        First, roast the garlic for the garlic cream sauce. Remove most of the outer layer of skin on the garlic leaving enough to hold them in place, lay sideways and cut the tops off. Place garlic cut side up on a piece of tinfoil, drizzle with olive oil and top with sea salt & cracked pepper. Fold ends of foil up and squeeze together and crimp the edge. Place on cookie sheet and cook for 40-45 minutes. Let cool. Check here for a great visual tutorial from Oh She Glows: How To Roast Garlic

        Once garlic is done, turn the oven up to 475-500 degrees. Place pizza stone inside the oven for about 45 minutes before cooking.

        While garlic is roasting, let pizza dough come to room temp in its package away from oven heat for 30 minutes. Remove from package, place on a lightly floured surface, flatten out a bit with your hands, cut dough into four equal portions, roll each portion into a ball, cover with light towel and let set for another 30 minutes away from oven heat to let the gluten relax....if the gluten isn't relaxed you may have a hard time rolling out your dough properly.

        Next onto the garlic cream sauce. Drain cashews and place all ingredients into food processor/blender and process until creamy, about 3 to 4 minutes. If cream is too thick and extra water 1 tablespoon at a time until desired consistency being careful not to thin it out too much making it runny, if in doubt leave it on the thick side. Taste for seasoning, set aside.

        Slice your grape/cherry tomatoes in half, place in small bowl and set aside. You may even want to dip a tomato half into the garlic cream sauce, just to make sure it tastes good! 

        In large skillet, heat olive oil over medium high heat. Add onion, garlic and cook until onions become soft. Add in mushrooms, broccoli, kale/spinach, thyme and salt & pepper to taste, cook for another 5 minutes or so. Turn off heat and cover ajar to help steam and soften the veggies a little more while working on the next step. 

        On a lightly floured surface, roll each portion out into an eight inch oval, rectangle, circle, ...whatever works easiest for you. Lay on some of the veggie mixture, add a few heaping tablespoons of the garlic miso cream and top with some of the kale and tomatoes (or layer however you like, this is just a suggestion, my emphasize is to keep the cream in the middle of the calzone as much as possible). Fold the other half over and seal the edges by rolling them up and sealing or by pressing with a fork, or both. Top with a light coat of olive oil and a sprinkle of salt, pepper and thyme.

        Portobello & Kale Calzone with Garlic Miso Cream

        Dust the heated pizza stone with cornmeal, place calzone on the pizza stone and bake for 7 - 10 minutes, until crust is puffy and golden brown. Let cool a few minutes and serve. Serve with some garlic miso sauce on the side.
        Note: Pizza stones are a really nice item to have...they work great for pizza of course, and this calzone, as well as baking artisan bread. Some of my favorite loaves of artisan bread were baked using a pizza stone. 

        Enjoy!

        I would love to see your masterpieces! #thesimpleveganista


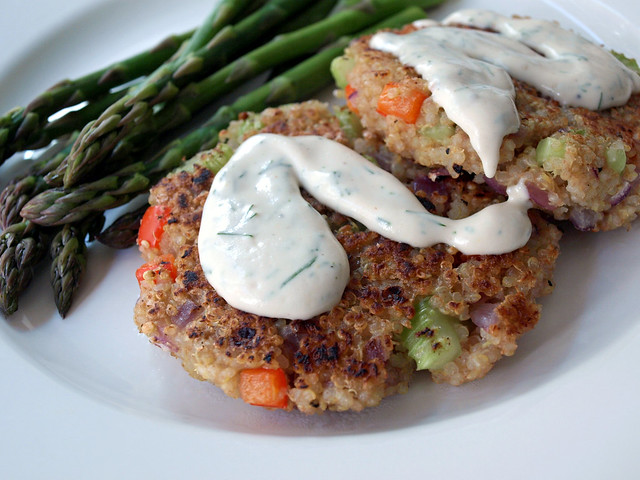
        Cajun Quinoa Cakes + Lemon-Dill-Sriracha Rémoulade

        Cajun Quinoa Cakes + Lemon-Dill-Sriracha Rémoulade

        I have been on a sriracha kick lately and happen to have found this recipe for these quinoa cakes with this great sounding rémoulade, and just had to give it a try. So glad I did as they were delicious! This recipe comes from Randy Clemens up and coming new vegan sriracha cookbook called, The Veggie-Lover's Sriracha Cookbook. This is the first recipe he is sharing from the book and you can find the original recipe here. His book will be ready to hit the shelves in the early part of July. You can also pre-order by clicking the book title link above. It will include 50 veggie loving recipes that will be based on fruits, vegetables, grains, legumes and beans...no fake meats...all will pack a punch with the sriracha chili sauce.

        Cajun Quinoa Cakes + Lemon-Dill-Sriracha Rémoulade

        These were great quinoa cakes and the sauce was so flavorful! I started with a small amount of sriracha here but feel free to add as much as you like, or none at all. You may even like to add some spices to the quinoa cakes as these are really simple with minimal seasoning except for the salt and pepper. It's really all about the sauce in this dish. I didn't change up the recipe too much either except for subbing the vegan mayo base of the rémoulade to a cashew base (see note below).

        Cajun Quinoa Cakes + Lemon-Dill-Sriracha Rémoulade

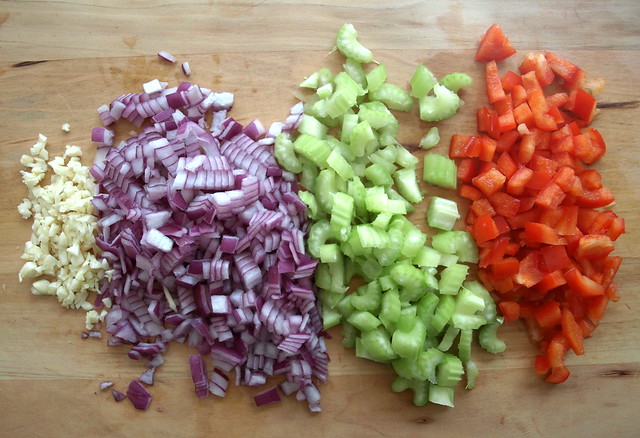
        Above are some of the simple vegetables for the quinoa cakes. I would suggest chopping your celery and bell pepper a little smaller than what I have here to help the patties stay formed. These were easy to put together, a little messy but once you do one or two you get the hang of it. I formed balls and flattened lightly, once on the griddle I pressed down with the spatula to flatten more. 

        Cajun Quinoa Cakes + Lemon-Dill-Sriracha Rémoulade

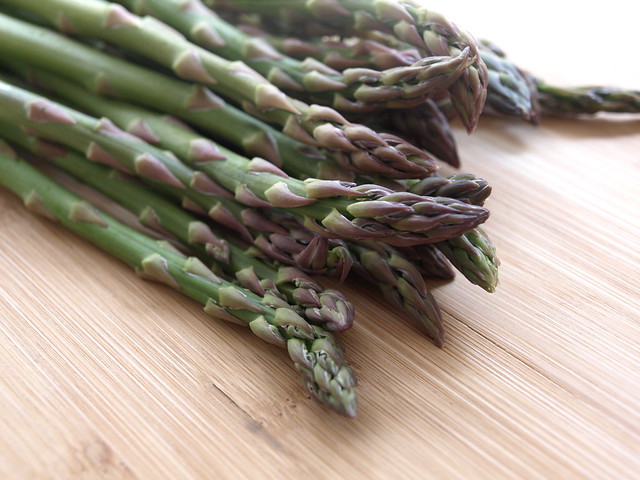
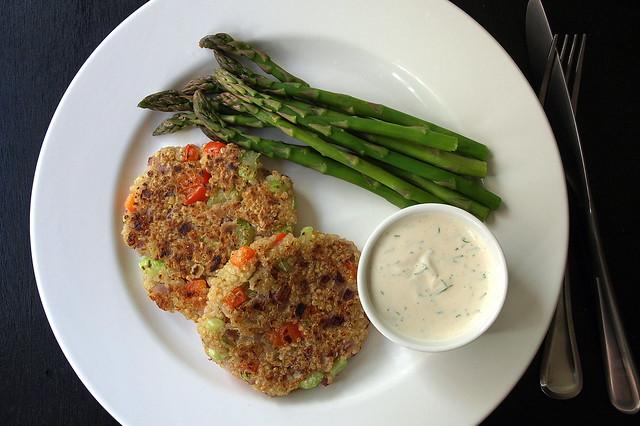
        Pair it all with some fresh steamed asparagus and you have yourself a wonderful meal. Artichokes would also be great with this. I can see dipping the leaves in this rémoulade sauce...mmm!

        Cajun Quinoa Cakes + Lemon-Dill-Sriracha Rémoulade

        Cajun Quinoa Cakes + Lemon-Dill-Sriracha Rémoulade

        Ingredients

        Quinoa Cakes
        • 1 cup quinoa
        • 2 cups vegetable stock or water
        • 1 tablespoon ground flax seeds
        • 3 tablespoons water
        • 1/4 cup flour of choice + more as needed (I used GF oat flour)
        • 1/2 red onion or 1 large shallot, diced
        • 1/2 red bell pepper, seeded and diced
        • 2 stalks celery, diced
        • 2 garlic cloves, minced or 1 teaspoon garlic powder
        • himalayan salt & freshly ground pepper
        • olive oil for the skillet

        Lemon-Dill-Sriracha Rémoulade
        • 2/3 cups cashews* (preferably soaked for 2 -3 hours)
        • 1/3 cup water + more as needed
        • 1 tablespoon sriracha, + more to taste OR 1/4 to 1/2 teaspoon cayenne
        • 1 clove garlic
        • 3 heaping tablespoons fresh chopped dill
        • 1 lemon, zest and juice
        • dash or two onion powder
        • salt & fresh cracked pepper to taste

        In small pot over medium high heat, add broth/water and quinoa, bring to a boil, cover, reduce heat to low and simmer for 15 minutes. Once done, remove cover, fluff with fork and let set for another 15 minutes to cool and absorb remaining water.

        While the quinoa is cooling, start your flax egg by mixing the ground flax seed with 3 tablespoons water in a small bowl and set aside to thicken.

        Prepare the rémoulade by placing all the ingredients in a blender/food processor, except the dill, and blend until smooth (the magic bullet is a perfect tool for this job). If your mixture is too wet add a few cashews and blend again...if too thick add 1 tablespoon water at time until desired consistency. Stir in the dill by hand. Taste for seasoning adding more of whatever you like. Cover and keep at room temp or place in the refrigerator until ready to use (I served mine at room temp). This can also be made a couple days in advance and kept in the refrigerator (will stay fresh for up to a five or six days).

        On to the quinoa cakes, in a medium bowl, combine the quinoa, flax gel, flour, onion, celery, bell pepper and garlic. Mixture should be moist enough to stick together. Add additional flour or water, 1 -2 tablespoons at time if needed to adjust consistency. Taste for seasoning. Form into approx. 8 patties about 1/2 inch thick. (Patties can be made a day in advance and kept in the refrigerator.)

        Preheat oven to 200 degrees. In a large cast-iron skillet or non-stick pan/griddle over medium heat heat 2 teaspoons olive oil, add the patties and cook, until nicely browned on each side, about 4-5 minutes per side.

        Keep finished quinoa cakes on a baking sheet in the preheated oven until all cakes are cooked. Serve the quinoa cakes with a nice dollop of rémoulade and pair with a steamed vegetable of choice. Serve immediately.

        Notes:

        * Feel free to use vegan mayo instead of cashews for this rémoulade. When making the rémoulade, replace the cashews and water with 1/2 - 3/4 cup vegan mayo. Mince your garlic and make sure zest of lemon is finely grated or minced. Combine ingredients in a small bowl and mix by hand.

        The quinoa cakes can also be baked in the oven until golden brown and heated through on a lightly greased baking sheet at 400 degrees for about 25 minutes, flipping once after the first 15 minutes.

        Enjoy!


        Sriracha Cashew Cream Sauce

        Sriracha Cashew Cream Sauce

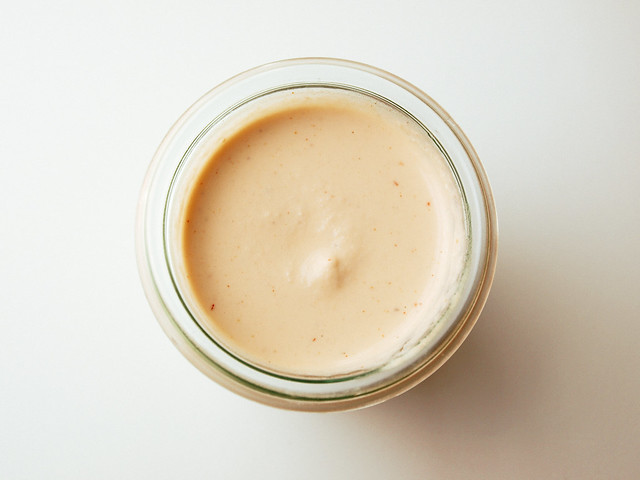
        Sriracha is spicy with a touch of sweetness making it irresistible to those who try it and this cashew cream sauce is another way for us sriracha fans to get our fix. This recipe is so simple, versatile and can be used in many different ways. Use it as a pasta cream sauce or as a sauce to drizzle on roasted vegetables and baked sweet potatoes (recipes coming soon). You can use it as a dip or as a salad dressing. This is also fantastic as a spread on burgers, sandwiches or any place you may use mayo type products. Even tacos, burritos and quesadillas would benefit from a drizzle of this sriracha cashew cream sauce. And don't forget to add it to vegan sushi rolls, this makes for a great dragon sauce. Make it as spicy as you like or keep it on the mellow side with the amount of ingredients I have listed below. I found that one teaspoon of sriracha was just the right starting point to taste the flavors while adding a nice subtle punch to your meals, on a scale from 1 -10 the 1 teaspoon of chili sauce ranks in at about a 2, mild. I made it a second time using 2 teaspoons of sriracha and it kicked it up to 3-4. This is one of my favorite cashew sauces so far as it is so versatile and so good !

        Sriracha Cashew Cream Sauce

        Sriracha Cashew Cream Sauce

        Ingredients (makes about 2/3 cups or 3 servings)
        • 1/2 cup raw cashews, preferably soaked for 2-3 hours
        • 1/4 cup water, + 1-2 tablespoons as needed for thinning
        • 1 garlic clove
        • 2 teaspoons nutritional yeast
        • 1 teaspoon sriracha chili sauce, + more to taste

        Place all ingredients into a small blender (I used a magic bullet for this job). Blend until creamy, taste for flavor adding extra chili sauce if needed. Thin with water to desired consistency using one tablespoon at a time. If you find it's too watery add a few cashews and blend again until smooth. Store leftovers in an air tight container in the refrigerator for up to six days.

        Notes:  Add as much sririacha as you like to suit your taste. The one tsp I have listed here is a good starting point for a mellow flavor. I also didn't add in any salt but feel free to add salt to taste. Lastly, I usually use 1 tablespoon of lemon juice in my cashew creams but didn't add any in this recipe, I didn't feel it needed either. You may try adding 1 tablespoon if you have it on hand for another layer of flavor.

        Serve however you like! I hope you find many uses for this sauce. I have many in mind and will be sharing within the recipes as they come up.

        Here are a few options for using this flavorful cream...

        Baked Stuffed Sweet Potato + Sriracha Cashew Cheese Sauce

        Avocado and Black Bean Torta (in recipe as spread)

        Portabello & Kale Calzone (replace the garlic-miso cream)

        Street Tacos (drizzle on top)

        Mac & Cheese Bake (would be great as the base)

        Vegan Sushi Rolls (add some to the center or drizzle on top)

        Tofu Scramble Stuffed Poblano Peppers

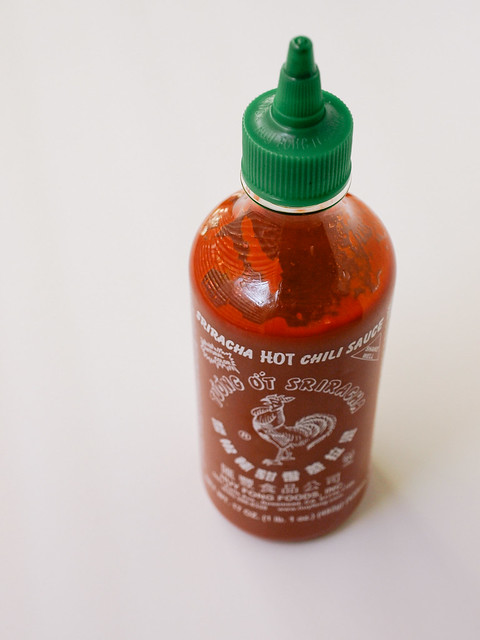
        sriracha

        Sriracha can be found in the Asian section of most stores. 

        Enjoy!

        Basic Cashew Sour Cream

        Basic Cashew Sour Cream

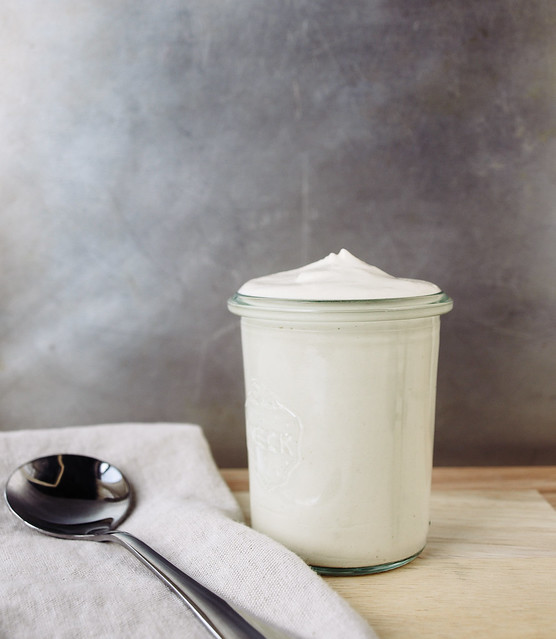
        I have a few variations of this basic cashew sour cream on a couple recipes in the collection and thought it was time to add a simple version which you can adjust adding herbs or spices to suit your taste. I love simplicity and am always looking for ways to share them here. It's extremely easy to make your own vegan sour cream and will last up to five or six days in the refrigerator. Just soak, process and you have yourself a raw, soy free, vegan food that is much cleaner than any sour cream you will purchase in the grocery store, vegan or not. It's so easy to make and will enhance a variety of meals and recipes. I encourage you to give this a try and be amazed how wonderful these simple ingredients come together to make a vegan sour cream of your dreams!

        Basic Cashew Sour CreamBasic Cashew Sour Cream

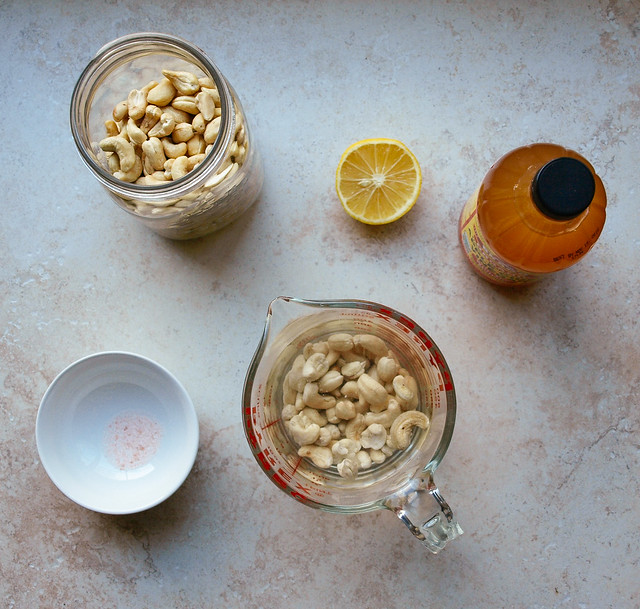
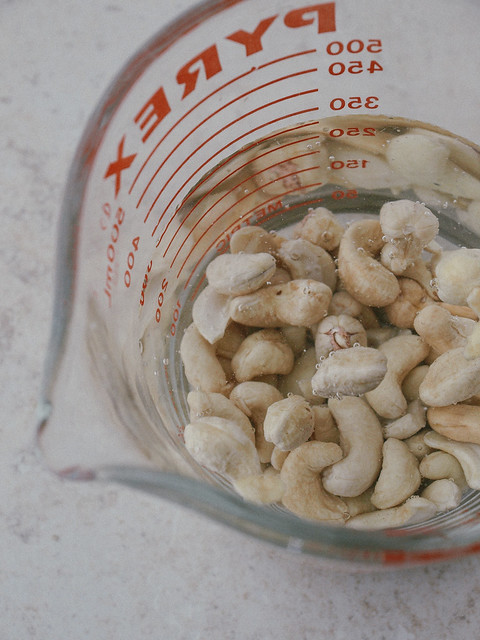
         It is recommended to soak your nuts before processing. I know we snack on nuts without soaking or eat them in our foods without going through this process but it does have some advantages. The soaking of the cashews will increase enzyme activity, offer greater absorption of the food's nutrients by the body and help to increase digestibility. But please don't panic if you don't have time to go through this process, you'll be just fine if you don't. Ideally they should be soaked for 2 - 4 hours, overnight is great too but not necessary for cashews. Find more about soaking here: How to Soak & Sprout Nuts, Seeds, Grains & Beans from Vegetarian Times & The Benefits of Soaking Nuts and Seeds from Food Matters

        Basic Cashew Sour Cream

        So now to the good stuff and where you can use your homemade sour cream. Try adding a dollop on Cuban Black Bean Soup, Texas Three Bean Chili, Raw Taco Salad, Street Tacos, burritos and baked potatoes for starters....anywhere you would normally use sour cream. Use in baking whenever sour cream is called for like this Sour Cream Banana Bundt Cake from VeganYumYum. When making ranch or onion dip let this be your go to sour cream. Try using it in stroganoff recipes or blend in your mashed potatoes. Make a sour cream fruit topping by adding maple syrup and dash of vanilla for a sweet, tangy dessert. From sweet to savory, this cashew sour cream will come in handy and save the day.

        Basic Cashew Sour Cream

        Basic Cashew Sour Cream

        Ingredients
        • 1 cup raw cashews, soaked 2 - 3 hours
        • 1/2 - 3/4 cup unsweetened almond milk or water
        • juice of one small lemon or about 1 tablespoon 
        • 1 teaspoon apple cider vinegar
        • pinch of mineral salt

        Soak and drain your cashews. In food processor/high-speed blender, add all ingredients and blend until nice and creamy, stopping to scrap down the sides every now and then. Add a tad more water/milk as needed to create desired consistency. If using fresh herbs, add once the cashew blend is creamy pulsing until just incorporated, or blend in by hand. Best refrigerated for at least an hour before serving but will do fine if served right away. Sour cream will thicken upon being chilled.

        Makes about 1 cup.  Will keep in refrigerator for 5 - 6 days.

        Variations:

        Use lime instead of lemon and add a few sprigs of cilantro at the end for a Lime Cilantro Sour Cream.

        Try adding a few dill fronds and 1 tablespoon dijon mustard for a Dill Sour Cream.

        Try this Chili Cilantro Sour Cream from Food 52.

        Make a sour cream fruit topping by adding 2 tablespoons pure maple syrup and a dash of vanilla to this recipe. Top on strawberries, blueberries, grapes, mango, raspberries, oranges, etc.

        Try this Spicy Avocado and Sour Cream Puree from Huff Post.

        Notes:

        Adding extra water will depend on how long you've soaked your nuts. The longer you soak, the more water they'll absorb making for less extra liquids needed. Less water will result in a thicker sour cream while more water makes it thinner. If you feel you've put in too much liquids, add a few more cashews and blend until smooth. Keep in mind that refrigerating will also thicken your cream.

        You can sub in blanched almonds that have been soaked for 8+ hours in place of cashews.