.

Showing posts with label sriracha. Show all posts

Roasted Delicata Squash Fries + Sriracha

Roasted Delicata Squash Fries + Sriracha

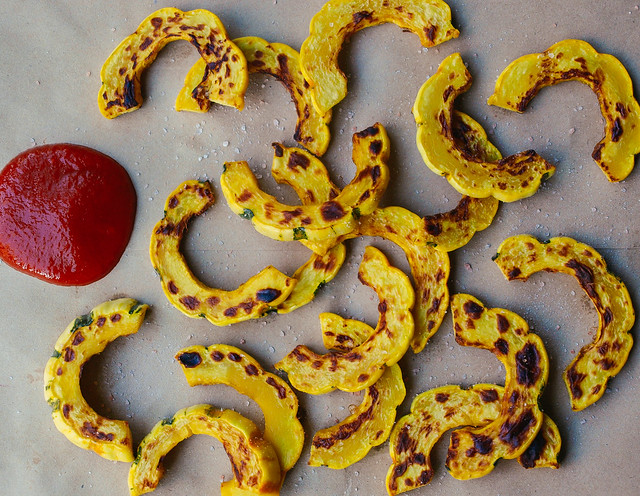
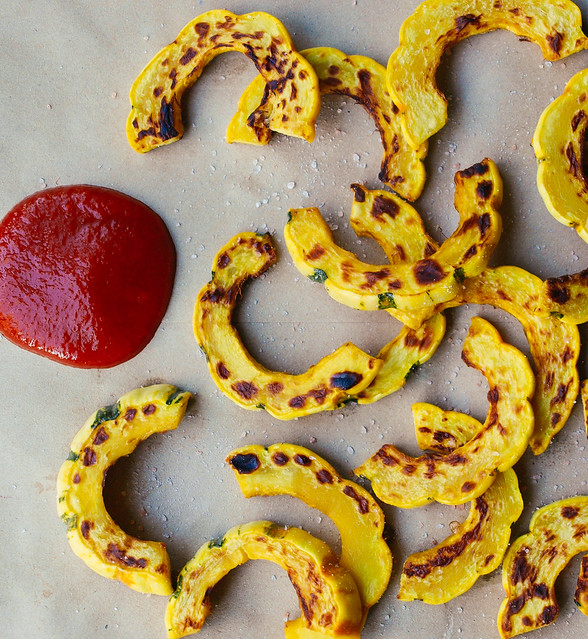
I love eating seasonally for two great reasons. One, it's happens to be cheaper. And two, it makes it more exciting to anticipate the coming seasonal harvest. It's time for the fall season's delicata squash and here it is simply roasted, salted and served with the ever wonderful and highly addicting sriracha. If you don't like heat you can just as well serve this with any kind of ketchup mix like this one from Dulcet: Peppery Moroccan Ketchup (their site is where the inspiration for this recipe came from, even the picture is inspired from here) or you can try making a quick curry ketchup. You may also opt to try it with a Cashew Sriracha Cream Sauce. The simple flavor of the squash pairs well with a robust flavored condiment. I love it with the heat of the sriracha myself (it's good for the sinuses and the facial sweat glands!) but am curious to try out some of the other condiments mentioned for variation. These can be served alone as a mono meal or as a snack. You can also pair it with a sandwich, veggie burger or possibly a simple tomato soup. You may even find me topping these on a bed of quinoa, adding a drizzle of sriracha on top! These roasted squash fries are a simple way to enjoy this seasonal vegetable and something to look forward to each year as fall arrives.
Roasted Delicata Squash Fries + Sriracha

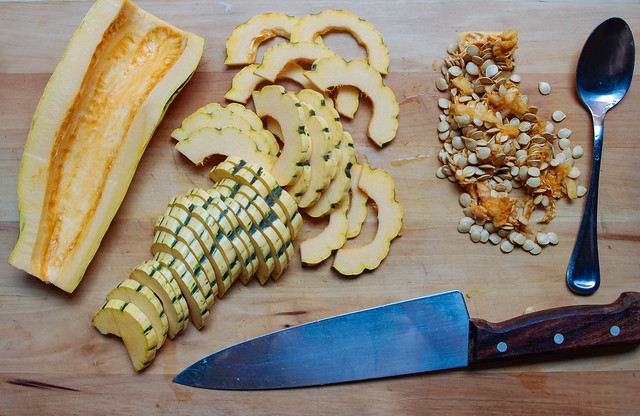
Don't throw those seeds away! You can try roasting them with this recipe for Roasted Delicata Squash Seeds. It simply uses coconut oil, cinnamon and salt but feel free to use whatever spices you like in place of the cinnamon.
Roasted Delicata Squash Fries + Sriracha

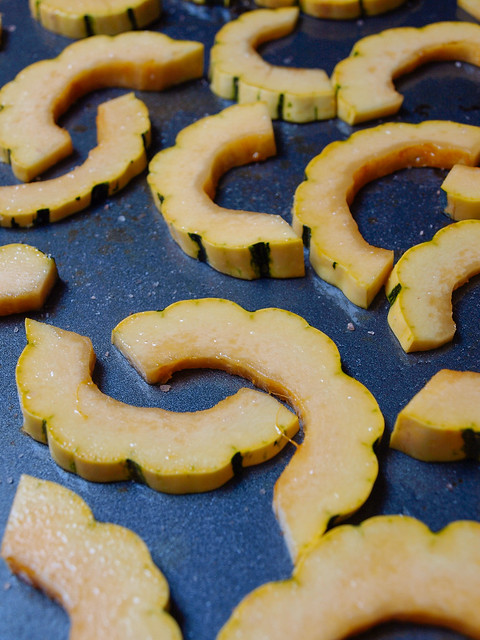
And yes, just in case your wondering, you can eat the skin too!
Roasted Delicata Squash Fries + Sriracha

Roasted Delicata Squash Fries + Sriracha

Ingredients
  • 1 medium sized delicata squash
  • olive, grapeseed or coconut oil
  • mineral salt
  • sriracha

Wash and dry your squash. Trim ends off. Cut squash in half lengthwise, scrap out seeds and cut into 1/4 - 1/2 inch thick slices.

Roast your squash 1 of 2 ways:

1. Oven: Preheat oven to 500 degrees f. . Place squash on baking sheet, or two if needed, and use just enough oil to lightly coat squash on both sides. Spread squash in an even layer so as to not touch. Sprinkle with mineral salt. Bake for 10 minutes. Remove from oven, using tongs or spatula flip squash over, bake another 8 - 10 minutes, or until both sides are nicely browned (your oven may vary).

2. Broiler: Set broiler to medium. Place squash on a baking sheet, use just enough oil to lightly coat squash on both sides. Spread squash in an even layer so as to not touch. Sprinkle with mineral salt. Place under broiler and cook for about 6 minutes. Flip squash over using tongs or spatula, bake another 2 - 4 minutes, or until both sides are nicely browned. Once you flip be sure to keep an eye on them so they don't burn and overcook. (This method may take 2 or 3 batches to complete depending on the size of your broiler)

Serve with sriracha. Feel free to use any condiment you like.

Notes:

These won't be crispy but they will be delicious!

Enjoy the season's harvest!

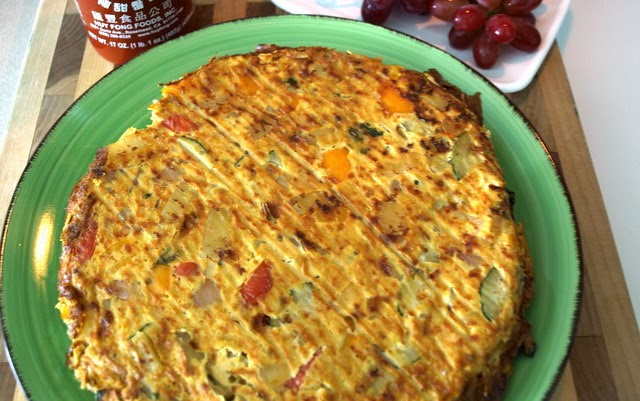
VEGETABLE FRITTATA

Vegetable Frittata & Sriracha

I love sriracha and this vegetable frittata was the absolute perfect accompaniment. Truth be told this is the first time making a frittata, never had one the old traditional way with eggs either. I must say it was flavorful, filling and I will definitely be making this again in the future for family and friends when needed. It can be served anytime of day. This is also great for using up produce that needs be used asap, it will handle a large assortment of veggies. This was as good if not better than I expected. Adding the sriracha chili sauce finishes it off nicely...it really does the trick.


VEGETABLE FRITTATA

Ingredients
  • 3 small potatoes, diced...either with or without the skin
  • 1 tablespoon extra virgin olive oil
  • 1 small onion, diced
  • 1 small bell pepper, diced
  • 1 small zucchini, diced
  • 2 cloves garlic, minced
  • handful grape tomatoes, quartered
  • small handful parsley or cilantro, chopped
  • shake of red pepper flakes, optional

for the blender/food processor
  • 1 package organic firm tofu (14/16 oz), drained
  • 1/3 cup unsweetened non-dairy milk
  • 1 tablespoon cornstarch
  • 3 tablespoons nutritional yeast
  • 1 teaspoon mustard (any kind) or 1/2 teaspoon mustard powder
  • 1/2 teaspoon garlic powder
  • 1/2 teaspoon salt or 1 tablespoon tamari
  • 1/4 teaspoon turmeric
  • 1/8 teaspoon white or black pepper, optional

1. Preheat the oven to 375°F.

2. Heat oil in a pan over medium heat, saute potatoes for 5 minutes, add onion and saute until translucent, another 5 minutes. Add the peppers, zucchini, and garlic, saute until just soft. Add tomatoes, parsley/cilantro and optional red pepper flakes, cook for one minute more. Remove from heat. I also added a twist or two of cracked pepper & himalayan salt to the veggies as well.

3. In food processor/blender, combine the remaining ingredients and process/blend until smooth. Taste, adding any additional spices as desired. 

4. In a large bowl, combine the sauteed vegetables into the tofu mixture.

5. Cut a circle out of parchment paper to line the bottom of your pie dish. Spoon mixture into the lined pie dish and using the back of a spoon smooth the top. Bake for 35 to 40 minutes, or until frittata is firm to the touch. Remove from heat and let stand 10 minutes. Loosen edges of frittata. Using pot holders if needed, place plate on top of pie dish and flip so frittata falls onto plate, remove parchment paper and serve. Serves 4 to 5. 


 Notes: My top was browning when cooking, but since we are flipping don't worry too much about it. If you decide not to invert you may wish to cover lightly with foil. I also accidently cooked mine at 400 which may be why it was browning so fast, but even at 400 degrees for 35 min. it came out great!


Vegetable Frittata & Sriracha

Lots of  veggies make this a fully satisfying meal...


Vegetable Frittata & Sriracha


Don't forget the Sriracha :)

Recipe adapted from PETA , Vegan Vegetable Frittata 

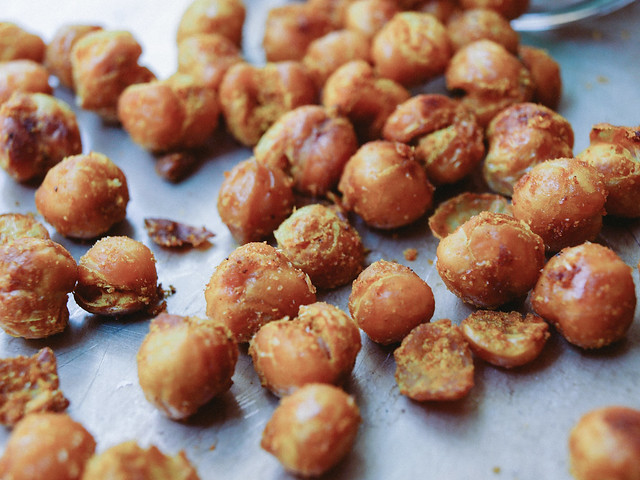
Curry + Sriracha Roasted Chickpeas


For the love of chickpeas, curry & sriracha!

Curry + Sriracha Roasted Chickpeas

I love these little crunchy guys. I was revisiting my Curry & Sriracha Roasted Cauliflower and thought why not do a batch of chickpeas too. I'm out to keep the campaign going... 


Fair enough. I know the chickens would agree too. I hear them cheering me on as I type...well not really, but if they knew my plan they surely would. These little roasted chickpeas are yet another great way to add this versatile little bean into your life. They are full of protein and fiber, they toast up nicely and take on a variety of flavors making for a great anytime of day snack. Skip the chips and roast up some chickpeas instead. They are so easy to make, you may want to double up the recipe as they can go pretty fast. Try adding these as salad and soup toppers too. Get creative with the chickpeas!

Curry + Sriracha Roasted Chickpeas

Curry + Sriracha Roasted Chickpeas

Ingredients
  • 2 cups cooked garbanzo beans (chickpeas), or 1 can (15oz), drained, rinsed and patted dry
  • 1 heaping teaspoon sesame, coconut or olive oil
  • 1 heaping teaspoon sriracha
  • 1 heaping teaspoon curry powder
  • dash or two garlic powder
  • mineral salt, to taste

Preheat oven to 400 degrees.

Place ingredients in a medium size bowl and combine well to coat. Place in a single layer on a roasting pan or rimmed cookie sheet. Bake for about 40-45 minutes mixing them around every 15 minutes or so until chickpeas have a nice roasted look and are crispy. Keep a close eye on them in the last 10-15 minutes as some may burn. Let cool for 10 minutes before serving.

Notes:

Keep your jarred chickpeas crunchy by adding some rice to bottom of your jar or container. They seem to soften up a bit once sealed away, the rice will help soak up extra moisture to keep them crunchy. You can also keep them in a container that let's air flow through so they can keep their crunch and be sure to eat within a few days. 

Feel free to add extra spice if you want it a little spicier. Also, next time around try mixing up the spices using some of these other alternative options: chili powder, cayenne pepper, cumin, thyme, smoked paprika, vinegar & salt, cinnamon, lime, garam masala, salt & cracked pepper, lemon pepper, nutritional yeast, etc...mix and match to whatever appeals to you.

P.S. Don't forget to drink plenty of water with your chickpeas...

Enjoy!


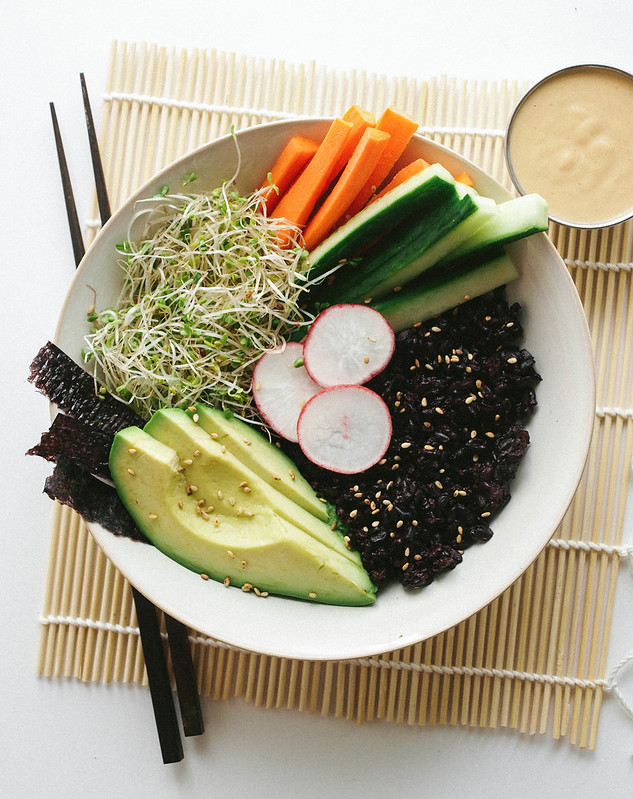
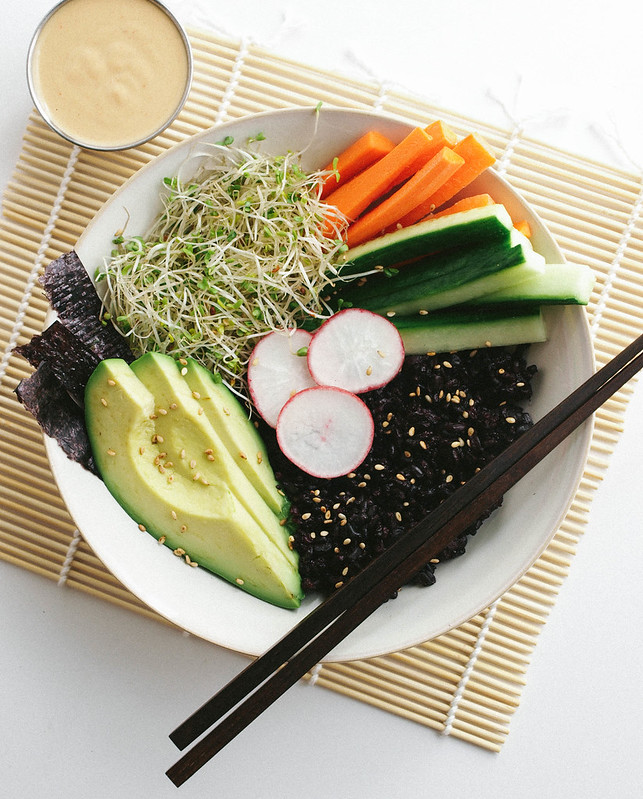
BLACK RICE SUSHI BOWL + DYNAMITE SAUCE

BLACK RICE SUSHI BOWL + DYNAMITE SAUCE

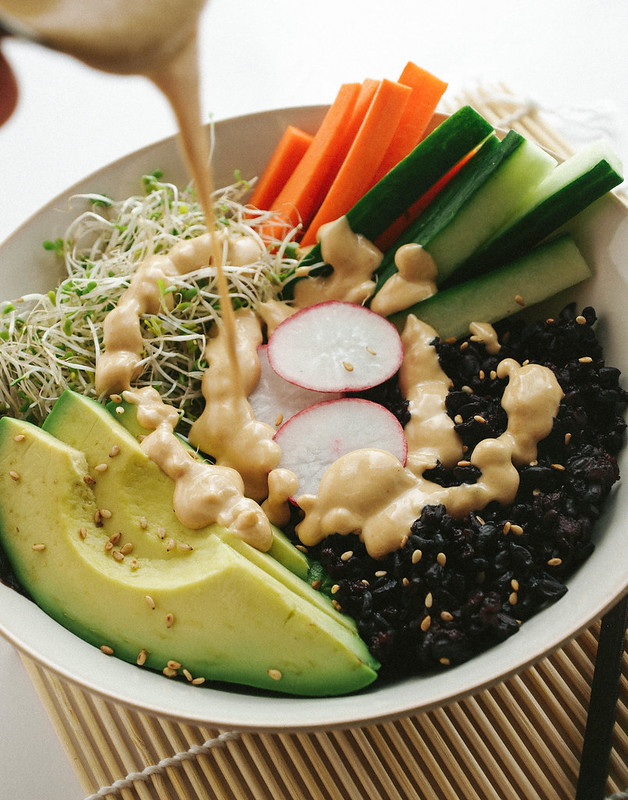
Sushi roll, in a bowl!

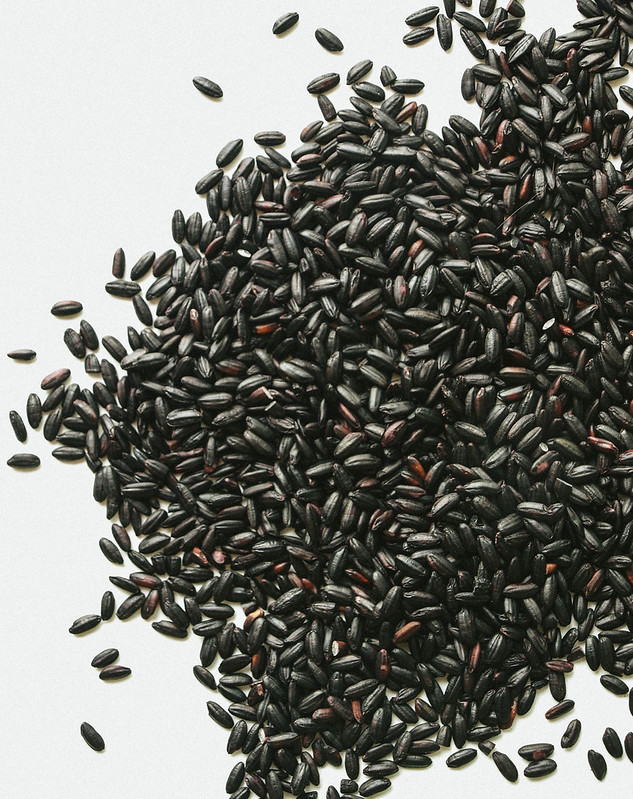
Black Rice

I've had a bag of black rice in my pantry for far too long. It's one of those items I use on occasion and thought it would be perfect for this a sushi dish. Black rice (aka purple, fortune, Emperor's or forbidden rice) is highly nutritious and a grain that we could all benefit from adding to our meal rotation. It's slightly more nutritious than brown rice and can be used in place of other colored rices, even in dessert recipes. Its main attribution over brown rice is the concentration of anthocyanin anti-oxidants in its dark color. The power of these anti-oxidants can be compared to that of blueberries and other dark colored fruits and vegetables. Its flavor and texture is about the same as brown rice and the nutritional profile is similar as well. After having it here, I can see myself grabbing for the black rice more often...its nutty texture and softly sweet undertone is delicious!

BLACK RICE SUSHI BOWL + DYNAMITE SAUCE

Sometimes it's just easier to throw your sushi ingredients into a bowl, which was just the case for me here. I started out by attempting to make sushi rolls. My knives were not sharp enough making it hard to cut the roll properly. I ended up simply eating it as a hand roll and decided to create a sushi bowl to share with you. I'll sharpen my knives and save the sushi roll for later. I kept the vegetables simple but you can make your sushi bowl your own by changing up the vegetables to whatever you have accessible in your area or on hand. Use julienned bell peppers, enoki mushrooms or pan seared sliced shitake mushrooms, shredded purple or green cabbage, pea shoots, etc. Add in some cubed tofu or edamame for added protein. Whatever vegetables you use, the creamy spicy sauce will finish it off and make it all come together beautifully!  I've been into creamy sauces lately, they're something so satisfying to me, and this was another dressing that hit the spot. As well as being so simple to put together, the dressing can double as a dip or dressing making it versatile. Altogether, this is an easy to throw together sushi bowl that you can enjoy whenever the craving strikes!

BLACK RICE SUSHI BOWL + DYNAMITE SAUCE

BLACK RICE SUSHI BOWL + DYNAMITE SAUCE

Ingredients
  • 1/2 cup black rice 
  • just under 1 cup water or vegetable broth
  • 1 - 2 carrots, julienned
  • 1/2 cucumber, julienned
  • 1 avocado
  • 1/2 cup alfalfa sprouts, or sprouts of choice
  • 3 radishes, sliced
  • nori sheet, cut into strips
  • sesame seeds, to garnish

Dynamite Sauce
  • 4 tablespoons (1/4 cup) tahini
  • 6-7 tablespoons water
  • juice of 1/2 small lemon or splash of apple cider vinegar
  • 2 - 3 teaspoons sriracha, sambal oelek or chili garlic (or your favorite hot sauce)
  • pinch of salt

Rinse rice well under cool running water using a fine mesh sieve. In a small sauce pan, bring rice and water to a boil, cover, reduce heat to simmer and cook for 25 minutes without disturbing. When done remove lid and let rest about 10 minutes, fluff with fork. Please check your package for cooking directions just in case, this was mine.

In a small bowl, mix all the dressing ingredients together, cover and set aside. Add more water to thin your dressing, add more tahini to make it thicker.

To serve, add 1/2 of the rice (about 1/2 cup) into your serving dish and arrange the prepared vegetables over top or to the side. Drizzle with dynamite sauce and add a sprinkle of sesame seeds. Enjoy your deconstructed sushi bowl in all its creamy gloriousness!

Serves 2.

Notes: 

If you don't have tahini on hand, use any vegan mayo of choice, about 1/2 cup + a tablespoon or so of water to thin if needed. Omit the lemon/vinegar juice.

Change up the vegetables using colored bell peppers, pan seared julienned shitake mushrooms, shredded purple or green cabbage,  peas shoots, etc. 

Add in some cubed tofu or edamame for added protein.


I'd love to see what you've created!
#thesimpleveganista


CURRY & SRIRACHA ROASTED CAULIFLOWER

Curry & Sriracha Roasted Cauliflower

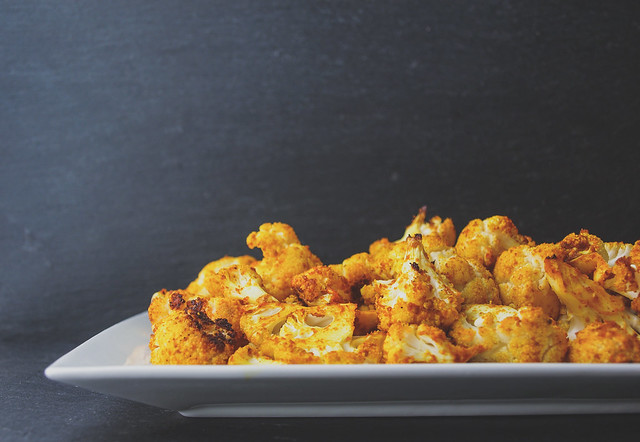
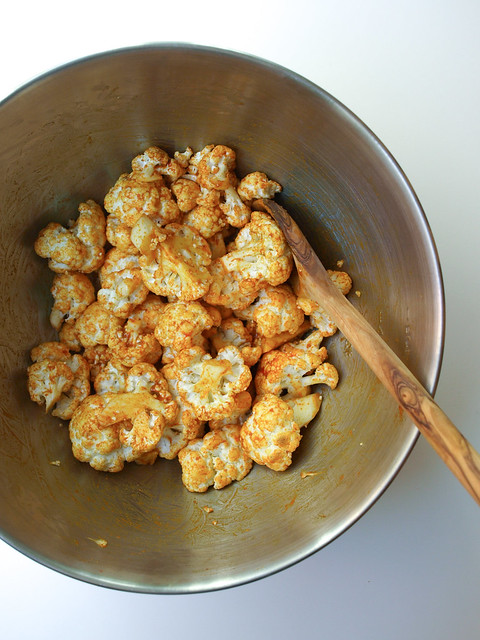
 I never used to care much for cauliflower a few years ago...but times have changed. Cauliflower is awesome! I especially love it roasted. I had a head of cauliflower in my fridge that I was going to do buffalo wing style but didn't feel like going through the whole ordeal so I decided to simply coat it with curry and sriracha and roast it up. It was fantastic on all accounts...taste, texture and color. I thought maybe it was going to be too spicy but it was perfect. I sat and ate the whole thing to myself enjoying this as a mono meal. You can of course use this as a side dish along with some rice or quinoa too. I absolutely love this dish and make it often! Simply delicious...

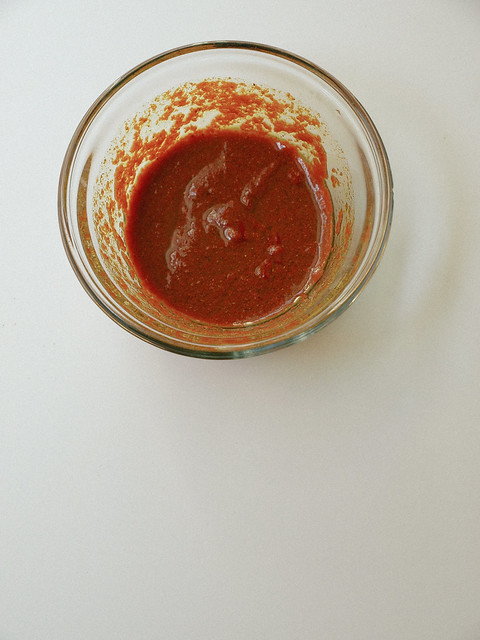
Curry & Sriracha Roasted Cauliflower ....the sauce!Curry & Sriracha Roasted Cauliflower ...the mix!
 Curry & Sriracha Roasted Cauliflower [revisited]

CURRY & SRIRACHA ROASTED CAULIFLOWER

Ingredients
  • one head cauliflower
  • 1-2 tablespoons sesame, coconut or olive oil
  • 1 heaping tablespoon sriracha chili sauce
  • 1 heaping tablespoon curry powder
  • generous dash of garlic powder

Preheat oven to 425 degrees. Cut cauliflower into florets and place in large bowl. Combine oil, siracha, curry and garlic powder in a small bowl. Pour over cauliflower and coat well, mixing for a minute or so. Place coated cauliflower in a single layer on a roasting pan lined with parchment paper or lightly greased with oil if needed. Cook for 45 minutes, stirring every 15 minutes. 

Serve alone, or over basmati, jasmine or brown rice, even quinoa would be excellent.

Feel free to add more curry, sriracha and garlic powder to your taste...

Enjoy !

sriracha

Sriracha makes everything better...well, almost! Get your sriracha on :)


Vegetable 'Fried' Quinoa

Vegetable 'Fried' Quinoa [revisited]

This is one of those recipes that will make it into the meal rotation consistently. I'm always looking for ways to make my dishes more nutrient dense and this was a great recipe for that giving me protein and fiber. I'm happy to have another great addition to the recipe collection. This was a nice use of quinoa and fantastic!

Another reason I love quinoa so much is it comes out of the fridge the next day as well as it went in. It also tastes just as great warm as it does cold. It's unlike rice that hardens and doesn't reheat very well for my liking. Quinoa is a sure staple in my kitchen.

Vegetable 'Fried' Quinoa [revisited]

This dish can go any way you like...add/subtract whatever you want...my favorite kind of cooking. You could up the amount of quinoa to vegetable ratio. Here I have one cup quinoa to about 3 - 4 cups vegetables. You don't have to use all these vegetables either but I highly recommend a good assortment for nutrition, texture and color. I have so many because I love veggies! This is also a great recipe for a 'cleaning out the fridge' meal. Almost everything and anything will be tasty. Try snow peas, broccoli, sweet peas, bean sprouts, baby corn and/or celery for variety. Add in some cubed tofu for added protein. Top with white and/or black sesame seeds for a little extra nutrition.

Vegetable 'Fried' Quinoa [revisited]Vegetable 'Fried' Quinoa [revisited]

So easy to make...cook your quinoa, stir fry your vegetables, add in quinoa, stir fry a little longer and done. I guarantee you will love this as much as I do! I can easily eat this to myself given the opportunity.♥

Vegetable 'Fried' Quinoa [revisited]

Vegetable 'Fried' Quinoa

Ingredients
  • 1 cup quinoa, rinsed 
  • 1 1/2 cups vegetable broth or water
  • 1 corn off the cob
  • 1 8 oz. package mushrooms, sliced
  • 2 carrots, peeled and diced
  • 3 scallions, thinly sliced (green and white parts)
  • 1 small zucchini, diced
  • 1 cup shredded cabbage
  • 1/2 cup bell pepper, diced...red, orange or yellow
  • 1/2 cup basil, chopped, optional
  • 1 tablespoon sesame oil
  • 3 tablespoons tamari, Bragg's Liquid Amino's or soy sauce
  • 1 tablespoon garlic powder
  • salt & pepper to taste
  • Sriracha hot sauce, red pepper flakes or dash of cayenne pepper, to taste

Rinse your quinoa in a fine mesh sieve under cool running water. In medium sauce pan combine quinoa with 1 1/2 cups water or vegetable broth, bring to a boil, simmer covered for 15 minutes. Once done remove cover and let set for another 15 minutes to soak up the excess water. Fluff with a fork and set aside.

In wok or large skillet, heat oil over medium high, add vegetables and stir fry for 1 minute or so. Add tamari, garlic powder and other seasonings to taste. Cook for another 3 - 4 minutes stirring occasionally, use a lid if needed to help soften the vegetables a bit. Add in quinoa, turn heat to high, cook another 3 - 5 minutes stirring constantly adding a drizzle of oil if mixture seems too dry.

Serve warm. Top with a little sriracha or tamari if you like.

Notes:

I added a few drops of sriracha while adding the garlic powder and tamari, a little goes a long way. This dish doesn't need a lot of seasoning, I felt that the tamari alone would've been enough.

Feel free to use any assortment of vegetables, and be sure to use as much or as little as you like of each vegetable. Try snow peas, broccoli, sweet peas, bean sprouts and/or celery for variety. I always feel you can almost never have too many vegetables!

Use thawed frozen vegetables of choice for convenience.

Add some extra firm cubed tofu in with the vegetables for added protein. 

Enjoy !


Cucumber Salad + Peanut Citrus Dressing

Cucumber Salad + Peanut Citrus Dressing

As we head into summer and the temperatures begin to rise here in Southern California, I find myself craving salads more and more. This is a refreshing salad of cucumbers and fresh vegetables with a wonderful peanut citrus dressing that will have you tipping the bowl for every drop (I know I say that about all the salad dressings but it's true...you'll see!)

Originally I wanted to create cucumber noodle salad for this recipe but quickly decided that I would rather keep this as easy as possible without having to use too many tools. The only tool I do recommend for this recipe is a microplane for grating your ginger and garlic. It's a great tool for any kitchen and will come in handy over and over again.

Bring on the warmer weather and let's beat the heat with this easy and flavorful Thai inspired salad!

Cucumber Salad + Peanut Citrus Dressing

Cucumber Salad + Peanut Citrus Dressing

Salad 
  • 2 1/2 cups English cucumbers, sliced and quartered
  • 1 cup carrots, sliced
  • 1/2 red bell pepper, diced
  • 2 scallions, thinly sliced
  • 1/4 head of purple cabbage, sliced
  • handful cilantro, roughly chopped
  • handful cashews, for garnish
  • red pepper flakes, for garnish (optional)

Peanut Citrus Dressing
  • 3 tablespoons orange juice, lime juice or lemon juice, + more as needed
  • 3 tablespoons raw or natural peanut butter (almond or cashew butter is great too)
  • 1 tablespoon tamari, bragg's liquid aminos or soy sauce
  • 1 tablespoon pure maple syrup
  • 1/2 garlic clove, grated
  • 1/4 - 1/2 teaspoon fresh ginger, grated
  • pinch of red pepper flakes or 1/2 teaspoon sriracha hot sauce (optional)

In a small bowl, whisk together the ingredients for the peanut citrus dressing, set aside allowing the flavors to come together. Then before adding the dressing to the salad, taste for flavor adding anything extra you might like. For a thinner dressing add 1 or 2 tablespoons citrus juice or water. To make it thicker add a tad bit more nut butter.

Prepare your salad ingredients. Check your dressing for flavor. In a large bowl combine the salad mix with the dressing, toss well and serve. Top with cashews and red pepper flakes. Serves two.

Notes for the dressing: Use the orange juice for a less tangy dressing. I used orange for this recipe and have also used lemon as well. Both were great, and I know the lime will be wonderful too! You can also lessen the amount of juice replacing it with water. Add in some citrus zest of choice if desired. And if you're a vinegar lover, try adding a splash or two of rice vinegar!

Notes for the salad: Try tossing in a cup of cooked quinoa after mixing for a more nutritionally balanced profile.

Recommended tool for grating as mentioned above: Microplane

Enjoy!


    QUICK & EASY CHICKPEA TACOS

    QUICK & EASY CHICKPEA TACOS

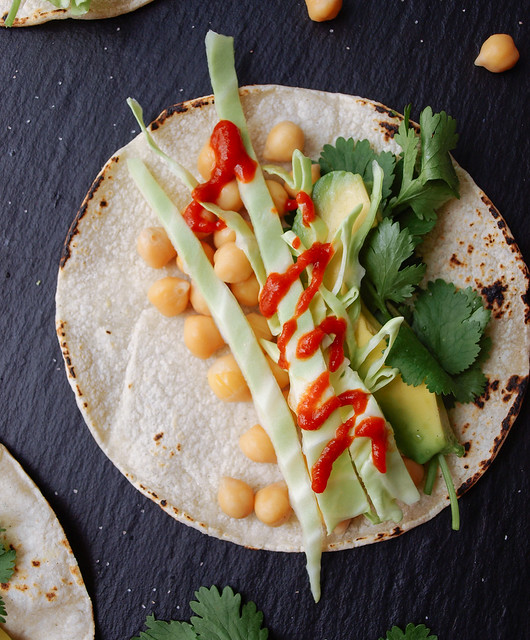
    I have been eating these tacos on a fairly regular basis. I shared a similar version of this on Instagram and Facebook about seven months ago (my how time flies!). It went over very well, especially on Facebook! I don't know why it took me so long for but I finally decided it was time to put this simple taco here as a valuable veggie resource. They are so quick and easy to pull together. They can be eaten as a snack or a meal. Usually I skip the cabbage and cilantro if I don't have it on hand. I love it simply with chickpeas, mashed avocado and sriracha but for the recipe I decided to add a few extras for your consideration making it a heartier taco. Chickpeas are one of my favorite beans and are about the most versatile bean in existence! They work well here served at room temp so there's no heating involved making your taco preparation speed along. Of course, if you prefer your beans heated, by all means heat them up. These tacos have been a useful creation and a complete meal to boot. I hope you enjoy them as much as I do! Cheers :)

    QUICK & EASY CHICKPEA TACOSQUICK & EASY CHICKPEA TACOSQUICK & EASY CHICKPEA TACOS

    QUICK & EASY CHICKPEA TACOS

    Ingredients
    • 1 1/2 cups cooked chickpeas (garbanzo beans) or 1 can (15oz.), drained and rinsed
    • 1/4 head green cabbage, shredded
    • avocado, sliced
    • cilantro
    • corn tortillas, warmed
    • sriracha, sambal oelek or your favorite hot sauce
    • lime wedges, to serve
    • mineral salt

    I'll let you do the measuring on most of the ingredients. I usually eat about 3 of these tacos at one sitting...sometimes 5. I will have left over chickpeas and cabbage with both of those amounts. If serving 7 or more tacos, add a bit more chickpeas to your list just to be on the safe side.

    Warm your tortillas. I do this carefully on the stove top over an open flame to give it some charring on the edges.

    Layer your tacos with chickpeas, cabbage, avocado and cilantro. Top with mineral salt, sriracha and a squeeze of lime. You may also opt to mash some avocado as your first layer and then add the chickpeas, cabbage and cilantro. This will help hold the chickpeas in place a little better.

    So quick and easy...enjoy!


    I'd love to see your masterpieces!
    #thesimpleveganista


    Spicy Lentil & Quinoa Wraps with Spicy Tahini Sauce

    Spicy Lentil & Quinoa Wraps with Tahini Sauce

    You may be familiar with the Spicy Lentil Wraps from Trader Joe's. They are one of four vegan wraps available at the moment, the other's being a Veggie Wrap, Falafel Wrap and Eggplant Wrap. I love all of these wraps with the Spicy Lentil Wrap and Falafel Wrap being my favorites. Out of them all the Spicy Lentil Wrap has the highest protein amount with 14 grams and is the one I usually grab for. Lentils are an excellent addition to your diet. Not only are they a great source of protein but also fiber, vitamin B and a few essential trace minerals your body needs to function well, all of this with very low fat. If you have a local Trader Joe's near you, check out the lentil wrap and the other wraps too. Also, take a look at this list of vegan products they have to offer. Items do change from time to time but this is a great list to get you started. A few other favorite grab-n-go items I love at Trader Joe's are the Lentil Soup with Ancient Grains, Black Bean and Corn Enchilada's, Tofu Spring Rolls and a few various salads.

    Spicy Lentil & Quinoa Wrap with Tahini Sauce

    Spicy Lentil & Quinoa Wrap with Tahini Sauce

    I've wanted to do my own version of their Spicy Lentil Wrap and finally got around to it. I started with the ingredient list using lentils and bulgur wheat but really wanted to create a recipe that was gluten free. I was going to try an all lentil mix but once I shared my testing on Instagram, someone suggested that I use quinoa. Brilliant idea! Why didn't I think of that? ;) After trying a few batches with and without the quinoa, the quinoa was a keeper as it had the preferred texture. The mix is super versatile, easy to put together and can be stored in the fridge for up to a week or frozen if needed. I'm very happy to say that even my 'picky eater' daughter loved this. I actually made her a wrap using flour tortillas with no greens, only avocado, which she ate with no complaints. That is something of a miracle around here as we tend to be very different eaters!

    Spicy Lentil & Quinoa Wrap with Tahini Sauce

    As for the tahini sauce and chili paste, the sauce is pretty straight forward and is meant to be on the thin side. It can be used as a drizzle for each bite. It can also double as a salad dressing, or drizzled on steamed or roasted vegetables! The Trader Joe's chili paste uses a recipe that is made up of red pepper flakes that I just didn't get around to recreating, maybe I'll come back to it later, but rather decided to use ready made chili paste that I've been loving lately. I use the Huy Fong, Garlic Chili Paste or their plain Chili Paste. I love this stuff and have been steaming vegetables topping it with either of the chili paste as all the flavoring I need, maybe a dash of pink salt too. I definitely love my spicy food! If you haven't given it a try, I highly recommend it. It can be found in the Asian section of your grocery store or bought online. There's more to love about chili peppers than just the flavor, they are good for clearing congestion, fighting inflammation, boosting immunity, act as a topical pain reliever, help with weight loss and can stop cancer cells. If you can take the heat, get your spicy on!

    Spicy Lentil & Quinoa Wraps with Tahini Sauce

    Make yourself a wrap using lavash bread or go gluten free using warmed corn tortillas for tacos.

    Spicy Lentil & Quinoa Wraps with Spicy Tahini Sauce

     Both are super hearty and filling!

    Spicy Lentil & Quinoa Wraps with Tahini SauceSpicy Lentil & Quinoa Wraps with Tahini Sauce
    Spicy Lentil & Quinoa Wraps with Spicy Tahini Sauce

    Ingredients

    Lentil & Quinoa Mix
    • 3/4 cup red lentils, sorted and rinsed 
    • 1/2 cup quinoa, rinsed
    • 2 1/2 cups water, + more as needed
    • 1 tablespoon grapeseed oil, optional
    • 2 heaping teaspoons cumin
    • 1 teaspoon garlic powder
    • 1 teaspoon onion powder
    • 1/2 teaspoon pink salt, or to taste
    • 1 teaspoon red pepper flakes, optional
    • 2 tablespoons chopped parsley
    • 1 scallion, sliced

    Spicy Tahini Sauce
    • 1/4 cup tahini
    • 1/2 cup water, + more as needed 
    • juice of 1/2 lemon or 1 tablespoon
    • pinch of pink salt
    • pinch of red pepper flakes
    • 1 tablespoon finely chopped parsley

    to serve
    • shredded cabbage or micro greens
    • lavash bread or corn tortillas (flour tortillas work too)
    • chili paste or sriracha (may fav chili paste)
    • sliced avocado, for tacos (optional)

    In a medium sauce pan, bring water, lentils, quinoa and oil to a boil, reduce heat to low, add in cumin, garlic & onion powder, salt and optional red pepper flakes, stir to combine, cover and simmer for 20 minutes. Remove from heat, add in chopped parsley and scallions, let rest for 10 minutes. If you feel it's too dry, add a couple tablespoons of water. Mixture should be creamy, not dry. Add extra spices to taste.

    While lentil & quinoa mix is cooking, combine all the ingredients for the sauce in a small bowl. Set aside.

    For the wrap, lay your lavash bread on a flat surface. Spread a tablespoon or so of chili paste about 1 1/2 inches from the edge on the first 1/3 portion from top to bottom, leaving an inch on both ends. Layer with about 1/4 cup lentil & quinoa mix and cabbage, fold over and roll. Slice in half and serve with a drizzle of tahini sauce on each bite.

    For tacos, warm your tortillas, layer with lentil & quinoa mix, micro greens or cabbage, add chili paste and tahini dressing to taste and sliced avocado.

    Notes:

    Feel free to use all cabbage, or any greens that you like. I have used micro greens here because I had them on hand and for variation.

    Lentil & quinoa mix makes about 3 cups. Refrigerate for up to a week or freeze for longer.

    Tahini sauce makes about 3/4 cup. Store in refrigerator for up to a week. Great on salads, steamed or roasted vegetables too! If you prefer it to be thicker, use less water.

    If you don't have quinoa available you can still pull this together using all lentils. 1 cup lentils to 2 1/4 cups water. If using brown/green lentils, cook at least 40-45 minutes.

    Enjoy!

    Chinese Chop Salad + Peanut Sesame Dressing

    Chinese Chop Salad + Peanut Sesame Dressing

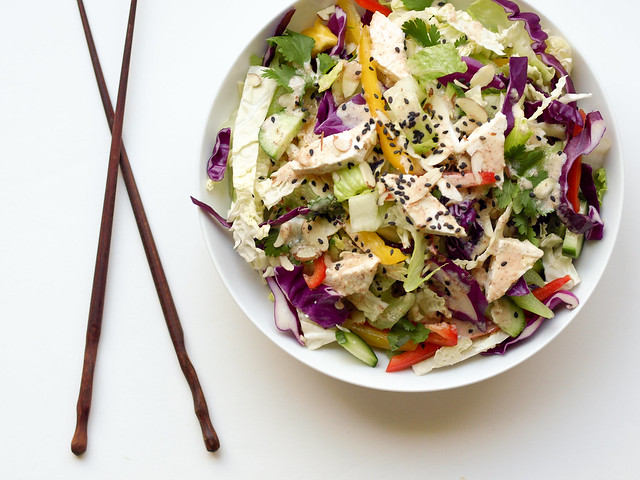
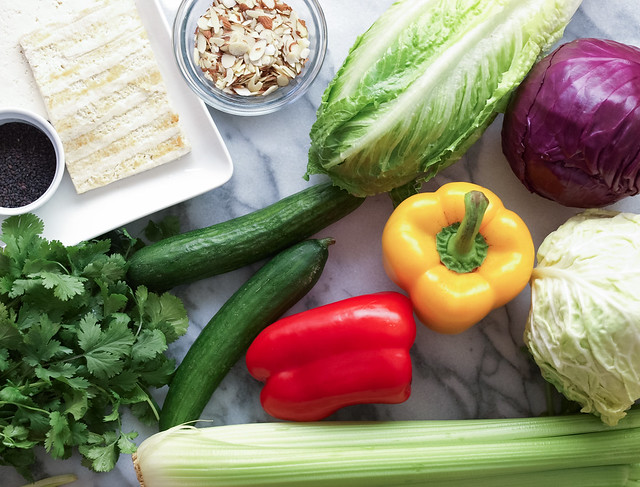
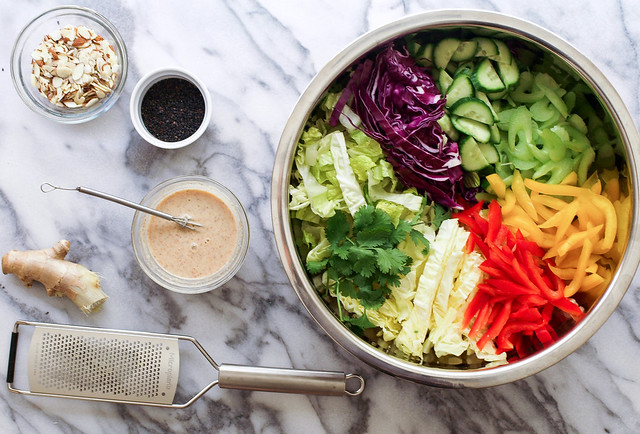
    Light, fresh foods are my inspiration these days. Fresh is back in my kitchen as I crave the lighter fare with the changing season. Today I share with you this Chinese chop salad which is meant to be enjoyed in abundance! It will make quite a bit so you can either graze on it throughout the day or simply have some, saving the rest for later if not making for a group, or simply half the recipe. It's meant to be versatile as well, using whatever ingredients you prefer or have on hand. I have used red and green cabbage along with romaine lettuce here. Feel free to use any combination if you don't want to use all three. The vegetables are in abundance too, I didn't add any carrots so that my be something you might like to add to yours. I have also included lightly grilled tofu on top of my salad but this is an option. The dressing will add a little extra protein to the salad. It's another peanut dressing. What can I say?! I love the creaminess as well as the little extra protein and nutrition it gives...and this one is a little different from the others. I used quite a bit of vinegar in this one giving it a nice bright zestiness. If your not a fan of vinegar, like I once was, you'll see a substitution for you in the notes. As Tim Gunn from Project Runway liked to say, 'Make it work!'...that's exactly how we'll approach this salad with the various tastes we all have. Hope you'll enjoy it as much as I did. Cheers to the changing seasons and new adventures in vegan fare!

    Chinese Chop Salad + Peanut Sesame Dressing

    Chinese Chop Salad + Peanut Sesame Dressing

    Light, fresh and delicious! 

    Chinese Chop Salad + Peanut Sesame Dressing

    Chinese Chop Salad + Peanut Sesame Dressing

    Ingredients
    • 1 small head green, savoy or napa cabbage, sliced
    • 1 head romaine lettuce, sliced
    • 1/3 head red cabbage, sliced
    • 1/2 red bell pepper, julienned
    • 1/2 yellow bell pepper, julienned
    • 2 Persian cucumbers or 1 small cucumber, halved and thinly sliced
    • 2 stalks of celery, thinly sliced 
    • 1/2 cup chopped cilantro, loosely packed
    • 2 tablespoons black sesame seeds, garnish
    • small handful slivered almonds, garnish
    • 8 oz. plain or grilled firm or extra firm tofu, cubed (optional)
    Peanut Sesame Dressing
    • 1/2 cup apple cider or rice wine vinegar
    • 3 tablespoons natural peanut or almond butter
    • 1 tablespoon pure maple syrup (2 if using raw almond butter)
    • 2 teaspoons sesame or toasted sesame oil
    • 1/2 inch knob ginger, grated or minced
    • 1 teaspoon sriracha, optional
    • pinch of pink salt or splash of tamari

    In a small bowl, mix your dressing and set aside letting the flavors develop. Taste before serving adding anything you feel it needs.

    Prepare your vegetables, place in a large bowl. Here you can either add the dressing and toss to coat then serve in individual dishes. OR, you can toss and serve adding a drizzle of dressing over top once plated. Top with tofu, sesame seeds and slivered almonds.

    Serves 4.

    Notes:

    Use whatever ingredients you like here. There is plenty so if you don't have access to a few of the items you can sub in something else or omit it all together. Make this a rainbow salad by adding in some julienned or grated carrots. You may like to add in some small broccoli florets, sliced scallions or zucchini too.

    If you don't care for vinegar, I would suggest replacing the 1/3 cup of  vinegar with water or unsweetened almond milk and maybe a splash of vinegar for the extra zest it gives. This dressing is meant to be somewhat on the thin side. If you prefer it thicker add a bit more nut butter, to thin add a tad more of the liquids.

    For the tofu, you can use uncooked or grilled. I lightly cooked mine using sesame seed oil and a cast iron griddle, about 6 minutes on each side. But it is perfectly fine with tofu from the package, just press if needed and cube it. If you're looking to use cooked tofu here is tutorial from Olives for Dinner that you can reference: 15-Minute Quick and Easy Tofu

    Enjoy the lighter side!

    Baked Stuffed Sweet Potato + Sriracha Cashew Cheese Sauce

    Baked Stuffed Sweet Potato + Sriracha Cashew Cheese Sauce

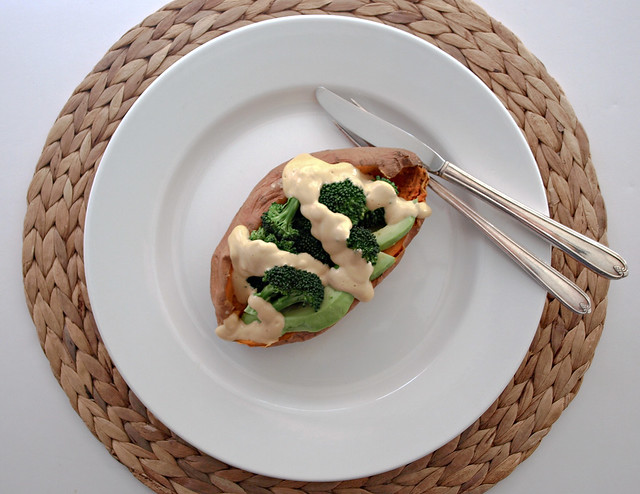
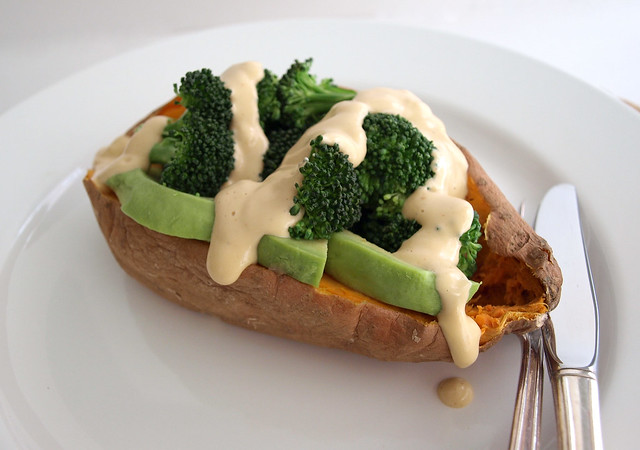
    Simple, simple, simple! This baked stuffed sweet potato is a perfectly filling and a great tasting meal all by itself. Once you dig in and open up your sweet potato, it will fill the plate with its beautiful orange flesh, while all the flavors combine to create a healthy and satisfying meal....it's both visually appealing and delicious. This is a nutrient dense meal, full of fiber and protein. The addition of the sriracha cashew cheese sauce gives it a nice added spicy punch of flavor that pairs so well with the sweet potato. I also added extra broccoli on the side for myself. Feel free to add anything more or less that you like. Add a grain like quinoa, farro or brown rice if you need a little extra heartiness, but for some of us this is a filling meal in itself. Now, let's get back to basics...

    Baked Stuffed Sweet Potato + Sriracha Cashew Cheese Sauce

    Baked Stuffed Sweet Potato + Sriracha Cashew Cheese Sauce

    Ingredients (serves 1)

    Preheat oven to 400 degrees.

    Scrub sweet potato and prick them in a few places with a fork. Place on baking sheet and bake until soft, about 45 minutes to 1 hour.

    Prepare your sriracha cashew cheese sauce and set aside.

    Towards the end of baking time, or when sweet potatoes are cooling, steam your broccoli.

    To serve, slice your sweet potato along the top center from end to end, push the ends to open up the middle. Fill with broccoli, sliced avocado and top with spicy cheese sauce.

    Enjoy the simples!