.

Showing posts with label zucchini. Show all posts

Raw Veggie Chili with Taco Nut Meat

Raw Veggie Chili with Taco Nut Meat

This is a welcome meal after all the Thanksgiving festivities. Nothing like adding a raw meal into the mix and this was superb! I have to hand it to Ani Phyo for not being afraid to use spices, this packs great flavor with fresh produce to create a raw chili that I absolutely adore and am craving already. Adapted from this recipe 'Fresh Tomato Chili with Taco Nut Meat'. I will definitely be adding this to my to go lunches as well as my at home meals. Feel free to add/subtract any vegetable you wish. Get in as many as you can to really make this a well rounded garden chili recipe. Use as much or as little as you like of each ingredient. This could've really used a dollop of raw Sour Cream or this flavorful Lime Cilantro Cashew 'Sour Cream', it would've added that final touch.

Raw Veggie Chili with Taco Nut Meat

Mine didn't seem to come out with as much soupyness as Ani's photo shows. But never the less, this is so very fresh, hearty and delicious...simply great! Be sure to take a peek at her photo to see what I mean. You can find it here, just scroll down a bit. She also has other recipes you may be interested in. Her focus in on raw food only.

Raw Veggie Chili with Taco Nut Meat

Dice up your vegetables and fresh oregano (if using fresh)...

Raw Veggie Chili with Taco Nut Meat

Combine with seasoning, I also added in some cilantro as an after thought...

Raw Veggie Chili with Taco Nut Meat

Using a food processor, puree half of the mixture... 

Raw Veggie Chili with Taco Nut Meat

Bring back pureed vegetables to diced vegetables and combine. Then, onto your nut meat...

Raw Veggie Chili with Taco Nut Meat

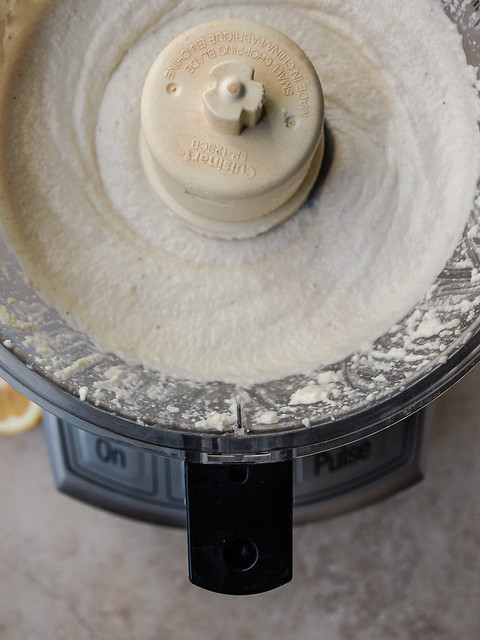
Add nut meat ingredients to food processor and pulse just until crumbly...

Fairly simple...just slicing, dicing, pureeing and pulsing. So fresh and good. I always feel the best after eating meals like this! Don't forget to add some raw Sour Cream or Lime Cilantro Cashew 'Sour Cream' on top for even more added deliciousness, or simply add some avocado slices to round it out even more.

Raw Veggie Chili with Taco Nut Meat

Vegetable Chili
  • 3 cups tomatoes (I used roma and grape)
  • 1 small red bell pepper (orange would be great too), diced
  • 1 large celery stalk, diced
  • 1/2 yellow or red onion, diced
  • 1 small zucchini, diced
  • 1 corn off the cob
  • 1 - 2 garlic cloves, minced
  • cilantro (as much as you like), chopped
  • 1 - 2 teaspoon chili powder, to taste
  • 1 teaspoon cumin
  • 3/4 teaspoon oregano, fresh or dried
  • 1/4 teaspoon sea salt, to taste

Prepare vegetables and combine all ingredients in large size bowl. Place 1/2 or so of the mix into a food processor and blend until pureed. Return puree to diced vegetables and toss well.


Nut Meat
  • 1 cup walnuts
  • 1 cup mushrooms
  • 1 tablespoon cumin
  • 2 teaspoons coriander
  • 1 teaspoon tamari, bragg's or nama shoyu, or 1/4 teaspoon sea salt, to taste

Place all ingredients into food processor and pulse until crumbly. You don't want to over blend or it will be a paste.

To serve, place vegetable chili in bowls and top with nut meat adding any additional garnishes you like. Serves four, or two generously. Store left overs, if there is any, in an air tight container in the refrigerator. Chili will last for five to six days. Nut meat will last up to two to three days, depending on the freshness of the mushrooms. Before eating let sit at room temp as it tastes best this way.


Enjoy the freshness!

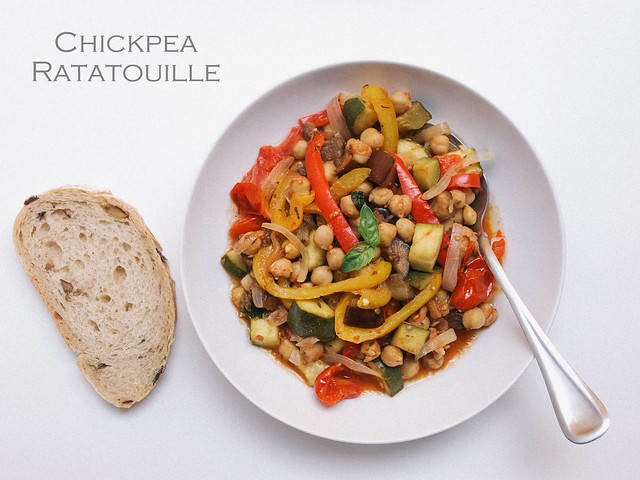
Chickpea Ratatouille Niçoise

Chickpea Ratatouille Niçoise

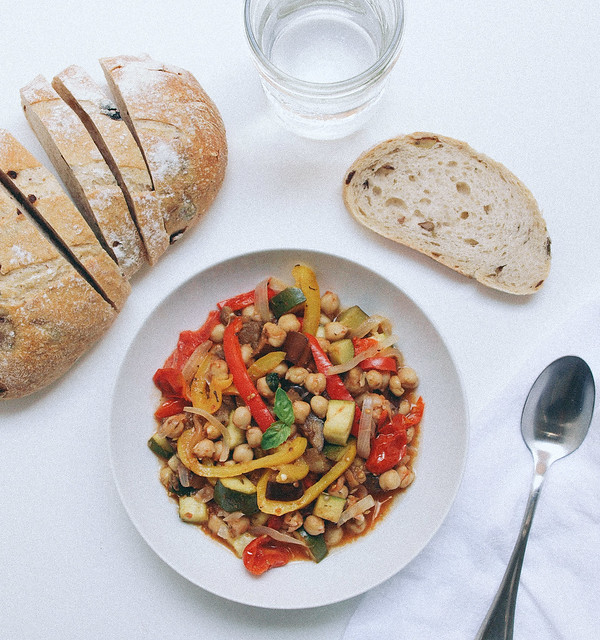
Ratatouille, a rustic farm to table style dish. It's a summer/early fall recipe for those who appreciate big flavor and simplicity while using the seasons harvestOriginating in Nice, it's a traditional French Provençal stewed vegetable dish. Ratatouille is often served as a side dish but it is a recipe that can undoubtedly stand alone, especially with the addition of chickpeas adding a fair amount of protein to this colorful array of garden vegetables. There is much debate as to how to prepare ratatouille, but I chose to adapt my recipe from this one at La Tartine Gourmade, she also has a nice story with hers. It's a fairly simple approach to preparing this dish involving sauteeing and stewing on the stove top which resulted in a wonderful finish. And it tastes even better the next day! You may also like to see other cooking styles of ratatouille, I recommend looking at these for more inspiration: Saveur (I'll for sure be doing this one, it's perfectly old world rustic and comfy looking),  86 Lemons (a simple roasted version using chickpeas as well) and Olives For Dinner (a 'confit byaldi', a little more tidy looking making for a beautiful presentation). 

I know ratatouille isn't anything new but this classic sure deserves a place in the simple veganista collection!

Chickpea Ratatouille Niçoise

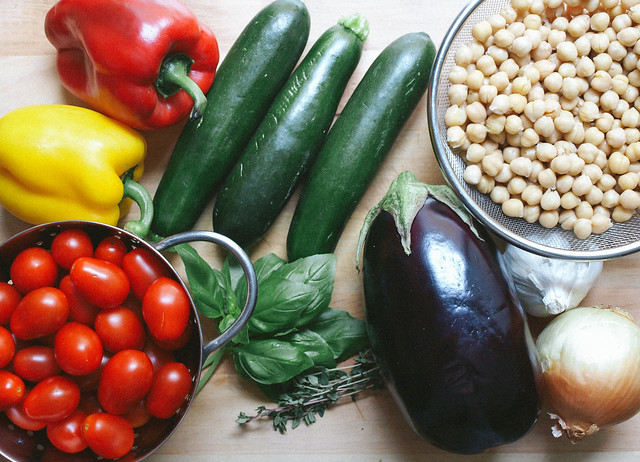
Gather your ingredients. These are all common vegetables, and fruits ie, tomato, and available year round here in Southern California. Eggplant is the only produce that seems to be more seasonal here, or maybe I just don't notice it as much as I don't use it often. For the garbanzo beans, you can start with dried beans cooking them according to this guide or use canned for extra ease. Herbs can be varied to suit your taste. Bea, author of the original recipe, uses a bay leaf and tarragon in her recipe. Here I have used fresh basil, thyme and some herbes de Provence. I even threw in some red pepper flakes. Go with what you feel, there is no wrong way to season your ratatouille as long as you like it! It's also a great way to change it up. I think I'll try some tarragon next time myself.

Chickpea Ratatouille Niçoise

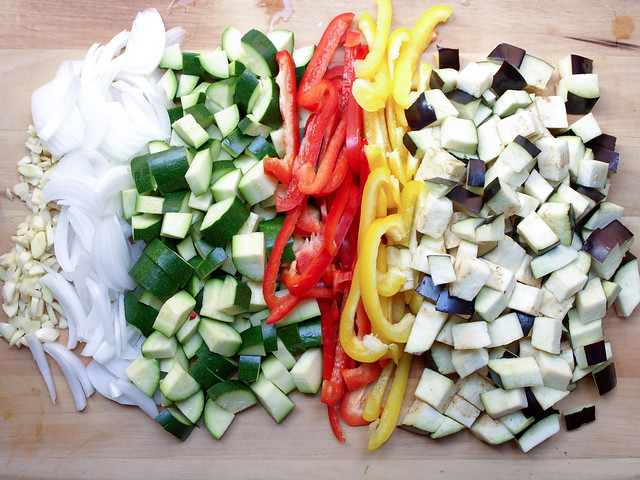
Dice your vegetables. Next time, I'll be sure to chop the bell peppers the same size as the zucchini and eggplant, about 1/2 inch cubes. It makes it a bit easier to eat when they are uniform in size. I do like the onion sliced here but feel free to dice that instead too. It may seem as though you have too much produce (the tomatoes aren't even shown) and won't fit in the pot but the eggplant will shrink down and the rest of the veggies will soften and you'll be fine. You may even consider adding extra next time to make sure you have leftovers.

Chickpea Ratatouille Niçoise

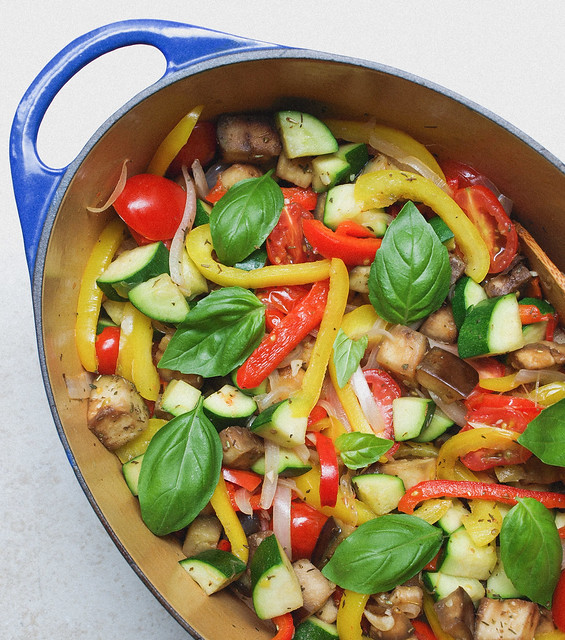
Vegetables have been sauteed and the ratatouille is ready for the first round of simmering before adding in the chickpeas. Still nice and colorful.

Chickpea Ratatouille Niçoise


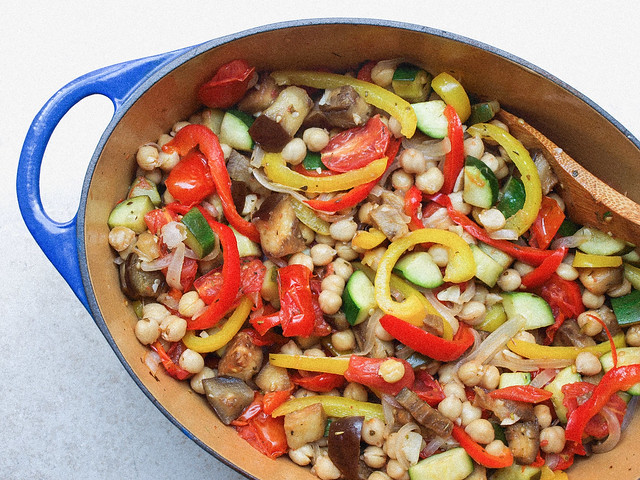
Chickpeas have been added and will simmer awhile longer. Depending on how you like your vegetables will depend on the length of time you allow your ratatouille to simmer. The longer you leave it, the more juices will form making for a great dipping sauce for a slice of good artisan bread. I preferred simmering mine for a total of about 35 minutes, I like the color and crisper texture but I didn't get as much of the juices. Go for a full hour or more to really let the ingredients sweat and get the juices going. Again, still colorful here. Your colors may become muted the longer you stew but the result with be delicious!

Chickpea Ratatouille Niçoise

Chickpea Ratatouille Niçoise

Ingredients
  • 3 cups cooked chickpeas (2 cans (15oz) garbanzo beans, drained and rinsed)
  • 4 tablespoon olive oil, divided
  • 1 eggplant, diced
  • 3 small zucchini or 2 medium, diced
  • 2 bell peppers (1 yellow & 1 red pref.), seeds removed, sliced
  • 1 onion, sliced
  • 4 garlic cloves, chopped
  • 1 lb. grape tomatoes, cut in half 
  • 2 teaspoons herbes de Provence or fresh thyme (I added a bit of both)
  • a few fresh basil leaves (left whole or chopped)
  • mineral salt, to taste
  • pinch of red pepper flakes, optional

In a heavy bottom pot or dutch oven, heat 2 tablespoons olive oil over medium heat, add eggplant and zucchini, saute for 5 minutes. Remove from pot and set aside.

Heat remaining 2 tablespoons olive oil over medium heat, add onions, garlic and bell peppers, saute for 3-4 minutes. Add tomatoes, mix well and cook 5 minutes. Add in eggplant, zucchini, herbs, spices and season with salt and pepper. Reduce heat to a low and simmer uncovered for 15 minutes. Add in chickpeas and simmer anywhere from 45 minutes to 1 hour, depending on your personal preference (less time for crisper vegetables, more time for softer vegetables and more juices). Stir occasionally until ready.

Serve topped with chopped fresh herbs. Pair it with a gluten free or favorite artisan loaf of bread. I have it here with a wonderful olive loaf. Try serving it on a bed of quinoa, rice or pasta to make it go further.

Serve warm, cold or at room temperature.

Notes:

To make this virtually fat free, try water sauteeing your vegetables using about 3 - 4 tablespoons of water instead of oil. Total amount of water for this recipe would be 6 - 8 tablespoons, divided.

I would dice my bell peppers next time, it's easier to eat them when they are the same size as the zucchini and eggplant pieces.

For the spices, try mixing and matching marjoram, thyme, rosemary, fennel and/or savory. Or use a bay leaf and tarragon.

The longer you simmer the more juices will accumulate.

Enjoy!

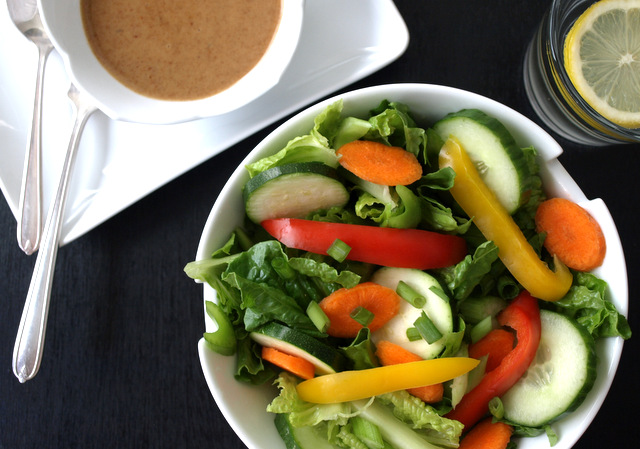
Simple Salad + Almond-Lime Dressing


More ways to eat almond butter. I just love it...it's the best ! I go through about a jar a week these days. I make it here at home, you can find the recipe here: Raw Almond Butter. And salads, I love fresh salads...I can eat them every day. Pair this almond-lime dressing with this salad and it creates some kind of wonderful. The sweetness and coolness of the cucumbers, carrots, bell peppers, zucchini and leafy greens combined with the slightly salty, yet sweet and somewhat citrus almond flavors make this a salad I can enjoy often. I found myself tipping the bowl to get the last drops of this dressing. I think you might too. :)


All of these ingredients are alkaline based. The only questionable ingredient is the maple syrup, I find it on both the acid & alkaline list. I will be adding more meals that are 100% alkaline in the following months as I learn new habits of bringing my pH higher and maintaining a neutral level to combat some inflammation I am experiencing such as RA (explained more here: Let's Talk pH: The importance of Acid vs. Alkaline). And I plan on doing it with the most delicious meals. Eating healthy has to taste good and this hits the mark! 

Almond Butter & Lime Dressing 
  • 2 heaping tablespoons almond butter
  • 2 teaspoons tamari
  • 2 teaspoons pure maple syrup or agave
  • juice from 1 lime
  • pinch of red pepper flakes, optional

Salad
  • zucchini
  • cucumber
  • carrots
  • celery
  • bell pepper
  • scallions
  • leafy greens of choice
  • almond slices or pepitas, optional


Start with the dressing first so it can sit and let the flavors mingle while cutting up the salad mix. Combine dressing ingredients in a small bowl, mix well until creamy. Taste for flavor....more tamari? more sweetener? Add 1 tablespoon water at a time if needed if to thin. I added the extra tablespoon water this time around but prefer it on the thicker side myself, these photos reflect the thinner dressing. Dressing makes one serving.

Next, prepare your vegetables any way you like, using as much as you like. Taste dressing once more to make sure it's to your liking. Build your salad and drizzle with your perfected dressing...


Enjoy !


Make your own Raw Almond Butter ... It's very easy to do and it's a good clean food. It only has one ingredient: almonds...no sugars, fillers or junk. Spread it on apple slices, toast, put a dollop on top of your oatmeal with bananas slices & a drizzle of pure maple syrup, etc...so many ways to enjoy it!

White Flatbread-Pizza with Zucchini

white flatbread-pizza

I like a good pizza every now and then. My craving was for a white pizza and this did not disappoint! It was absolutely delicious. Simple, easy, healthy and yummy...all the makings for a great go to meal any time. The was my first time using a tofu ricotta and it came out fantastic as well. Instead of mashing the tofu, I blended mine in a food processor for a creamy ricotta. And the flatbread can be found almost anywhere. I really enjoyed this white pizza...seriously so good! 


White Flatbread-Pizza with Zucchini


Topping
two small/medium zucchini, green & gold
1 small red onion
whole grain vegan naan bread


White Sauce
1 block organic tofu (16 oz..soft or firm..I used soft)
3 tablespoons nutritional yeast
2 teaspoons mellow white miso
1/2 teaspoon garlic powder
1/2 teaspoon onion powder
dash of pepper (I used white)
dash of nutmeg
twist or two of himalayan salt
juice of 1 lemon
few parsley tops


Directions

Preheat oven to 400 degrees.

Start with the ricotta by placing all ingredients in food processor/blender and blend until creamy. Taste for spices adding anything you may like. Makes about 2 1/2 cups. I had left overs.

Slice your zucchini and onions very thinly. You can use a mandolin or put your knife skills to work and slice. I used both methods. Spread a layer of the ricotta on your flatbread and top with veggies. Bake on cookie sheet lined with parchment paper for 10-12 minutes. Serve.

Note: For a crumble style ricotta to use in lasagna, use firm or extra firm tofu, mash in medium size bowl with a fork then add rest of ingredients and combine together.


Delicious...Enjoy !


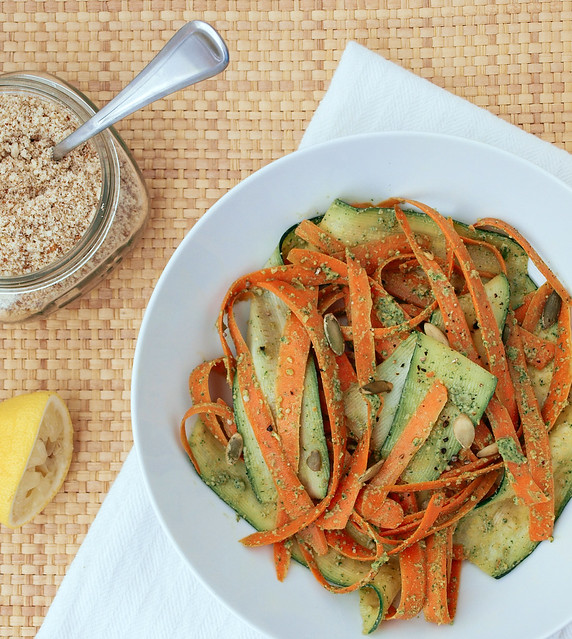
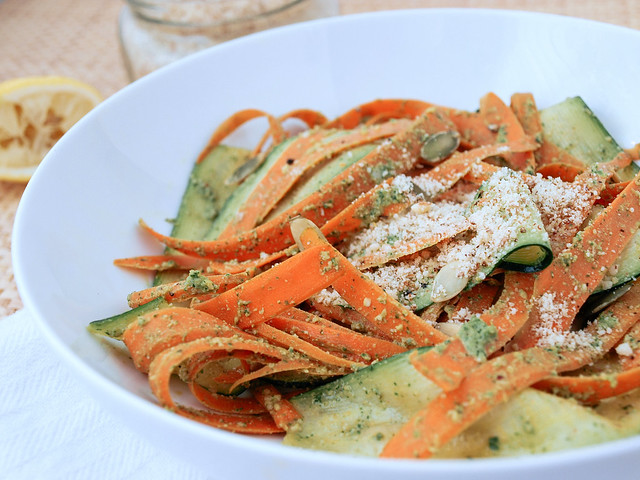
Carrot + Zucchini Ribbons + Cilantro Pepita Pesto

Carrot + Zucchini Ribbons + Cilantro Pepita Pesto

It's about time I added a new raw dish to the collection. I have received many emails over the course of starting this blog. I was just recently inspired by a most wonderful email I received from one of my readers letting me know how much she appreciates this blog and really enjoys cooking from it. It has helped her return to eating vegan full-time again (hooray!), as she has fallen of the wagon a few times and needed this inspiration to get back on. In particular, the raw recipes were a source of inspiration at one point. She had eaten raw dishes here and there, but never for a solid period of time. She went away over the summer for two months and did a raw eating cleanse using the raw recipes as a source of inspiration. After her cleanse was over, she felt amazing and knew this is how the body is supposed to feel. Free from the toxins of the typical everyday eating, you feel alive and full of energy. It's completely healthy to eat this way for short periods like this and really puts you in tune with yourself. It gives your body a boost of natural healing energy if done right, it's an almost godliness feeling in a way. I know she is shining bright and feeling her best. I thank her so much for sharing her story with me. I love hearing from you all, as much as I may be a source of inspiration for you, you are a source for me too! Whether it's about a life changing event, a certain ingredient you used or just to say hi...all of it is wonderful to me and I thank you! I can't tell you enough how much I love all of you and want only the best for each and every one of you! So I share with you another wonderful raw dish to be eaten generously and frequently.

Carrot + Zucchini Ribbons + Cilantro Pepita PestoCarrot + Zucchini Ribbons + Cilantro Pepita Pesto

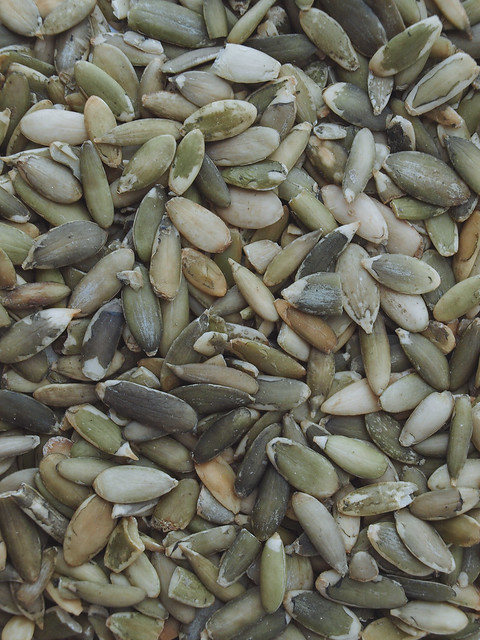
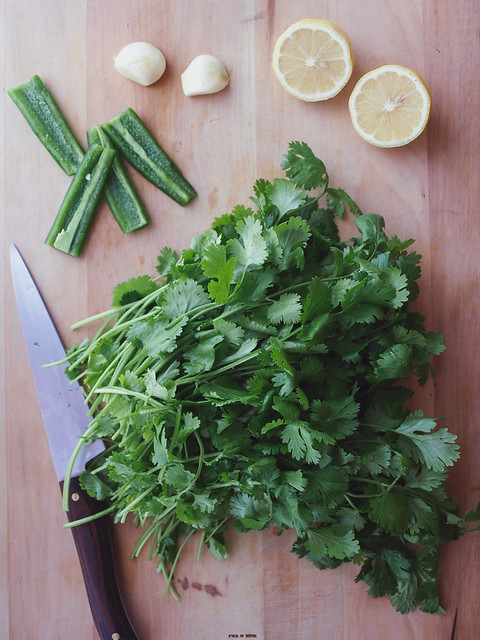
I have a ton of pepitas (shelled pumpkin seeds) that I need to use up and thought this was a great way to use them. I also had some cilantro on hand and decided to use that. What I really love about cilantro, besides the lovely flavor, is that it's available in bunches and so easy to find. In general, it's hard to find basil in large amounts enough to make pesto, making cilantro a great alternative to the traditional basil pesto. I also added a small amount of garam masala to this pesto but feel free to omit it if you don't have it on hand or don't care for it. I have yet to use my garam masala and thought why not try it here for something unusual. So I tested it out and found that I rather liked it as it adds an interesting layer of flavor and pairs well with the fresh vegetable ribbons. I even used my left over pesto as a dip for carrot sticks...so good! But keep in mind that I'm quite strange and can eat the weirdest combinations. So If you feel like experimenting, go for it...if in doubt, leave it out. I also added in some hemp hearts as well, two tablespoons or so, if you have some on hand this is a great place to use them!

Carrot + Zucchini Ribbons + Cilantro Pepita Pesto

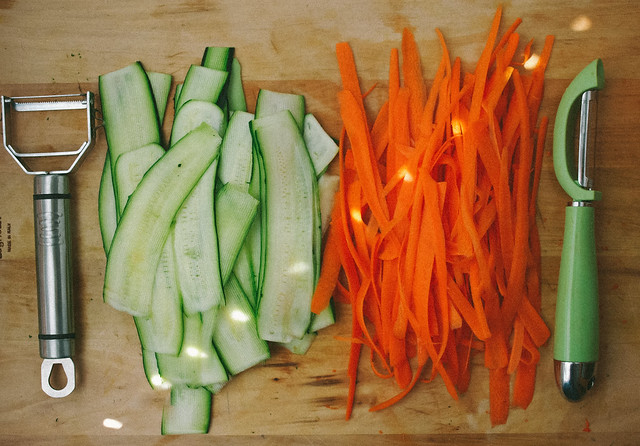
The ribbons are easy to create. I used a mandolin to ribbon the zucchini and a peeler to do the carrots. It's best to use smaller sized zucchini so the mandolin will be wider. This will help keep the zucchini edges cleaner looking instead of scoured. But do it however you're comfortable and use whatever tools you have. If you only have a peeler you can just as easily use that to ribbon the zucchini too. You can also simply use a julienne tool for thinner ribbons or julienne everything by hand if need be.

Carrot + Zucchini Ribbons + Cilantro Pepita PestoCarrot + Zucchini Ribbons + Cilantro Pepita Pesto
Carrot + Zucchini Ribbons + Cilantro Pepita Pesto

Carrot + Zucchini Ribbons + Cilantro Pepita Pesto

Ingredients
  • 3 large carrots
  • 3 small zucchini
  • pepitas, for serving
  • mineral salt & cracked pepper to taste
  • almond parmesan, for serving

Cilantro Pepita Pesto
  • 1 large bunch cilantro (3 cups loosely packed), ends removed, leaves and small stems ok
  • 1/3 cup pepitas (shelled pumpkin seeds), toasted or raw
  • 2 tablespoons hemp hearts, optional
  • 2 cloves garlic
  • 1 small jalapeno, seed removed (leave a few seeds for heat if you like)
  • 3 tablespoons extra virgin olive oil
  • juice of 1 large lemon
  • 1/2 teaspoon himilayan salt
  • 1/2 teaspoon garam masala, optional

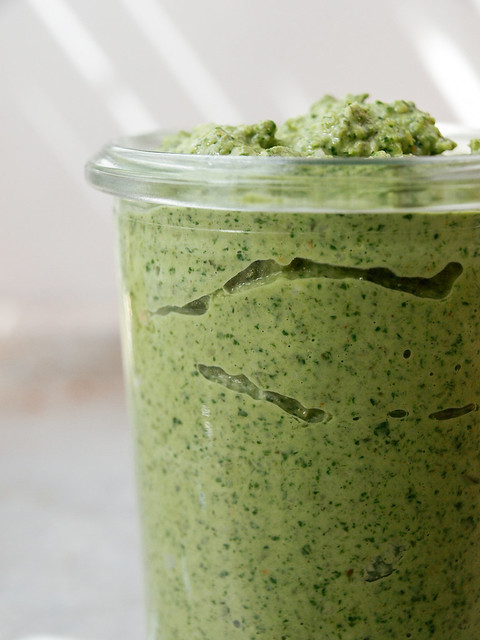
Start with your pesto, place pepitas in your food processor and pulse a few times until seeds are broken down fairly well. Add remaining ingredients and blend until well combined and fairly smooth, stopping to scrap down the sides as needed. Add water, 1 tablespoon at a time, to thin if needed (no need to add more oil unless you want). Taste for flavor and season to taste. Set aside.

Peel the outer layer of your carrots and discard. Using the peeler, ribbon the carrots. Wash your zucchini, cut the ends off and using a mandolin, or tool of choice, ribbon the zucchini. You can just as well julienne your carrots and zucchini with a julienne tool or by hand if you would rather have thinner strands.

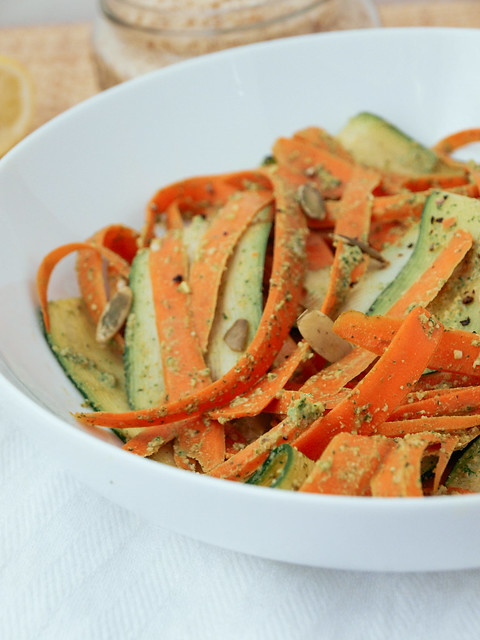
In a medium size bowl, place carrots and zucchini, add a few spoonfuls of pesto and mix to combine. You will have pesto leftover unless you really love the stuff and use it all!

Plate your ribbons, top with a sprinkle of pepitas and a nice dusting of almond parmesan. For a little extra color you could add some red pepper flakes to the top.

Serves two.

Store leftover pesto in an air tight container in the fridge for up to a week. Use the pesto for pasta, as a dip for vegetables, as a spread for sandwiches, thin it out with water or lemon juice and make a dressing for salads, etc. Lots of ways to use pesto.

Notes: Use almonds in place of pepitas if needed. I used raw pepitas instead of toasting them.

For the garam marsla, if pairing this with regular pasta I would leave it out. It pairs well with the freshness of the carrot & zucchini ribbons. Also, I found that it tasted fine with almond parmesan. But like I said earlier, I can eat some really unusual combinations. If you feel like experimenting, try it out...if in doubt, skip it.

Enjoy!


Lazy Pasta

Lazy Pasta

This one should really be called, 'Lazy Pasta, Lazy Post', but I don't want to give too much away. It's entirely ok to have those lazy days, as well as a lazy post every now and then! I find I am not posting as much as I used to. I feel one recipe, maybe two a week, is all I can manage these days. I do try to share some of my everyday eats on facebook and instagram which is where this recipe comes from and felt it really should be in the recipe collection, iphone photo and all (VSCOcam app it's awesome and free), as inspiration for something easy you can make on a weekly basis. It's a wonderfully rustic and cozy dish that can be whipped up in a cinch. These everyday meals are filling, nutritious and delicious!  Feel free to change up the veggies using whatever appeals to you best...bell peppers, carrots, broccoli, eggplant, etc. Let your imagination, or whatever needs to be used up in the fridge, be your guide!

quinoa pasta
Lazy Pasta

Lazy Pasta

Ingredients
  • 8 oz. mushrooms, sliced (I used baby bella)
  • 2 medium zucchini, thinly sliced and cut in half
  • 1 onion, diced
  • 2 - 3 garlic cloves, diced
  • 2 cans (15oz.) diced tomatoes (pref. fire roasted)
  • 1/2 teaspoon red pepper flakes
  • 1 teaspoon dried oregano
  • mineral salt & cracked pepper to taste
  • 2 tablespoons olive oil
  • 8 oz. pasta of choice (I used quinoa linguini pasta)
  • almond parmesan, to serve

Cook your pasta of choice according to package directions. Set aside.

In a large skillet/wok, heat oil on medium high, add mushrooms, zucchini, onion, garlic and spices, cook for about five minutes, or until mushrooms and zucchini are tender. Stir in tomatoes and cook until heated through. Taste for seasoning.

Serve over a bed of pasta with a good sprinkling of almond parmesan.

Notes: If you want, you can saute your onions and garlic first for five minutes and then add the other ingredients and saute again until tender. That is how it is usually done in recipes, but this is 'lazy pasta' and I cut that part out with great results....at least I think it was fine!

So easy and so good...

Pairs well with this song from Theivery Corp. Un Simple Histoire

Enjoy!


Follow TSV on Instagram

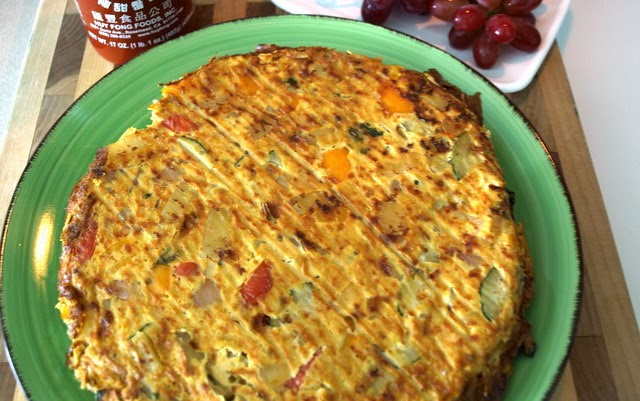
VEGETABLE FRITTATA

Vegetable Frittata & Sriracha

I love sriracha and this vegetable frittata was the absolute perfect accompaniment. Truth be told this is the first time making a frittata, never had one the old traditional way with eggs either. I must say it was flavorful, filling and I will definitely be making this again in the future for family and friends when needed. It can be served anytime of day. This is also great for using up produce that needs be used asap, it will handle a large assortment of veggies. This was as good if not better than I expected. Adding the sriracha chili sauce finishes it off nicely...it really does the trick.


VEGETABLE FRITTATA

Ingredients
  • 3 small potatoes, diced...either with or without the skin
  • 1 tablespoon extra virgin olive oil
  • 1 small onion, diced
  • 1 small bell pepper, diced
  • 1 small zucchini, diced
  • 2 cloves garlic, minced
  • handful grape tomatoes, quartered
  • small handful parsley or cilantro, chopped
  • shake of red pepper flakes, optional

for the blender/food processor
  • 1 package organic firm tofu (14/16 oz), drained
  • 1/3 cup unsweetened non-dairy milk
  • 1 tablespoon cornstarch
  • 3 tablespoons nutritional yeast
  • 1 teaspoon mustard (any kind) or 1/2 teaspoon mustard powder
  • 1/2 teaspoon garlic powder
  • 1/2 teaspoon salt or 1 tablespoon tamari
  • 1/4 teaspoon turmeric
  • 1/8 teaspoon white or black pepper, optional

1. Preheat the oven to 375°F.

2. Heat oil in a pan over medium heat, saute potatoes for 5 minutes, add onion and saute until translucent, another 5 minutes. Add the peppers, zucchini, and garlic, saute until just soft. Add tomatoes, parsley/cilantro and optional red pepper flakes, cook for one minute more. Remove from heat. I also added a twist or two of cracked pepper & himalayan salt to the veggies as well.

3. In food processor/blender, combine the remaining ingredients and process/blend until smooth. Taste, adding any additional spices as desired. 

4. In a large bowl, combine the sauteed vegetables into the tofu mixture.

5. Cut a circle out of parchment paper to line the bottom of your pie dish. Spoon mixture into the lined pie dish and using the back of a spoon smooth the top. Bake for 35 to 40 minutes, or until frittata is firm to the touch. Remove from heat and let stand 10 minutes. Loosen edges of frittata. Using pot holders if needed, place plate on top of pie dish and flip so frittata falls onto plate, remove parchment paper and serve. Serves 4 to 5. 


 Notes: My top was browning when cooking, but since we are flipping don't worry too much about it. If you decide not to invert you may wish to cover lightly with foil. I also accidently cooked mine at 400 which may be why it was browning so fast, but even at 400 degrees for 35 min. it came out great!


Vegetable Frittata & Sriracha

Lots of  veggies make this a fully satisfying meal...


Vegetable Frittata & Sriracha


Don't forget the Sriracha :)

Recipe adapted from PETA , Vegan Vegetable Frittata 

Zucchini + Mint + Cashew Ricotta + Pasta

Zucchini + Mint + Cashew Ricotta + Pasta

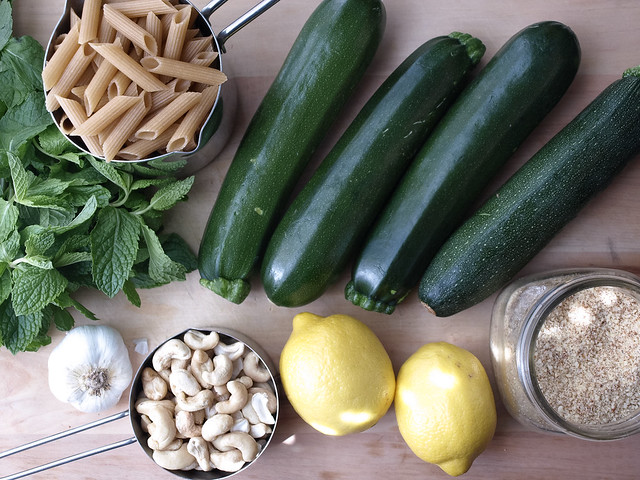
Today it's a celebration of zucchini & mint...and lots of it!

Zucchini + Mint + Cashew Ricotta + Pasta Ingredients

A fresh combination paired with lemon, pasta, cashew ricotta cheese, garlic and a dusting of almond parmesan to top it off. A simple, wholesome and flavorful meal that can be enjoyed warm or chilled.

Zucchini + Mint + Cashew Ricotta + Pasta 1Zucchini + Mint + Cashew Ricotta + Pasta 2
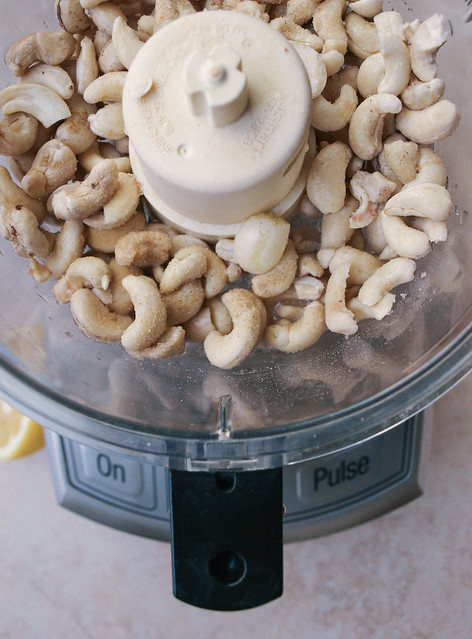
The cashew ricotta is so easy to make. Soak your cashews for 3+ hours in purified water. The soaking will increase enzyme activity, offer greater absorption of the food's nutrients by the body and help to increase digestibility. Once done, place all ingredients in blender/food processor and process for 3-5 minutes. So simple and good! Once you make it a few times you'll adjust the flavoring to your liking. Some like it very salty while others may not. You may like to use apple cider vinegar in place of the lemon. You may even prefer to add a tablespoon of nutritional yeast or a 1/2 teaspoon of mellow miso for an extra layer of flavor. Whatever you have on hand is good...from the simplest of ingredients listed to the addition of the extras mentioned will give you great results. 

Zucchini + Mint + Cashew Ricotta + PastaZucchini + Mint + Cashew Ricotta + Pasta

I used a gluten free penne pasta here but feel free to use whatever pasta you like. I've also made this with a quinoa linguini pasta that was fabulous as well. For the zucchini I used my wok. I love using my carbon steel wok for tender vegetables like zucchini that can overcook quickly. The carbon steel wok is perfect in that it heats up quickly and cools down quickly once removed from the heat so your tender vegetables will not overcook. 

Zucchini + Mint + Cashew Ricotta + Pasta Mixed

Mix everything together making sure to season to taste with mineral salt & cracked pepper, and serve with a good dusting of almond parmesan, it makes all the difference in the world...trust me!

Zucchini + Mint+ Cashew Ricotta + Pasta Serve


Zucchini + Mint + Cashew Ricotta + Pasta 

Ingredients
  • 4 zucchini, thinly sliced and cut in half
  • 6 cloves garlic, chopped
  • 1 cup mint (loosely packed), julienned
  • 1 - 2 lemons
  • 8 oz. penne pasta (about 2 cups)
  • olive oil
  • mineral salt & cracked pepper to taste
  • lemon wedges, to serve
  • almond parmesan, to serve

Cashew Ricotta
  • 1/2 cup raw cashews, soaked for 3+ hours 
  • 3 tablespoons water
  • 1 small garlic clove
  • juice of 1/2 lemon or 1 teaspoon apple cider vinegar
  • mineral salt & cracked pepper to taste
  • dash or two of onion powder, optional

Start by preparing your cashew ricotta. Soak your cashews for 3+ hours in a jar with at least 1 cup water. Once ready, drain and rinse your cashews. Place the cashews and remaining ingredients into your food processor/blender and process until smooth, about 4 minutes or so, scrapping down the sides as needed to make sure everything comes together nicely. Add an extra tablespoon of water if needed, you may need to if you didn't soak the cashews longer than 3 hours. Set aside. This can be made in advance, a day or two, and kept in the fridge until ready to use. When ready, let set at room temp for an hour or so.

In a large pot, cook your pasta according to package directions. Drain, rinse and place back in the pot you cooked your pasta in. Using the strainer you strained the pasta in (if the holes aren't too big to catch the lemon seeds), place strainer over pasta and add the juice of one lemon along with a small glug of olive oil. Mix well, let set until ready to add the zucchini and ricotta. 

In large wok/skillet, heat 1 tablespoon of olive oil over medium heat and cook your zucchini and garlic to your liking. I like mine al dente and only cook for about four minutes at most, depending on how thick the slices are.

Add your cashew ricotta to the pasta and mix well. Add in the zucchini, garlic and mint, gently toss to coat. Taste for flavor and serve. Serve with lemon wedges and a good dusting of almond parmesan...it's simply delicious!

Serves four generously. 

Enjoy!


Enchiladas Verde w/ Cashew Crema

Enchiladas Verde w Cashew Crema

I love enchiladas...not the kind with tons of processed cheese, be it vegan or otherwise, but the kind just like this one...fresh veggies and fresh sauce. It may not look like much but these were super! This is straight up casual dining at its best. Unfortunately it doesn't plate as well as I was hoping so make sure to keep this amongst your closest friends and family who don't mind a messy yet delicious meal. The verde sauce was amazing. I made it the day before so it could really set and combine flavors. It would make for a great salsa or even a taco salad dressing. And this version of the cashew crema is nice with the smoked paprika flavor, giving it just a touch of the smoky paprika flavor (add more if you like). Another cashew cream that would work fantastic here is this 'Cilantro Lime Cashew 'Sour Cream'.  

Enchiladas Verde w Cashew Crema

I didn't go to far from the original recipe as I loved everything about it and it was fantastic. I added some black beans for protein and carrots for more color. Also, if you don't want to make the verde sauce, feel free to use a good brand pre-made verde sauce instead. But I highly recommend making your own as it is delicious!

Enchiladas Verde w Cashew Crema

Enchiladas Verde w/ Cashew Crema

Cashew Crema
1 cup raw cashews, soaked for 2+ hours
1 teaspoon apple cider vinegar (optional)
2 tablespoon fresh lime or lemon juice
1/4 teaspoon smoked paprika
1/2 teaspoon onion powder
salt, to taste
1/2 - 3/4 cup water

Verde Sauce 
2 lb fresh tomatillos, husked and quartered
1 medium red onion, coarsely chopped
2 garlic cloves, chopped
1 jalapeño, seeded and coarsely chopped
2 cups vegetable broth
1/2 cup parsley or cilantro, chopped
himalayan salt & cracked pepper

Enchiladas
1 medium zucchini, chopped into 1/2″ pieces
2 ears of corn, shucked with the corn cut off the cob
3/4 cup or 1/2 pint cherry/grape tomatoes
1 carrot, peeled and diced (optional)
olive oil
1/2 -1 teaspoon cumin
himalayan salt & cracked pepper
1 can black beans, drained and rinsed
9 - 12 corn tortillas

Start with your paprika cashew crema, this can be made in advance, a day or two and kept in the fridge, or you can assemble it while the enchiladas are cooking as long as you soak your cashews first. Soak cashews in two cups water for 2+ hours, drain and rinse well. Place cashews, lemon/lime juice, paprika, onion powder, salt and 1/2 cup water into food processor/blender and blend until smooth, about 4 minutes or so. Add additional water, 1 tablespoon at a time, to thin to desired consistency. Taste for flavor. Add more paprika to your liking, but keep in mind the color will change.

Preheat the oven to 400 degrees Fahrenheit.

Place the zucchini, corn and tomatoes in a large bowl and drizzle with 1-2 tsp olive oil. Add cumin and a pinch of salt & pepper, toss to coat with the olive oil. Spread the vegetables in an even layer on a roasting pan lined with parchment paper, silpat or lightly greased with oil and roast for 15 - 20 minutes. Remove and set aside. 

While the veggies are cooking, start your sauce, this can also be made a day or two in advance. Place the tomatillos, onion, garlic, jalapeno, and vegetable broth in a sauce pot and bring to a boil. Lower to a simmer and cook until tender, about 15 minutes. Transfer to a food processor/blender, add the parsley or cilantro, salt and pepper to taste and process until smooth. Set aside. You may need to process your verde sauce in two batches. It makes quite a bit. 

Once everything is ready, start putting the enchilada's together. Wrap your corn tortillas in a dampened paper towel and microwave 45 seconds. This steams the tortillas and makes them pliable. Pour 1/3 of the sauce into the bottom of a 9×13 baking dish. Fill each tortilla with about 1/4 c of the vegetable mixture, a spoon full the black beans, roll up and place seam side down in the baking dish. Once filled, pour the remaining sauce on top of the enchiladas. Cover with foil and bake 25 minutes at 400 degrees F, until heated through. You may also like to leave the foil off for the last 10 minutes to let the exposed tortillas get a bit crispy.

Serve with the cashew crema. A side of sliced avocado would be great too.

If you only use half of the recipe like I did, the left overs make great taco fillings.

Enjoy!

Pizza Pie + Balsamic Tomato Sauce + Roasted Vegetables

Pizza Pie + Balsamic Tomato Sauce + Roasted Vegetables

It's been awhile since I've indulged in pizza. I was so inspired by this post from the Minimalist Baker and decided it was time to add another pizza recipe to the list. Not only does Minimalist Baker have nice simple recipes, a lot of them are vegan too, but the photography is superb! Take a look and find some inspiration for yourself through both the recipes and photography. Of course for this recipe we aren't using cheese, only almond parmesan which is fantastic served on top of your slice of pizza pie. We are dousing this pizza with a nice balsamic tomato sauce and lots of beautiful veggies making this a colorful pizza with lot's of wonderful flavor. I just thought it was so cool to cook your pizza in a skillet but feel free to use your normal method such as a pizza stone, which I also love, or other baking dish that your accustomed too (just adjust directions to your baking vessel).

Pizza Pie + Balsamic Tomato Sauce + Roasted Vegetables

We'll be broiling our veggies in the stove under the flame, or roasting as some countries call it. One side of the baking sheet is for the toppings. I used zucchini, bell peppers, tomatoes, asparagus and red onion for this pizza. Feel free to add/subtract other veggies to suit your taste. I imagine mushrooms would be divine too! The other side is for the whole grape tomatoes we will be using for our tomato sauce. Also, if you would like to add some broiled onion to your sauce be sure to add a few pieces along with your grape tomatoes.

Pizza Pie Sauce

Once veggies are ready after 5 to 6 minutes under the broiler...your ready to carefully transfer your tomatoes to the food processor to make the tomato sauce. 

Pizza Pie Sauce 1Pizza Pie + Balsamic Tomato Sauce + Roasted Vegetables

Your sauce should come out with a nice semi-thick consistency. If you find it's too runny, add a little more tomato paste. This tomato sauce is delicious and would be great on pasta too!

Assemble your pizza, cook and voila...pizza pie! 

Pizza Pie Slice

Pizza Pie + Balsamic Tomato Sauce + Roasted Vegetables 

Ingredients
  • 1 ready made pizza dough (pref. whole wheat)
  • fresh basil leaves, to serve
  • red pepper flakes, to serve
  • almond parmesan, to serve

Topping
  • 1/2 small zucchini, sliced thin and halved
  • 1/2 cup aspargus, cut into 1 inch pieces
  • 1/2 orange bell pepper
  • 1/4 red onion, diced
  • 3/4 cup cherry tomatoes (red & yellow), halved
  • a few large basil leaves, chopped
  • a guzzle of balsamic vinegar
  • pinch or two mineral salt

Balsamic Tomato Sauce
  • 1 dry pint (about 8 oz package or 1 1/2 cups) grape tomatoes
  • 3 rounded tablespoons tomato paste
  • 1 - 2 tablespoons balsamic vinegar
  • 1 garlic clove or 1/2 teaspoon garlic powder
  • 1 teaspoon Italian seasonings or a mix of oregano, basil, thyme, etc.
  • mineral salt & cracked pepper to taste

  1. Preheat oven to 450 degrees or heat oven to dough directions. (We'll start with this high temp to move the pizza cooking along as quickly as possible.)
  2. While oven is heating, prepare your vegetables, place them in a medium size bowl along with the tomatoes for the tomato sauce and add a guzzle of  your favorite balsamic vinegar. You can also add a tad of olive oil if you wish. Toss to coat. Place vegetables on a baking sheet keeping the cut topping and whole tomatoes separate for ease later on. 
  3. Coat your cast iron skillet with olive oil, place your dough in the center, flatten out along the bottom and bring a small bit up the edges. Let set to rest until ready to layer.
  4. Once oven has heated to 450, turn off oven and turn on the broiler (I had mine set on high but medium is good too), place vegetables under the flame and cook for about 6 minutes checking every so often. Remove and set aside. 
  5. Turn oven back on to 450 degrees. The heat sensor should go off right away letting you know the oven is ready. If you skip the first heating at 450, this step will take around 15-20 minutes.
  6. In a food processor or blender, being careful not to burn yourself, add the uncut grape tomatoes along with the other ingredients for the tomato sauce and process until blended and fairly smooth. Taste for flavor adding anything extra you might like. Your sauce should be a semi-thick consistency. If you find it's too runny, try adding an extra tablespoon or two of tomato paste. 
  7. Finally, add a nice layer of your tomato sauce and veggies to the pizza dough. Place in oven and bake for 20-25 minutes, until crust is golden. Remove from oven and let cool a few minutes before cutting to serve. Serve with red pepper flakes and a good dusting of almond parmesan
Notes:

I found that I needed to cook my pizza longer than the directions on the pizza dough package, about 20 -25 minutes worked for me but each oven is different.

If your crust doesn't become golden enough for you, place the skillet pizza under the broiler for a minute or so checking often so it doesn't burn.

If you have a hard time with your crust being soggy under the tomato sauce and veggies, try cooking your dough first for about 15 minutes, then add your sauce and veggies and cook another 5 minutes or so.

I would love to recommend a good pizza dough recipe but I haven't made one yet and find the ready made dough is quick and works great for me. If you have a good whole wheat pizza dough recipe I'd love know about it!

Hope this inspires you...Enjoy!