.

Showing posts with label main dish. Show all posts

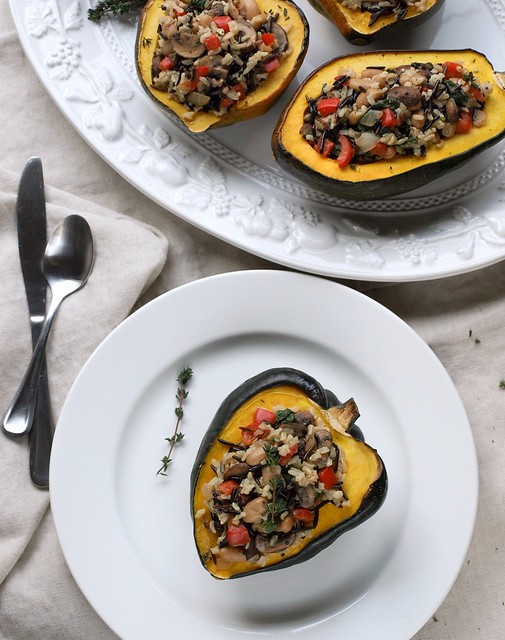
Stuffed Acorn Squash + Wild Rice Medley

Stuffed Acorn Squash + Wild Rice Medley [Revisited]

If you've never had a stuffed acorn squash, you really should give it a try. They are just so good and surprisingly filling. I love them unstuffed too with simple seasonings, but this is a tasty and satisfying meal with a good nutritional profile. I'm a big eater and one of these filled me up. Not too hard to put together either. It does take three separate cooking sections but it comes together pretty smoothly, unless your like me...the burner on the rice went out without me knowing so I had to add an additional 45 min onto my cooking time. But no harm done...there were dishes to do and cleaning around the house to keep my mind busy and off the mishap. All in all it's fairly easy, the rice and squash cook themselves, so the vegetables are the only real work which isn't much. This is also one of those recipes that can be tailored to your preference of veggies or beans. To top it all off, you just gotta love eating out of an acorn squash...it's pretty fun!
Stuffed Acorn Squash + Wild Rice Medley

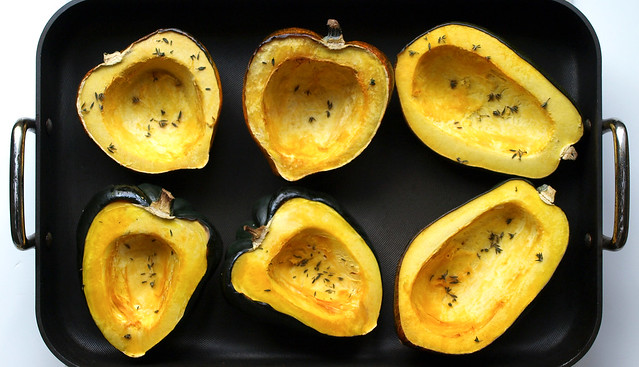
Start by slicing your acorn squash and scraping out the seeds. The seeds scrape out very easily with a sharper edged spoon. Here you can either brush your acorn squash with a little olive oil or leave it out. I go either way as I don't find it makes too much of a difference, so it just depends on how I'm feeling if I want to add extra oil to the meal. Sprinkle with fresh or dried thyme leaves and mineral salt. You can even add a few fresh thyme sprigs inside each squash, just remove before eating. Cook until fork tender.
Stuffed Acorn Squash + Wild Rice MedleyStuffed Acorn Squash + Wild Rice Medley

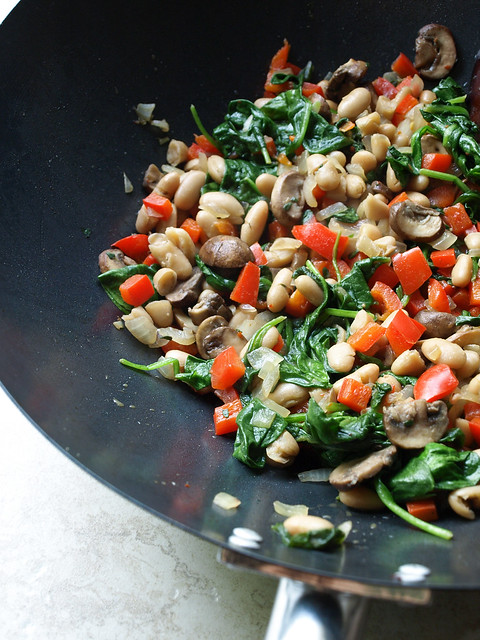
Cook your rice and set aside. Prepare your vegetables and add in the rice once done. 
Stuffed Acorn Squash + Wild Rice Medley

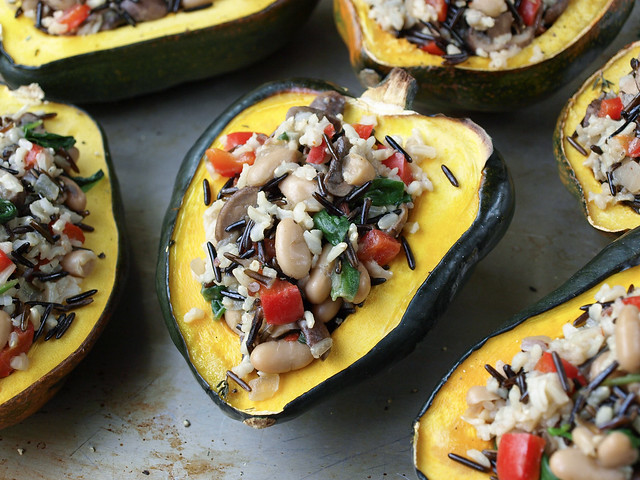
Fill your acorn squashes and serve! 

Stuffed Acorn Squash + Wild Rice Medley

Stuffed Acorn Squash + Wild Rice Medley

Ingredients

Acorn Squash
  • 3 acorn squashes, cut in half lengthwise and seeded
  • 1 1/2 teaspoons thyme, divided
  • sea salt

Wild Rice Medley
  • 1 cup rice, dry (I used half black wild rice and half long grain brown rice)
  • 2 tablespoons extra virgin olive oil
  • 1 small red bell pepper, diced
  • 1 large shallot or small onion, diced
  • 2 cloves garlic, minced
  • 2 cups mushrooms, sliced
  • 2 large handfuls greens (I used a 5 oz. combo package of baby kale, baby chard and baby spinach)
  • 1 can cannellini beans (15 oz), drained and rinsed
  • 1 tablespoon thyme
  • 1 teaspoon red pepper flakes, optional
  • sea salt and cracked pepper to taste
sriracha or hot sauce, to taste as garnish

Directions

Preheat oven to 400 degrees F.

In an oven proof sauce pan, fill half way with water and place on the bottom rack (this will give a little steam to your squash). Cut and seed your squash, place on baking sheet with cut side up. Season each squash with about 1/4 teaspoon thyme along with a few twists of the mineral salt grinder. Bake for 40-45 minutes, until tender...knife should easily pierce the flesh.

Cook your rice according to package. Wild rice will take about the same time as the squash to cook, about 40-45 min. (Quinoa or quinoa/rice combo would be great too and add even more protein per serving.)

Once the squash and rice are cooked, set aside to cool and begin with the vegetables.

In large wok or saute pan, heat oil on medium heat. Add shallots, garlic and bell peppers, saute for about three minutes. Add mushrooms, beans, one tablespoon thyme, red pepper flakes, a few twists of salt and pepper, cook for another three minutes. Add leafy greens, stir frequently until they are wilted (you may also want to use a cover in between stirring to help soften the greens). Combine rice and sauteed vegetables in the larger of the two pots. Taste for seasoning adding additional salt and pepper as needed.

Scoop mixture into each acorn squash half and serve with any additional seasonings. I like to top mine with some sriracha for that extra heat and flavor I love so much. So very good with this meal. Serves six, or three for the hearty eaters.

Store leftovers in an air tight container in fridge for up to a week.

Enjoy!


Simple Lasagna & Asparagus

Simple Lasagne & Asparagus

 If you love lasagna than you'll love this. It tastes just like the lasagna I grew up with, not with the asparagus (that's a new twist) but the cashew ricotta cheese is just amazingly like the days of old. I can't believe it's made from cashews and has that same texture and taste as traditional ricotta. I call it serendipity! I just love a good find, especially when it's one of those comfort foods I love so much every now and then. This is an outstanding replication. This also passed the picky eater test...my daughter has approved it. This is another super easy meal to put together, nothing complicated here. Add whatever veggies you like to this. I pretty much stayed in line with the original recipe and it was nothing short of fantastic. I love the bean idea, it adds some extra protein. This will be a family favorite for sure! This comes from Hipster Food...they have a nice tutorial on this recipe if you need...

Simple Lasagne & Asparagus

Simple Lasagna & Asparagus

Ingredients
  • 1 jar (28oz) organic pasta sauce (I used a simple marinara)
  • 1 can (15oz) black beans, drained and rinsed
  • 1 recipe cashew ricotta cheese (2 to 3 cups if not using this recipe)
  • 1 bunch asparagus
  • 10 or so strips of lasagna, adjust to your needs


Make your cashew cheese ahead of time and keep in the fridge. If you're in a pinch you could just as easily prepare it right along with everything else. 

Preheat oven to 400 degrees.

Cook your noodles, al dente, and set aside. Start layering with pasta sauce first, then noodles, cheese, beans, noodles, sauce, cheese, beans, noodles, sauce and whatever cheese is left you can smear on top with the sauce. Top with asparagus, coating them lightly with some extra virgin olive oil and balsamic vinegar. Top with a few twists of sea salt and cracked pepper. 

Bake for approx 20-25 minutes until asparagus is slightly tender. Serve with crispy bread.

If you manage to have any leftovers, store in airtight container in refrigerator for up to a week.

FYI: my heart shaped dish is approx to an 8x8 dish...recipe reflects this size.


Simple Lasagne & Asparagus

This is a keeper...enjoy!

SPICY CARROT & HUMMUS SANDWICH

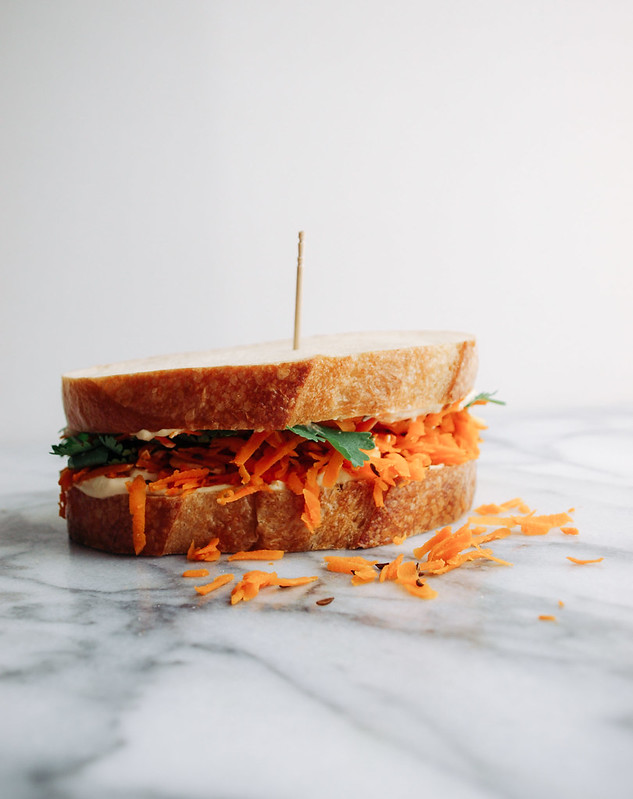
Spicy Carrot & Hummus Sandwich

 I am loving making my way through all the wonderful plant based meals I come across. This sandwich was completely lovely...and I used my own homemade bread too! How does it get any better than that. What a great sandwich idea and good use for some caraway seeds, they are delicious. I would have never thought of this myself so thank goodness my eyes are always open for the next inspiration, and there is a lot of inspiration out there.

This sandwich was created by the British chef, Nick Sandler, for Paul, Stella & Mary McCartney's book, The Meat Free Monday Cookbook. I adapted it from Spicy Carrot Sandwiches from Food & Wine. It's a minimal ingredient recipe full of terrific flavor. Add this to your must try list, you will not be disappointed!

Spicy Carrot & Hummus Sandwich

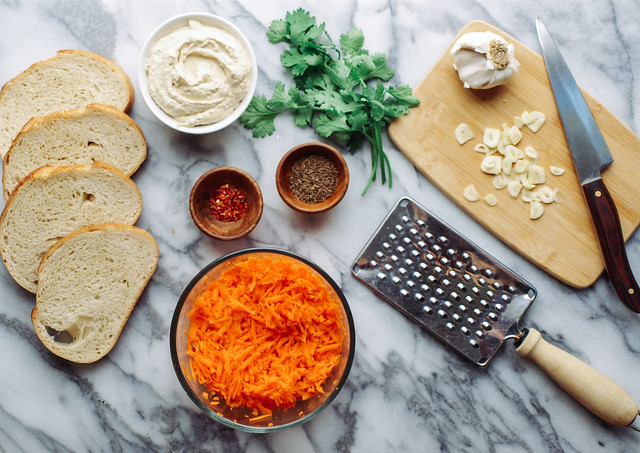
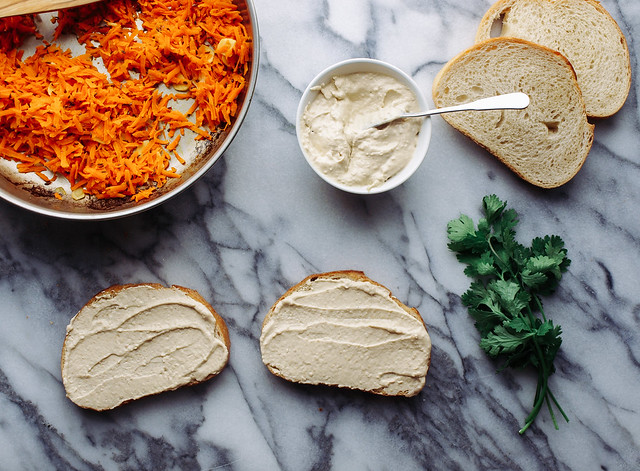
Grate your carrots, slice your garlic and gather the other ingredients...

Spicy Carrot & Hummus Sandwich

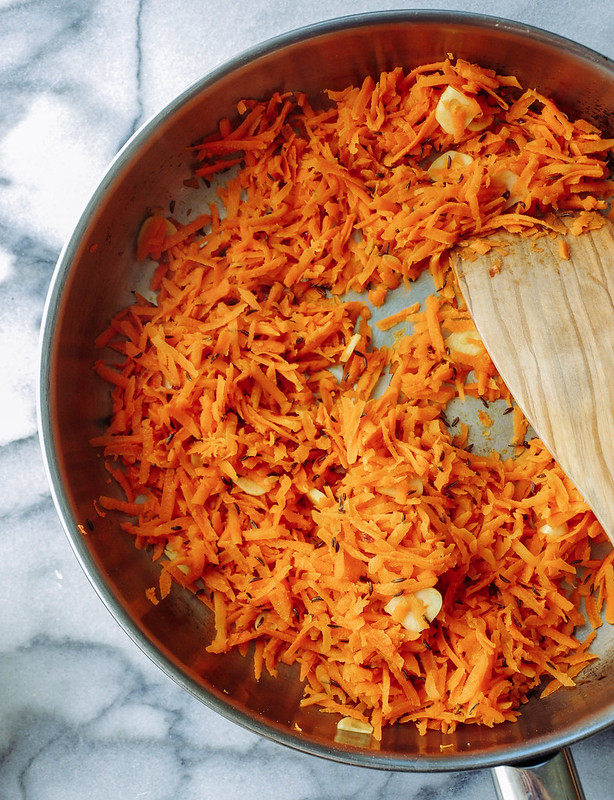
Saute the few ingredients...

Spicy Carrot & Hummus Sandwich

Toast your bread, spread hummus on both sides...because hummus is amazing!

Spicy Carrot & Hummus Sandwich

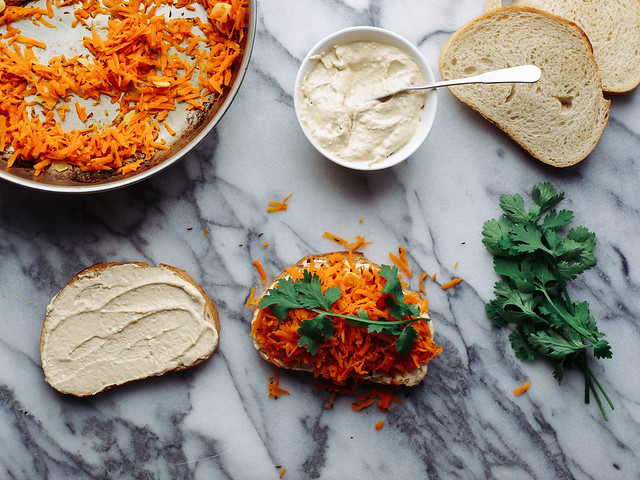
Add your carrot mixture along with a few spigs of cilantro...

Spicy Carrot & Hummus Sandwich

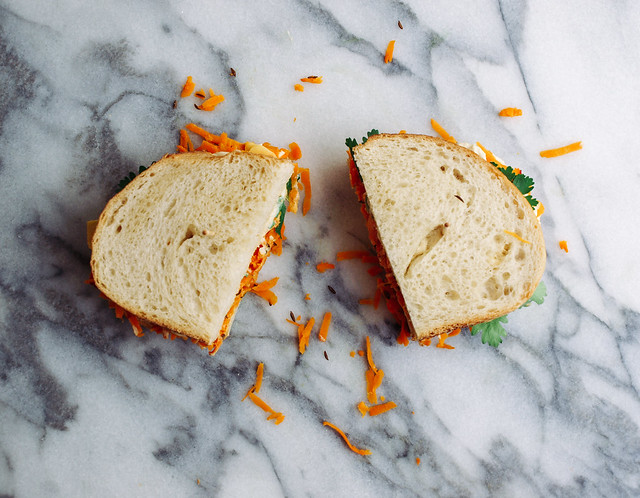
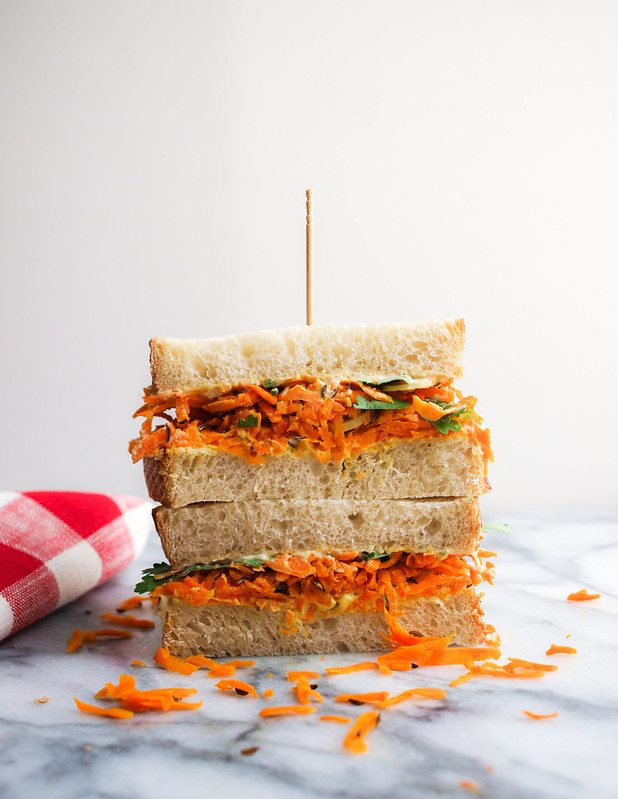
Slice in half and that's it...a great sandwich any time of day!

Spicy Carrot & Hummus Sandwich

SPICY CARROT & HUMMUS SANDWICH 

Ingredients
  • 2 - 3 large carrots, coarsely crated
  • 2 garlic cloves, thinly sliced
  • 1 teaspoon caraway seeds, or cumin would be nice too
  • 1 tablespoon extra virgin olive oil
  • pinch red pepper flakes
  • himalayan/mineral salt, to taste
  • four slices bread of choice...french, sourdough, rye or whole grain would pair nicely
  • hummus to spread
  • cilantro
  • cracked pepper, optional

In skillet heat oil on medium, add the carrots, garlic, caraway seeds and season with salt and red pepper. Cook until carrots are just wilted, about 4 minutes. Let cool.

Toast or grill your bread, layer with hummus (I do both sides because I have hummus love). Add carrot mixture, top with cilantro and season with black pepper...serve. Makes two servings.

Notes: 

To make your own fresh, four ingredient, no knead bread, check my recipe here: No Knead Artisan Bread: Short Rise and/or No Knead Artisan Bread: Long Rise


Enjoy!


High Protein White Bean & Cauliflower Alfredo Sauce

High Protein White Bean & Cauliflower Alfredo Sauce

 This is just an awesome sauce all around! I say if you don't like it you must be crazy...but that's just me. :) It's not the high saturated fat and high calorie alfredo sauce that you may be used too...no, no, no...this is much better and in my opinion tastes better too! This whole meal is high protein and high fiber with wonderful flavors to match. I really love using the kale and sun-dried tomatoes with this as well for their added benefits...the sun-dried tomatoes add a nice sweetness to the dish. Did you know that sun-dried tomatoes contain 12 times the amount of Lycopene as raw tomatoes ounce for ounce. Lycopene is a phytochemical and proven antioxidant that fights free radicals in the body. More reason to add a few sun-dried tomatoes to your dishes.

Pair all this goodness on top of this wonderful pasta I found and this meal is as healthy as it can get!

High Protein White Bean & Cauliflower Alfredo Sauce

Bella Terra 100% Organic 8 Whole Grain Pasta with Milled Flaxseed - Penne Rigate

High Protein White Bean & Cauliflower Alfredo Sauce

Per serving it has...190 calories...1 gram fat...7 grams protein...7 grams fiber...those are great numbers! Along with this high protein, high fiber white bean alfredo sauce...plus a little kale, sun-dried tomatoes and mushrooms you have a nutritionally dense meal that tastes great! I promise :)

I will be using this sauce over and over again varying the added vegetables...you could also use broccoli, peas, spinach, etc...or even serve this sauce over rice quinoa using some of  the leftovers. 

Now lets' make some awesome Alfredo sauce that you will come back to again and again making it your own each time...

High Protein White Bean & Cauliflower Alfredo Sauce

High Protein White Bean & Cauliflower Alfredo Sauce

Ingredients

Alfredo Sauce (makes approx. 4 cups)
  • 1 can cannellini beans (15oz), drained and rinsed
  • 1/2 cauliflower
  • 1 to 1 1/4 cup unsweetened almond milk
  • 3 tablespoon olive oil, divided
  • 1 large shallot or 1/2 onion, diced
  • 1/4 teaspoon nutmeg
  • himalayan sea salt & pepper to taste
  • 1 or 2 tablespoon nutritional yeast, optional (I didn't use any)

additional veggies
  • a few kale leaves
  • 1/4 cup sun-dried tomatoes
  • 1/2 cup mushrooms, sliced
  • 1 or 2 teaspoons red pepper flakes, to taste
  • 1 tablespoon olive oil
  • whole grain pasta, cooked
  • adjust these measurements to suit your needs

Cut cauliflower into large florets and place in pot of boiling water. Cook for about 20 minutes, or until soft, drain. While Cauliflower is cooking, heat 1 tablespoon of olive oil in saute pan over medium to medium high heat, add shallots and cook until soft and lightly browned.

Place cooked cauliflower in blender/food processor along with beans, milk, shallots and nutmeg. Blend until creamy. Taste for flavor adding salt, pepper and any other spice you might like. Also if sauce is too thick add a splash or so more milk as needed, blend again.

And now for the veggies. In same saute pan as you cooked the shallots, heat 1 tablespoon olive oil over medium heat. Add mushrooms, kale, sun-dried tomatoes and red pepper flakes. Saute kale until it has sweated down, approx 5 min. You could use a cover to help. Turn off heat when done. 

Bring pasta back to the same pot as cooked in, add as much sauce as you like to coat the pasta. Add the veggie mix and gently stir. Add a tad more sauce if needed. Turn heat to low and cook until warmed through adding a splash or so of milk if needed to keep from drying out. We want to keep it moist and creamy! 

Best served right away. I've been working on a loaf of french bread I bought last week so I paired mine with a well toasted piece drizzled with a bit of olive oil. Heavenly!

Keep remaining sauce or any leftovers in an airtight container in the fridge. Will last up to a week. When reheating, add more non-dairy milk to maintain creaminess if needed.


Enjoy !


Inspired by this recipe from Cupcakes and Kale 


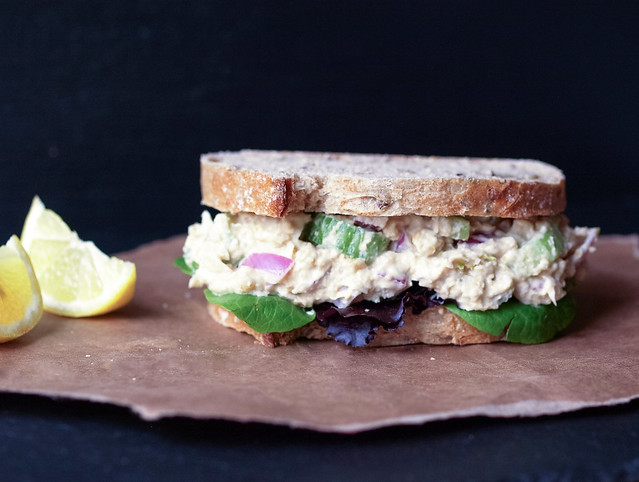
'Chickpea of the Sea' Salad Sandwich

'Chickpea of the Sea' Salad Sandwich

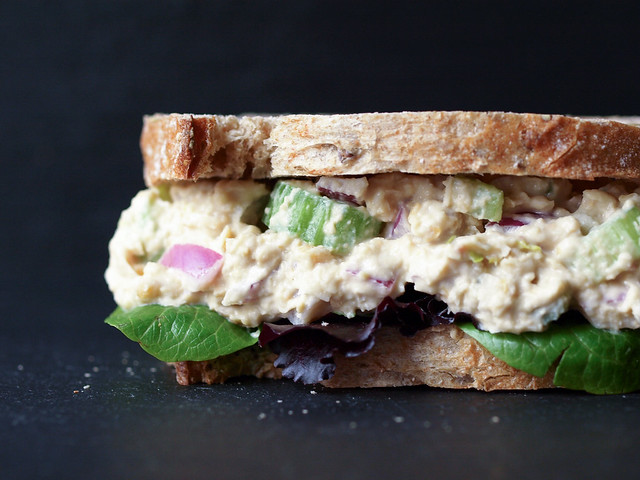
 This is a wonderfully simple mock 'tuna' salad that can be served many ways. Great alone...or serve on whole grain/artisan bread, bed of leafy greens or simply with crackers. You could even cut some bell pepper strips or cucumber slices and serve with that, they make great scoopers. Pairs well with fresh fruit too! It's healthy, delicious and sustainable. Of course, it's not going to taste exactly like tuna, but it will give you the mouth feel and fullness that its predecessor, the 'tuna salad' sandwich, gave you. Add some nori sheets or flakes to add more of a sea flavor. I have really been enjoying trying all these different foods and sharing them here in hopes to inspire others who are looking to make changes, or who already have and are looking for new inspiration. I find it's not difficult eating a plant based diet, in fact...it's a joy! I hope you like this version as much as I did.

'Chickpea of the Sea' Salad Sandwich

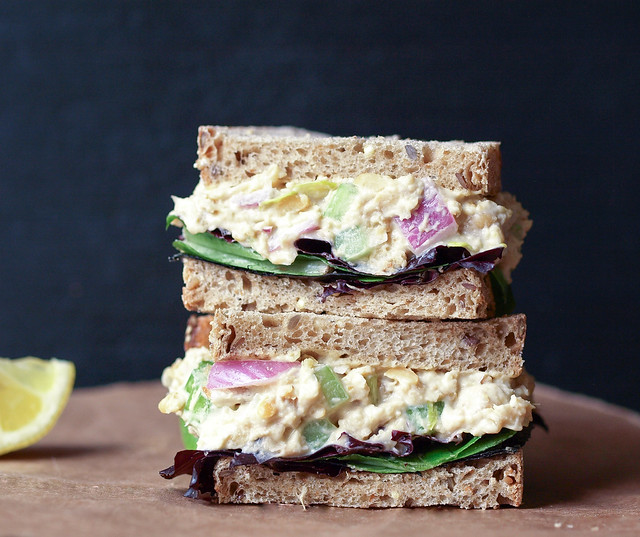
I never tire of the simples...

Chickpea of the Sea Salad Sandwich

My kind of wonderful!

'Chickpea of the Sea' Salad Sandwich

'Chickpea of the Sea' Salad Sandwich

Ingredients
  • 1 can chickpeas (garbanzo beans) (15 oz)
  • juice of 1/2 lemon + some zest if you like
  • 3 or 4 tablespoons hummus or white bean hummus (vegan mayo is great too)
  • 1/2 cup celery (about 2 small stalks, leaves ok too), chopped
  • 1/2 cup red onion (about 1/2 small), chopped
  • 1/2 teaspoon garlic powder
  • himalayan salt & cracked pepper to taste
  • dash of cayenne, optional
  • 6 slices whole grain, sprouted whole grain flourless or artisan bread, to serve
  • leafy greens, to serve
  • nori sheets, to serve (optional)

Other optional ingredients:
  • crushed nori sheets or dulce
  • 1 tablespoon chia seeds or hemp hearts for some omega 3 & 6


Drain and rinse beans, place in medium size bowl and roughly mash with back of a fork or potato masher until desired consistency, I like mine a little chunky. Add rest of ingredients and mix well adding any extra ingredients you like. Alternately, you could use a food processor starting with the beans, pulse a few times...add remaining ingredients pulsing again a few times until desired consistency. 

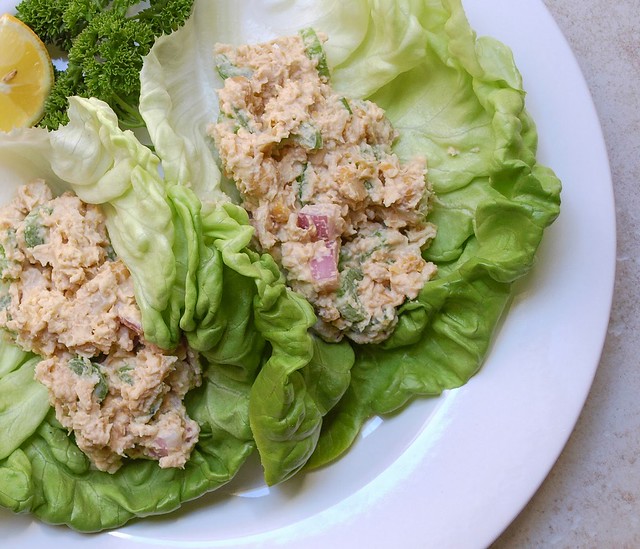
Serve chilled or at room temperature on bread of choice along with some leafy greens and the optional 1/4 sheet of nori. You can also serve on bibb or romaine lettuce like a wrap instead of using bread for a gluten free meal like shown below. Also, try serving this with sliced fresh scooping veggies like cucumber, red bell peppers, zucchini, etc.

Serves 3 generously. Store any leftovers in an airtight container in fridge for a week or so.

Notes: 

If using store bought hummus that is thick, take a couple heaping tablespoons of the hummus in a small bowl and add 1 tablespoon water at a time to thin to desired consistency making for a really nice binder. And if using the hummus recipe link in the ingredient list, omit the cumin.


'Chickpea of the Sea' Salad

Crunchy and flavorful...Enjoy! 


White Flatbread-Pizza with Zucchini

white flatbread-pizza

I like a good pizza every now and then. My craving was for a white pizza and this did not disappoint! It was absolutely delicious. Simple, easy, healthy and yummy...all the makings for a great go to meal any time. The was my first time using a tofu ricotta and it came out fantastic as well. Instead of mashing the tofu, I blended mine in a food processor for a creamy ricotta. And the flatbread can be found almost anywhere. I really enjoyed this white pizza...seriously so good! 


White Flatbread-Pizza with Zucchini


Topping
two small/medium zucchini, green & gold
1 small red onion
whole grain vegan naan bread


White Sauce
1 block organic tofu (16 oz..soft or firm..I used soft)
3 tablespoons nutritional yeast
2 teaspoons mellow white miso
1/2 teaspoon garlic powder
1/2 teaspoon onion powder
dash of pepper (I used white)
dash of nutmeg
twist or two of himalayan salt
juice of 1 lemon
few parsley tops


Directions

Preheat oven to 400 degrees.

Start with the ricotta by placing all ingredients in food processor/blender and blend until creamy. Taste for spices adding anything you may like. Makes about 2 1/2 cups. I had left overs.

Slice your zucchini and onions very thinly. You can use a mandolin or put your knife skills to work and slice. I used both methods. Spread a layer of the ricotta on your flatbread and top with veggies. Bake on cookie sheet lined with parchment paper for 10-12 minutes. Serve.

Note: For a crumble style ricotta to use in lasagna, use firm or extra firm tofu, mash in medium size bowl with a fork then add rest of ingredients and combine together.


Delicious...Enjoy !


Eggplant Puttanesca

Eggplant Puttanesca

 It's been years since I've had eggplant, in fact I can't remember the last time I had it. I remembered it not being so good for my taste at the time but I thought I'd give this recipe a try. It was delicious ! A perfect blend of spicy from the pepper flakes and salty from the kalamata olives, with a slight touch of sweetness from my sauce. The eggplant was tender and fit in just right...absolutely a meal to fulfill all your senses and wanting more. This is one warm, hearty and cozy meal. It has that rustic feel that I love. I would have more but one bowl filled me up...I'll have to wait for the leftovers which I think will be even better.

Eggplant Puttanesca

Ingredients

  • 2 medium eggplants, cleaned and cut into 1 inch cubes
  • 1 medium onion, chopped
  • 1 tablespoon extra virgin olive oil
  • 3 cups pasta sauce (I used an organic roasted bell pepper sauce)
  • 1/2 cup olives (kalamata, green or greek)
  • 2 tablespoon capers
  • 1 tablespoon red pepper flakes


In large skillet/saute pan heat olive oil over medium high heat, cook eggplant and onion until tender, about 8- 10 min. Add sauce, olives, capers, red pepper flakes, cover and simmer for 20 min. Serve with a light dusting of Almond Parmesan over pasta of choice (I used whole wheat) or with crusty bread.

Serves four.

Enjoy !


Enchiladas Verde w/ Cashew Crema

Enchiladas Verde w Cashew Crema

I love enchiladas...not the kind with tons of processed cheese, be it vegan or otherwise, but the kind just like this one...fresh veggies and fresh sauce. It may not look like much but these were super! This is straight up casual dining at its best. Unfortunately it doesn't plate as well as I was hoping so make sure to keep this amongst your closest friends and family who don't mind a messy yet delicious meal. The verde sauce was amazing. I made it the day before so it could really set and combine flavors. It would make for a great salsa or even a taco salad dressing. And this version of the cashew crema is nice with the smoked paprika flavor, giving it just a touch of the smoky paprika flavor (add more if you like). Another cashew cream that would work fantastic here is this 'Cilantro Lime Cashew 'Sour Cream'.  

Enchiladas Verde w Cashew Crema

I didn't go to far from the original recipe as I loved everything about it and it was fantastic. I added some black beans for protein and carrots for more color. Also, if you don't want to make the verde sauce, feel free to use a good brand pre-made verde sauce instead. But I highly recommend making your own as it is delicious!

Enchiladas Verde w Cashew Crema

Enchiladas Verde w/ Cashew Crema

Cashew Crema
1 cup raw cashews, soaked for 2+ hours
1 teaspoon apple cider vinegar (optional)
2 tablespoon fresh lime or lemon juice
1/4 teaspoon smoked paprika
1/2 teaspoon onion powder
salt, to taste
1/2 - 3/4 cup water

Verde Sauce 
2 lb fresh tomatillos, husked and quartered
1 medium red onion, coarsely chopped
2 garlic cloves, chopped
1 jalapeño, seeded and coarsely chopped
2 cups vegetable broth
1/2 cup parsley or cilantro, chopped
himalayan salt & cracked pepper

Enchiladas
1 medium zucchini, chopped into 1/2″ pieces
2 ears of corn, shucked with the corn cut off the cob
3/4 cup or 1/2 pint cherry/grape tomatoes
1 carrot, peeled and diced (optional)
olive oil
1/2 -1 teaspoon cumin
himalayan salt & cracked pepper
1 can black beans, drained and rinsed
9 - 12 corn tortillas

Start with your paprika cashew crema, this can be made in advance, a day or two and kept in the fridge, or you can assemble it while the enchiladas are cooking as long as you soak your cashews first. Soak cashews in two cups water for 2+ hours, drain and rinse well. Place cashews, lemon/lime juice, paprika, onion powder, salt and 1/2 cup water into food processor/blender and blend until smooth, about 4 minutes or so. Add additional water, 1 tablespoon at a time, to thin to desired consistency. Taste for flavor. Add more paprika to your liking, but keep in mind the color will change.

Preheat the oven to 400 degrees Fahrenheit.

Place the zucchini, corn and tomatoes in a large bowl and drizzle with 1-2 tsp olive oil. Add cumin and a pinch of salt & pepper, toss to coat with the olive oil. Spread the vegetables in an even layer on a roasting pan lined with parchment paper, silpat or lightly greased with oil and roast for 15 - 20 minutes. Remove and set aside. 

While the veggies are cooking, start your sauce, this can also be made a day or two in advance. Place the tomatillos, onion, garlic, jalapeno, and vegetable broth in a sauce pot and bring to a boil. Lower to a simmer and cook until tender, about 15 minutes. Transfer to a food processor/blender, add the parsley or cilantro, salt and pepper to taste and process until smooth. Set aside. You may need to process your verde sauce in two batches. It makes quite a bit. 

Once everything is ready, start putting the enchilada's together. Wrap your corn tortillas in a dampened paper towel and microwave 45 seconds. This steams the tortillas and makes them pliable. Pour 1/3 of the sauce into the bottom of a 9×13 baking dish. Fill each tortilla with about 1/4 c of the vegetable mixture, a spoon full the black beans, roll up and place seam side down in the baking dish. Once filled, pour the remaining sauce on top of the enchiladas. Cover with foil and bake 25 minutes at 400 degrees F, until heated through. You may also like to leave the foil off for the last 10 minutes to let the exposed tortillas get a bit crispy.

Serve with the cashew crema. A side of sliced avocado would be great too.

If you only use half of the recipe like I did, the left overs make great taco fillings.

Enjoy!

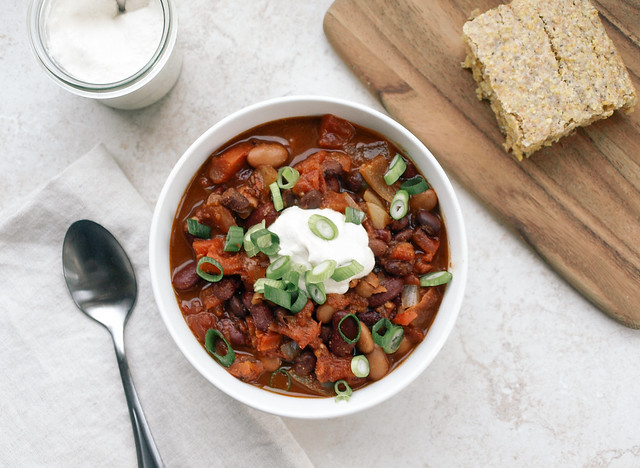
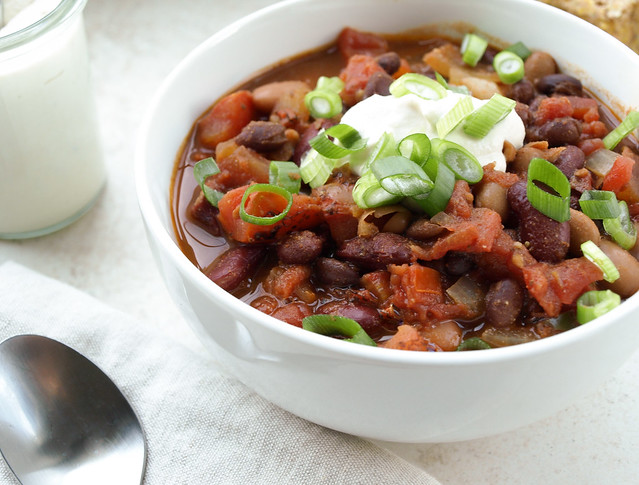
Texas Three Bean Chili & Sweet Chia Cornbread

Texas Three Bean Chili & Sweet Chia Cornbread

I know it's hot these days but I've been craving a chili as of late. I've seen a few recipes here and there and have been inspired to add one to my list. A good chili recipe is a must and this one is loaded with flavor, protein and fiber....all the while being easy to put together! Along with the sweet chia cornbread, this is a completely satisfying and hearty meal that is sure to please.

Texas Three Bean Chili & Sweet Chia Cornbread

Texas Three Bean Chili

Ingredients
  • 1 can black beans (15 oz), drained and rinsed
  • 1 can kidney beans (15 oz), drained and rinsed
  • 1 can pinto beans (15 oz), drained and rinsed
  • 1 can fire roasted diced tomatoes with green chilies (15 oz)
  • 1 cup tomatoes, diced (I used grape tomatoes cut in half)
  • 1 onion, diced
  • 3 cloves garlic, minced
  • 2 tablespoons chili powder
  • 2 teaspoons cumin
  • 1 teaspoon old bay seasoning, if on hand
  • 1/2 teaspoon garlic powder
  • 1/4 - 1/2 teaspoon chipotle or cayenne pepper, to taste
  • 1 -2 teaspoon cocoa powder or one small piece of dark chocolate
  • 1 1/2 cups water or vegetable broth, + more if needed
  • 1 tablespoon olive oil
  • salt to taste
  • scallions and cashew sour cream to garnish

In large pot heat olive oil, saute onion and garlic until translucent, about 5 min. Add all ingredients to pot and bring to boil, reduce heat and simmer for 45 minutes or so, stirring occasionally and adding additional water as needed, shouldn't need more than 1/4 cup if that. Taste for flavor adding anything you feel it needs. Serve with the sliced green onions and cashew sour cream. Serves three generously.

Notes:

Replace the 1 cup fresh diced tomatoes for another can (15oz) of tomatoes for ease.

Mix and match your beans to whatever you like or have on hand. Cooking dried beans would be even better, texture and taste wise.

Add veggies if you like such as chopped celery, carrots, bell peppers, corn, etc...delicious! Adding more vegetables will make this go further giving about 4 serving. Add extra water if needed.


On to the Sweet Chia Cornbread....


Texas Three Bean Chili & Sweet Chia Cornbread

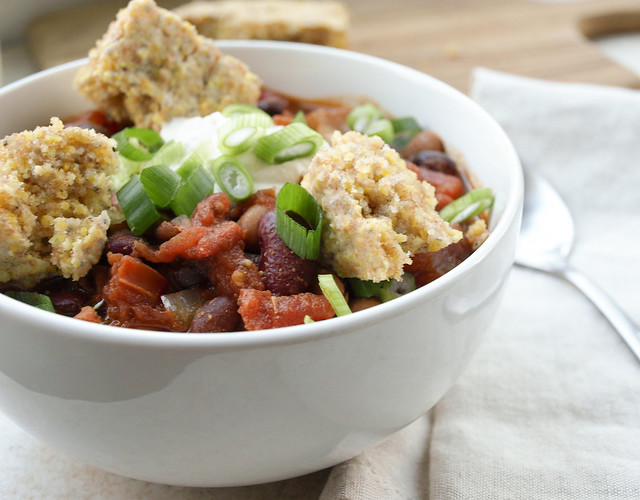
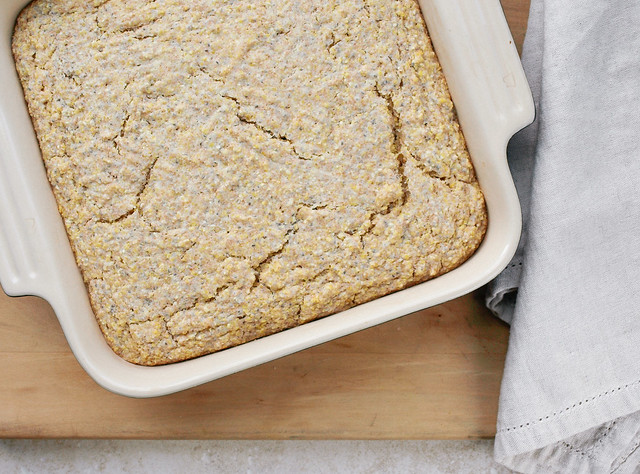
The sweet chia cornbread has lots of texture and completes the chili dish, I can't imagine it without. The chia seeds give this a little bit of a crunchy texture so those who don't like little bits of crunchiness this may not be for you. But for those willing to explore new things, I highly recommend giving this a try! The chia seeds add some good extra nutrition. They contain six times more calcium per serving than milk and six times more iron than spinach. These little seeds contain almost half your daily fiber requirements in a single serving, 2 tablespoons. Adding them is a nice mix up of the traditional corn bread. I enjoyed it best by breaking it up and eating in my chili barely noticing the bits. It was so good!

Texas Three Bean Chili & Sweet Chia Cornbread

Sweet Chia Cornbread

Ingredients
  • 1 cup organic corn meal (I used a course grind)
  • 1 cup spelt flour, whole wheat pastry flour or all-purpose gluten free
  • 5 tablespoons pure cane sugar
  • 1 tablespoon baking powder
  • 1/2 teaspoon salt
  • 3 tablespoons chia seeds
  • 1/2 cup water
  • 1 cup almond milk 
  • juice of 1/2 lemon or 1 tsp apple cider vinegar
  • 1/4 cup coconut oil (melted) or extra light flavored olive oil

Preheat oven to 425 degrees.

Prepare a vegan buttermilk by mixing the almond milk with the lemon or vinegar and set aside.

Mix the chia seeds with the 1/2 cup water, set aside. Let these set for 10 minutes.

Combine all dry ingredients in medium size bowl. Add milk, oil, chia seed mixture and combine making sure to break up any lumps of chia seeds. Pour batter into an 8x8 greased baking pan or dish. Bake for 25 minutes. Test by inserting a toothpick, if it comes out clean it's ready.

Notes:

You could also add in 1 cup canned, fresh or thawed corn to the mix.

Enjoy!


SPICY LENTIL DAL

SPICY LENTIL DAL

Anyone who gardens and has tomato plants, especially here in California, will know that our plants are blooming with tomatoes at the moment. I set out to use some of my tomatoes and incorporate some lentils into my recipe collection. Lentils are a great source of protein and fiber for any lifestyle, and they are a low fat food. Nice to make up for all the higher fat foods I eat frequently like avocados and nut butters, albeit they are good fats but still nice to balance it out. One cup of lentils boosts 18 grams of protein and 16 grams of fiber. Adding cooked tomatoes to any dish is also healthy as cooking increases the level of phytochemicals, such as lycopene to do it's magic. Altogether, this was a great place to use a few garden tomatoes and add a good dose of lentils to my day. I've made lentil dishes in the past but easily tired of them. This recipe is perfect, not overly spicy with nice hints of cinnamon, cumin and ginger. I could easily eat this on a regular basis and will next time double the recipe so I have plenty of leftovers. I encourage you to gather your ingredients, get in the kitchen and make yourself some spicy lentil Dal. If you don't care for spice, you can omit the cayenne altogether...but do trust me when I say it's very low heat. Happy chopping, dicing, cooking and most of all eating!

SPICY LENTIL DAL

 A very easy ingredient list, you may have all of them on hand already. A simple, delicious dish to enjoy often!

SPICY LENTIL DAL

Dal is an Indian dish that's traditionally served over rice but I LOVED it on a bed of arugula. The nutty flavor paired beautifully while adding freshness. Even if you decide to serve this with a grain, I highly recommend adding in some sort of fresh leafy greens.

SPICY LENTIL DAL

SPICY LENTIL DAL

Ingredients
  • 1 cup red lentils (if using green/brown, see notes)
  • 4 cups water or vegetable broth
  • 1 tablespoon olive or grapeseed oil or 3 tablespoons water (for water saute)
  • 2 medium yellow onions, diced
  • 2 cloves garlic, minced
  • 1 tablespoon ginger, minced
  • 3-4 medium tomatoes, diced or 1 can (28oz) diced tomatoes, drained
  • 1 teaspoon cumin
  • 1 teaspoon coriander
  • 1 teaspoon turmeric
  • 1/4 teaspoon cinnamon
  • 1/4 teaspoon cayenne pepper
  • 1/2 teaspoon mineral salt, or to taste

Place lentils, liquid, and dry spices in a large pot, cover, and bring to boil over medium high heat. Reduce heat to low and simmer 20 minutes, stirring occasionally, until lentils are tender, not mushy. 

Meanwhile, saute onions, ginger & garlic in oil over moderate heat until onions are translucent, about 5 minutes. Add tomatoes and stir-fry 4-5 minutes. Set aside. 

When lentils are tender, stir in onions and tomato mixture, cover and simmer 5 minutes. Serve over arugula, brown rice, whole wheat pasta or as is with some of your favorite bread.

Notes:

I happen to love this with fresh greens, it adds so much freshness to the dish. Even if you serve this with a grain, fresh arugula or cilantro will do wonders.

If you happen to not have a spice or two you will still have a flavorful dish. Adjust ingredients to suit your taste.

If using green or brown lentils, cook about 45 minutes, or until tender. 

If two medium onions is too much onion for you, one will do fine.

Enjoy !

Pineapple Veggie Lover Pizza - Gluten Free


It's been ages since I've had pizza and have been wanting to make one for a while now. It's always fun to make your own and this one came out so colorful & yummy! I picked up a package of Bob's Gluten Free pizza crust and thought I'd give it a go. I'm not gluten intolerant but do try to keep my recipes along those lines as much as possible. Feel free to use any pizza crust you like. I've heard Trader Joe's has a great pre-made crust I want to try later. This one was surprisingly easy to make. Once you get the dough together it sits for 20 min to rise and then about 7-9 min in the oven so you can chop up your veggies while waiting. Everything flows together nicely. After pizza is topped and in the oven you'll have about 20 min till ready. 

As usual, this is one of those dishes that can be adapted to your own flavors. These are mine!

Ingredients

Dough:
  • Bob's Red Mill Gluten Free Pizza Crust Whole Grain Mix
  • 1 1/2 cup warm water
  • 2 flax eggs (2 tablespoons flax seed meal & 6 tablespoons water, mix and let set for 10 min)
  • 2 tablespoons extra virgin olive oil
  • Yeast packet, included in pizza mix
  • fresh herbs or spices, optional (I didn't use any this time but it would be nice to spice it up with something)
Pizza topping:
  • marinara sauce or any pizza sauce of choice 
  • 1/2 cup pineapple
  • 1-2 jalapeno
  • small handful mushrooms
  • 1/2 bell pepper, I used orange
  • 4-5 grape tomatoes, quartered
  • 1/2 small red onion
  • 1 scallion
  • 5-6 big leaves of basil, chopped

Directions

Prepare and cook pizza dough according to package, layer with pizza topping when called for. I cooked mine on a cookie sheet lined with parchment paper.

Try adding a little Almond Parmesan topping if you want to add a bit of cheesiness. It's really easy to make and a great pantry staple!

Enjoy!


I can finally check this off my 'to do' cooking list. After making this pizza I had a wonderful idea....'Pizza Pasta'...a little quirky but very tasty. If you can load all these gems on a pizza, why not on pasta! Pineapple adds a whole new level to this dish, I found myself searching for those sweet pineapple pieces, along with the mushrooms too....pretty good. 


Cheers to quirkiness...

Simple Udon Noodles

Simple Udon Noodles

I love a good noodle dish. I've been trying all the Asian style noodles lately. Finally got around to the udon noodles today. I rummaged in my refrigerator and pulled out some produce I thought would be good and went to town. I can tell you after devouring this meal that I like udon noodles, they are a keeper! The seasoning in the recipe is really simple adding to the ease of this dish. I love that all of the Asian noodles I've tried so far only take 4 min to cook, makes everything move a little faster, which was good because I was hungry...and this was really scrumptious!

Simple Udon Noodles

The udon noodles I used already came split into three bundles. I only used one batch as this recipe was for myself, so adjust accordingly to your needs. These are organic and made with 100% whole wheat...making this one of my very few non-gluten free recipes I have. I do hope you enjoy this as much as I did...

Simple Udon Noodles

Simple Udon Noodles

Ingredients
  • 1 bundle udon noodles
  • 1 tablespoon sesame oil or 3 tablespoons water (for water saute)
  • 1 small zucchini, cut in half and sliced
  • 4 medium sized mushrooms, sliced (I used baby bellas)
  • 1 small shallot, diced
  • handful of basil, julienned
  • 3 tablespoons tamari, Bragg's Liquid Amino's or soy sauce (I used tamari)
  • 1 teaspoon pure maple syrup
  • pinch or two red pepper flakes
  • 1 scallions, sliced
  • 1/4 - 1/2 cup bean sprouts (I mixed mine in raw at serving...you could cook it in if you like)

Start the water for the noodles. While you're waiting for the water to boil, begin slicing up your veggies. Cook noodles, drain and set aside. Preheat your oil/water in a saute pan, or pan you cooked your noodles in, on medium high heat. Add your veggies and saute for about a minute, add the rest of the ingredients and cook for another 3 minutes. Remove from heat, add noodles to the pan and mix together. Serve with a little extra sprinkle of red pepper flakes, a few chopped scallions and fresh bean sprouts. Serves one generously.

Enjoy !

RAW VEGETABLE PASTA

RAW VEGETABLE PASTA

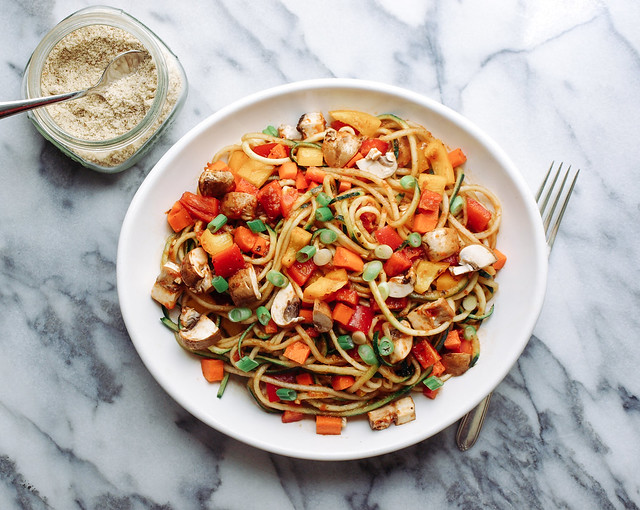
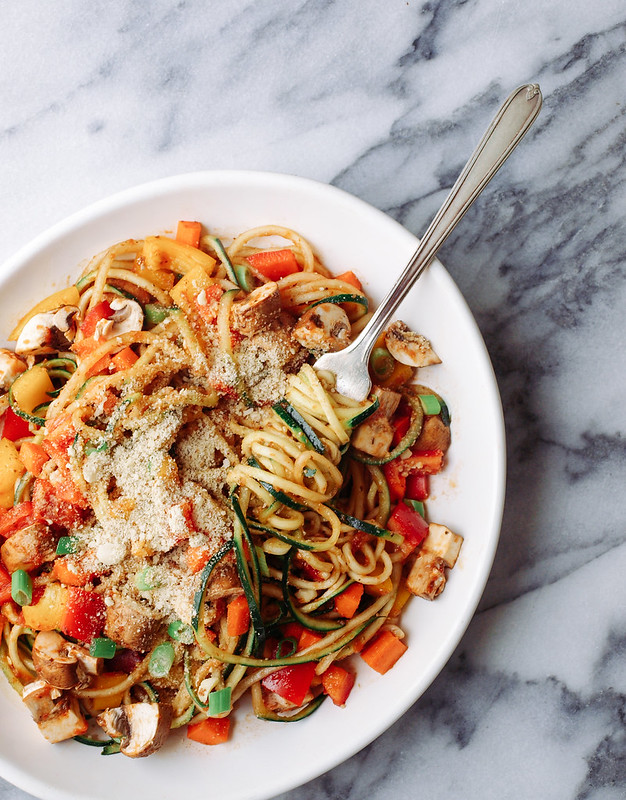
We can all benefit from a raw meal at least once a day, whether it's a salad or something like this raw vegetable pasta. Adding a fresh, raw dish to your daily meal plan is good for your system in countless ways. So with some marina'raw' sauce I had left over from a previous recipe, I decided to put together this raw vegetable pasta dish. I started with just the usual zucchini 'noodles' and decided to try some cucumber 'noodles' as well. Turned out to be a nice combo! I added in some fresh vegetables that I happen to have on hand and the result was a complete success. Adding a layer of almond parmesan over top will take this to the next level of deliciousness while adding protein....it's amazing over top! This complete dish is simple, delicious and refreshingly filling! 

'RAW VEGETABLE PASTA

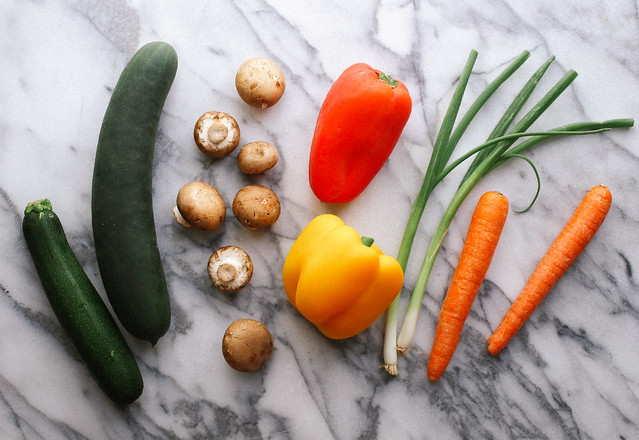
Feel free to use any vegetables you like. These are what I had on hand and threw together. 

'RAW VEGETABLE PASTA 

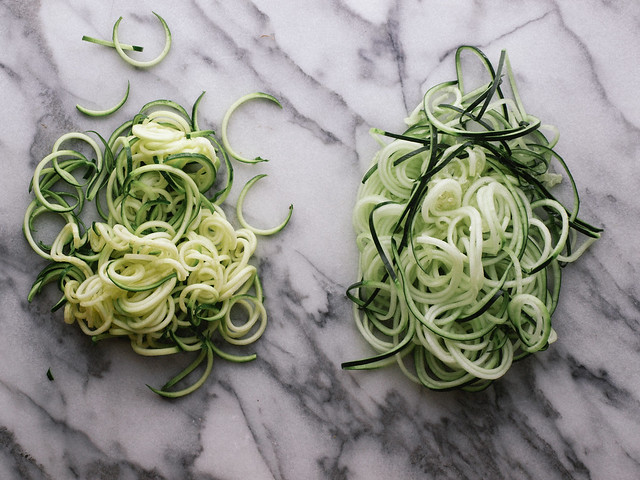
On the left are the zucchini noodles and on the right are the cucumber noodles. Very refreshing and filling. 

RAW VEGETABLE PASTA

RAW VEGETABLE PASTA

Ingredients (serves two)
  • handful mushrooms, diced
  • 1/2 each red & yellow bell pepper, diced
  • 1 - 2 carrots, diced
  • 1 - 2 scallions, sliced
  • fresh chopped cilantro, basil or parsley (optional)
  • mineral salt & cracked pepper, to taste

Noodles 
  • 1 small zucchini (1 per person)
  • 1 small cucumber (1 per person)

Marina'raw' Sauce

Spiralize your zucchini and cucumber, set aside. You can also julienne by hand or use a julienne tool but the spiralizer is really fun and easy. I highly recommend having one if you make raw noodles often. (check notes below on spiralizer options)

Dice up your veggies, using as much as you like. Now you can either mix everything together in a separate bowl and transfer to individual serving dishes or you can serve and mix right in your serving dish. Top with sliced green onions, fresh herbs of choice, mineral salt & cracked pepper to taste. Extra Aaamazing topped with a dusting of Almond Parmesan!

Notes:

Depending on the size, I generally use 1 zucchini & 1 cucumber per person. You can use half of each if they are on the larger side but even then it won't hurt to have a little extra on your plate.

You could also use raw nut meat with this as well. The nut meat is a combination of walnuts and mushrooms...really delicious! You can find the recipe here. Since this is for an Italian style dish, I recommend subbing the spices to be more of an Italian flare...sage, thyme, basil, oregano, rosemary, marjoram and sun-dried tomatoes. Use your best judgment on which ones to use and combine.

This could easily be prepared for to go lunches. Make a batch of the marina'raw' sauce, cut up some vegetables and store for quick access to preparing a 'to-go meal' or anytime when your at home. A little preparation goes a long way. The sauce will last up to 5 - 6 days and the fresh chopped veggies should last about the same.

If you're in a pinch, try subbing in bottled organic tomato sauce of choice. It won't be considered 100% raw but it will still be delicious!

I use the Paderno Spirooli which is around $35 on Amazon, lots of features compared to others (you can wait for sales and purchase for cheaper). You can also use a julienne tool which is much less cumbersome and can easily fit into your utensil drawer.

Enjoy often!