.

Showing posts with label cilantro. Show all posts

Creamy Lemon Herb Dressing

Creamy Lemon Herb Dressing
Creamy Lemon Herb DressingCreamy Lemon Herb Dressing

My last post of 2012. What a great year this has been! Food blogging and taking pictures has been a fun and learning experience. I've improved much but still have a ways to go. Meeting like minded people and being inspired everyday has been amazing. I look forward to what adventures lie ahead. I leave you all with this really wonderful dressing. I know many will be eating healthier as a New Year's resolution and this dressing will help you get some freshness in your meal plans. I personally found myself tipping the bowl to get the last of it. It's light and refreshing on its own, adding it to a fresh salad just makes it that much better. I've been waiting to find a great creamy style dressing that's easy to make at home and finally I've found one that fits my needs. This is raw, nut free, soy free, gluten free and of course vegan. I think this will amaze you as much as it amazed me. Happy New Year's to you all....Cheers!

The base of this recipe is hemp hearts. If you're unfamiliar with hemp seed hearts, you will want to add these great little seeds to your lifestyle. They are easy to sprinkle in smoothies, on salads, add some to the top of your toast and jam. In this recipe they create a wonderful creaminess. Hemp seeds are a great source of omega 3 & 6 and are a high quality complete protein. Four tablespoons, or 1/4 cup, of hemp seeds contain 15 grams of protein, and they're also a good source of fiber containing 2.5 grams per quarter cup. They also contain high concentration of vitamins and minerals such as iron, vitamin E, thiamine, riboflavin, folic acid and many other micro-nutrients that your body needs. Another great thing about hemp seeds is that they do not need to be soaked to aid in digestion, they can be eaten raw and the body will absorb and digest all nutrients readily and easily. They contain a lot of nutrition in a small package. If you love hemp hearts, you may also like my other recipes containing hemp hearts. Raw Healthy, Happy, Hemp Seed Cookie Balls Raw Creamy Miso Soup w/ Mushrooms...a few great ways to use hemp seeds!

Now, let's make some delicious dreamy creamy dressing...

Creamy Lemon Herb Dressing


Creamy Lemon Herb Dressing

Ingredients
  • 1/2 cup hemp hearts
  • 1/3 cup water, plus more as needed for thinning
  • juice of 1 medium lemon
  • a few strands chives, broken into 1 inch pieces
  • a few sprig leaves fresh dill 
  • a few sprig tops fresh cilantro and/or parsley
  • dash or two garlic powder
  • dash or two onion powder
  • himalayan salt to taste 

Using a blender, I used the magic bullet for this, combine ingredients and blend until smooth. Add water 1 tablespoon at a time until desired consistency. Taste for flavor adding anything extra to suit your taste...more lemon?...more herbs?...more garlic or onion powder? Chill before serving. Makes about 5 servings.

Store in an air tight container in refrigerator for up to a week.

Note: I have not made this in a regular blender. The magic bullet works wonders but if you don't have one this should work fine your blender at home. You may consider doubling the recipe if using a larger blender. Mix and match herbs to suit your taste.

Salad shown consists of romaine lettuce, grape tomatoes, cucumbers and topped with cracked pepper...simple and delicious!

Enjoy!


How to Freeze Fresh Herbs:

Fresh is always best, but I do find that I buy fresh organic herbs and then they get thrown away. If you find that is the case for you, below is a few simple ways to freeze your herbs making them easily ready for this recipe and others.

Fresh dill sprigs can be frozen for up to a couple months, but they will darken in color. There is no need to thaw before using. Frozen dill weed will still always have more flavor than dried dill. Below are two methods for freezing dill.

Cilantro is best used fresh, freezing turns it mushy, so fresh is best for great flavor.

Parsley is another herb that freezes well. You can freeze parsley the same as dill by using one of the two methods provided below.

Chives also freeze well. Frozen chives have the same flavor as fresh chives. To freeze chives you can cut the strands into small pieces, lay on cookie sheet and place in freezer for about 20 minutes. Once frozen place in air tight container, should last up to year. You can also freeze by using the ice cube tray method below.

Whole Stalks: 

Dill: Place a bunch of dill, stalks and all, in a reusable plastic bag or airtight container. Once the dill freezes, use clean kitchen shears to remove the needed portion, then return the remaining dill to the freezer. Entire stalks can be used to flavor soups and stews, then use a slotted spoon to remove the dill just before serving.

Parsley: Chop parsley into small pieces, place in reusable plastic bag or airtight container.

Ice Cubes:

An ice cube tray provides serving size cubes of herbs that can be tossed into soups, stews and other hot dishes. Dice the herbs, place a small amount in each section of an ice cube tray, add water and freeze. Once frozen, remove the cubes and store them in resealable plastic bag or freezer container. You can also add veggie broth instead of water, or combine herbs as well for a ready to use herbal blend.
KIMCHI BREAKFAST TACOS

KIMCHI TOFU SCRAMBLE TACOS

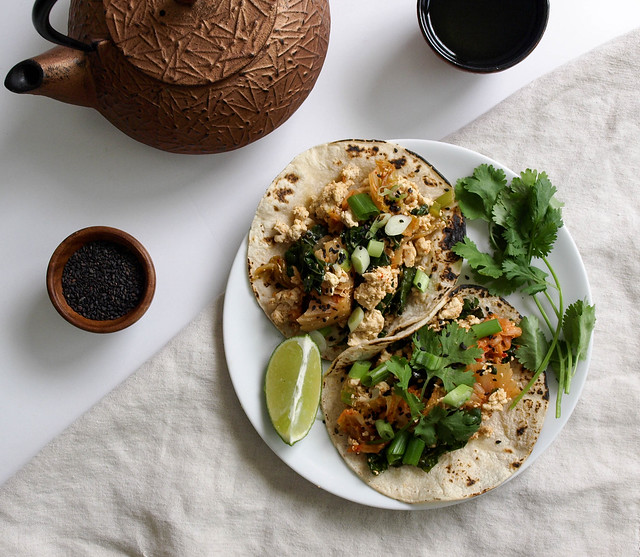
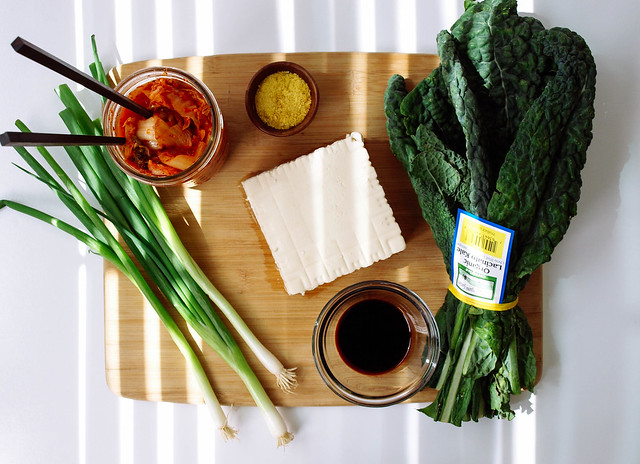
Now that kimchi has been added to the recipe collection, it's time to experiment with this spicy, tangy mixture. What better way than to add this spiciness to a tofu scramble. Tofu at times can use a little help, kimchi is a perfect addition and will whip that tofu into shape. This is my vegan version of a recipe I saw for a kimchi scramble using eggs. My tofu interpretation came out amazing and I'm very happy with the results. If you're a kimchi lover and tofu appreciator, than I think you'll agree! I first made this recipe using spinach (which tasted great, of course!) but ultimately decided to use kale here as we try to use the most nutrient dense foods possible whenever we can. I loved the kale, it cooks down beautifully adding a nice pop of green to the scramble. I've kept the seasoning super simple, it doesn't need much as the kimchi will shine through. Best to use your most fermented batch of kimchi, the ripened flavors will work best when cooking with kimchi. These tacos can be eaten any time of day. It pairs great with green tea. If having these for lunch or dinner and you're a beer drinker, I think an Asian or Mexican beer would be great too. Beers like Kirin Ichiban, Sapporo, Corona and Dos Esquis are vegan friendly. To see if your favorite beer or alcohol is vegen, check this great guide: Barnivore. Whatever your drink of choice is, you're going to love every bite of these kimchi tacos! 

KIMCHI TOFU SCRAMBLE TACOS
KIMCHI TOFU SCRAMBLE TACOSKIMCHI TOFU SCRAMBLE TACOS
KIMCHI TOFU SCRAMBLE TACOS

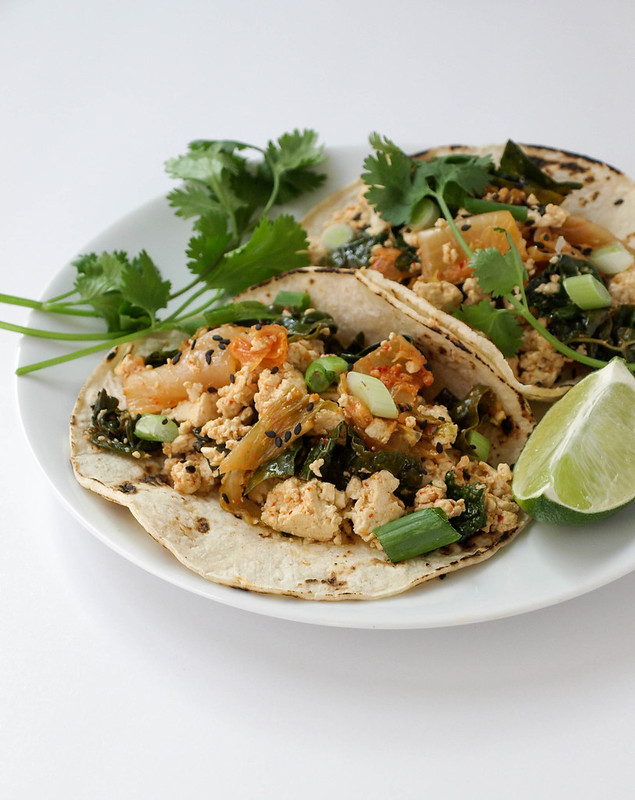
All cooked and ready to go. I could eat it just like you see it above...so good! But we're making tacos here, so fill your warmed tortillas (I used corn), you may like to use two if your mixture is very wet. Top with cilantro sprigs, scallions, sesame seeds and a squeeze of lime. Enjoy to the fullest!

KIMCHI TOFU SCRAMBLE TACOS

KIMCHI TOFU SCRAMBLE TACOS


Ingredients
  • 1 tablespoon sesame seed oil, optional
  • 1 block (14 - 16 oz) organic tofu, firm or extra-firm
  • 4-5 large leaves of kale, center stem removed and julienned
  • 3 scallions, sliced (divided)
  • 1-2 tablespoons tamari
  • 1/2 teaspoon garlic powder
  • 1-2 tablespoons nutritional yeast, optional
  • 1 cup kimchi
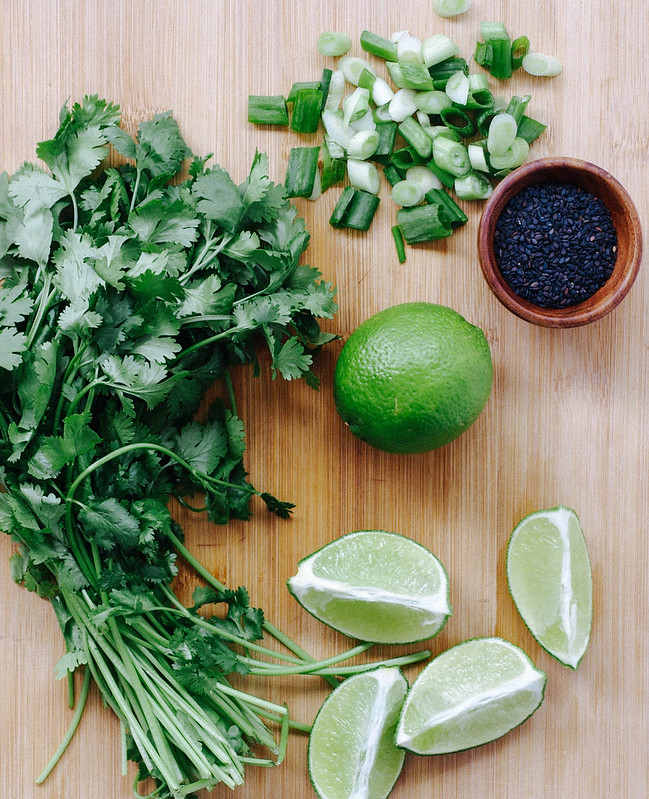
  • cilantro sprigs, for garnish
  • sesame seeds (toasted, black or white), for garnish
  • lime wedges, to serve
  • 6 corn or flour tortillas, to serve

Measure out 1 cup kimchi and let come to room temp.

Open and drain tofu. You may like to give it a quick press to remove moisture if not using a vacuum packed brand. 

In a large wok/skillet, heat oil over medium high heat. Add tofu, crumbling between your fingers, cook, stirring occasionally, for about 2 -3 minutes. Turn heat to medium, carefully add tamari and garlic powder, give a good stir. Add kale and 2/3 - 3/4 of the scallions, cook, stirring occasionally until kale becomes soft and wilts, cover partially to help with the process, about 5 - 7 minutes. Lastly, add the nutritional yeast and kimchi, mix and cook just until kimchi has warmed through, about 1 minute or so. We don't want to overcook the kimchi or it will destroy some of the health benefits of the probiotics. 

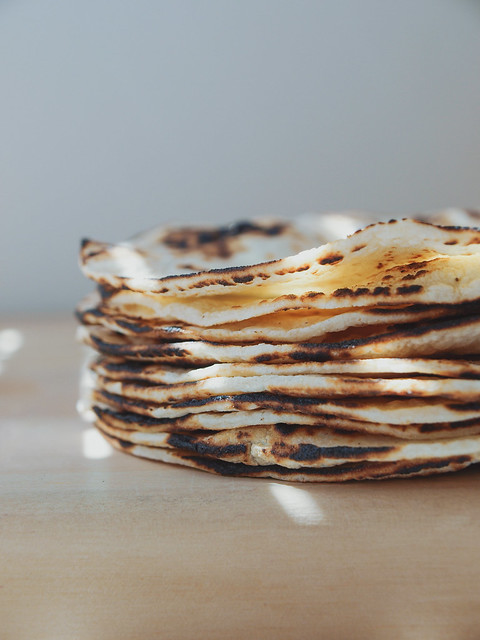
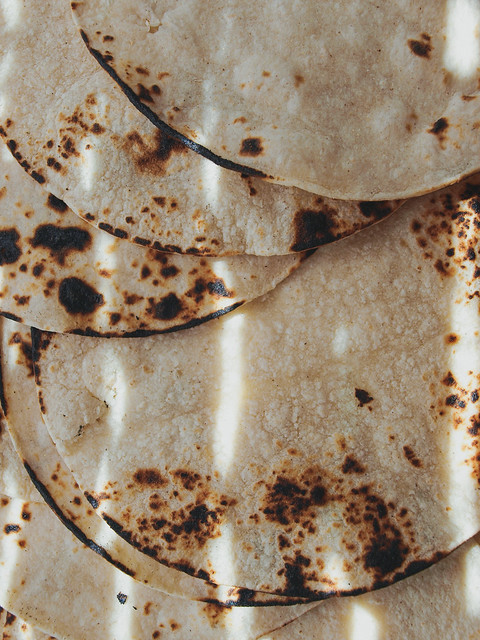
Heat your tortillas. I like to heat mine carefully over a gas burner until lightly charred in spots. Use your preferred method.
Layer your tortillas with the scramble mixture, add a few sprigs of cilantro, some of the reserved scallions, a sprinkle of sesame seeds and a squeeze of lime. 
Serves 3

Notes: 

Use spinach in place of kale.

Use ripened kimchi, the flavors will be more pronounced. You may prefer fresher kimchi, in which case use your favorite.

You may like to chop your kimchi a bit before adding it to the tofu. I kept it as it was but it's an optiona.

Try adding a drizzle of this Garlic Miso Cashew Sauce, or for extra heat try the Dynamite Sauce or Sriracha Cashew Cream. You can control the heat when adding the spice to each of these condiments. 


SPICY CARROT & HUMMUS SANDWICH

Spicy Carrot & Hummus Sandwich

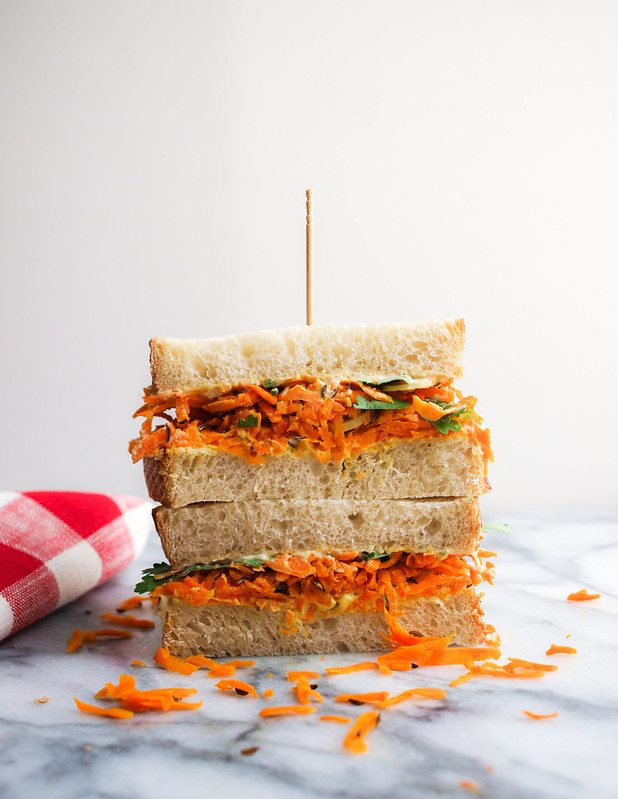
 I am loving making my way through all the wonderful plant based meals I come across. This sandwich was completely lovely...and I used my own homemade bread too! How does it get any better than that. What a great sandwich idea and good use for some caraway seeds, they are delicious. I would have never thought of this myself so thank goodness my eyes are always open for the next inspiration, and there is a lot of inspiration out there.

This sandwich was created by the British chef, Nick Sandler, for Paul, Stella & Mary McCartney's book, The Meat Free Monday Cookbook. I adapted it from Spicy Carrot Sandwiches from Food & Wine. It's a minimal ingredient recipe full of terrific flavor. Add this to your must try list, you will not be disappointed!

Spicy Carrot & Hummus Sandwich

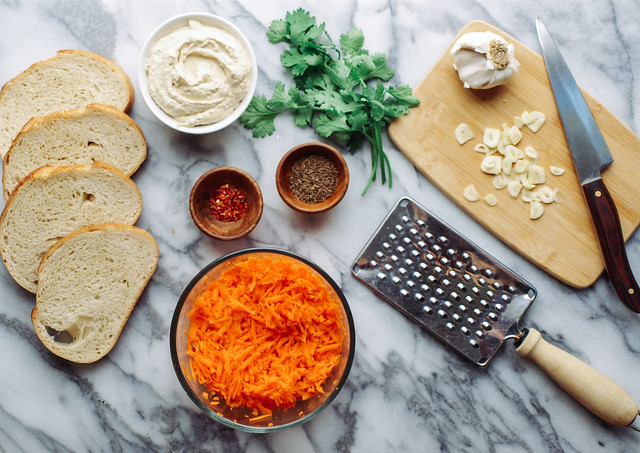
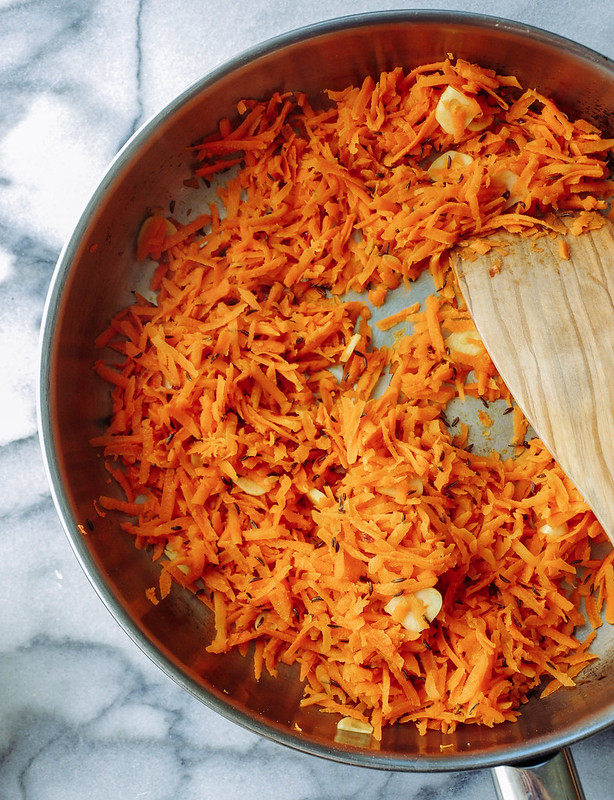
Grate your carrots, slice your garlic and gather the other ingredients...

Spicy Carrot & Hummus Sandwich

Saute the few ingredients...

Spicy Carrot & Hummus Sandwich

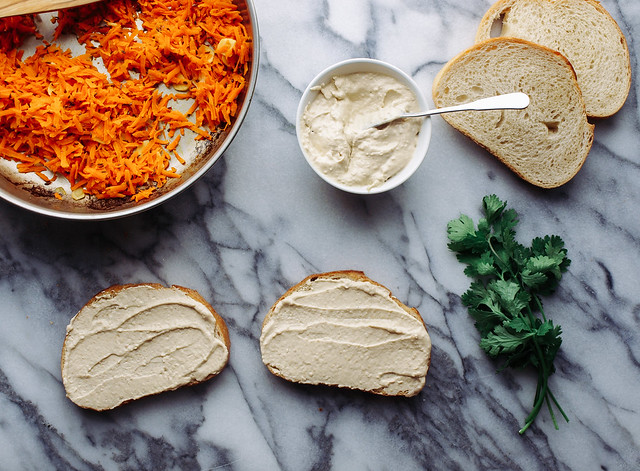
Toast your bread, spread hummus on both sides...because hummus is amazing!

Spicy Carrot & Hummus Sandwich

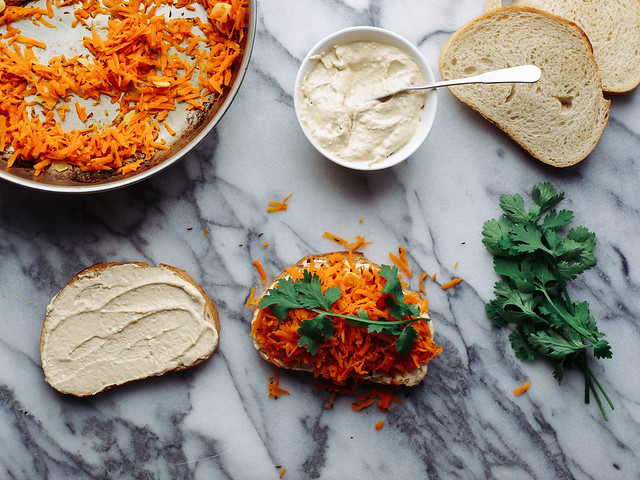
Add your carrot mixture along with a few spigs of cilantro...

Spicy Carrot & Hummus Sandwich

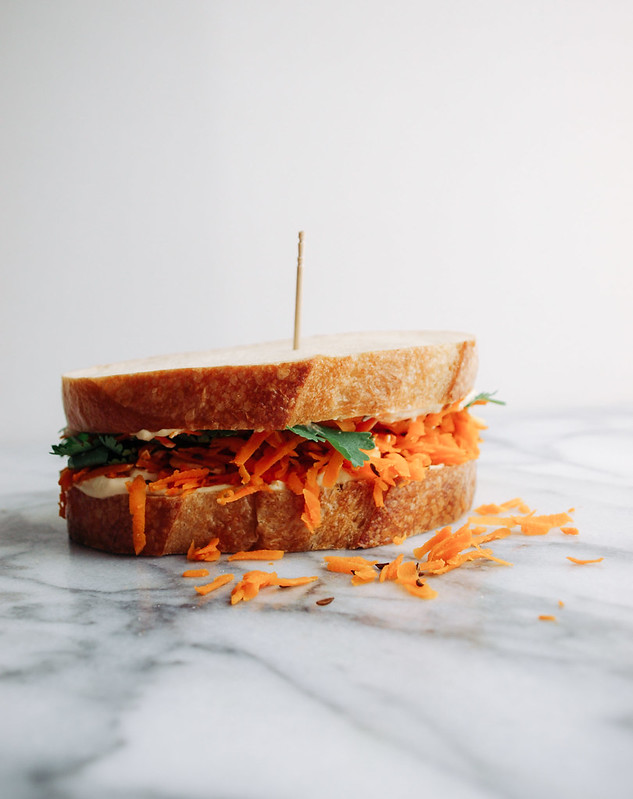
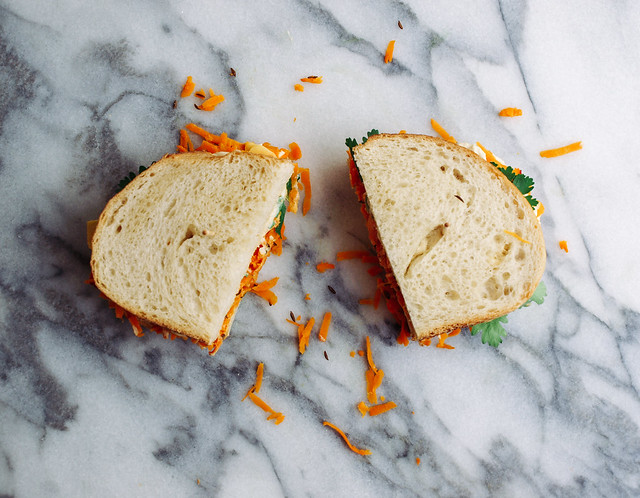
Slice in half and that's it...a great sandwich any time of day!

Spicy Carrot & Hummus Sandwich

SPICY CARROT & HUMMUS SANDWICH 

Ingredients
  • 2 - 3 large carrots, coarsely crated
  • 2 garlic cloves, thinly sliced
  • 1 teaspoon caraway seeds, or cumin would be nice too
  • 1 tablespoon extra virgin olive oil
  • pinch red pepper flakes
  • himalayan/mineral salt, to taste
  • four slices bread of choice...french, sourdough, rye or whole grain would pair nicely
  • hummus to spread
  • cilantro
  • cracked pepper, optional

In skillet heat oil on medium, add the carrots, garlic, caraway seeds and season with salt and red pepper. Cook until carrots are just wilted, about 4 minutes. Let cool.

Toast or grill your bread, layer with hummus (I do both sides because I have hummus love). Add carrot mixture, top with cilantro and season with black pepper...serve. Makes two servings.

Notes: 

To make your own fresh, four ingredient, no knead bread, check my recipe here: No Knead Artisan Bread: Short Rise and/or No Knead Artisan Bread: Long Rise


Enjoy!


Carrot + Zucchini Ribbons + Cilantro Pepita Pesto

Carrot + Zucchini Ribbons + Cilantro Pepita Pesto

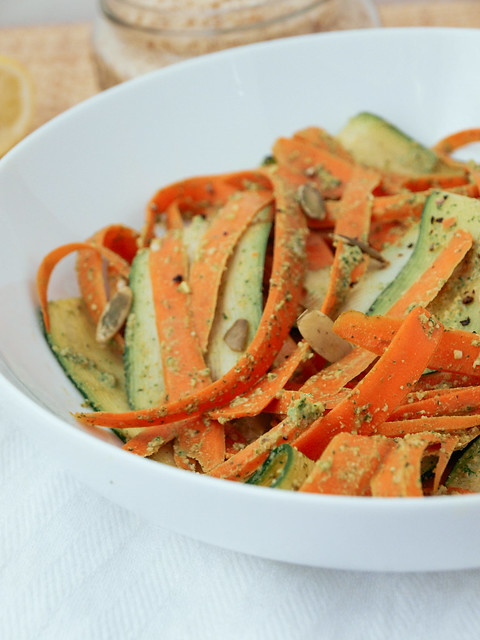
It's about time I added a new raw dish to the collection. I have received many emails over the course of starting this blog. I was just recently inspired by a most wonderful email I received from one of my readers letting me know how much she appreciates this blog and really enjoys cooking from it. It has helped her return to eating vegan full-time again (hooray!), as she has fallen of the wagon a few times and needed this inspiration to get back on. In particular, the raw recipes were a source of inspiration at one point. She had eaten raw dishes here and there, but never for a solid period of time. She went away over the summer for two months and did a raw eating cleanse using the raw recipes as a source of inspiration. After her cleanse was over, she felt amazing and knew this is how the body is supposed to feel. Free from the toxins of the typical everyday eating, you feel alive and full of energy. It's completely healthy to eat this way for short periods like this and really puts you in tune with yourself. It gives your body a boost of natural healing energy if done right, it's an almost godliness feeling in a way. I know she is shining bright and feeling her best. I thank her so much for sharing her story with me. I love hearing from you all, as much as I may be a source of inspiration for you, you are a source for me too! Whether it's about a life changing event, a certain ingredient you used or just to say hi...all of it is wonderful to me and I thank you! I can't tell you enough how much I love all of you and want only the best for each and every one of you! So I share with you another wonderful raw dish to be eaten generously and frequently.

Carrot + Zucchini Ribbons + Cilantro Pepita PestoCarrot + Zucchini Ribbons + Cilantro Pepita Pesto

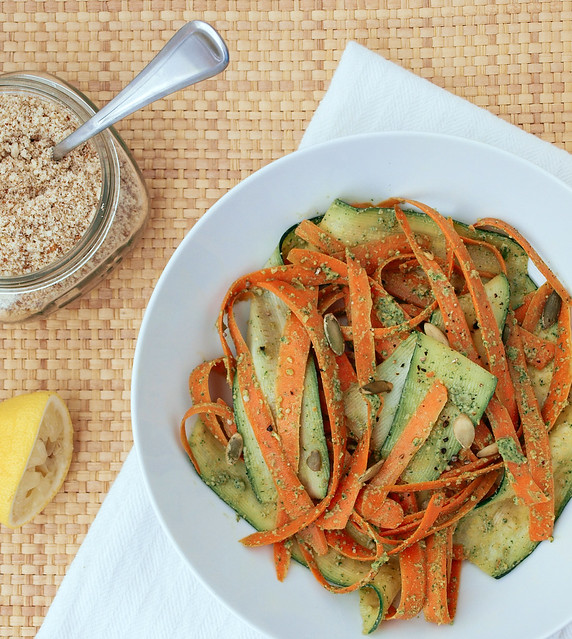
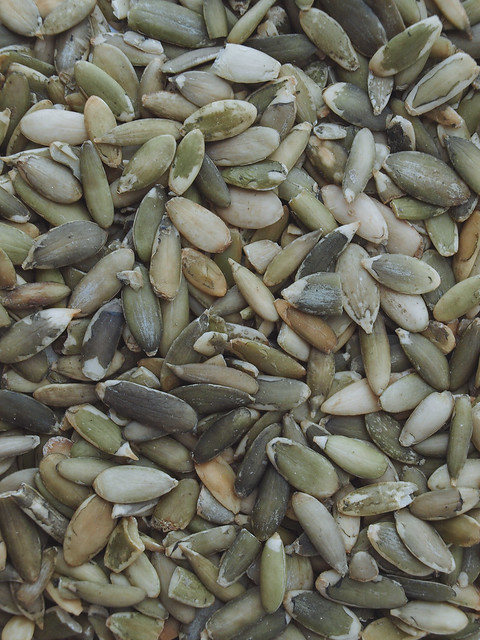
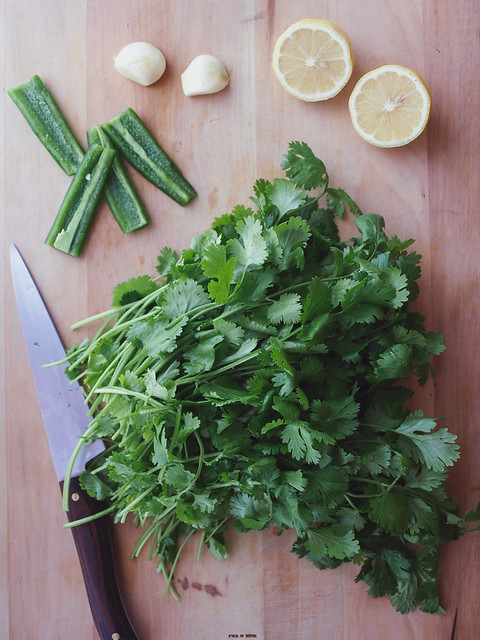
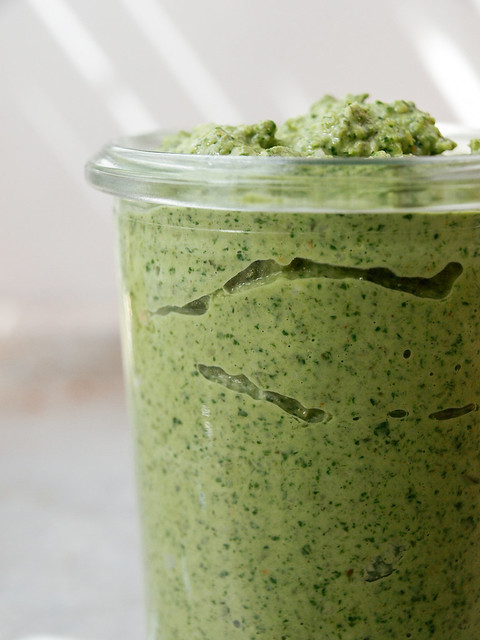
I have a ton of pepitas (shelled pumpkin seeds) that I need to use up and thought this was a great way to use them. I also had some cilantro on hand and decided to use that. What I really love about cilantro, besides the lovely flavor, is that it's available in bunches and so easy to find. In general, it's hard to find basil in large amounts enough to make pesto, making cilantro a great alternative to the traditional basil pesto. I also added a small amount of garam masala to this pesto but feel free to omit it if you don't have it on hand or don't care for it. I have yet to use my garam masala and thought why not try it here for something unusual. So I tested it out and found that I rather liked it as it adds an interesting layer of flavor and pairs well with the fresh vegetable ribbons. I even used my left over pesto as a dip for carrot sticks...so good! But keep in mind that I'm quite strange and can eat the weirdest combinations. So If you feel like experimenting, go for it...if in doubt, leave it out. I also added in some hemp hearts as well, two tablespoons or so, if you have some on hand this is a great place to use them!

Carrot + Zucchini Ribbons + Cilantro Pepita Pesto

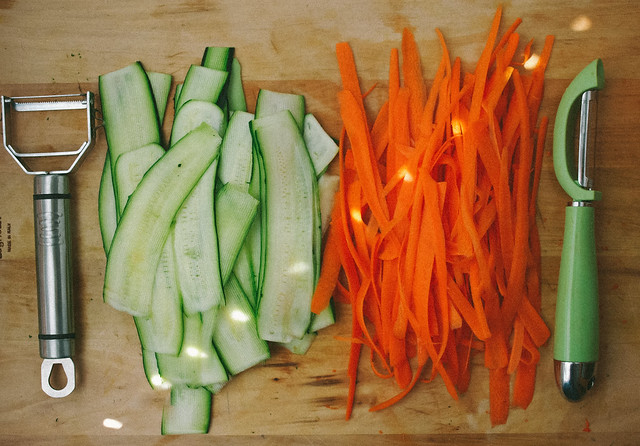
The ribbons are easy to create. I used a mandolin to ribbon the zucchini and a peeler to do the carrots. It's best to use smaller sized zucchini so the mandolin will be wider. This will help keep the zucchini edges cleaner looking instead of scoured. But do it however you're comfortable and use whatever tools you have. If you only have a peeler you can just as easily use that to ribbon the zucchini too. You can also simply use a julienne tool for thinner ribbons or julienne everything by hand if need be.

Carrot + Zucchini Ribbons + Cilantro Pepita PestoCarrot + Zucchini Ribbons + Cilantro Pepita Pesto
Carrot + Zucchini Ribbons + Cilantro Pepita Pesto

Carrot + Zucchini Ribbons + Cilantro Pepita Pesto

Ingredients
  • 3 large carrots
  • 3 small zucchini
  • pepitas, for serving
  • mineral salt & cracked pepper to taste
  • almond parmesan, for serving

Cilantro Pepita Pesto
  • 1 large bunch cilantro (3 cups loosely packed), ends removed, leaves and small stems ok
  • 1/3 cup pepitas (shelled pumpkin seeds), toasted or raw
  • 2 tablespoons hemp hearts, optional
  • 2 cloves garlic
  • 1 small jalapeno, seed removed (leave a few seeds for heat if you like)
  • 3 tablespoons extra virgin olive oil
  • juice of 1 large lemon
  • 1/2 teaspoon himilayan salt
  • 1/2 teaspoon garam masala, optional

Start with your pesto, place pepitas in your food processor and pulse a few times until seeds are broken down fairly well. Add remaining ingredients and blend until well combined and fairly smooth, stopping to scrap down the sides as needed. Add water, 1 tablespoon at a time, to thin if needed (no need to add more oil unless you want). Taste for flavor and season to taste. Set aside.

Peel the outer layer of your carrots and discard. Using the peeler, ribbon the carrots. Wash your zucchini, cut the ends off and using a mandolin, or tool of choice, ribbon the zucchini. You can just as well julienne your carrots and zucchini with a julienne tool or by hand if you would rather have thinner strands.

In a medium size bowl, place carrots and zucchini, add a few spoonfuls of pesto and mix to combine. You will have pesto leftover unless you really love the stuff and use it all!

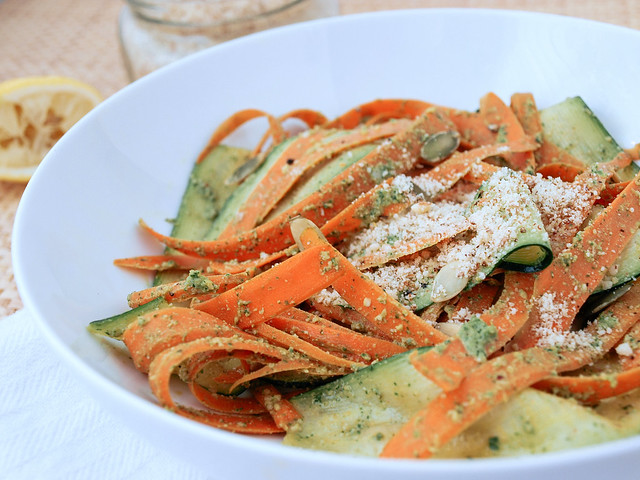
Plate your ribbons, top with a sprinkle of pepitas and a nice dusting of almond parmesan. For a little extra color you could add some red pepper flakes to the top.

Serves two.

Store leftover pesto in an air tight container in the fridge for up to a week. Use the pesto for pasta, as a dip for vegetables, as a spread for sandwiches, thin it out with water or lemon juice and make a dressing for salads, etc. Lots of ways to use pesto.

Notes: Use almonds in place of pepitas if needed. I used raw pepitas instead of toasting them.

For the garam marsla, if pairing this with regular pasta I would leave it out. It pairs well with the freshness of the carrot & zucchini ribbons. Also, I found that it tasted fine with almond parmesan. But like I said earlier, I can eat some really unusual combinations. If you feel like experimenting, try it out...if in doubt, skip it.

Enjoy!


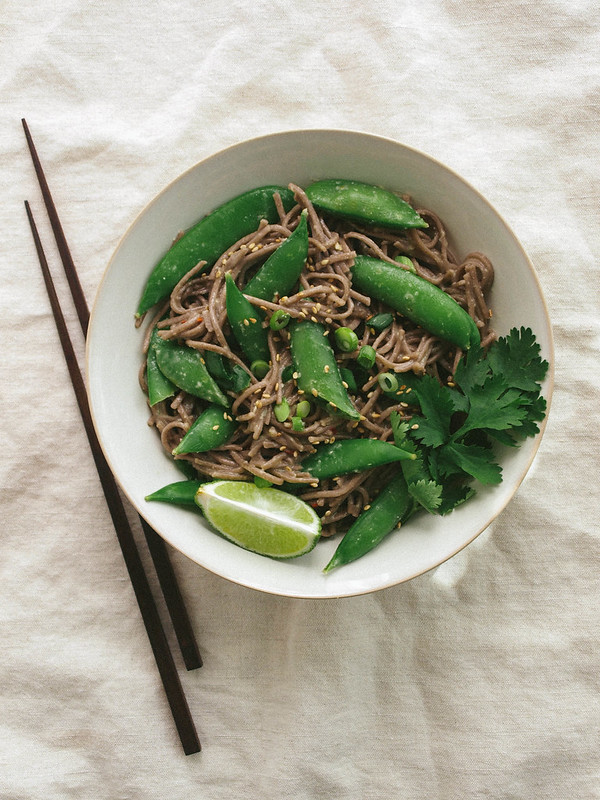
SUGAR SNAP PEA & SOBA NOODLE BOWL + MISO SAUCE

SUGAR SNAP PEA & SOBA NOODLE BOWL + MISO SAUCESUGAR SNAP PEA & SOBA NOODLE BOWL + MISO SAUCESUGAR SNAP PEA & SOBA NOODLE BOWL + MISO SAUCE

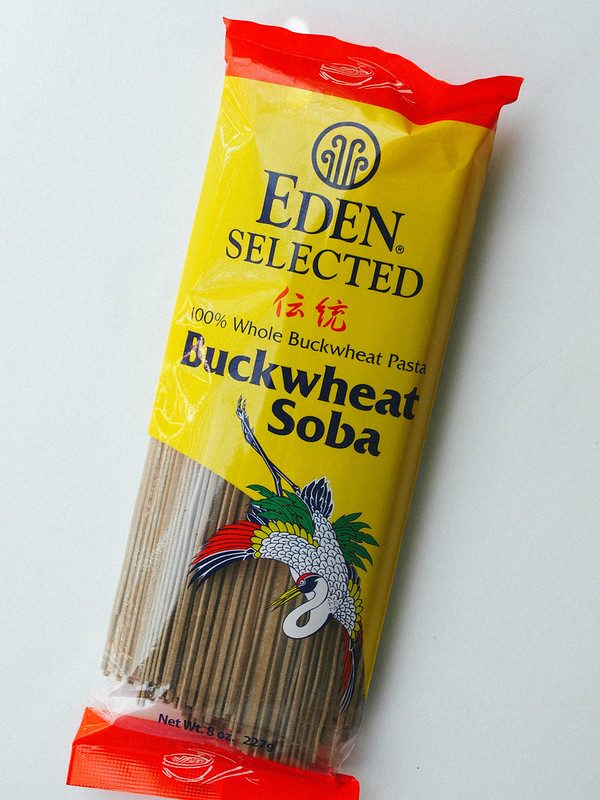
Soba noodles have become a favorite of mine. I love the 100% buckwheat noodles from Eden FoodsThey have a nutty flavor with a somewhat chewy texture. Each serving contains 6 grams of protein and 3 grams of fiber. I love that they can be served warm or cold making them a versatile noodle choice. They are gluten free using only buckwheat flour, unlike other brands of soba noodles which use a combination of wheat and buckwheat flours. They tend to be a bit more expensive than the mixed flour soba noodles. I happen to see these noodles as a tradeoff for the more expensive items that I don't purchase anymore such as meat, poultry and dairy. Keeping that in mind, the extra expense doesn't bother me. I hope you may have the same perspective as I do when picking and choosing your plant based grocery items.

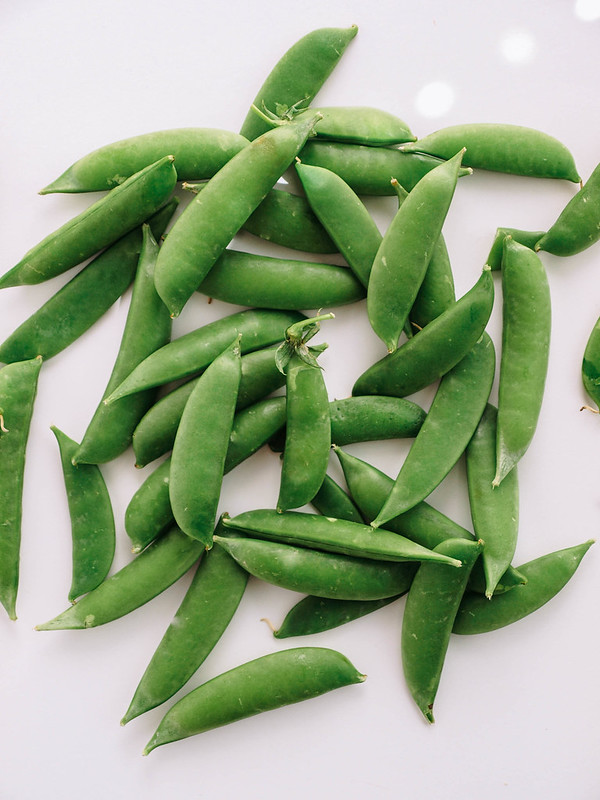
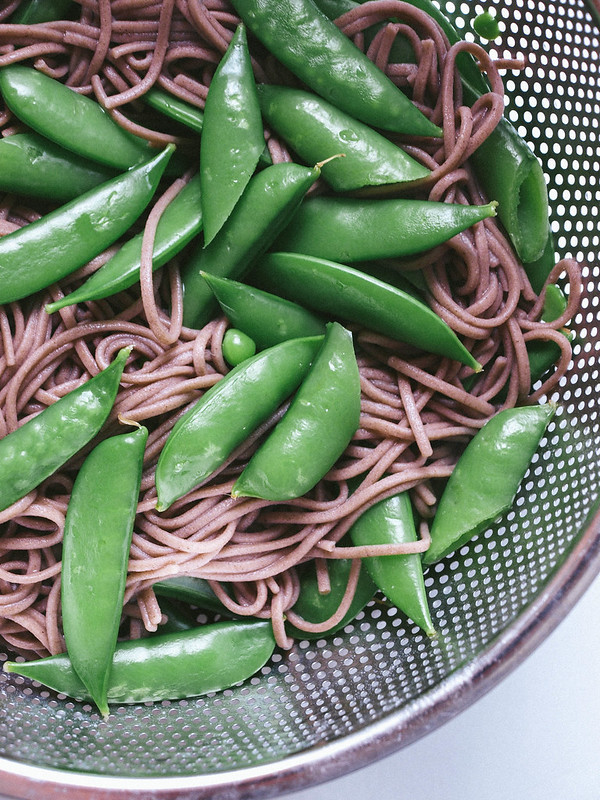
The addition of sugar snap peas add a perfect dose of sweetness and crunch to the soba noodles. I love sugar snap peas and have them often dipping them in hummus and eating as is. In this recipe we will be adding the pods to the soba noodles half way through as they cook to soften them a bit and bring out their greenest green. 

SUGAR SNAP PEA & SOBA NOODLE BOWL + MISO SAUCE
SUGAR SNAP PEA & SOBA NOODLE BOWL + MISO SAUCESUGAR SNAP PEA & SOBA NOODLE BOWL + MISO SAUCE

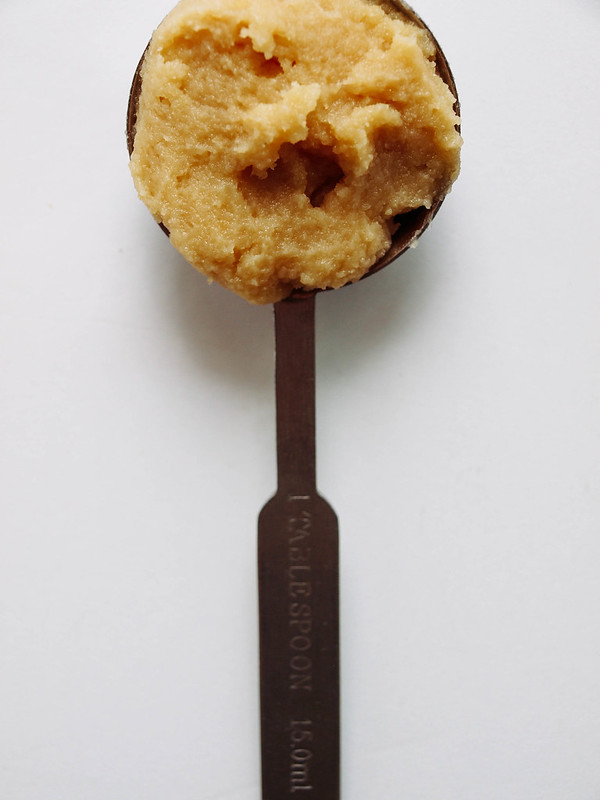
Miso is another great addition to your healthy eating habits. With a few additional ingredients it makes for an easy and flavorful dressing for the noodles and sweet peas. A tub of miso will last up to 9 months + in the refrigerator and can be used for soups, dressing/dips and adding richness to vegan cheeses and sauces. It will go a long way in your kitchen and is a great staple ingredient to have on hand.

This is a very easy meal to throw together and will be ready in about 25 minutes or less. I originally planned on having cubed tofu in this recipe but in the end forgot to add it in for this set of pictures. Feel free to add in a serving of tofu (as per the notes). With or without tofu, enjoy this simple, wholesome and delicious meal! 

SUGAR SNAP PEA & SOBA NOODLE BOWL + MISO SAUCE

SUGAR SNAP PEA & SOBA NOODLE BOWL+ MISO SAUCE

Ingredients
  • 1 package (9oz.) soba noodles
  • 8 oz. sugar snap peas
  • 2-3 scallions (green onions), sliced, to garnish
  • toasted sesame seeds, to garnish
  • handful cilantro sprigs, to serve
  • lime wedges, to serve

Miso Sauce
  • 2 - 3 tablespoons mellow miso paste (white miso)
  • 2 tablespoons rice wine vinegar 
  • 3 tablespoons water, + more as needed to thin
  • 1 inch knob of ginger, grated or minced
  • juice of 1 lime (about 1 tablespoon)
  • pinch of red pepper flakes

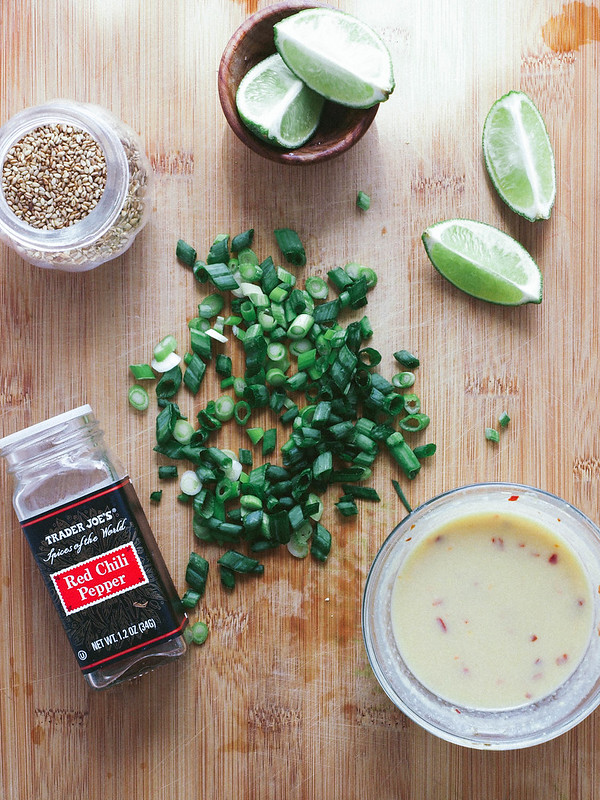
In a small bowl, mix the miso sauce ingredients together, set aside.

Fill a large pot just under 1/2 full of water, bring to a boil, add a pinch of salt and soba noodles, cook 4 minutes. If using 100% soba noodles, careful to watch the water after 2 minutes or so, it will start to become foamy and bubble over...turn the heat to medium and back up again as needed to keep the water at a boil but not boiling over.

2-3 minutes before noodles are done according to package directions, add sugar snap peas to the noodles and continue cooking until noodles are done. Drain and rinse noodles and peas under cool running water.

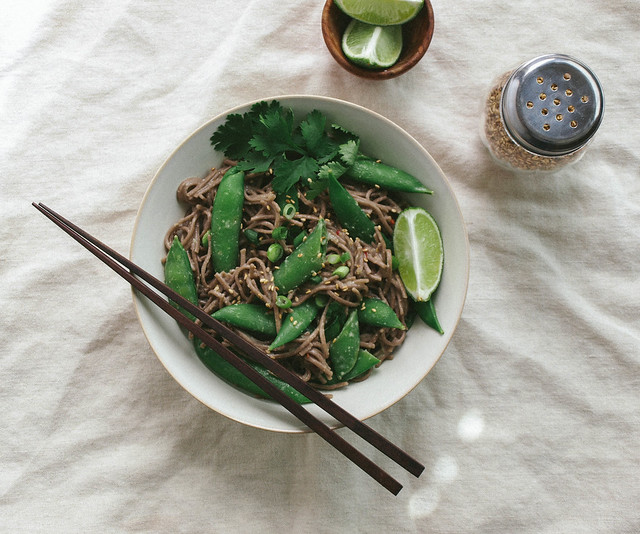
Add noodles/peas back to the pot they were cooked in, add sauce and gently toss to coat. Serve in individual bowls with sliced scallions, sesame seeds, cilantro and lime wedges to squeeze over top.

Serves 2

Notes:

If your sugar snap peas are on the larger side, slice them diagonally in the center to make them easier to eat.

Add in a serving or two of cubed tofu for extra protein if you like...either baked, pan cooked until golden or simply diced from the package. You may even like to add in a serving or so of edamame.

If you have soy allergies, try using other miso's which don't contain soy such as chickpea miso. 


    White Bean + Tomatillo Soup

    White Bean + Tomatillo Soup

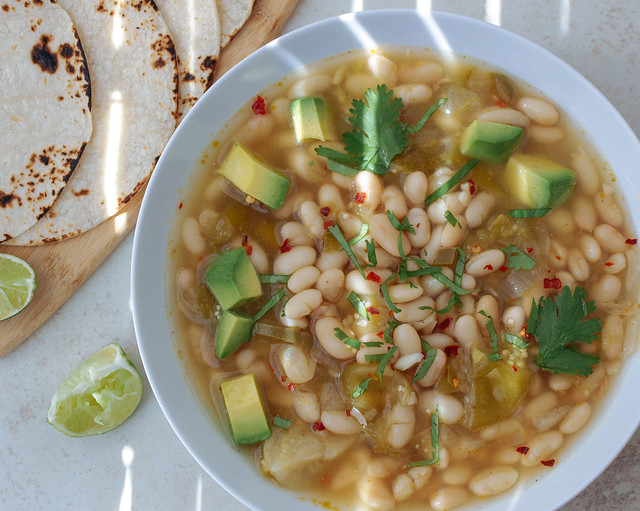
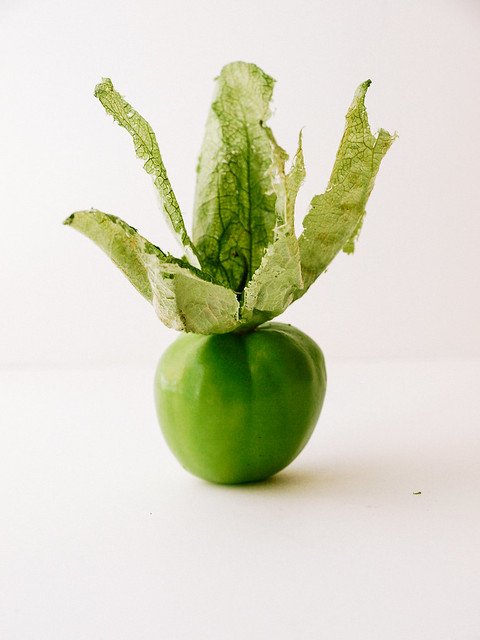
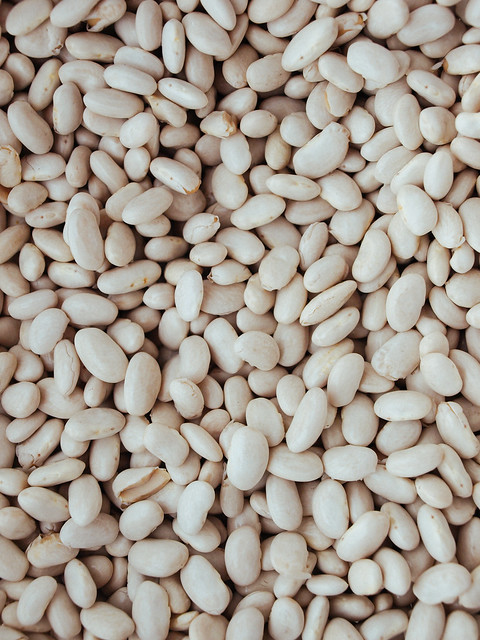
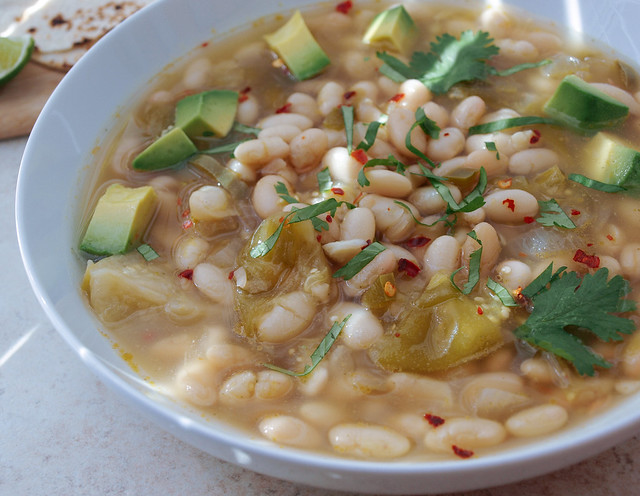
    Today is a celebration of tomatillos and white beans...

    White Bean + Tomatillo SoupWhite Bean + Tomatillo Soup

     Summer is coming to an end and cooler weather is setting in. It seems a good time to put some of the season's tomatillos to good use and this soup is a great way to use this wonderful fruit. Eaten raw tomatillos have a bright, somewhat lemony flavor about them. Once cooked, they soften in texture and their flavor mellows making them a wonderful complement to the white beans and other ingredients in this hearty soup. White beans are a great source of protein, and together the tomatillos and beans have plenty of fiber to keep you feeling full and keep your digestive track running smoothly. If you find you are gassy with beans, take a look at this article from Care 2, 7 Ways To Avoid Gas From Beans, to see if it can help you. Once you start to add beans to your diet on a regular basis your body will naturally adjust and ease itself of those unwanted symptoms. Beans should be a staple in your healthy vegan diet...they are accessible, affordable, versatile and contain plenty of nutrients to keep the body healthy and satisfied. 

    White Bean + Tomatillo Soup

    So as the seasons are changing and the sun will soon be hidden from my window until next year, we are catching the last rays of summer here. I'm ready to bring on the fall and bundle up with a nice bowl of soup. Cheers to the cooler temperatures, bundling up and keeping our food pure and clean as possible! 

    White Bean + Tomatillo Soup

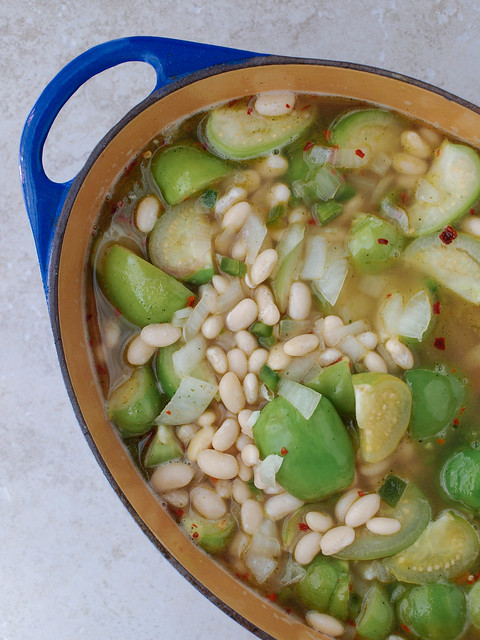
    A look at the soup before it's put on the flame to simmer. So fresh and colorful!

    White Bean + Tomatillo Soup - Corn TortillasWhite Bean + Tomatillo Soup

    Adding some warmed tortillas will round this soup out making for a very satisfying meal. 

    White Bean + Tomatillo Soup

    White Bean + Tomatillo Soup

    Ingredients
    • 1 lb. dry northern beans or 3 cans (15 oz) cannellini beans or navy beans, drained and rinsed
    • 1 onion, diced
    • 2 - 3 garlic cloves, diced
    • 1 1/2  lb. tomatillos (about 13-15), husks removed, washed and quartered or cut into 6 pieces
    • 1 jalapeno, seeds removed and diced
    • 4 cups (32 oz) vegetable broth or 4 cups water with 3 repunzel vegetable cubes
    • 2 cups water
    • 1/2 teaspoon cumin
    • 1/2 teaspoon coriander
    • mineral salt to taste
    • pinch or two red pepper flakes (I like it for a little color)
    • small glug of olive oil
    • 1/4 cup cilantro, chopped
    • avocado, diced, to serve
    • lime wedges, to serve
    • corn or flour tortillas, to serve (organic tortilla chips would be great too)

    If using dried beans, wash and pick through removing any unsightly beans or pebbles. Soak beans overnight or quick soak them according to package directions. Drain and rinse beans well. Place in a medium size bowl until ready to use. If using canned beans go to next step and add the drained and rinsed canned beans as called for below.

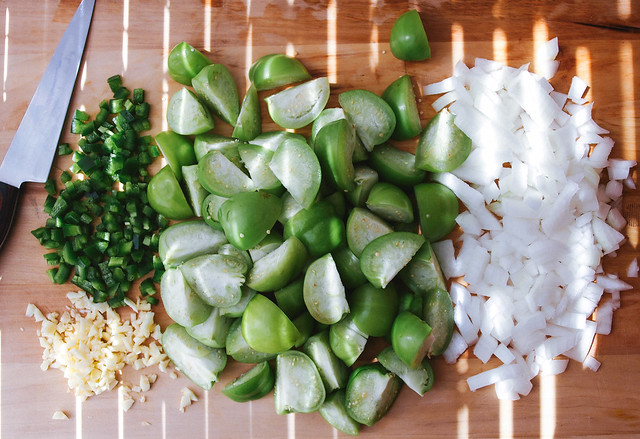
    Prepare your tomatillos by removing the husks and washing them well to remove any of the sticky residue. Chop into quarters or six pieces depending on the size of your fruits. Cut and remove seeds from your jalapeno, and dice. Dice your onion and garlic.

    In a large pot, heat oil over medium high heat, add onion, saute for 5 minutes. Add in the garlic, tomatillos, jalapeno, cumin, coriander, and a pinch or two of salt, saute another 5 minutes. Add in the beans and liquids, bring to a boil, cover, reduce heat and simmer for one hour. If using canned beans, cook for 30 minutes.

    Serve with diced avocado, cilantro, lime wedges and tortillas. Serves 4 - 6

    Notes:
    Make this fat free by opting to add all the ingredients to the pot without sauteing the vegetables in oil. I did this on my first batch of this soup and it was still very delicious without any added oils.

    I used dried northern beans for this recipe. If you have the time I recommend using dried beans but canned beans are great too.

    Add more cumin if you like, or none at all. I just wanted a hint of the spice but if you're a cumin lover by all means add more to your liking.

    Add an ear or two of chucked corn to the soup to make it even heartier. It will add a touch of sweetness and more color.

    This soup could also benefit from a dollop of Lime Cilantro Cashew Cream

    Enjoy!


    This recipe was first inspired by photographer/photo stylist Kate Lewis from her Instagram account. After some internet googling I ran across this recipe at Running with Tweezers which I adapted from.


      CUBAN BLACK BEAN SOUP

      Cuban Black Bean Soup

      Was a nice weekend to do some cooking. I decided to make a black bean soup that I've been wanting to do. Black beans are a 'superfood' containing good amounts of fiber, protein and other trace minerals so important to good health. I want to incorporate more of them into my diet and this is great recipe for that. This is a dish that you will need to begin a day ahead but I have also included a shorter version for those who would rather have it within an hour. Although using the dried beans does take longer to put together, it's simple and so very good. It's especially good with the cashew cream's. I'm finding many uses for these. I have it pictured here with a Cashew Sour Cream, but feel free to use this Lime Cilantro Cashew Cream or Paprika Cashew Crema that would be just as well adding some great flavors.

      Cuban Black Bean Soup

      CUBAN BLACK BEAN SOUP

      Ingredients
      • black beans, 1 lb. dried or 3 cans (15 oz.), rinsed and drained (see notes)
      • 2-3 bay leafs
      • 4 garlic cloves, chopped
      • 1 tablespoon cumin
      • 1 -2 teaspoons smoked paprika
      • 1 large white onion, chopped
      • 2 stalks celery, chopped
      • 2 medium carrots, chopped
      • 1 medium red bell pepper, chopped
      • 2 medium tomatoes, chopped
      • 3 cups water or vegetable broth
      • juice of one orange + remainders
      • himalayan salt and pepper to taste

        Soak beans: The night before, rinse beans in colander with cold running water. Pick through and remove any broken or shriveled beans. Place beans in large pot with 5 or 6 cups water and cover to soak overnight.

        Cook: Next day, drain beans and rinse again. Place beans back in pot, add water, bring to a boil and simmer covered for 1 hour. Add in the remaining ingredients except juice of the orange. Bring to a boil, simmer for 40 minutes to one hour, or until beans and vegetables are tender, stirring occasionally. Add extra water as necessary.

        Puree: Once beans are tender, remove orange halves and bay leaves. Use an immersion blender to blend soup to desired consistency. I blended about 3/4, leaving some chunkiness. You could also use a food processor/blender (this method may take two batches to complete). Blending is optional, you may like it chunky as is. Add orange juice and cook another 5-10 minutes.

        Serve alone or over a bed of cooked buckwheat, farro or brown rice. Top soup with a dollop of Sour CreamLime Cilantro Cashew 'Sour Cream' or Paprika Cashew Crema. You may also like to top it with diced onion, tomatoes, bell peppers, avocado, jalapeno's, a squeeze of lime and cilantro. Serves four to six.

        Notes: 

        If you decide to use canned beans, be sure to drain and rinse them. Put ingredients in pot as in the instructions for Cook but only use 2 cups water to start, bring to boil and simmer for 40 minutes, or until vegetables are tender. Add more water as needed. Continue with step 3. You may also decide to saute your onions, celery, carrots & bell pepper first on medium high heat using oil of choice for about 5 min before you start with your canned beans.

        Enjoy!

        BLACK BEAN, BROCCOLI & AVOCADO SALAD + CUMIN LIME TAHINI DRESSING

        BLACK BEAN, BROCCOLI & AVOCADO SALAD + CUMIN LIME TAHINI DRESSING

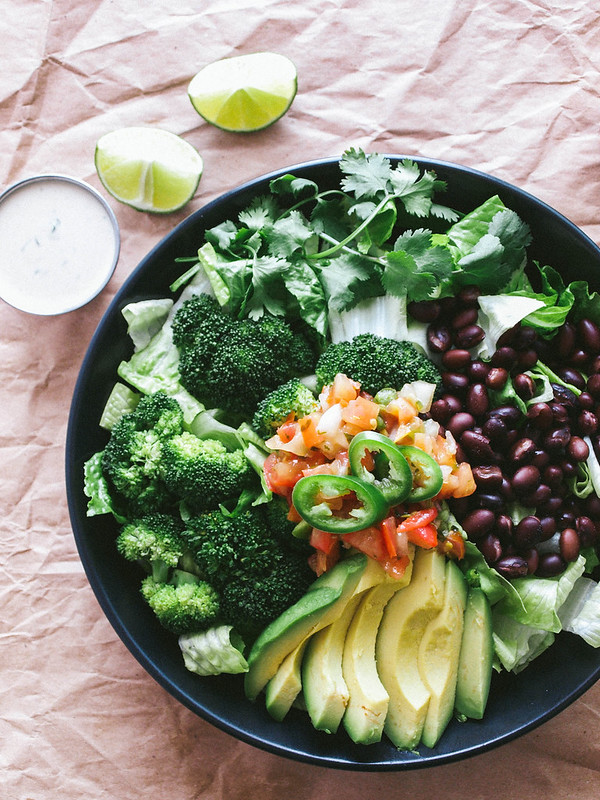
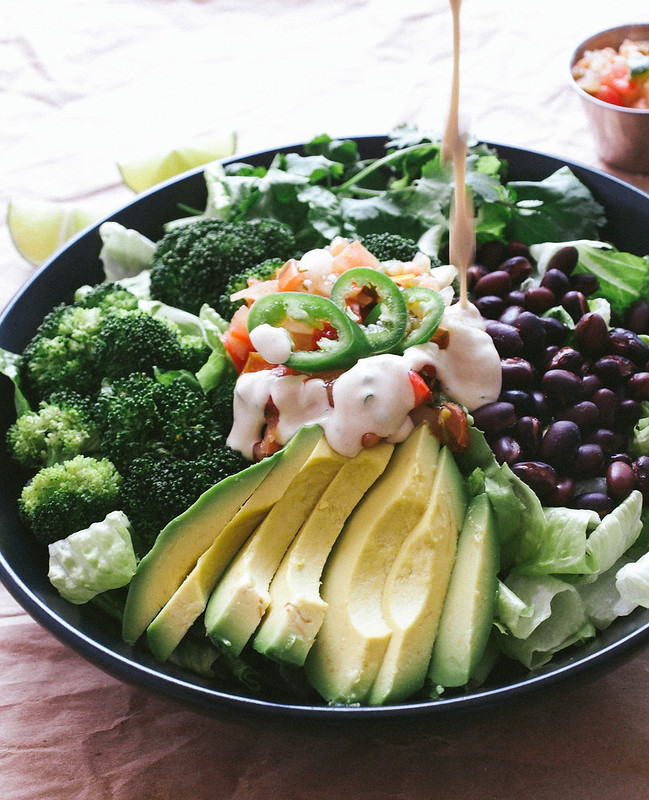
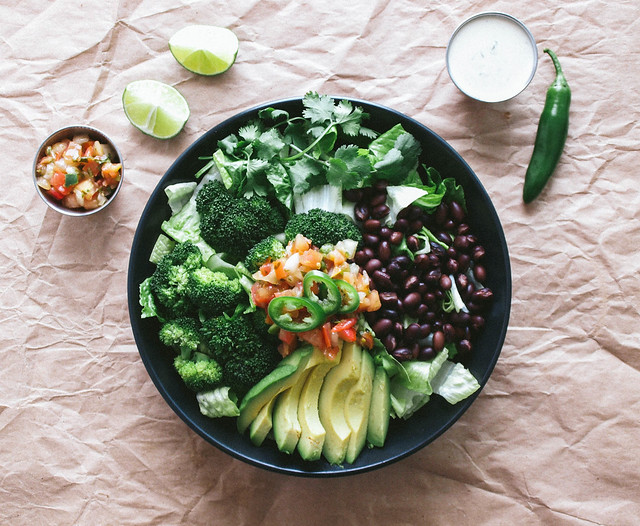
        Hello September! The weather here is still in the upper 90's so I have another salad to share with you. Not much cooking going on here. I've been opting for throw together salads that meet my needs and keep me coming back for more. The inspiration for this salad came about by a recent visit to El Pollo Loco, a local fast food chain. I'm the only vegan in the house and can usually find suitable meals for myself when dining out. Fast food is a little more difficult than sit down dining but I can rework a menu item most of the time. In this case, I ordered their Avocado Salad, omitting the cheese and replacing the chicken with extra black beans (it already came with some). Instead of using their dairy based creamy cilantro dressing, I ordered a couple extra sides of pico de gallo and had myself a great meal. I enjoyed it enough that I wanted to recreate it at home using a creamy cumin lime tahini dressing and it's really quite wonderful! I love the tender steamed broccoli and the creaminess the avocado adds along with the cool crisp romaine lettuce. Black beans complete the salad adding a nice dose of protein. I used my beans at room temperature but you can heat them if you prefer. The salad is easy to throw together and is full of great flavor and texture. A great lunch or dinner salad that's nutrient dense and will fill you up perfectly!

        BLACK BEAN, BROCCOLI & AVOCADO SALAD + CUMIN LIME TAHINI DRESSINGBLACK BEAN, BROCCOLI & AVOCADO SALAD + CUMIN LIME TAHINI DRESSING
        BLACK BEAN, BROCCOLI & AVOCADO SALAD + CUMIN LIME TAHINI DRESSING

        Need a salad inspiration, this is it!

        BLACK BEAN, BROCCOLI & AVOCADO SALAD + CUMIN LIME TAHINI DRESSING

        BLACK BEAN, BROCCOLI & AVOCADO SALAD + CUMIN LIME TAHINI DRESSING

        Ingredients
        • 2 romaine hearts, chopped
        • 1 can (15oz.) black beans, drained and rinsed
        • 1 1/4 cup broccoli florets, steamed
        • 1 avocado, sliced
        • 1/3 cup pico de gallo
        • cilantro sprigs
        • 1 jalapeno or serrano chili, sliced and most seeds removed

        Dressing
        • 3 heaping tablespoons tahini
        • 1/3 cup water
        • juice of 1 lime
        • 1/8 teaspoon cumin 
        • pinch of salt
        • 2 teaspoons finely chopped cilantro

        In a small bowl, combine the dressing ingredients, except for the cilantro. Use a tad more water as needed to thin. If dressing is too thin, add more tahini. Once blended to your liking, taste for flavor, stir in cilantro and set aside.

        Steam your broccoli just until al dente and bright green using a bamboo steamer, double broiler or preferred method.

        Add romaine to your serving dishes, top with black beans, broccoli, avocado, pico de gallo, a few sprigs cilantro and slices of chili peppers. Top with dressing and enjoy!

        Serves 2.

        Notes:

        This is a great place to add a sprinkle of seeds. Try using pepito's (pumpkin seeds), sunflower seeds or hemp hearts.

        If you don't have tahini on hand, try using extra pico de gallo and a squeeze of lime. I find it works great! You may even opt to use a dollop of hummus.

        Use spinach or any leafy green of choice.


        Enchiladas Verde w/ Cashew Crema

        Enchiladas Verde w Cashew Crema

        I love enchiladas...not the kind with tons of processed cheese, be it vegan or otherwise, but the kind just like this one...fresh veggies and fresh sauce. It may not look like much but these were super! This is straight up casual dining at its best. Unfortunately it doesn't plate as well as I was hoping so make sure to keep this amongst your closest friends and family who don't mind a messy yet delicious meal. The verde sauce was amazing. I made it the day before so it could really set and combine flavors. It would make for a great salsa or even a taco salad dressing. And this version of the cashew crema is nice with the smoked paprika flavor, giving it just a touch of the smoky paprika flavor (add more if you like). Another cashew cream that would work fantastic here is this 'Cilantro Lime Cashew 'Sour Cream'.  

        Enchiladas Verde w Cashew Crema

        I didn't go to far from the original recipe as I loved everything about it and it was fantastic. I added some black beans for protein and carrots for more color. Also, if you don't want to make the verde sauce, feel free to use a good brand pre-made verde sauce instead. But I highly recommend making your own as it is delicious!

        Enchiladas Verde w Cashew Crema

        Enchiladas Verde w/ Cashew Crema

        Cashew Crema
        1 cup raw cashews, soaked for 2+ hours
        1 teaspoon apple cider vinegar (optional)
        2 tablespoon fresh lime or lemon juice
        1/4 teaspoon smoked paprika
        1/2 teaspoon onion powder
        salt, to taste
        1/2 - 3/4 cup water

        Verde Sauce 
        2 lb fresh tomatillos, husked and quartered
        1 medium red onion, coarsely chopped
        2 garlic cloves, chopped
        1 jalapeƱo, seeded and coarsely chopped
        2 cups vegetable broth
        1/2 cup parsley or cilantro, chopped
        himalayan salt & cracked pepper

        Enchiladas
        1 medium zucchini, chopped into 1/2″ pieces
        2 ears of corn, shucked with the corn cut off the cob
        3/4 cup or 1/2 pint cherry/grape tomatoes
        1 carrot, peeled and diced (optional)
        olive oil
        1/2 -1 teaspoon cumin
        himalayan salt & cracked pepper
        1 can black beans, drained and rinsed
        9 - 12 corn tortillas

        Start with your paprika cashew crema, this can be made in advance, a day or two and kept in the fridge, or you can assemble it while the enchiladas are cooking as long as you soak your cashews first. Soak cashews in two cups water for 2+ hours, drain and rinse well. Place cashews, lemon/lime juice, paprika, onion powder, salt and 1/2 cup water into food processor/blender and blend until smooth, about 4 minutes or so. Add additional water, 1 tablespoon at a time, to thin to desired consistency. Taste for flavor. Add more paprika to your liking, but keep in mind the color will change.

        Preheat the oven to 400 degrees Fahrenheit.

        Place the zucchini, corn and tomatoes in a large bowl and drizzle with 1-2 tsp olive oil. Add cumin and a pinch of salt & pepper, toss to coat with the olive oil. Spread the vegetables in an even layer on a roasting pan lined with parchment paper, silpat or lightly greased with oil and roast for 15 - 20 minutes. Remove and set aside. 

        While the veggies are cooking, start your sauce, this can also be made a day or two in advance. Place the tomatillos, onion, garlic, jalapeno, and vegetable broth in a sauce pot and bring to a boil. Lower to a simmer and cook until tender, about 15 minutes. Transfer to a food processor/blender, add the parsley or cilantro, salt and pepper to taste and process until smooth. Set aside. You may need to process your verde sauce in two batches. It makes quite a bit. 

        Once everything is ready, start putting the enchilada's together. Wrap your corn tortillas in a dampened paper towel and microwave 45 seconds. This steams the tortillas and makes them pliable. Pour 1/3 of the sauce into the bottom of a 9×13 baking dish. Fill each tortilla with about 1/4 c of the vegetable mixture, a spoon full the black beans, roll up and place seam side down in the baking dish. Once filled, pour the remaining sauce on top of the enchiladas. Cover with foil and bake 25 minutes at 400 degrees F, until heated through. You may also like to leave the foil off for the last 10 minutes to let the exposed tortillas get a bit crispy.

        Serve with the cashew crema. A side of sliced avocado would be great too.

        If you only use half of the recipe like I did, the left overs make great taco fillings.

        Enjoy!

        Raw Taco Salad + Nut Meat + Cilantro Lime 'Sour Cream'

        Raw Taco Salad with Lime Cilantro 'Sour Cream'

        I'm in love with this raw nut meat and have been wanting to try it for awhile. I ran across a recipe from Rawified for 'Raw Nut Meat' and immediately agreed with the use of mushrooms in the nut meat and knew this would be a winner. Since becoming a vegan, mushrooms were the replacement for meats in most meals because of their wonderful meatiness, and they are so earthy...I just love them. But if your not into mushrooms, don't fear because this will still work great for you as you can't taste them at all. One of the reasons I love the addition of mushrooms in the nut meat is to help make a good serving size without too much fat. Although it's good fat, too much is too much. It made perfect sense to me that they should be a key ingredient in raw nut meat. Mushrooms are full of goodness, same as the walnuts used in this recipe. This mixture is full of omega's, protein, healthy fats and trace minerals from the mushrooms such as selenium. This was just delicious, clean and simple just the way I like my foods. The nut meat is definitely a keeper for my life as a vegan as well as this colorful salad. Goodness everywhere on my plate.

        Let's begin with the nut meat as it is the true feature here...

        Raw Taco Salad with Lime Cilantro 'Sour Cream'
        Raw Taco Salad with Lime Cilantro 'Sour Cream'Raw Taco Salad with Lime Cilantro 'Sour Cream'

        Raw Nut Meat

        Ingredients
        • 1 cup walnuts
        • 1 cup mushrooms
        • 1 tablespoon nama shoyu or tamari
        • 2 teaspoons cumin
        • 1/8 teaspoon chipotle powder or cayenne

        Place ingredients in food processor and pulse until coarse and chunky, don't over blend or it will become a spread, pate like consistency.

        Serves two.


        That's it...so easy and so good! 

        I know you will love it as much as I do. Now for some added extras to top things off. It's based off a basic cashew sour cream with wonderful added flavors of lime and cilantro...a great accompaniment to this salad. 

        Raw Taco Salad + Mushroom Nut Meat + Lime Cilantro Sour Cream

        Lime Cilantro 'Sour Cream'

        Ingredients

        • 1/2 cup cashews, soaked for 2 - 3 hours 
        • 1/4 cup water, give or take
        • 1 small lime, squeezed
        • 1 teaspoon apple cider vinegar
        • 1 clove garlic
        • few sprigs cilantro
        • pinch of mineral salt

        Soak your cashews in at least 1 cup water for 2 - 3 hours. Drain well. 

        Add ingredients to blender or food processor, blend/process, scraping down the sides every now and then until smooth. Add extra water 1 tablespoon at a time if needed. For thicker cream use less water, for thinner use more. I found that I needed to add more water to get to my consistency. Add a dollop or thin enough to add a good drizzle over the whole salad.


        Now on to build our taco salad... 

        Raw Taco Salad with Lime Cilantro 'Sour Cream'

        Raw Taco Salad

        Ingredients
        • romaine lettuce, chopped
        • handful grape tomatoes, halved
        • bell peppers (any color), diced
        • scallions, thinly sliced
        • cilantro, chopped
        • pepitas, to garnish
        • lime wedges, to serve
        • sliced avocado, to serve
        • Nut meat (recipe above)
        • Lime Cilantro Sour Cream (recipe above) or Basic Cashew Sour Cream (shown)

        Use as much as you like of anything or feel free to add other ingredients like fresh corn, sliced jalapenos, etc. Serve with a few juicy limes as your dressing.

        Add a dollop of cream or a drizzle depending on how thick/thin your cream is.

        It was a fairly simple salad that will leave you feeling fresh and satisfied!

        Enjoy!