.

Showing posts with label parsley. Show all posts

Creamy Lemon Herb Dressing

Creamy Lemon Herb Dressing
Creamy Lemon Herb DressingCreamy Lemon Herb Dressing

My last post of 2012. What a great year this has been! Food blogging and taking pictures has been a fun and learning experience. I've improved much but still have a ways to go. Meeting like minded people and being inspired everyday has been amazing. I look forward to what adventures lie ahead. I leave you all with this really wonderful dressing. I know many will be eating healthier as a New Year's resolution and this dressing will help you get some freshness in your meal plans. I personally found myself tipping the bowl to get the last of it. It's light and refreshing on its own, adding it to a fresh salad just makes it that much better. I've been waiting to find a great creamy style dressing that's easy to make at home and finally I've found one that fits my needs. This is raw, nut free, soy free, gluten free and of course vegan. I think this will amaze you as much as it amazed me. Happy New Year's to you all....Cheers!

The base of this recipe is hemp hearts. If you're unfamiliar with hemp seed hearts, you will want to add these great little seeds to your lifestyle. They are easy to sprinkle in smoothies, on salads, add some to the top of your toast and jam. In this recipe they create a wonderful creaminess. Hemp seeds are a great source of omega 3 & 6 and are a high quality complete protein. Four tablespoons, or 1/4 cup, of hemp seeds contain 15 grams of protein, and they're also a good source of fiber containing 2.5 grams per quarter cup. They also contain high concentration of vitamins and minerals such as iron, vitamin E, thiamine, riboflavin, folic acid and many other micro-nutrients that your body needs. Another great thing about hemp seeds is that they do not need to be soaked to aid in digestion, they can be eaten raw and the body will absorb and digest all nutrients readily and easily. They contain a lot of nutrition in a small package. If you love hemp hearts, you may also like my other recipes containing hemp hearts. Raw Healthy, Happy, Hemp Seed Cookie Balls & Raw Creamy Miso Soup w/ Mushrooms...a few great ways to use hemp seeds!

Now, let's make some delicious dreamy creamy dressing...

Creamy Lemon Herb Dressing


Creamy Lemon Herb Dressing

Ingredients
  • 1/2 cup hemp hearts
  • 1/3 cup water, plus more as needed for thinning
  • juice of 1 medium lemon
  • a few strands chives, broken into 1 inch pieces
  • a few sprig leaves fresh dill 
  • a few sprig tops fresh cilantro and/or parsley
  • dash or two garlic powder
  • dash or two onion powder
  • himalayan salt to taste 

Using a blender, I used the magic bullet for this, combine ingredients and blend until smooth. Add water 1 tablespoon at a time until desired consistency. Taste for flavor adding anything extra to suit your taste...more lemon?...more herbs?...more garlic or onion powder? Chill before serving. Makes about 5 servings.

Store in an air tight container in refrigerator for up to a week.

Note: I have not made this in a regular blender. The magic bullet works wonders but if you don't have one this should work fine your blender at home. You may consider doubling the recipe if using a larger blender. Mix and match herbs to suit your taste.

Salad shown consists of romaine lettuce, grape tomatoes, cucumbers and topped with cracked pepper...simple and delicious!

Enjoy!


How to Freeze Fresh Herbs:

Fresh is always best, but I do find that I buy fresh organic herbs and then they get thrown away. If you find that is the case for you, below is a few simple ways to freeze your herbs making them easily ready for this recipe and others.

Fresh dill sprigs can be frozen for up to a couple months, but they will darken in color. There is no need to thaw before using. Frozen dill weed will still always have more flavor than dried dill. Below are two methods for freezing dill.

Cilantro is best used fresh, freezing turns it mushy, so fresh is best for great flavor.

Parsley is another herb that freezes well. You can freeze parsley the same as dill by using one of the two methods provided below.

Chives also freeze well. Frozen chives have the same flavor as fresh chives. To freeze chives you can cut the strands into small pieces, lay on cookie sheet and place in freezer for about 20 minutes. Once frozen place in air tight container, should last up to year. You can also freeze by using the ice cube tray method below.

Whole Stalks: 

Dill: Place a bunch of dill, stalks and all, in a reusable plastic bag or airtight container. Once the dill freezes, use clean kitchen shears to remove the needed portion, then return the remaining dill to the freezer. Entire stalks can be used to flavor soups and stews, then use a slotted spoon to remove the dill just before serving.

Parsley: Chop parsley into small pieces, place in reusable plastic bag or airtight container.

Ice Cubes:

An ice cube tray provides serving size cubes of herbs that can be tossed into soups, stews and other hot dishes. Dice the herbs, place a small amount in each section of an ice cube tray, add water and freeze. Once frozen, remove the cubes and store them in resealable plastic bag or freezer container. You can also add veggie broth instead of water, or combine herbs as well for a ready to use herbal blend.
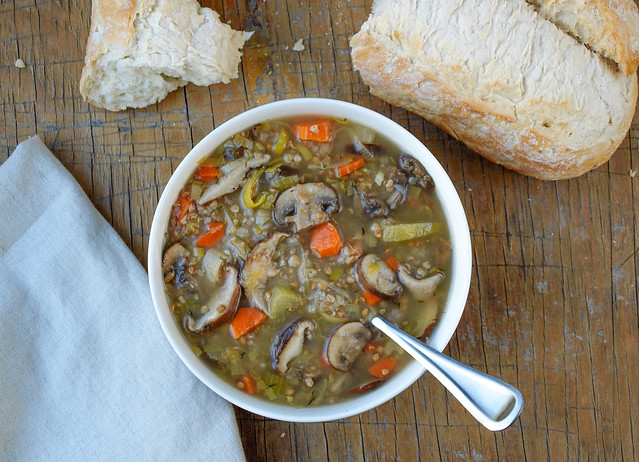
MUSHROOM & BUCKWHEAT SOUP

Mushroom & Buckwheat Soup

The temperatures here have been steadily on the cool side. It's been rainy, windy and chilly but absolutely beautiful! We had our first dusting of snow on the mountains a couple days ago. I love this time of year when the temperatures drop. It's time for beanie’s, sweaters and snuggling up with a bowl of soup or chili to keep warm. I've been making a lot of chili lately and decided it was time to add another soup to the recipe collection. This soup was inspired by a friend of mine who shared a picture of her mushroom & buckwheat soup on Facebook and I fell in love. Off I went googling to research and pull together this recipe. 

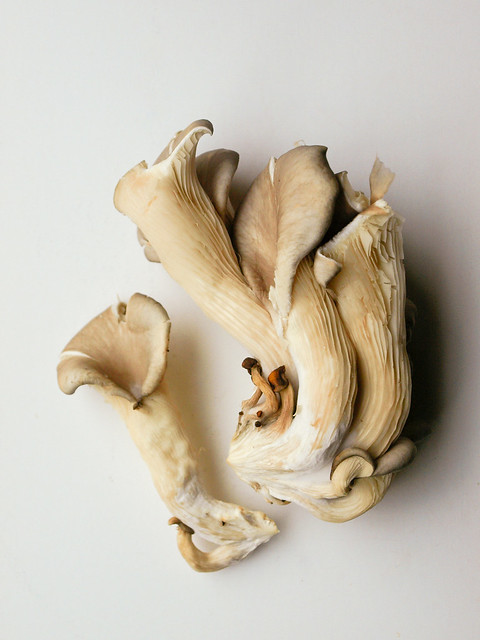
I have two firsts here, for one I am using toasted buckwheat groats, aka kasha, (usually I use raw) and the other I will be trying out oyster mushrooms. I also get a chance to use fennel seeds which I am in love with right now! But don't worry if you don't have any on hand, the thyme called for will do just fine. In fact you can play around with the herbs using sage, smoked paprika, a bay leaf while cooking, a pinch of cayenne or simply use no herbs and opt for salt & pepper to taste. As for the mushrooms, you can use a variety or keep it simple with just one type. If you’re feeling exotic, try using some wild mushrooms. If you’re feeling simple, use regular button mushrooms for convenience and ease. No matter what kind of mushrooms you use I'm sure you'll enjoy this simple honest soup!

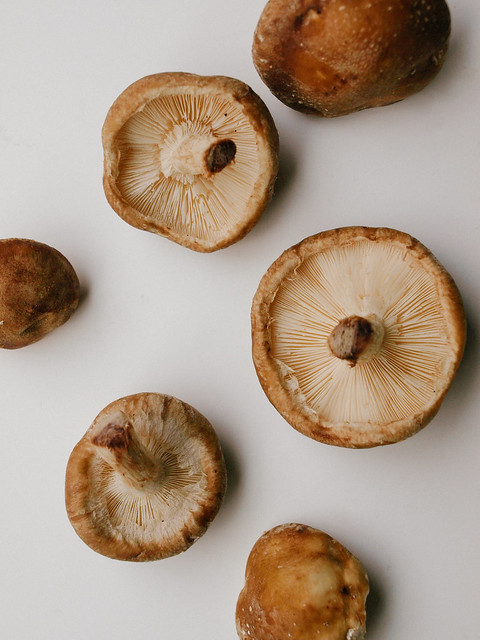
Mushroom & Buckwheat Soup - Oyster MushroomMushroom & Buckwheat Soup - shitake Mushroom
Mushroom & Buckwheat Soup

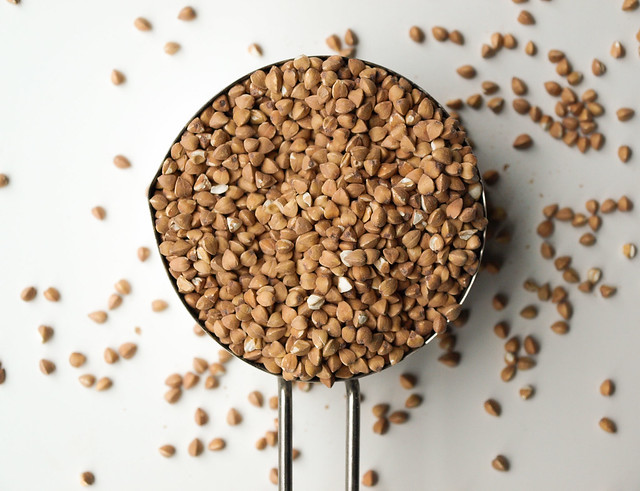
Let's talk a little about buckwheat before we get to the recipe. Despite its name, buckwheat, aka kasha once toasted, does not contain wheat or belong to the wheat family. It's a gluten free seed, sometimes considered a grain, with a good amount of protein, containing 6 grams per 1/4 cup dry. They have a mild, earthy flavor. Once roasted, the flavor will intensify lending a nuttier flavor. Buckwheat groats work great in soups, cereals and raw cookies so far that I have tried. I'm sure there are many more uses for this nutritious seed. In this recipe they will plump up and soften making them a great replacement for the traditional barley that is served in this soup. You can purchase these raw buckwheat groats from Bob's Red Mill or these toasted buckwheat groats from Arrowhead Mills. I made the mistake of buying the latter but wasn't too disappointed as they are great as well, but I prefer the raw ones for cereals like this Bircher Muesli and raw dessert truffles like these Coconut Lemon Bombs. I used the toasted ones here with a first time success but I'm sure the raw buckwheat groats would be just as tasty, if not better!

Mushroom & Buckwheat Soup

MUSHROOM & BUCKWHEAT SOUP

Ingredients
  • 2 tablespoons olive or grapeseed oil
  • 2 leeks, sliced lengthwise and thinly sliced (green and white part only) or 1 large onion, diced
  • 2 celery stalks, sliced (a few chopped leaves is great too)
  • 2 large carrots, peeled and diced
  • 1 1b. (16 oz) mushrooms, sliced
  • 1 cup buckwheat groats (use either raw or toasted), rinsed
  • 2 teaspoons thyme
  • 2 teaspoons fennel seeds
  • 7 - 8 cups vegetable or mushroom broth, or 7 - 8 cups water with 2 vegetable boullion cubes
  • juice of 1 lemon, optional
  • mineral salt & fresh cracked pepper, to taste
  • 1/2 cup flat leaf parsley, chopped to garnish

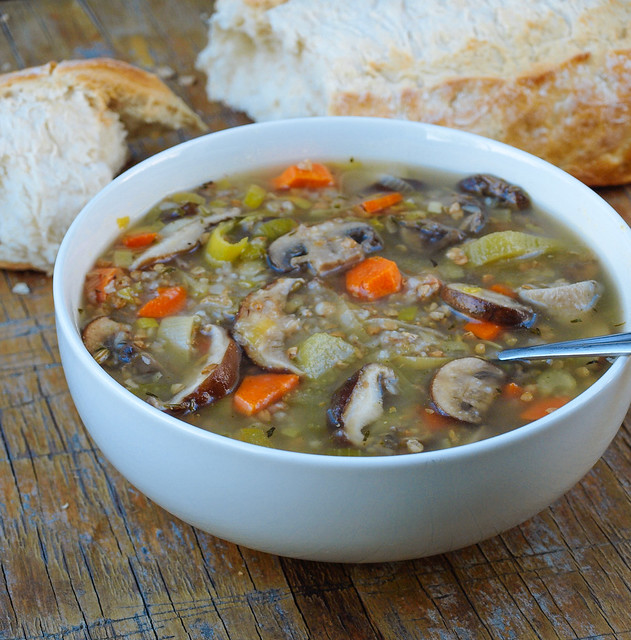
In a large dutch oven or stock pot, heat oil over medium heat, add leeks and celery, cook, stirring occasionally until softened, about 5 minutes. Add in carrots and mushrooms, cook another 4 minutes. Add in groats, thyme, fennel seeds, broth, lemon juice and salt & pepper, bring to a boil, partially cover, reduce heat to low and simmer for 15 minutes.

Serve garnished with a sprinkle of parsley and a side of crusty artisan bread or gluten free bread of choice.

Serves 4 - 6

Notes:

For the mushrooms, feel free to use one or more of the following...shitake, oyster, porcini, button, cremini or baby bella's. I used a combination of shitake, oyster and baby bella's but all one kind would be great too! Feel free to add extra mushrooms to the soup if you like!

For the liquid I used about 8 cups. Start with the smaller amount and add more as you see fit.

I completely forgot to top with parsley for the photos. It will add a nice fresh bright flavor to the soup!

Feel free to use pearl barley, which is not gluten free, in place of the buckwheat groats. Just be sure to cook your soup for about 20 to 30 minutes, until barley is tender.

Enjoy!

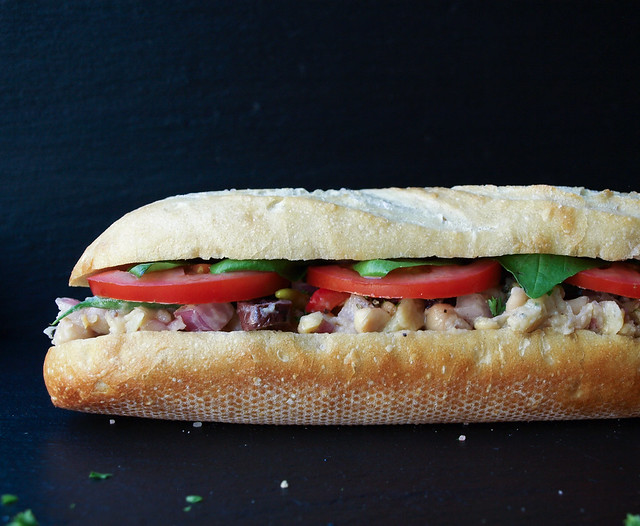
Pan Bagnat (White Bean Niçoise Salad Sandwich)

Pan Bagnat (White Bean Niçoise Salad Sandwich)

This recipe was inspired by a recent post on BuzzFeed for 27 Awesome Easy Lunches To Bring To Work. I'm thrilled to have been included in the roundup with the Mashed Chickpea Salad Sandwich! There is also a few other great vegan options as well so be sure to take a look. In it I saw a Pan Bagnat from Food 52 and had to recreate it for us plant powered lovers. I love Food 52, and have always been inspired by the simplicity and beauty of their photography. And of course the recipes are great too! I have a few in my collection that were inspired from there like this Mushroom Bourguignon and these Gluten Free Banana Flap Jacks. It's a great community if you haven't heard of it yet! In fact, they have a vegan column called The New Veganism with Gena Hamshaw of Choosing Raw as the recipe creator. Be sure to take a look and be inspired by both the recipes and photography!

Pan Bagnat (White Bean Niçoise Salad Sandwich)

The pan bagnat (meaning 'bathed bread') is a classic specialty sandwich served in and around the region of Nice, France. It's a sandwich version of the salade niçoise which is a combination of tuna, anchovies and/or sliced hard boiled egg mixed with raw vegetables like red bell pepper, green beans, radishes, olives and onion. You will also find there to be olive oil and possibly vinegar, salt and pepper. Here we'll be using a few of these traditional ingredients but veganizing this classic using white beans as our protein. And I can guarantee you this is just as delicious if not better than the traditional version! Not only does the salad make for a great sandwich filler but it would be just as good on a bed of leafy greens as well. This recipe may give you leftovers, and that's a good thing because it only gets better in the next day. One day make a sandwich for work, home or a picnic and the next top it on some leafy greens or just eat as is. It's pretty amazing on its own!

Pan Bagnat (White Bean Niçoise Salad Sandwich)Pan Bagnat (White Bean Niçoise Salad Sandwich)
Pan Bagnat (White Bean Niçoise Salad Sandwich)

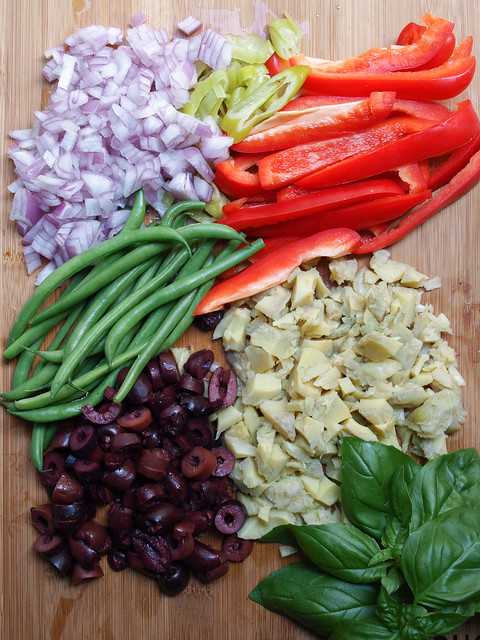
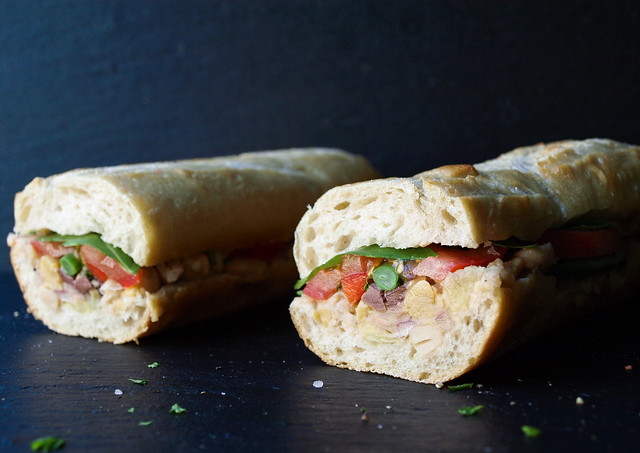
I love the saltiness from the olives here, you can add a tablespoon of capers if you like. The fresh bell pepper and blanched green beans add a nice crunch and sweetness while the onion and artichokes add another layer of flavor. Tie the vegetables together with the white beans, dressing made of olive oil, lemon and mustard, add a good sprinkling of mineral salt & plenty of cracked pepper and this salad will be another favorite to come back to time and time again!

Pan Bagnat (White Bean Niçoise Salad Sandwich)

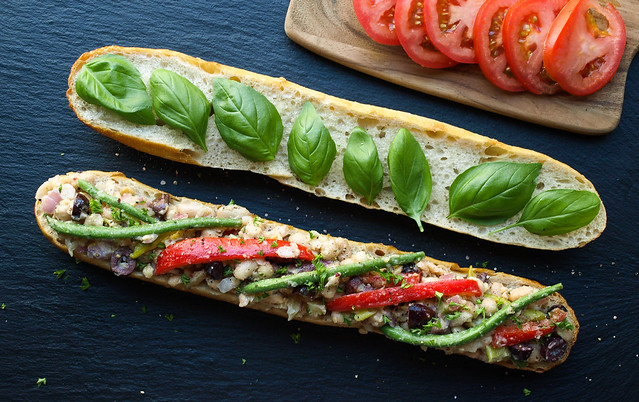
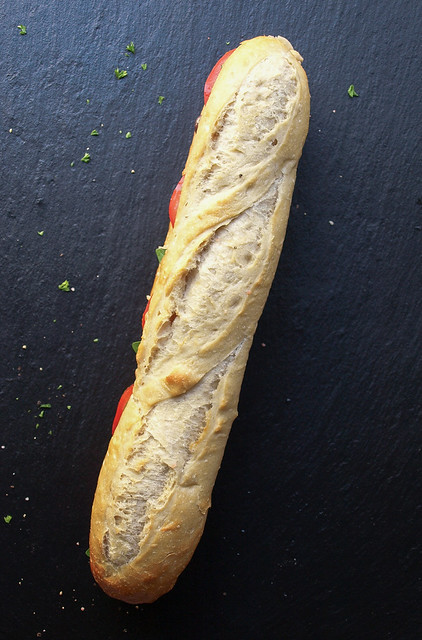
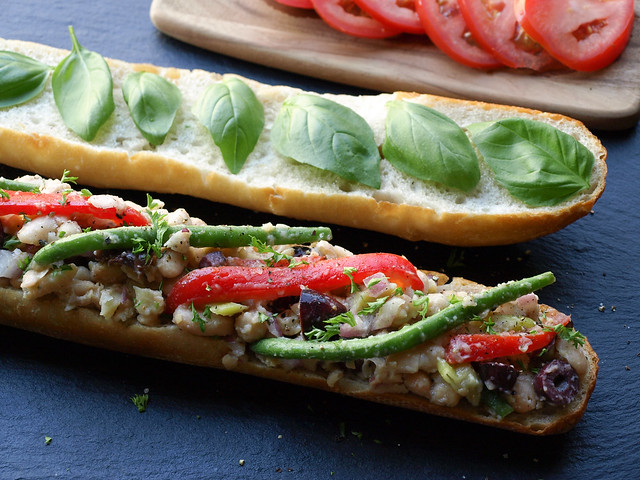
To create the traditional pan bagnet you'll first want to hollow out the insides of your bread. I left the top on this alone but from now on will hollow it out as well. It gives more room for your salad, helping to hold it together better while using less bread at the same time which is great too. Brush the insides of the bread with olive oil. Layer your bottom half with the salad. Since we're going to press the sandwich you can pile it on pretty good making a very hearty sandwich. Add your tomatoes across the top. Then layer basil, top with mineral salt & cracked pepper and remaining slice.

Pan Bagnat (White Bean Niçoise Salad Sandwich)

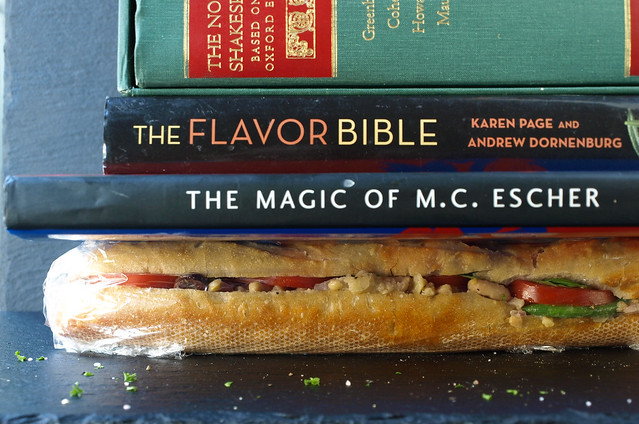
Wrap your sandwich tightly in saran wrap, fold ends under and press with a few heavy books or pots. This is an important part or your sandwich will be very messy and fall all over. Trust me, I know this from first hand experience. Plus, this helps the bread soak up the moisture of the salad dressing making for 'bathing the bread'. So be sure to press your sandwich, even if just for an hour, it will make all the difference...although overnight is even better. This makes a perfect grab and go sandwich for lunches and picnics, once pressed it's ready to go!

Pan Bagnat (White Bean Niçoise Salad Sandwich)

 Pan Bagnat (White Bean Niçoise Salad Sandwich) 

Ingredients 
  • 1 can (15 oz.) cannellini or chickpeas (garbanzo beans), drained and rinsed well or 1 1/2 cups cooked white beans
  • 1/2 red bell pepper, thinly sliced
  • 1/4 cup blanched French green beans, cut into half or thirds
  • 1 jar artichoke hearts in water, drained and chopped
  • 1/2 red onion, diced
  • 3/4 cup kalamata olives, pitted and sliced
  • 2 tablespoons parsley, finely chopped
  • 1 -2 greek pepperoncinis, diced (optional, not a traditional ingredient)
  • mineral salt & fresh cracked pepper, to taste
Dressing
  • 2 - 3 tablespoons extra virgin olive oil
  • juice of 1 large lemon (about 2 tablespoons)
  • 1 heaping teaspoon Dijon mustard
To assemble
  • 1 French baguette, ciabatta loaf, Pain de campagne, boule or artisan loaf of choice (even good sized rolls would be great)
  • extra virgin olive oil, to brush
  • 8 - 10 basil leaves
  • 1 medium tomato, thinly sliced
  • mineral salt & cracked pepper

Cut bread in half lengthwise. Remove some of the insides of each half making a trough for the filling (this will help keep the filling inside the sandwich when eating). Brush both halves with extra virgin olive oil.

In a small bowl, mix the dressing ingredients together until dijon has emulsified. Set aside to let the flavors develop.

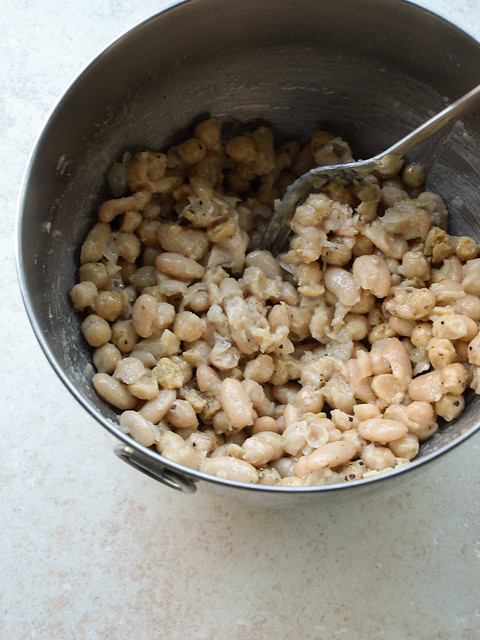
In a medium/large mixing bowl, add beans and roughly mash leaving about 2/3 whole beans. Add in dressing to the beans and mix well. Add in the bell pepper, green beans, artichokes, red onion, olives, parsley, optional pepperoncini and salt & pepper. Mix to combine.

Layer your bottom half of bread with a good serving of the mixed salad. Add tomatoes across the top, then top with basil leaves and salt & pepper. Top with other slice of bread. (You can also vice versa this layer order starting with the basil and tomato on the bottom and salad on top.)

Wrap sandwich tightly in saran wrap and press with a few heavy books/pots for at least an hour to overnight. If overnight, be sure to press in the refrigerator.

When ready to serve, slice in half or make as many slices as you like. Serve chilled or at room temperature.

Store any leftover salad mixture covered in the refrigerator for up to 5 days. 

Notes:

The cannellini beans have more protein and fiber than chickpeas so if that is a priority use them. Otherwise use your preferred white bean.

Try adding a splash of red or white wine vinegar to the dressing if you like.

As with all my recipes, add/subtract ingredients to your liking. Try adding a tablespoon or so of capers. I've had someone sub in asparagus for the green beans. Add sliced radishes along the top.

I edited this recipe on 11/10/13 at 12:15pm so it wouldn't make so much leftovers. The old recipe called for 2 cans white beans, 1 red bell pepper, 1/2 cup French green beans, 1 cup kalamata olives and 4 tablespoons olive oil. The old recipe was delicious, it just made a bit too much but of course feel free to use the old version instead so you'll have plenty of leftovers!

Enjoy!


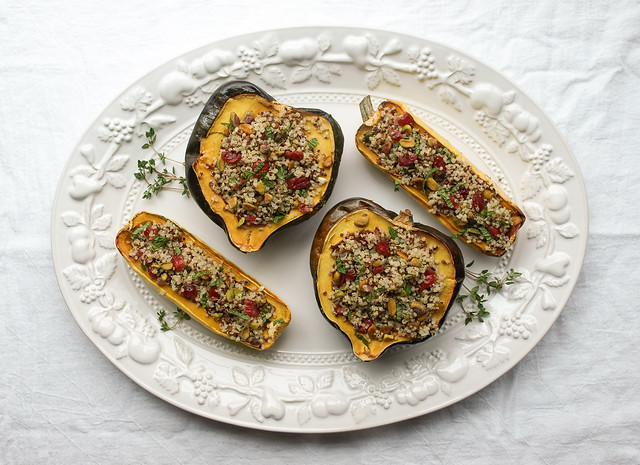
Stuffed Winter Squash + Quinoa, Cranberry & Pistachio

Stuffed Winter Squash + Quinoa, Cranberry & Pistachio

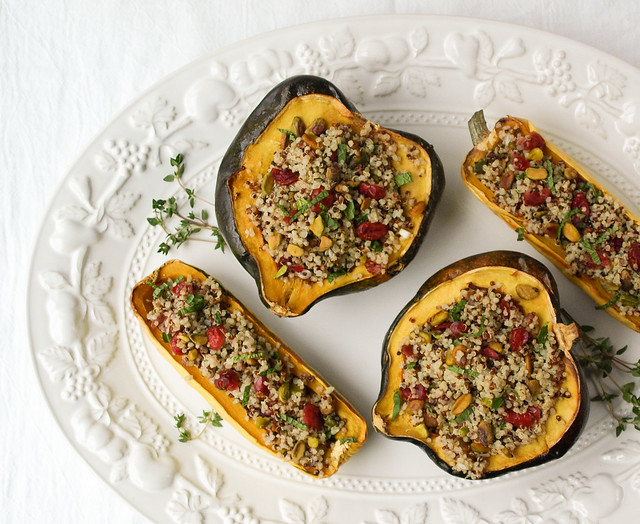
This is the time for winter squashes and all their wonderful flavors. These stuffed squashes would make for a pretty presentation on any holiday table, or simply enjoy anytime during the season for a flavorful and filling meal. This recipe can be dressed up fancy or kept simple, depending on your mood or occasion. Keep it to a few ingredients while adding more to add complexity to the dish. I've made this with just six ingredients (squash, quinoa, cranberries, pistachios, oil and salt) and it was great, adding a few other components give it more depth and flavor. This recipe is more of a template for you to create a quinoa stuffing to your liking. I encourage you to play around with the ingredients adjusting to your personal tastes. 

Stuffed Winter Squash + Quinoa, Cranberry & Pistachio

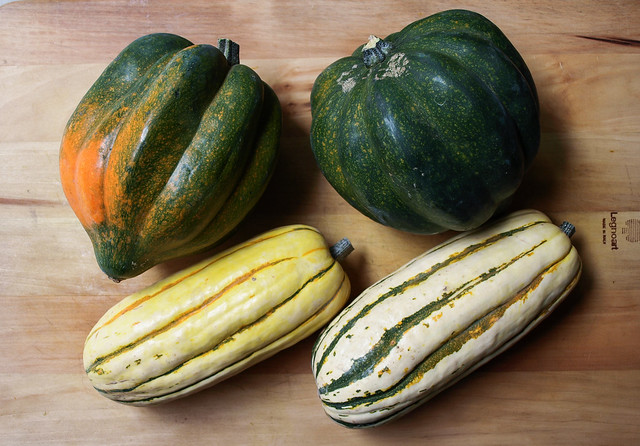
I decided to do both the acorn and delicata squash with this because they both work so well here. You can use one or the other, or both for variation at the table. I love the delicata squash because the skin is edible. The acorn squash on the other hand may have a tougher, and possibly bitter, skin making it less likely that you'll be able to eat it but it does make for a great bowl. So either way, they both are great and can cook together if doing both. 

Stuffed Winter Squash + Quinoa, Cranberry & Pistachio

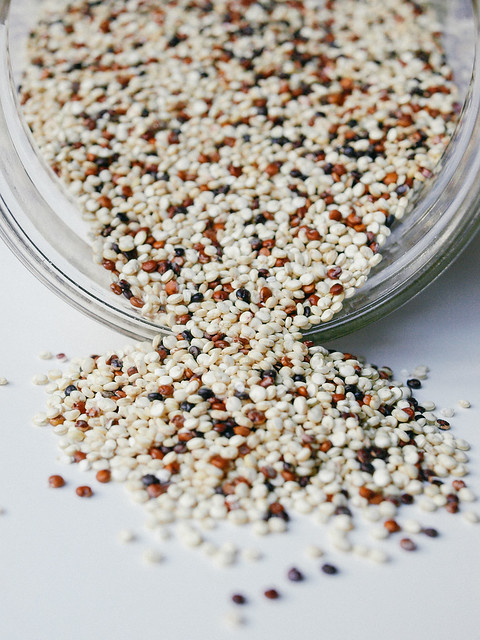
Quinoa is my favorite grain, well technically it's a seed but can be prepared like a grain. It's a complete protein, full of fiber and a good source of calcium, magnesium and iron making it a great alternative to grains. And it's gluten free. It's perfect for those on a plant based diet and those seeking nutritionally dense foods. Served warm or cool, quinoa tastes great and is such a versatile grain. Here I used a blend of pearl and tri-colored quinoa. I like blending the two so there is just a few specks of the darker quinoa.

Stuffed Winter Squash + Quinoa, Cranberry & PistachioStuffed Winter Squash + Quinoa, Cranberry & Pistachio

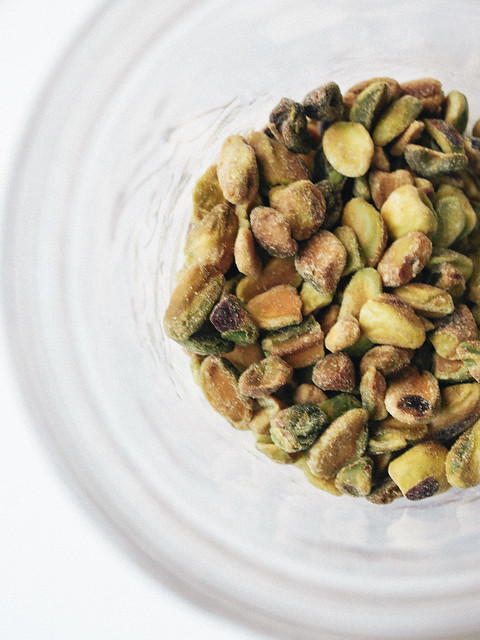
Add in some festive colors from the pistachios and cranberries and this dish is as appealing looking as it is good, and good for you!

Stuffed Winter Squash + Quinoa, Cranberry & Pistachio

Stuffed Winter Squash + Quinoa, Cranberry & Pistachio

Ingredients
  • 2 large or 3 small acorn or delicata squash
  • maple syrup
  • olive oil
  • 1 cup quinoa, rinsed well 
  • 1 3/4  cup water
  • 1/2 cup dried cranberries
  • 1/2 cup pistachios
  • 2 tablespoons finely minced shallot, optional
  • mineral salt & freshly ground pepper to taste
  • juice of 1 lemon

add complexity to the quinoa by adding one or more of the following to suit your taste:
  • pinch red pepper flakes
  • 1/2 cup chopped parsley (if your a mint fan, try 1/4 cup fresh mint)
  • 1 - 2 teaspoons fresh thyme 
  • drizzle of olive oil

Preheat oven to 375 degrees F.

Wash and dry squash. Slice each squash in half lengthwise, remove seeds. The seeds should come out easily by scraping the inside of the squash with a spoon. Lightly brush the inside of each squash with a little oil and/or maple syrup. sprinkle with a bit of mineral salt. Place on baking sheet cut side up. Bake in oven for 35 - 40 minutes, or until squash is tender and pierces easily with a fork.

While squash is cooking add 1 3/4 cup water and 1 cup quinoa to a medium size pot. Bring to a boil, cover, reduce heat to low and simmer for 15 minutes. Remove lid and let set 15 minutes. Add pistachios, cranberries, shallots, salt, juice of lemon, and any other optional ingredients. Toss to combine.

Scoop quinoa into squash halves, place back in the oven for 10 minutes to warm if needed, and serve.

Notes: 

For the quinoa I used a blend of 1/2 cup white and 1/2 cup tri-color quinoa. Feel free to use all of one type or mix and match to your preference.

Seek out organic cranberries if possible. Unsweetened is best but can be hard to find. The ones I have here are from Trader Joe's which are organic but sweetened.
Enjoy!

    Saffron Potato Leek Soup with Fried Garlic & Almonds

    Saffron Potato Leek Soup with Fried Garlic & Almonds

    This will have you smelling the finest aromas right from the get go. Its hearty and rustic with a side of something unusual. Fried garlic and almonds add a nice touch along with the hint of saffron. For the saffron, I buy mine from Trader Joe's for $5 or so, it contains a good amount. I hope you will have access to this price since it can be fairly pricey in the general stores, upwards of $15 to $20. It really pairs well with all the other ingredients leaving your house smelling wonderful. I also imagine it will taste just as good without it, so feel free to be flexible and attempt this without the saffron if need be. Either way, open the windows and let the neighbors get a wiff of this aromatic soup you have going. Potato soup never tasted so good! Recipe adapted from Food 52 Anya von Bremzen's Potato Soup with Fried Almonds. I changed up the recipe a little, mainly adding rice and leeks. I also increased the almonds for extra protein, they'll soften up a bit in the soup adding a nice light crunch too. I hope you enjoy it as much as I did!
    Saffron Potato Leek Soup with Fried Garlic & Almonds

    Ingredients
    • 2 pounds organic yukon gold potatoes
    • 2 small leeks, sliced and any dirt removed
    • 2 tablespoons olive oil
    • 3/4 cup blanched almonds (almond with skin is ok too)
    • 4 large garlic cloves, minced
    • 5 cups vegetable broth, + more as needed
    • 1/2 cup basmati or jasmine rice
    • 1 pinch saffron, partially crushed
    • mineral salt and fresh cracked pepper to taste
    • 2 teaspoons sherry vinegar or red/white wine vinegar
    • 2 tablespoons flat leaf parsley, minced

    Cut potatoes into irregular chunks by inserting the tip of a small, sharp knife into a potato and twisting until a 1 1/2 chunk comes out. Repeat until the entire potato is cut up, than continue with the remaining potatoes, set aside. You can also just roughly chop the potatoes into 1 1/2 inch chunks. Peeling is optional.

    Heat oil in a heavy pot over medium heat, add almonds and garlic, cooking, stirring frequently until golden, 3 - 4 minutes. Transfer the almonds and garlic to a bowl to cool slightly. Add leeks and a 2 tablespoons of water to the pot and cook, stirring occasionally, until softened, about 4 minutes. Add potatoes, vegetable broth and rice, bring to a boil, cover, reduce heat to low and simmer 40 to 45 minutes.

    In a food processor, place the garlic and almonds, pulse until desired texture. I left mine fairly course. Add all but 2 tablespoons to the soup. Season soup with salt and pepper to taste.

    Remove a few tablespoons of soup from the pot and place in a small bowl, add saffron and let steep for 2 minutes, add to the soup. Add a little more water or broth if the soup seems to thick and continue to cook.

    Once soup is ready, if you'd like it creamier, break up or mash some of the potatoes using a sturdy spoon. Add the vinegar to the reserved ground almond mixture and stir in the soup. Add the parsley and cook for a minute. Taste for seasonings, adding a little more salt and vinegar if necessary.

    Serve with dense whole grain or artisan bread.

    Notes: 

    If using almonds with the skin, just know that the skins will fall off in the soup. For me this is not an issue (I like the added fiber) but if you're serving for company you may consider using blanched almonds.


    RUSTIC CABBAGE, POTATO & WHITE BEAN SOUP

    RUSTIC CABBAGE, POTATO & WHITE BEAN SOUP

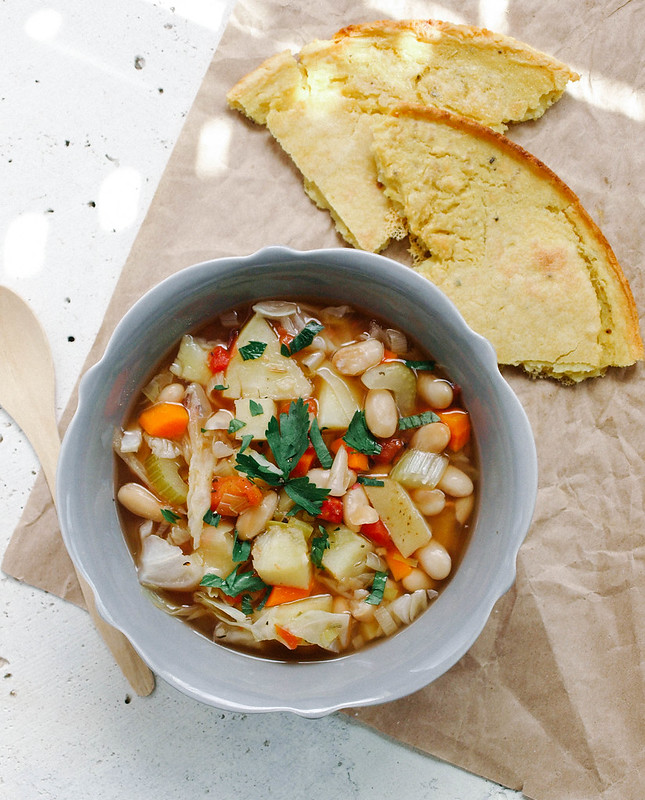
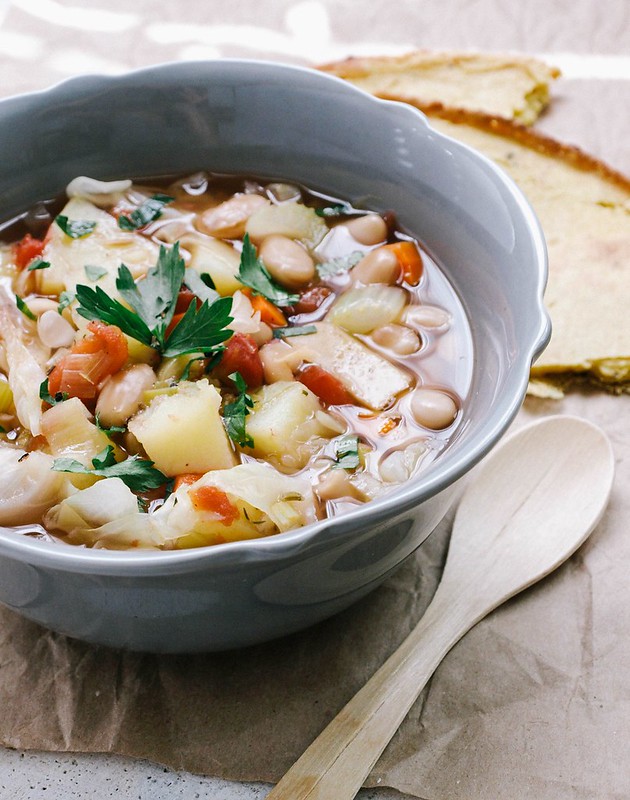
    Wondering what to do with a half head of cabbage and potatoes I had sitting around brought about this hearty soup. It's brimming with vegetables, white beans and spices and is enough to feed a small crowd. Add some socca or crusty bread to the meal and you're all set. The socca I made here was seasoned simply with salt & pepper and can be whipped up while the soup is cooking. It's a nice accompaniment, not so much of a soaking bread like crusty bread, but delicious and filling. The soup in itself makes for a complete, nutritious meal with the beans adding a good amount of protein. I used leeks in this recipe, they lend a nice mellow onion flavor, but you can sub in an onion if you like. This turned out to be a great place to use up the leftover produce. I love cabbage in soups, this will be made many times to come. I'm happy to share another hearty soup for the recipe collection to inspire your senses, keeping you plant strong and loving it! 

    RUSTIC CABBAGE, POTATO & WHITE BEAN SOUP

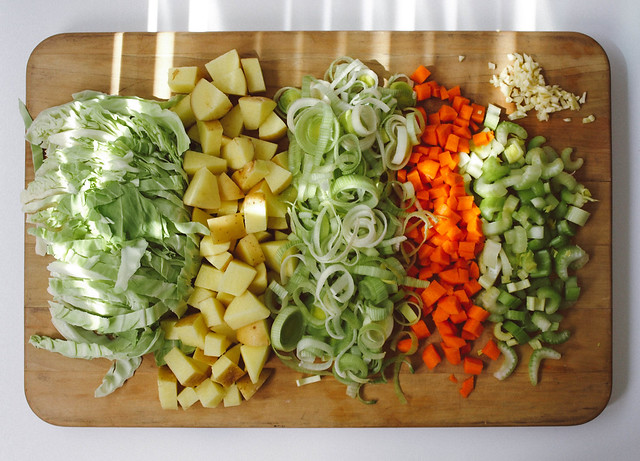
    Feel free to change up the vegetables. If you're missing one or two, you can still pull this together and have a wonderful soup. If you can't find leeks, use 1 medium onion, diced, in its place. For the cabbage, use your favorite here. I happen to have regular green cabbage on hand but savoy cabbage would be great too. 

    RUSTIC CABBAGE, POTATO & WHITE BEAN SOUP

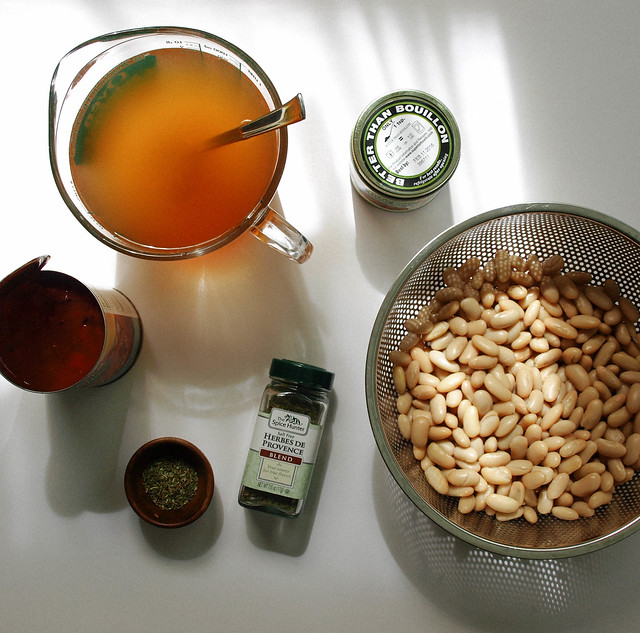
    For this time around I chose to use herbes de provence. I love the combination of spices, especially the fennel that I find in this blend from The Spice Hunter. I also added in a teaspoon of fennel here because I love it. Feel free to use any spices you like as most of them will work well here. You can use 2 - 3 teaspoons of an Italian blend or combine a few herbs using 1 teaspoon each: thyme, oregano, rosemary. You can also use sage, marjoram or parsley, savory, etc...in any combination as long it equals about 1 tablespoon. 

    When using Better Than Bouillon vegetable broth base, I never use the recommended serving size. I use just enough to flavor the water. For this recipe I used just under 2 teaspoons. This makes my jar last a lot longer and reduces the 'would be' sodium content per recipe. I've just recently (the last six months or so) been using their vegetable broth base and love it!

    RUSTIC CABBAGE, POTATO & WHITE BEAN SOUPRUSTIC CABBAGE, POTATO & WHITE BEAN SOUP

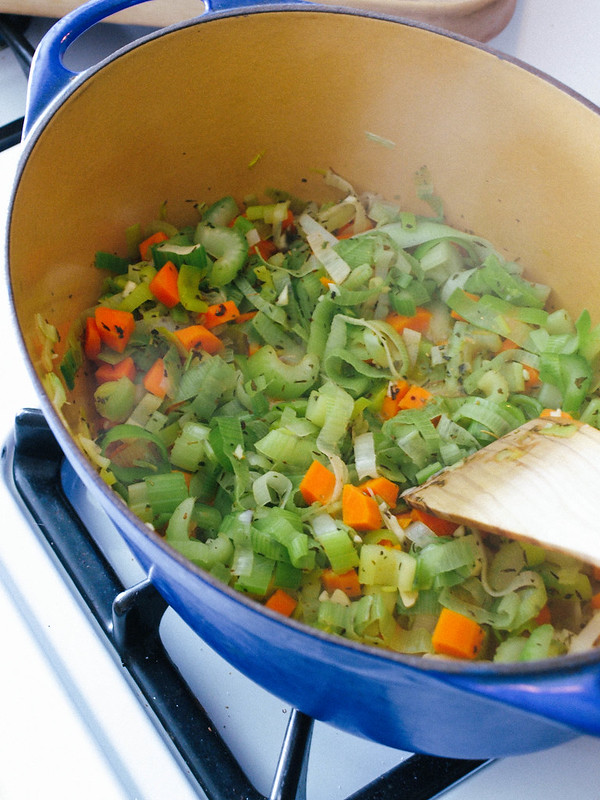
    This is a one pot soup that's so easy to pull together. Saute the leeks, celery and carrots, add spices and garlic, cook a bit more. Add remaining ingredients ending with cabbage and white beans last as pictured above. Cover and simmer until cabbage and potatoes are tender, about 30 minutes. Serve with bread of choice. Enjoy often!

    RUSTIC CABBAGE, POTATO & WHITE BEAN SOUP

    RUSTIC CABBAGE, POTATO & WHITE BEAN SOUP


    Ingredients
    • 1/4 cup water or 2 tablespoons olive or grapeseed oil (for sauteing)
    • 2 leeks (use white & pale green parts), sliced and rinsed 
    • 2 carrots, diced
    • 2 stalks celery, diced
    • 2 - 3 cloves garlic, minced
    • 1 tablespoon herbs de Provence OR 1 teaspoon each thyme, rosemary, oregano
    • 1 can (15oz) diced tomatoes 
    • 6 - 7 cups vegetable broth or water
    • 2 medium gold potatoes, diced
    • 1/2 head large cabbage, sliced (savoy or green)
    • 3 cups cooked white beans or 2 cans (15oz), drained and rinsed (use cannellini, great northern or navy) 
    • mineral salt & fresh cracked pepper, to taste
    • 1/4 cup chopped parsley, to garnish

    Prepare your vegetables. After slicing your leeks, be sure to place them in a colander and rinse them well under cool running water to remove any dirt and sand that may have collected between the leaf sheaths. If there's a lot of dirt, place sliced leeks in a bowl of cool water and gently swish the leeks around to dislodge any unwanted remnants. Drain water by gently tilting the bowl with one hand and holding your hand over the leeks with the other so they don't fall out, or simply drain into a colander. Repeat until leeks are clear of dirt and sand. Here is a good tutorial from, The Kitchn, on how to wash and prep your leeks. Lastly, another method you may try is this: Slice off the root and the dark green parts. Slice in half vertically. Run under cold running water, opening up the layers as you rinse. Lay on flat surface and slice thinly hortizontally. 

    In a large dutch oven or stock pot, heat water/oil over medium to medium-high heat, add leeks, carrots and celery, saute for 5 minutes. Smells delicious already! Add garlic and spices, saute for 1 minute more or until fragrant. Add tomatoes, broth, potatoes, cabbage and beans, bring to a boil, cover, reduce heat to low and simmer for 30 minutes, until potatoes and cabbage are tender. Taste for seasoning adding salt & pepper as needed. 

    Serve topped with parsley and a serving of socca or crusty bread. Enjoy!

    Serves 6 - 8.

    Notes: 

    As noted above, change the herbs to whatever you have on hand. You could also use an Italian blend seasoning if you like. I also like to add in a sprinkle of red pepper flakes.

    I would suggest using the biggest pot you have for ease, this makes quite a bit of soup.

    If leeks are not available, sub in 1 medium onion, diced.

    Roasted Cauliflower + Chickpeas + Mustard Dressing

    Roasted Cauliflower + Chickpeas + Mustard Dressing

    Can I interest you in some roasted cauliflower? Or maybe some roasted chickpeas? These are both just about the greatest thing ever...at least in my book they are! Pair them with this mustard dressing and you've got yourself another simple dish that is sure to please. I love all the ingredients in this recipe but have to admit that once I put the mustard dressing together, I wasn't so sure if it might have too strong of a mustard flavor. I was pleasantly surprised to find that once the dressing was mixed with the roasted chickpeas and cauliflower it mellowed out immensely. This has ended up being a new favorite dish of mine for ease of preparation and great flavor. It is also a complete meal with the addition of quinoa that adds extra protein and fiber so you can be sure you are getting what you need from your plant based diet. Try adding in some brussels sprouts as well for a nice variation. 

    The recipe was first spotted within the beautiful blog photos from Bluebird and originates from Gwyneth Paltrow's and Julia Turshen's cook book, It's All Good. A quick google search gave me the ingredients and more inspiration to put this together. 

    Roasted Cauliflower + Chickpeas + Mustard Dressing Ingredients

    Gather your ingredients and begin...

    Roasted Cauliflower + Chickpeas + Mustard Dressing

    Start by preparing your chickpeas and cauliflower for roasting...roast for 45 minutes.

    Roasted Cauliflower + Chickpeas + Mustard Dressing QuinoaRoasted Cauliflower + Chickpeas + Mustard Dressing Dressing

    In the meantime, prepare your dressing and cook your quinoa. Just a note about the dressing, I chose to use lemon instead of white wine vinegar like the original recipe called for. I also sought out a Dijon mustard that didn't use white wine vinegar. My reasoning is that white wine may or may not be a vegan product as many use animal remnants in the production. After searching on the shelves I found this great Dijon mustard from Maille that doesn't use any white wine vinegar in the ingredients, just vinegar. And as luck would have it, it is an award winning Dijon mustard! Win, win. And the lemon in the dressing to me was just perfect!

    Roasted Cauliflower + Chickpeas + Mustard Dressing

    Once chickpeas and cauliflower are ready...toss with the mustard dressing and serve over a bed of quinoa. Simply wonderful!

    Roasted Cauliflower + Chickpeas + Mustard Dressing

    Roasted Cauliflower + Chickpeas + Mustard Dressing

    Ingredients
    • 1 can (14 oz) garbanzo beans (chickpeas), rinsed, drained and patted dry on a kitchen towel
    • 1 large head cauliflower, cut into florets
    • olive oil
    • mineral salt
    • 1 cup quinoa (I used tri-color)
    • 1 1/2 cups water or vegetable broth
    • 1/4 cup fresh Italian parsley, chopped
    • fresh cracked pepper, to serve
    • lemon wedges, to serve

    Mustard Dressing
    • 1 tablespoon Dijon mustard
    • 1 tablespoon whole grain mustard
    • juice from 1 lemon or 1 tablespoon apple cider vinegar 
    • 1 - 2 tablespoons evo or olive oil

    Preheat oven to 400 degrees.

    Prepare cauliflower and chickpeas, toss together in a large roasting pan with 2 tablespoons of olive oil and dash or two of salt. Roast for 45 minutes, stirring every 15 minutes or so.

    In a medium pot, add quinoa, water and a pinch of salt. Bring to a boil, cover, reduce heat and simmer for 15 minutes. Remove cover and let set 10 minutes and fluff with a fork.

    In a small bowl, prepare your mustard dressing and set aside. You may like to double this recipe and have some to drizzle over top your plated serving.

    Once roasting is done, let cool a few minutes. While still warm, place cauliflower and chickpeas in a medium size bowl, add dressing and toss. Add in parsley last or top your portion when before serving. Tastes great warm or at room temperature.

    Serve cauliflower and chickpea mix over a nice bed of quinoa along with lemon wedges.

    Serves two with left over quinoa.


    Enjoy often and eat more chickpeas!


    MEDITERRANEAN KALE SALAD

    MEDITERRANEAN KALE SALAD

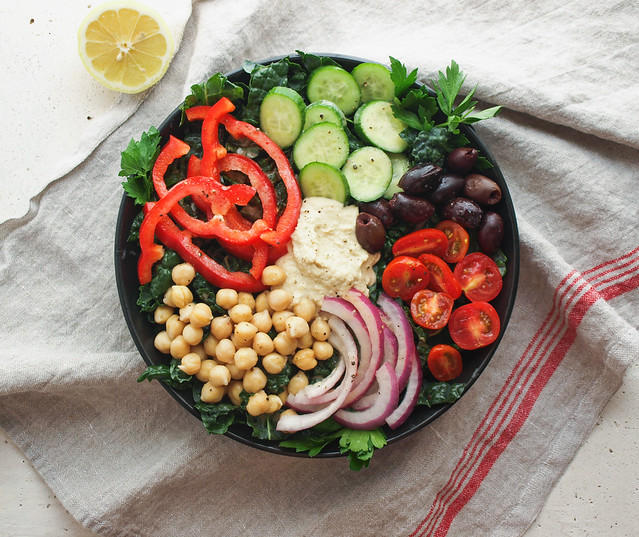
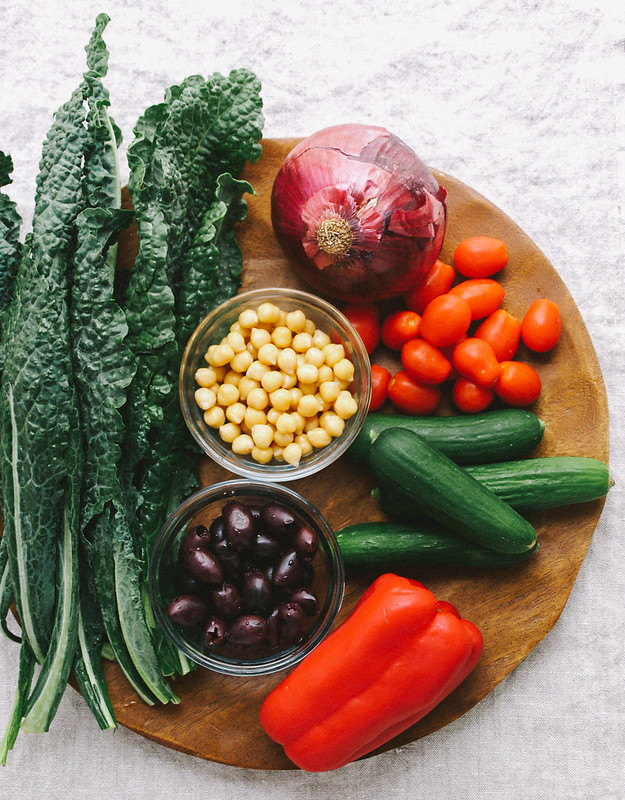
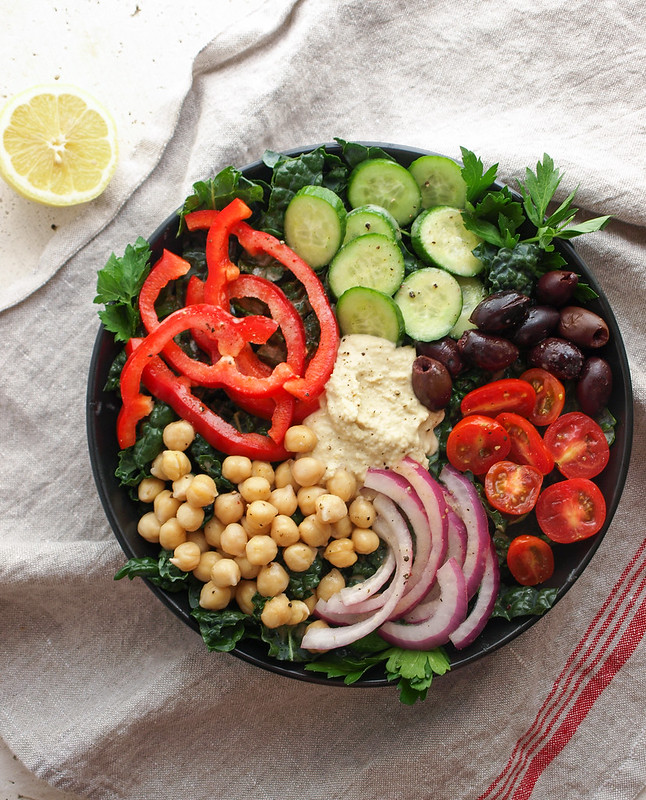
    Summer in California is setting in, the temperatures are rising and salads are always welcome. I've been on an olive loving kick lately, as well as a chickpea kick (I'll tell you why soon), so this salad hit the spot with some salty olives, fresh sweet grape tomatoes & red bell peppers, refreshing cucumbers, red onion and fresh cooked chickpeas. All dressed up with a light vinaigrette and nice dollop of hummus. This salad didn't start with a dollop of hummus, but half way through eating I added a scoop and decided it needed to be included in the recipe (and photo), although I list it as optional. It adds such nice creaminess and rounds it out the salad well. If you find raw kale too hard to eat, even after letting it relax in lemon juice, a dollop of hummus will definitely do a world of good for you. It adds a nice creaminess to the overall salad while masking some of kale's bitterness. Similar to the Every Day Nourish Bowl, we now have another option of whole hearted goodness to choose from when a craving for salads occur! It's simple, accessible, not too expensive and good for you. Cheers to all of those things! :)

    I have some fun news to share! I'm going to be immersed in all things chickpeas the next few months. I figured this post is a great place to introduce a project I've been working so hard on called, CHICKPEA: THE CHICKPEA HANDBOOK/COOKBOOK. It's all you need to know about chickpeas, with chapters containing information on nutrition, history, types, sprouting, growing (gardening), storing & selecting, flour, cooking and a few other relevant chapters. Plus, it will include upwards of 100+ recipes (not sure where to stop since there's so many good ones I want to add), including pictures of each one. It will include all of the favorite chickpea recipes from the blog and a ton of new ones. I'm excited out of my mind for this project! I was asked a few months ago what was the one ingredient that was important in my kitchen and my answer was chickpeas. They are so versatile and I use them often, especially for my hummus which is so much more than just a dip. After toying around with a couple cookbook ideas, doing a chickpea cookbook seemed so right. I want to celebrate the chickpea in all its glory and showcase its versatility, all the way from breakfast to desserts. It's a perfect fit for me and I know it will be a useful addition to any kitchen library! It's meant to be used often and will have my signature simplicity with a few recipes to kick it up a notch. I'm shooting for the end of the year but am really in no hurry as I want this book to be amazing. I ♥ chickpeas and think we should all eat more of them!

    Enjoy the salad, and of course, this will be in the book! :)

    MEDITERRANEAN  KALE SALADkale MEDITERRANEAN KALE SALADMEDITERRANEAN KALE SALADMEDITERRANEAN KALE SALAD

    MEDITERRANEAN  KALE SALAD

    Ingredients 
    • 3/4 bunch kale, stems removed and julienned
    • 1 large lemon, juice of
    • 1/2 small red bell pepper, sliced
    • 1/8 small red onion, sliced
    • 1/4 cucumber, sliced
    • small handful cup cherry tomatoes, sliced in half or campari tomatoes, quartered
    • small handful cup kalamata olives, pitted
    • 1/2 cup cooked chickpeas (garbanzo beans)
    • dollop of hummus, optional (but so good!), to serve
    • fresh chopped parsley, to serve
    Vinaigrette
    • 2 tablespoons red wine vinegar
    • juice of one lemon
    • 1 heaping teaspoon dijon mustard
    • 1/4 teaspoon dried oregano, optional
    • 1 tablespoon extra virgin olive oil
    • salt & pepper, to taste

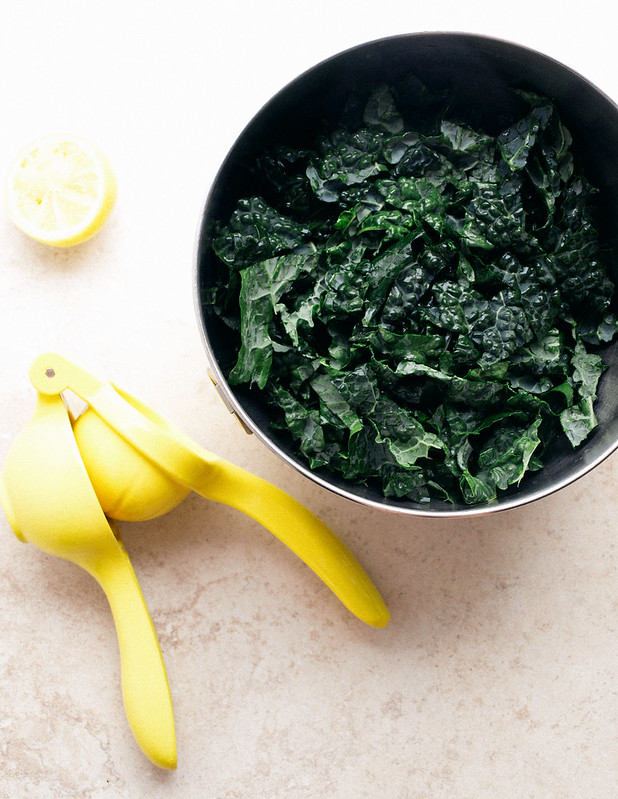
    Remove the stems from the center of the kale leaves, as least the thickest parts. Julienne kale leaves and place in a medium size bowl, add lemon juice, mix to coat the leaves and let set while you prepare the rest of the ingredients. The lemon juice will help soften the kale leaves. Toss every few minutes or so.

    In a small bowl, add the ingredients for the vinaigrette. Whisk together until emulsified. It usually takes me about one minute, set aside.

    Once you've prepped your other ingredients you're ready to assemble your salad. In a serving dish, add kale and top with bell pepper, onion, cucumber, tomatoes, olives and chickpeas. Add your vinaigrette over top and a dollop of hummus anywhere you like.

    Serves one generously.

    Notes:

    Depending on the size of your produce, amounts will vary. Adjust accordingly to suit your taste and situation. For instance, I used small Persian cucumbers here but used a whole small one. Typically, you'll be using a regular or English cucumber and will only use about 1/4 of it, as per the recipe.


    Enjoy!


    Greek Chickpea & Quinoa Salad

    Greek Chickpea & Quinoa Salad

    Another salad is born!

    Greek Chickpea & Quinoa SaladGreek Chickpea & Quinoa Salad
    Greek Chickpea & Quinoa Salad
    Greek Chickpea & Quinoa Salad

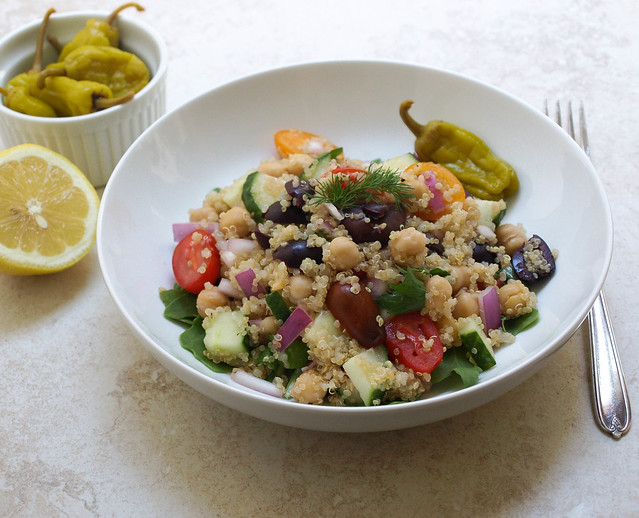
     Over the last week or so we've moved from a Thai inspired Cucumber Salad + Peanut Citrus Dressing to an Italian inspired Heirloom Tomato and Endive Salad + Bagna Cauda to this Greek inspired salad of quinoa and chickpeas. I have been a happy girl eating and testing each one of them. This one is as delicious as the last and the one before that. Filled with protein packed quinoa and chickpeas tossed with tomatoes, cucumbers, olives and onions, and drizzled with simple lemon juice. It's a sensational salad that will leave you feeling satisfied and great, inside and out. And don't forget those pepperoncini, they are an exceptional accompaniment to the flavors of this dish! This is a great salad for to-go lunches, pot lucks, picnics or any social occasion, as well of course as eating it anytime of day in your own private sanctuary. Dig in and be happy. :)

    Greek Chickpea & Quinoa Salad

    Greek Chickpea & Quinoa Salad

    Ingredients (serves 4 - 6)
    • 1 cup dried quinoa, rinsed
    • 1 1/2 - 1 3/4 cups water (anywhere in between)
    • 1 teaspoon garlic powder
    • 1 can (15oz) garbanzo beans (chickpeas), drained and rinsed
    • 1 cup grape tomatoes, sliced in half (diced red bell pepper would work here too)
    • 1 cup English cucumber, diced
    • 2/3 cup red onion or shallots, diced 
    • 1 jar (7oz) kalamata olives, pitted and sliced in half (drained)
    • 1/4 cup loosely packed parsley, chopped (dill, mint or oregano would be great too)
    • mineral salt & fresh cracked pepper to taste
    • juice of 1 large lemon
    • Greek pepperoncini, to serve
    • lemon slices, to serve (optional)
    • drizzle of extra virgin olive oil (optional)
    • arugula (optional)

    In a medium size pot, add the water, quinoa and garlic powder and bring to a boil. Cover, reduce heat and simmer for 15 minutes. Remove cover and let stand for 15 minutes. Fluff with a fork.

    While quinoa is cooking, prepare the remaining ingredients.

    Once quinoa is ready, add in the chickpeas, tomatoes, cucumber, onion, olives and parsley. Mix well. Season with salt, fresh cracked pepper and the juice of your 1 large lemon.

    Serve on a bed of arugula or as is. Tastes great with some pepperoncini and a little extra lemon juice on top. Add extra virgin olive oil if you wish. This dish can be served warm, at room temperature or chilled.

    Optional dressing: You may like to use this Garlic Dressing from a previous recipe. I would suggest doubling it for use here. Add/subtract any ingredients to suit your taste.

    I omitted the usual feta cheese in this recipe because I personally don't need it and haven't tried to replace it as of yet. But I know many of you will love your feta! Here is a recipe you can use to make your own from Happy Herbivore, Fat Free Vegan Feta Cheese. Or maybe you would like this Baked Almond Feta from Vegan Version. In either case,  be sure to read the comments before making this and enjoy! If you know of a great vegan feta recipe...please share...many would love to know.

    Simple, healthy and flavorful...

    Enjoy!


    Risi E Bisi (Rice and Peas)

    Risi E Bisi (Rice and Peas)

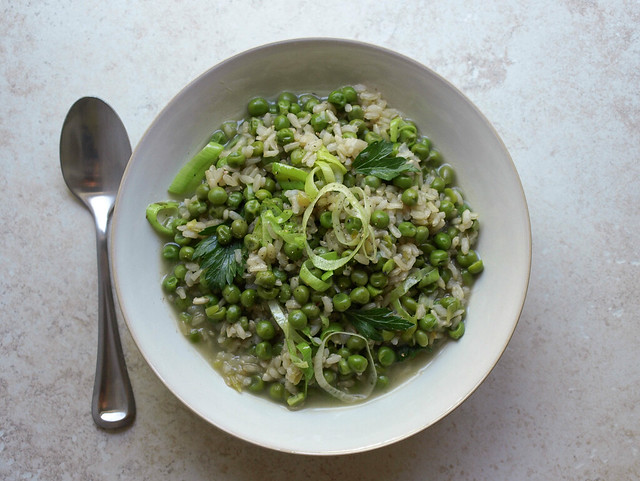
    Risi e bisi (pronounced REE-see ay BEE-see) is a classic Venetian dish. It's somewhat like a risotto but a little soupier to where you will be using a spoon. I really enjoyed the simplicity and beauty of this dish in every way. The peas are sweet and pair so nicely with the leeks and other flavors from the broth and light seasonings. This recipe makes a large batch so feel free to cut the recipe in half.

    This lovely recipe is inspired and adapted from NPR Kitchen Window, A Fresh Pod Cast: Savoring Springs Green Peas.

    Risi E Bisi (Rice and Peas)


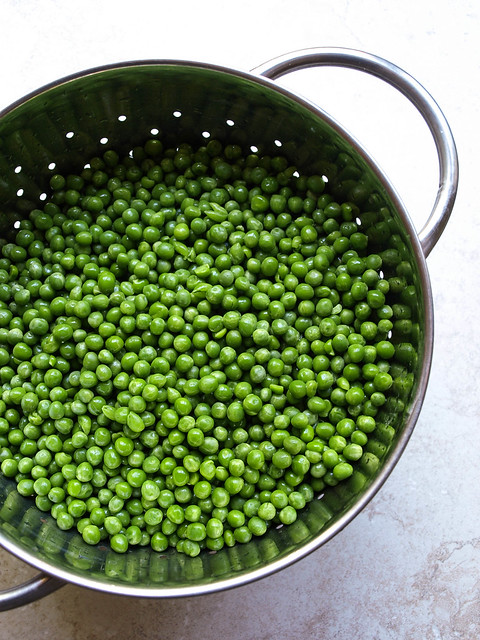
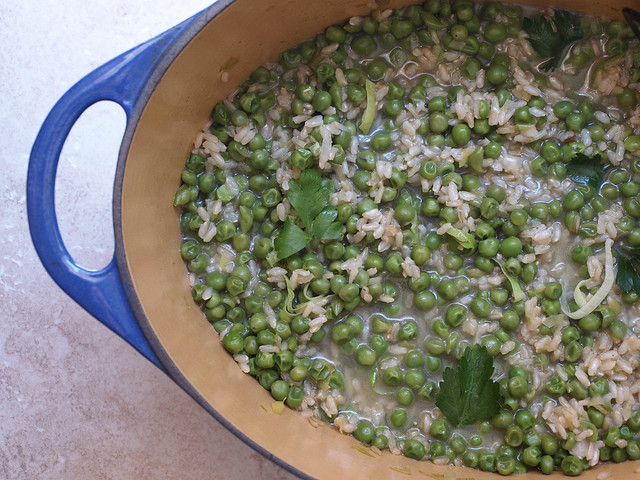
    I decided to use frozen petite peas for this as I honestly didn't feel like shelling 4 lbs. of peas. Please don't judge me. :) I think this is how most of you will be cooking this as frozen peas are convenient. But of course, fresh peas are best and will yield a lovely flavor. Try not to eat them all before they go into the recipe either. I know I can eat these peas by the handfuls. They are so sweet and tender that I can't get enough of them.

    Risi E Bisi (Rice and Peas)Risi E Bisi (Rice and Peas)

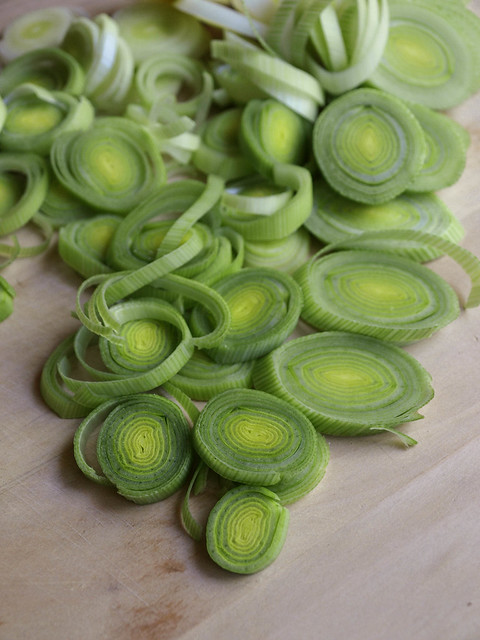
    Then we bring in the mild flavors of leeks and bay leaves. I used two medium sized leeks, light green and white parts only, slicing them thinly. I also chopped about 1/3 of the thinly sliced batch so there would be some smaller onion like pieces too (this is optional).

    Risi E Bisi (Rice and Peas)

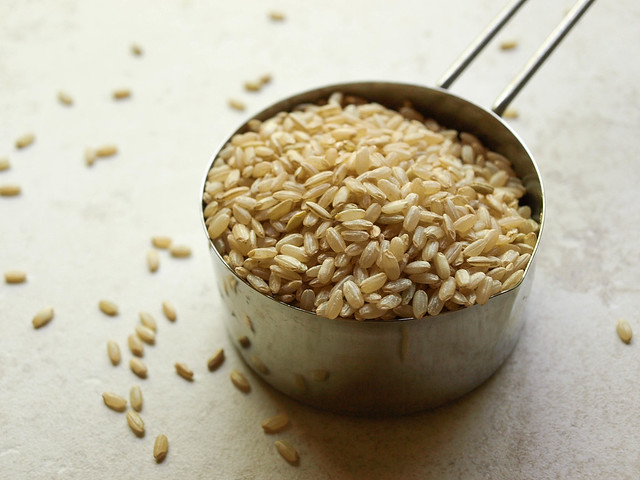
    I used this sprouted brown grain rice from Planet Rice that I picked up from my local grocery store. It was about $4 for a 20 oz bag. Using this rice I found that I needed to add a little extra cooking time to achieve the texture I was looking for. They do have a lightly milled spouted brown rice that will cook a bit faster, then you won't need the extra cooking time at the end like I needed. Traditionally the rice used in this dish is a risotto rice like Arborio rice, Carnaroli or Vialone Nano which are grown in Italy.

    Risi E Bisi (Rice and Peas)

    As mentioned in this Food & Wine recipe, it is said by the cooks in Venetia that "for each grain of rice there should be a pea"...I agree!

    Risi E Bisi (Rice and Peas)

     Risi E Bisi (Rice and Peas)

    Ingredients (serves 6 - 8)
    • 6 - 8 cups vegetable broth OR water with 3 Repunzel Vegetable Bouillons
    • 2 bay leaves
    • 3 tablespoons nutritional yeast, optional
    • 2 tablespoons olive oil
    • 2 medium leeks, thinly sliced OR one onion, diced
    • 1 garlic clove, minced
    • 2 cups sprouted brown rice, arborio or any medium grain rice of choice
    • 4 cups fresh peas or thawed frozen peas 
    • 1/4 cup flat leaf parsley, chopped and loosely packed
    • mineral salt and pepper, to taste
    • almond parmesan, for topping (not shown)

    In a medium saucepan, place the stock and bring to a gentle simmer. Add in the bay leaves, nutritional yeast and keep broth warm. 

    In a large stock pot or dutch oven, heat oil over medium heat. Add leeks and cook until just softened, about five minutes (remove and set aside a few tablespoons of the leeks for topping if desired). Add garlic and rice, toss until rice is nicely coated, about 3 minutes. 

    Add in warm broth, one cup at a time, the stock should be bubbly. Stir often allowing the broth to be just absorbed. Add in another cup of broth, repeat. Add in peas, more stock and continue the process for another 15 minutes or so, or until the rice is al dente, tender but chewy. The whole process should be about 25 minutes or so. Note: Using the sprouted brown rice, at the end I covered my rice and peas and let simmer for about 10-15 minutes until rice was ready to my liking.

    Add in more broth and stir. Your rice and peas should be a little soupy. Remove from heat, taste for seasoning and stir in parsley. Remove any bay leaves that made it into the rice and peas. Serve topped with a nice dusting of almond parmesan and freshly cracked pepper. 

    Quick method: After sauteing the leeks and rice as above. Add at least 7 cups broth, peas, bay leaves and nutritional yeast, bring to a boil, cover and cook for 20 - 30 minutes until rice is tender. Remove from heat add in parsley. Let set a few minutes and serve as desired.


    Quinoa and Peas

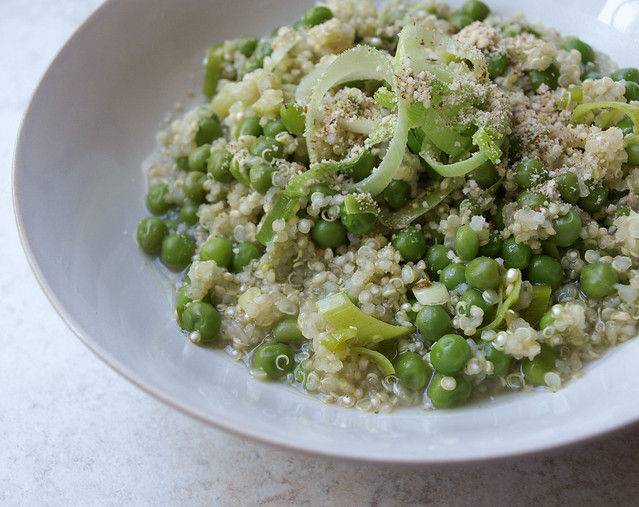
    And if you were thinking about subbing quinoa for the rice, go ahead, it's delicious too as pictured below (this is actually my preferred grain, I love everything about it...but then this dish isn't called Risi E Bisi). Top with Almond Parmesan like shown and your good to go. Truly wonderful!

    quinoa and peas with almond parmesan

    How to make using quinoa...

    In large pot, heat oil and saute leeks, about five minutes. Add 2 cups rinsed quinoa and cook for another 3 minutes, stirring frequently. 

    Add 7 cups broth, bay leaves, nutritional yeast, bring to a boil. Add in peas, do not stir, cover and simmer for about 20 - 25 minutes. Test quinoa for tenderness by tasting. Turn off heat, uncover and let set for about 10 - 15 minutes until broth is mostly absorbed. It will thicken upon standing, add more warm broth as needed for desired soupiness. Remove bay leaves. Toss in parsley, taste for seasoning and serve. 

    This method with the quinoa will leave you with wonderful leftovers. Quinoa holds up well and reheats beautifully the next day. 

    Enjoy!