.

Showing posts with label almonds. Show all posts

Almond Chunky Monkey Ice Cream....It's Raw!

Almond Chunky Monkey Ice Cream

I was just gifted a new food processor as an early Christmas present. What better way to break it in then by making chunky monkey ice cream using 4 ingredients! I know it's a bit cold out for something frozen, and although this was cold it sure warmed my heart on this chilly day! Needless to say this was delicious and super healthy, much better than the Ben & Jerry's version any day. :) 

Almond Chunky Monkey Ice Cream

Almond Chunky Monkey Ice Cream

Ingredients
  • 3 frozen bananas, cut into chunks
  • 3 tablespoons almond butter, or any nut butter of choice
  • almonds, cut in half
  • dark chocolate, either in chips or bars broken into pieces*

In food processor, place frozen banana pieces and almond butter, blend until a fairly smooth consistency stopping every now and then to scrap down the sides and push the mixture to the bottom of the processor. It took mine about five minutes max, it will depend on your food processor how long yours takes. Serve in bowls and top with, or incorporate, the chocolate pieces and almonds, use as much as you like. Should be eaten right away. Makes one generous serving or two small.

Note: Never throw your bananas away. The ripper they are the much sweeter they are making them perfect for smoothies and ice creams. So just when you think you should throw them out and/or don't feel like making banana bread, unpeel them and put them in the freezer using a container of sorts (I use tupperware), and you'll have frozen banana's whenever you need all year long.

* To make 100% raw use raw cocoa chips...find recipe here.

Try adding a scoop or two of vanilla or chocolate flavor protein powder to really boost the nutritional profile! You may need to add a splash or two of unsweetened almond milk as well.


Seriously so good...Enjoy!

Make you own Almond Butter, it's really easy...find recipe here.

You may also like this Chocolate Banana Ice Cream


Mirin & Maple Roasted Almonds

Mirin & Maple Roasted Almonds

Sweet but not too sweet, these mirin & maple roasted almonds are a welcome addition to the recipe collection. This is my first recipe for roasted nuts and it's about time they appear here. The idea for the mirin & maple glaze came about from my Mirin & Maple Tempeh Stir Fry. I wasn't sure how this was going to turn out as this was something unusual for me but they came out great! It's simple flavors with sweetness from the mirin and maple, warmth from the cinnamon and chipotle, and a tad bit salty. And did you know, almonds are the most alkalizing nut. They're balancing, nourishing and contain high levels of potassium and vitamin E. In fact, nine almonds contain all the vitamin E you need for one day. They make for a great snack anytime of day. They're easy to stash and take along with you when you need a little something to get you through. These roasted almonds are really easy to put together and once ready will be done in 30 minutes. No reason to not have a batch of roasted almonds on hand when they're so easy to make!

Mirin & Maple Roasted Almonds

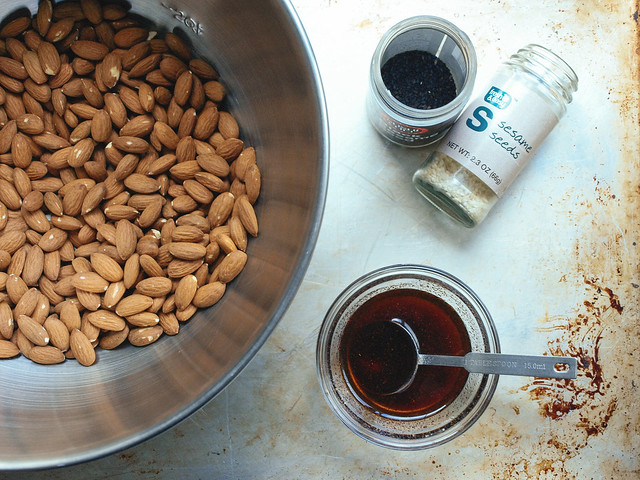
Start with fresh raw almonds. Mix your mirin, maple and spices.

Mirin & Maple Roasted Almonds

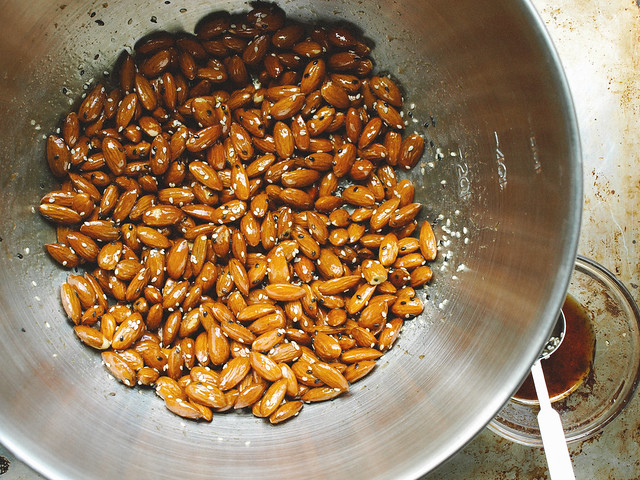
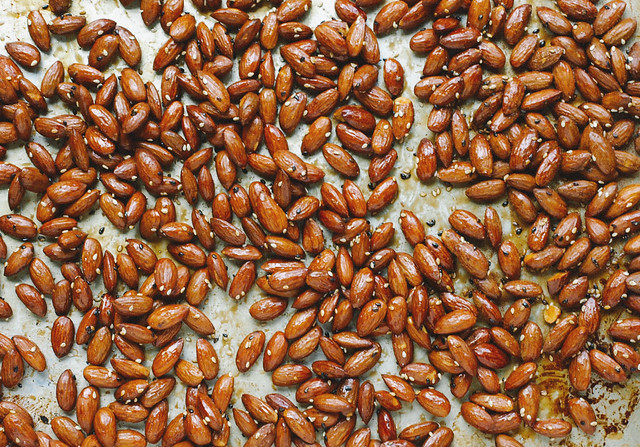
Add in your ingredients and toss to coat. Layer on baking sheet and roast.

Mirin & Maple Roasted Almonds

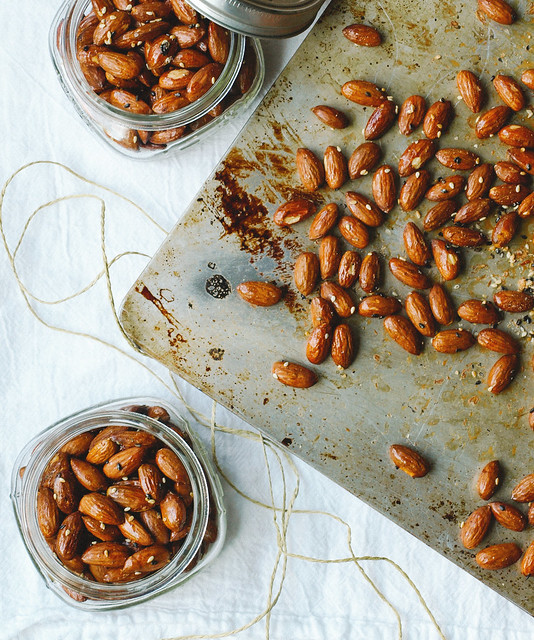
Remove from the oven, let cool and harden. And then you have beautifully glazed almonds that taste wonderful, will please your senses and satisfy your hunger. Be ready, these will be slightly addicting!

These roasted almonds are good things in little packages and make for great gift ideas too! 

Mirin & Maple Roasted Almonds

Mirin & Maple Roasted Almonds

Ingredients
  • 3 cups raw almonds (about 1 lb.)
  • 3 tablespoons mirin
  • 2 tablespoons pure maple syrup
  • 1/2 teaspoon cinnamon
  • 1/8 teaspoon chipotle powder
  • generous pinch or two mineral salt
  • 1 tablespoon white and/or black sesame seeds

Preheat oven to 350 degrees F.

In a small bowl, combine the mirin, maple syrup, cinnamon, chipotle powder and salt, mix well.

Put almonds in a large bowl, add the glaze and toss to coat. Add in sesame seeds and combine.

On a large baking sheet (a rimmed one would be ideal), spread mixture in an even layer...it's ok if some clump up. You may even like to sprinkle a little salt on top of the almonds for a little extra saltiness! Bake for 20 - 25 minutes, stirring once.

Remove from oven, let cool and harden.

Notes:

I recommend sourcing the best mirin you can get. Read the ingredient label and choose ones that are brewed traditionally and do not contain additives like corn syrup or use artificially produced koji enzymes. A good mirin will run you around $10 dollars and is worth the little extra compared to cheaper brands that use additives. You can also use it in the other recipes that call for mirin as mentioned in the first paragraph. It's great to use in marinades and stir fry's. You can use it to glaze your pie crusts and pastries too, giving them a beautiful shiny finish. It may also be used in making desserts such as poached fruit and puddings. 

I went a little easy on the spices so adjust to your preference. If you like a little more heat, add a tad bit more chipotle powder. I find these to be great without any spice as well, simply having the mirin, maple and salt as flavoring.

You may want to line your baking sheet with parchment paper for ease of clean up. I didn't personally use any and once cooled from the oven they did tend to stick to the bottom. I had to do a little scraping which didn't hurt my almonds one bit and just made for a little extra effort when cleaning the baking sheet. It's your call!

Enjoy!


CREAMY BROCCOLI + RED LENTIL SOUP

CREAMY BROCCOLI + RED LENTIL SOUP

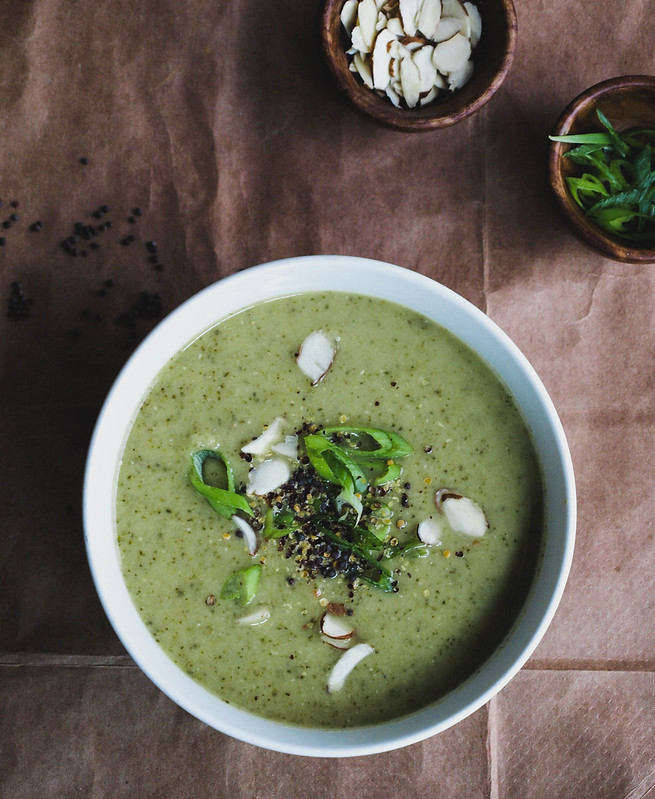
I had a bunch of broccoli that needed to be used up and thought this would be a perfect time to add a broccoli soup to the recipe collection. Seeing that my last soup, Butternut Squash + Red Lentil Soup, was so good with the addition of lentils, I decided to add them to this soup as well. Lentils add bulk, heartiness and boost the nutritional profile by adding protein and good carbohydrates. They cook fast too so you can pull this recipe together in about 40 minutes from start to finish. It's also a one-pot meal which I love (less dishes is always a plus)! I was inspired by both these recipes from 101 Cookbooks and Green Kitchen Stories. Both simple and delicious! I especially love the Savory Corn Biscuit recipe included in the GK Stories recipe, which I had a chance to make. I made half a batch and used different shapes, a flower and a circle. Because I didn't have the non-dairy yogurt on hand, I subbed unsweetened almond milk. They were still delicious without the yogurt, so easy to make and a perfect accompaniment to the soup! 

On a side note... 

Time is flying and the holidays are almost here. If you haven't finished your holiday menus, take a peek at my Vegan Thanksgiving & Christmas Recipe ideas on pinterest and follow along if you like. During mid-October through December of every year you'll find this link at the top of every page. All handpicked and include a note about the recipe or suggestions when needed. Check the board often, it will continue to grow as I find new recipes. Happy holidays and happy pinning! :)

I also updated a couple soup recipes over the last week or so. If you need some more soup inspiration take a look at these: Roasted Fennel & Potato Soup, Roasted Butternut Squash Soup, Parsnip & Split Pea Soup: Slow Cooker or Stove Top and this Curry Lentil & Greens Soup. Each one is delicious...check em out!

CREAMY BROCCOLI + RED LENTIL SOUPCREAMY BROCCOLI + RED LENTIL SOUP

We know broccoli is a nutrient dense vegetable. Rich in fiber, vitamin k & C and folate, its deep color holds many health benefits. I often eat it simply steamed with a dollop of hummus and a little sambal oelek. Once mixed, the combination is creamy, slightly spicy and delicious! Having it here in a soup is a nice change up, especially with soup season under way.

I love red lentils and their ability to blend easily in pureed soups. They add fiber, protein and cook up very light as to not alter the color of the soup as much as if using green/brown lentils. I would suggest sourcing and keeping red lentils in your pantry at all times. They are reasonable at about $2 to $3 a pound and will make dishes more nutrient dense when added. 

CREAMY BROCCOLI + RED LENTIL SOUP

CREAMY BROCCOLI + RED LENTIL SOUP

Ingredients
  • 1 tablespoon coconut, grapeseed or olive oil or 3 Tbsps water for water saute
  • 1 medium onion, diced
  • 3 garlic cloves, minced
  • 1/4 teaspoon red pepper flakes
  • 1 cup red lentils
  • 2 - 3 large heads broccoli, cut into florets (stalks chopped ok too)
  • 6 - 7 cups water or vegetable broth (or combo)
  • 1 can coconut milk, optional
  • mineral salt, to taste

to serve
  • mustard seeds, crushed (I used black)
  • 1 - 2 scallions, sliced
  • slivered almonds

In a large dutch oven or stock pot, heat oil/water over medium heat, add onion and cook until translucent, about 5 minutes. Add garlic and red pepper flakes, cook another minute or until fragrant. Add lentils, broccoli, broth/water and optional coconut milk. Turn heat to high and bring to a boil, using the back of a fork or spoon press the broccoli down as much as you can to cover with liquids. Cover pot with lid, reduce heat to low and simmer for 15 - 20 minutes. Soup is done when lentils are tender. Taste soup, add salt as needed. Using an immersion blender puree until desired consistency. Or once cooled a few minutes, use a food processor/blender to puree (this method may take two batches to complete).

Serve in individual bowls topped with mustard seeds, scallions and almonds. Pairs great with crusty bread or biscuits of choice. If you have one on hand, a squeeze of lemon will add some brightness. 

Notes: 

If using pre-cut packaged broccoli, use about 1 1/2 - 2 pounds or 8 - 10 cups.

You may feel there is not enough water, and most likely all the broccoli won't be covered by the liquids at first. As it cooks it will soften and sink down, and any that doesn't will steam and become soft. If you like you can push the broccoli down half way through cooking. If adding a while can of coconut milk, start with the lower amount of liquids adding more as needed.

If you don't use veggie broth or have run out of an onion and/or garlic. Try adding 1 teaspoon each of garlic and/or onion powder.

I recommend sticking with red lentils but you can use green/brown lentils if needed. Cook same as above but simmer for 30 - 35 minutes, or until lentils are tender. Your soup may look a bit muddy but flavor will be good.

Use full-fat or light coconut milk. If you'd prefer, use up to 1 cup or so of unsweetened almond milk. 


Saffron Potato Leek Soup with Fried Garlic & Almonds

Saffron Potato Leek Soup with Fried Garlic & Almonds

This will have you smelling the finest aromas right from the get go. Its hearty and rustic with a side of something unusual. Fried garlic and almonds add a nice touch along with the hint of saffron. For the saffron, I buy mine from Trader Joe's for $5 or so, it contains a good amount. I hope you will have access to this price since it can be fairly pricey in the general stores, upwards of $15 to $20. It really pairs well with all the other ingredients leaving your house smelling wonderful. I also imagine it will taste just as good without it, so feel free to be flexible and attempt this without the saffron if need be. Either way, open the windows and let the neighbors get a wiff of this aromatic soup you have going. Potato soup never tasted so good! Recipe adapted from Food 52 Anya von Bremzen's Potato Soup with Fried Almonds. I changed up the recipe a little, mainly adding rice and leeks. I also increased the almonds for extra protein, they'll soften up a bit in the soup adding a nice light crunch too. I hope you enjoy it as much as I did!

Saffron Potato Leek Soup with Fried Garlic & Almonds

Ingredients
  • 2 pounds organic yukon gold potatoes
  • 2 small leeks, sliced and any dirt removed
  • 2 tablespoons olive oil
  • 3/4 cup blanched almonds (almond with skin is ok too)
  • 4 large garlic cloves, minced
  • 5 cups vegetable broth, + more as needed
  • 1/2 cup basmati or jasmine rice
  • 1 pinch saffron, partially crushed
  • mineral salt and fresh cracked pepper to taste
  • 2 teaspoons sherry vinegar or red/white wine vinegar
  • 2 tablespoons flat leaf parsley, minced

Cut potatoes into irregular chunks by inserting the tip of a small, sharp knife into a potato and twisting until a 1 1/2 chunk comes out. Repeat until the entire potato is cut up, than continue with the remaining potatoes, set aside. You can also just roughly chop the potatoes into 1 1/2 inch chunks. Peeling is optional.

Heat oil in a heavy pot over medium heat, add almonds and garlic, cooking, stirring frequently until golden, 3 - 4 minutes. Transfer the almonds and garlic to a bowl to cool slightly. Add leeks and a 2 tablespoons of water to the pot and cook, stirring occasionally, until softened, about 4 minutes. Add potatoes, vegetable broth and rice, bring to a boil, cover, reduce heat to low and simmer 40 to 45 minutes.

In a food processor, place the garlic and almonds, pulse until desired texture. I left mine fairly course. Add all but 2 tablespoons to the soup. Season soup with salt and pepper to taste.

Remove a few tablespoons of soup from the pot and place in a small bowl, add saffron and let steep for 2 minutes, add to the soup. Add a little more water or broth if the soup seems to thick and continue to cook.

Once soup is ready, if you'd like it creamier, break up or mash some of the potatoes using a sturdy spoon. Add the vinegar to the reserved ground almond mixture and stir in the soup. Add the parsley and cook for a minute. Taste for seasonings, adding a little more salt and vinegar if necessary.

Serve with dense whole grain or artisan bread.

Notes: 

If using almonds with the skin, just know that the skins will fall off in the soup. For me this is not an issue (I like the added fiber) but if you're serving for company you may consider using blanched almonds.


Rosemary Almond Crackers

Rosemary Almond Crackers

These are great little crackers. Gluten free, grain free and full of goodness. Almonds are alkaline and are very low in cholesterol and sodium. They're also a good source of riboflavin, magnesium and manganese, and a very good source of Vitamin E. These crackers are simple to make with a minimal ingredient list. You can add whatever herbs or spices you might like. I just really love rosemary and it fits well in this cracker. Caraway seeds would be great too. Eat them alone, pair them with some hummus for a nice light healthy snack or along with some grapes or fresh fruit of choice. Almonds are an alkaline food and carry good nutrition for a healthy mind, body and soul. Have a go at these little crackers, I think you will enjoy them...

Rosemary Almond Crackers

Rosemary Almond Crackers

Ingredients
  • 2 tablespoons flaxseed meal 
  • 4 tablespoons water
  • 1 tablespoon extra virgin olive oil
  • 1 cup almond flour or almond meal, packed
  • 1 tablespoon fresh or dried rosemary or choice of herbs, finely chopped
  • 1 tablespoon sesame seeds, optional
  • 1/2 teaspoon salt

Preheat oven to 325 degrees.

Combine flaxseed meal with 4 tablespoons water and olive oil. Place in fridge for at least 10 min, or until the mixture is gooey, this is the binder for the mixture. 

You can buy almond flour or make it close enough at home like I did. In blender/food processor, grind 1 and 1/4 cup almonds into a fine powder or meal type consistency...doesn't have to be perfect but the finer the better.

Place all ingredients in medium size bowl and mix together well. Shape into a ball and place on a flat surface lined with parchment paper. Either roll to flatten or cover with another piece of parchment paper and press down with your hand, then roll with rolling pin flattening to about 1/8 inch or so. The thinner the better (even mine could have been thinner, take up the whole area spreading to the edges, the thinner they are the crispier they'll be). Remove top layer of paper, if using. Using a pizza cutter, or knife, cut squares or diagonals into whatever size you like. Top with a little sea salt.

Carefully slide and transfer prepared crackers along with the paper it lays on to a cookie sheet, bake for 20-25 minutes. After the first 10 minutes of baking, set timer every five minutes so you can keep an eye on them, removing the ones around the edges that are done. They will ever so slightly darken and turn golden, you don't want it too dark or it will have a burnt flavor. When done, let cool. Use your pizza cutter, or knife, and run through your lines once more to separate completely. Let set out for a few hours before storing, if they weren't rolled thin enough they may become more of a biscut style cracker if stored away to quickly...this will allow them to be completely air dried before storing. I keep mine in a large glass ball jar in the pantry or on the counter. 

Enjoy!

Here's a batch I just made using caraway seeds, no sesame seeds in this one. I rolled them a bit thinner this time giving them a bit more of a crunch. The caraway seeds are really great in this...right up there with the rosemary. These crackers pair so well with hummus. And some fresh fruit with this is an added bonus. These are super to make for parties or just to have around the house for a healthy snack for you and your family. Try it with this hummus.


Delicious!

APPLE HARVEST QUINOA SALAD + SWEET TAHINI DRESSING

Apple Harvest Quinoa Salad + Sweet Tahini Dressing

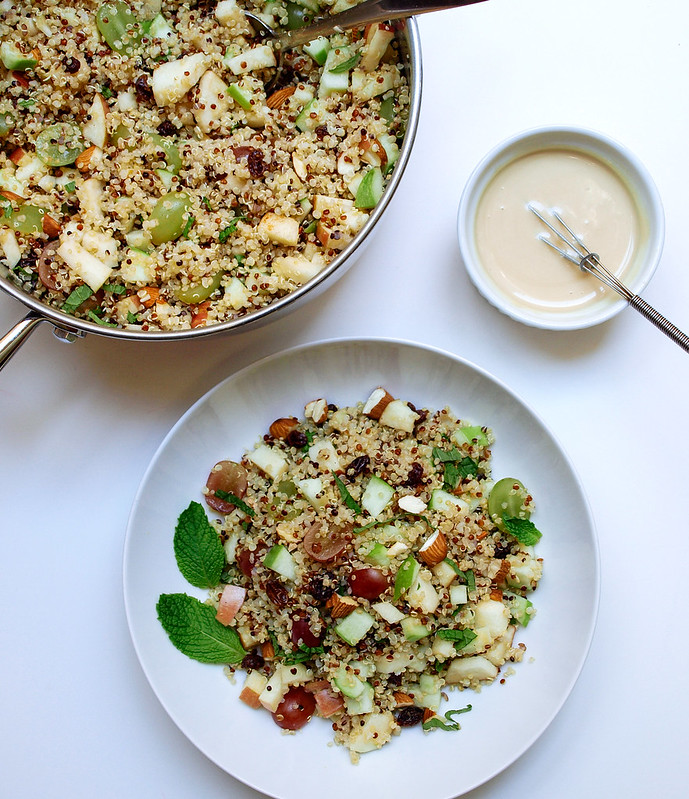
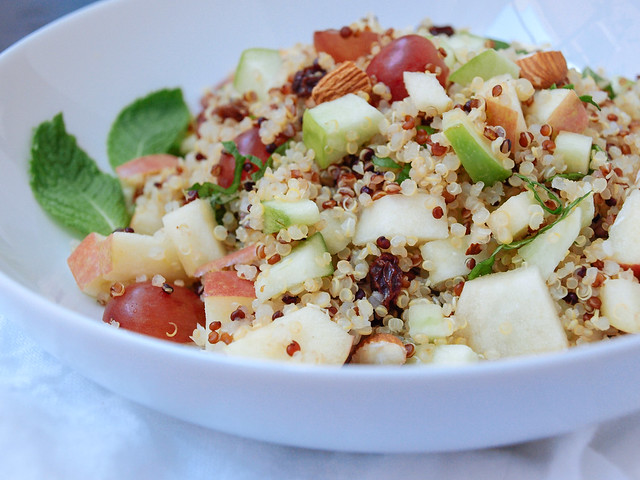
A little sweet, a little tart and a then a little more sweet...this quinoa salad is a wonderful mix of flavors and sensations. 

Apple Harvest

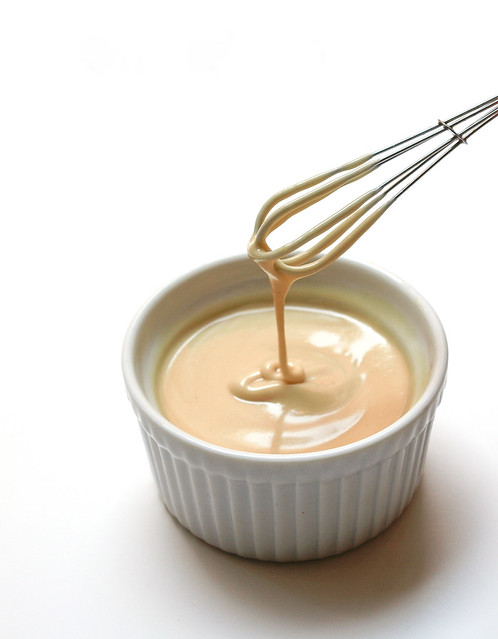
And then if it couldn't get any better, in comes the sweet tahini dressing...

Sweet Tahini Dressing

Without the dressing this salad can stand alone, especially with a nice hint of the cinnamon. But let me tell you, a good drizzle of this dressing adds whole new layer of yum factor. This is my first time having this sweet tahini dressing and I was amazed at how good it tasted. It's a wonderful creamy sweet dressing that so easy to make. The sesame paste isn't bitter here at all and mixes very well with sweetness. It would make for a nice twist on the Waldorf Salad. Yes, more ways to use tahini! I am now officially addicted to this new find. I also found myself using it as a dip for sliced apples. So good...better than caramel with apples I think! It has a unique flavor that I cannot explain, it is something you must experience for yourself if you haven't already. 

As for the salad, you can make it in one pot and uses common ingredients so you can whip this up anytime. You can also add/subtract ingredients to suit what you have on hand or to suit your taste. I love versatility and this salad allows for that. I know you will be fond of this combination and hope you put it on your must try list. It's a nice fruit fall salad...and a keeper! 

Lot's of flavor, texture and simple deliciousness in every bite. And, it's 100% percent good for you!

Apple Harvest Quinoa Salad + Sweet Tahini Dressing

APPLE HARVEST QUINOA SALAD + SWEET TAHINI DRESSING

Ingredients
  • 1 cup quinoa (I used tri-color)
  • 1 3/4 cup water
  • 1 lemon, juice of
  • 2 large apples, cored and diced (1 green + 1 red pref.)
  • 1 1/2 cup grapes, sliced in half (I used red & green)
  • 1 stalk celery, thinly sliced
  • 1/4 cup raisins
  • handful chopped almonds
  • a few large mint leaves, julienned
  • 1/2 teaspoon cinnamon, or to taste

Sweet Tahini Dressing
  • 1/3 cup tahini
  • 1/4 cup water
  • 2 tablespoons pure maple syrup
  • 1/2 teaspoon cider vinegar, or to taste (optional)

Rinse your quinoa in a fine mesh sieve. In a medium size pot, add water and quinoa, bring to a boil. Cover, reduce heat and simmer for 15 minutes. Remove cover and let set 15 minutes, fluff with a fork.

While quinoa is cooking, prepare your dressing by combining ingredients in a small bowl. Mix well and set aside to let the flavors relax into each other. Add more water, 1 teaspoon at a time, to thin as needed. To thicken add more tahini. It should be thin enough to drizzle. Dressing serves four.

Core and dice apples, top with lemon juice and toss gently (I did this right on the cutting board to not dirty up another bowl). Prepare the remaining ingredients. Add the apples, grapes, celery, raisins, almonds, mint leaves and cinnamon to the quinoa, mix well. Taste for flavor adding more cinnamon if you like.

Spoon into serving dishes and serve with a good drizzle of the sweet tahini dressing. Serves 4 - 6

Notes: 

I used 1 granny smith and 1 fuji apple. Feel free to use your favorite apples.

This recipe is just a template...feel free to sub in unsweetened cranberries for the raisins (I use raisins because they contain no added sugars and I can find organic ones easily). Opt to leave the celery or grapes out using just apples (or use any combo you like). Add in a grated carrot for more color. Add more cinnamon if you like. Try using pecans instead of almonds. Try serving with some leafy greens. Have fun playing around with this making it your own.

Store at room temperature if eating within a few hours or store in the refrigerator until ready.

Enjoy!


Did you make any changes or have suggestions that others might find helpful? 

Please share your experience with us. :)

Raw Almond Butter


I loooove raw almond butter! I eat it every day someway, somehow...whether it's on my morning toast with sliced fruit, smeared on pieces of my favorite dark chocolate bar I get from Trader Joe's or with apples slices. It's the best. I was super excited to try out my own homemade batch. After letting it cool for a bit, it was just as good as the raw almond butter I purchase from Trader Joe's, only this was better because I made it myself. It really came out perfect...I'm very pleased. I used a pound of raw almonds which cost $4.99...this is the same price for the same amount of almond butter I currently get from TJ's. I have also seen it go for upwards of $16.00. I will be making this from now on at home as I like knowing exactly what's in my almond butter plus I love the ability to add any special ingredients for special occasions or just because. 


Raw Almond Butter


Ingredients

1 pound (16 oz) raw almonds or 2 1/2 cups 
a bit of patience

optional add ins 
1/2 teaspoon or so of cinnamon
1 teaspoon vanilla extract or seeds of 1 vanilla bean


Add almonds to blender or food processor and pulse and blend until creamy. Stop frequently to push the sides down. (I found that gently shaking my food processor helped to keep the sides falling so I didn't have to stop as much. My machine has suction cups and stays put. But please, please, please use caution if doing this, I don't want you to break your appliance or hurt yourself.) 

The total time from beginning to end may take 15 to 25 min, depending on your machine. 

Notes:

To make sure you get that super creamy texture, just when you think you're done...keep the blender going for another 5 minutes or so. I've stopped to soon and had a somewhat pasty batch, it wasn't bad but the creamier it is (like in my final photos) the easier it is to spread.


After about five minutes or so it will start to bind and clump. 


This is about 10 minutes in. Finally the almonds are starting to warm up and release the oils..it's coming together now. Add any additional ingredients at this time. At this point my neighbors were probably wondering what the heck I was doing. :) 


15 - 20 minutes later and voila, my end product...raw almond butter!


And now I know what that's all about...ready for some toast in the morning or some chocolate pieces smeared with the nuts of my labor. 

Enjoy !

Here's a few other options for flavored almond butter...

Maple Cinnamon Almond Butter from Running to the Kitchen

Raw Chocolate Almond Butter from Diet, Dessert & Dogs

Have fun :)

Bircher Muesli with Chia Seeds, Figs & Apples


Muesli is a wonderful raw cereal and can be served with a variety of ingredients. Oats have been traditionally used along with fruits, nuts & seeds. Here is my favorite version of muesli using not only oats but other 'superfoods' like chia seeds and buckwheat grouts making this a nutritional powerhouse meal. 

This recipe originally came about for two reasons. One, I had picked up some figs the other day not quite knowing what to do with them. And the other is due to a question I had posted on The Simple Veganista facebook page asking about vegan breakfasts, cereals in particular, so it all came together and I really love the mixture of grains, fruits, nuts, seeds and spices. So very good! It's almost like a chia pudding. 


If you're in need of a meal that will carry you the distance, muesli is it. The added chia seeds in this version alone are an energy extender as well as the all-important omega's 3 & 6 they contain. They are one of the few plants based sources of omega 3. Chia seeds also contain a good amount of protein, fiber, iron and calcium per serving. The buckwheat can be optional in this version but I highly suggest that you get to know buckwheat, aka Kasha. Despite its name buckwheat isn't in the wheat family at all, it is considered a seed and is a great source of protein and fiber, even more than the oats per serving. In fact, you may decide to do all buckwheat and no oats sometime. It's also gluten free. The oats are a classic muesli staple and help soak up the liquids to make for a nice creamy dish while the other ingredients give texture and flavor. 

Some history on muesli taken from wikipedia...

'Muesli was introduced around 1900 by the Swiss physician Maximilian Bircher-Benner for patients in his hospital, where a diet rich in fresh fruit and vegetables was an essential part of therapy. It was traditionally eaten with juice and not milks.

The original Bircher-Benner recipe is proportionately the opposite of most muesli available in today's supermarket varieties, calling for far more fruit than grains. One serving based on the original recipe consists approximately of:
  • 1 tablespoon rolled oats, soaked in 2–3 tablespoons water
  • 1 tablespoon lemon juice
  • 1 tablespoon cream
  • 200 grams apple (about one large, preferably a sour variety), finely grated and mixed with the above directly before serving
  • optionally top with 1 tablespoon ground hazelnuts or almonds
The original recipe used sweetened condensed milk instead of cream, a compromise due to hygiene concerns regarding fresh milk products in 1900 (bovine tuberculosis etc.), before pasteurisation and refrigeration became commonly available. The original recipe also advised to soak the oats in water overnight as raw oats need a lengthy soaking to soften them before eating. This long soaking time is unnecessary with modern rolled "quick oats", which the manufacturers already soften through a steam treatment. While phytic acid is an antinutrient and strong chelator of important minerals, it is removed during the steam process, making muesli desirable, given its positive antioxidant qualities.'


I highly believe if Bircher-Brenner was alive today, he would agree that non-dairy milk is a much better option to dairy creams...


Let's make some 'superfood' muesli...I think Bircher would approve of this version :)

Ingredients

2 tablespoon rolled oats* ( I use GF)
2 tablespoons buckwheat groats/Kasha
1 tablespoon chia seeds
1/2 teaspoon or so vanilla
3/4 cup unsweetened almond milk, or non-dairy milk of choice
cinnamon, to taste
3 figs
1/2 apple, I use fuji
1-2 tablespoon raisins
a few almonds
a few pepitas
a few walnuts

In small/medium bowl combine oats, buckwheat groats, chia seeds, vanilla, milk, cinnamon, and half of the raisins. Mix well, cover and refrigerate overnight, or eat in one to two hours after it has set. Serve cold, or at room temp, topped with diced figs, apples, raisins and nuts/seeds and a sprinkle of cinnamon...add a little more milk if desired. I like to mix most of the apples in first and then top with the remaining ingredients. Serves one. Stores up to a couple days in airtight container in the refrigerator. Try drinking a glass of lemon water with this, very refreshing!
You may also like to try 100% fruit juice in place of the milk or use any fruits you like. 

*For 100% raw look for raw oats that have not undergone the steam process. These you will want to soak for eight hours plus.


You can also make it to go in the morning. Combine all the ingredients in a mason jar, or other to go container, give it a good stir and take it with you. The non-dairy milk is perfectly fine without refrigeration until ready to eat. At least if it's eaten within the day it should be fine, unlike dairy products that need refrigeration (another reason non-dairy milk is so great).

If you want to use more whole grains try this recipe below. It will fill you up for those extra long periods in between meals or can be munched on for a few hours...

Ingredients
1/4 cup rolled oats (I used GF)
1/4 cup buckwheat groats
2 tablespoons chia seeds
1/2 - 1 teaspoon vanilla 
1 cup unsweetened almond milk or milk of choice
any fruit and nut/seeds of choice

Enjoy these superfoods and eat them often !

RAW GINGER SNAPS

Raw Ginger Snaps

If you love gingersnaps you'll love this raw version. They are full of flavor, all the ingredients come through in this cookie and they are quite addicting! I'm really loving these no bake raw cookie balls if you haven't noticed....this is my fourth recipe within two weeks....they are so good and easy to make. Plus I love the idea of it being a doughy cookie, it does harden more once refrigerated and turns to be a little less doughy and more of a chewy style cookie. Along with that, I love all the natural ingredients that go into them. All you need is a few to satisfy your craving....and if you have too many, you won't feel guilty!

Raw Ginger Snaps

Start by pulsing your oats and almonds until a somewhat fine consistency.

Raw Ginger Snaps

Add in your remaining ingredients and blend until it clumps together forming a dough ball.

Raw Ginger Snaps

The dough is amazing, try not to eat too much before you roll your balls like I did. I would have gotten 12 balls but I couldn't resist eating some of the dough only leaving me with 11 of these delicious spiracle treats.

RAW GINGER SNAPS

Roll the balls in sesame seeds or cinnamon for a finished look, or leave them as is.

Raw Ginger Snaps

RAW GINGER SNAPS

Ingredients
  • 3/4 cup oats, regular or quick (I used GF)
  • 1/2 cup almonds
  • 3/4 cup dates, pitted and chopped
  • 2 tablespoons fresh ginger, minced or 1 1/2 teaspoons ginger powder
  • 3 tablespoons pure maple syrup or liquid sweetener of choice
  • 1 tablespoon unsulphured organic molasses, optional
  • 1/2 teaspoon vanilla extract
  • 1/4 teaspoon cinnamon
  • 1/8 teaspoon nutmeg or ground cloves
  • 1/8 teaspoon salt
  • sesame seeds & cinnamon, for rolling

Combine oats and almonds in food processor, blend until you get a fairly fine consistency, doesn't have to be perfect. Add dates and rest of ingredients, blend until combined and dough like consistency, about 1 minute. If for any reason you added more oats or nuts/seeds and you feel it is too dry, try adding 1 tablespoon of water at a time to get desired consistency.

Roll your dough into 1 inch balls. If you like you can roll them in cinnamon or white sesame seeds for a more finished look. Shredded coconut would be another great option.

Keep refrigerated and enjoy within two weeks or so. Makes 12 balls.

Notes: 

For those with nut allergies, you may substitute the almonds for sunflower seeds or hemp hearts.

I use oats in the recipe to cut the fat content. Feel free to use all almonds or more almonds and less oats. 

Enjoy often!


Almond Vanilla Chocolate Chip Bites

Almond Vanilla Chocolate Chips Bites

Almonds, vanilla and chocolate together...need I say any more. These are a nice easy treat anytime of day and meant to be enjoyed freely. Almonds are the most alkalizing nut, the more alkaline you eat the better. An alkaline (vs. acidic) system will help keep your system functioning at its peak! Almonds are also balancing, very nourishing, and contain high levels of potassium and vitamin E. In fact, nine almonds contain all the vitamin E you need for the day. Healthy meets delicious in these raw no-bake bites.

Almond Vanilla Chocolate Chips BitesAlmond Vanilla Chocolate Chips BitesAlmond Vanilla Chocolate Chips Bites

 Almond Vanilla Chocolate Chip Bites

Ingredients
  • 1 cup almonds
  • 1/2 cup oats (I use GF)
  • 3 tablespoons almond butter
  • 3 tablespoons pure maple syrup or agave
  • 6 medjool dates, pitted
  • 1 teaspoon vanilla
  • 1 vanilla bean, slit lengthwise and seeded
  • 2 tablespoons water, + plus more as needed
  • pinch of mineral salt
  • 1/4 cup dark chocolate chips, cacao or carob nibs, or raw chocolate

Place all ingredients in food processor except for chocolate chips. Blend, scrapping down the sides as needed, until combined. (I like to leave mine a little on the chunky side). Add 1 or 2 tablespoons more water as needed. Remove mixture and place in a medium size bowl, mix in the chocolate chips. Refrigerate for about 20 minutes, it will help the mixture stiffen a bit making it easier to handle. Roll into 1 inch balls or flatten like a cookie. If forming them into balls you may like to roll them in cacao powder, cinnamon or shredded coconut. I've done all three and all were great ! Makes approx. 12 - 18, depending on if your rolling or forming cookie shapes.

Store in fridge and enjoy within a few weeks. They also freeze well.

Optional add ins:
1/4 cup shredded coconut flakes
1/2 teaspoon or so of cinnamon

Enjoy !


PEANUT BUTTER & BANANA GRANOLA SNACK CLUSTERS

PEANUT BUTTER & BANANA GRANOLA SNACK CLUSTERS

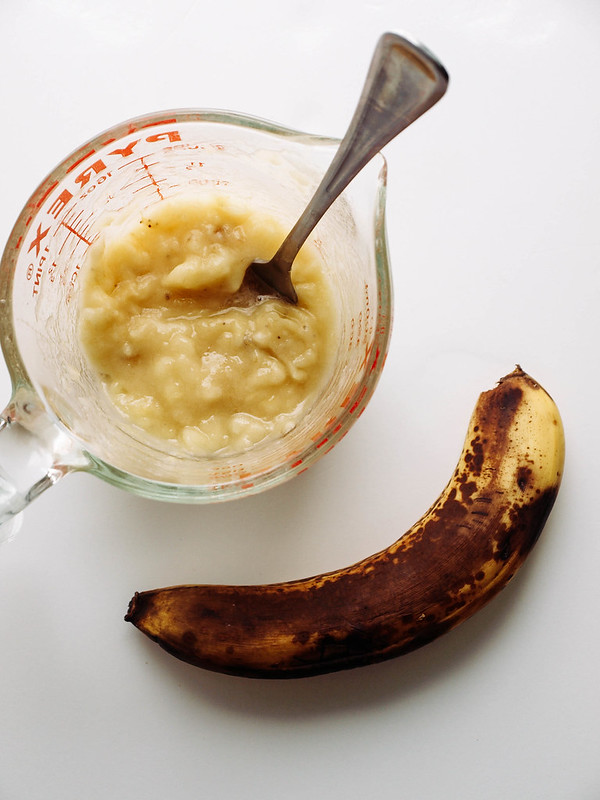
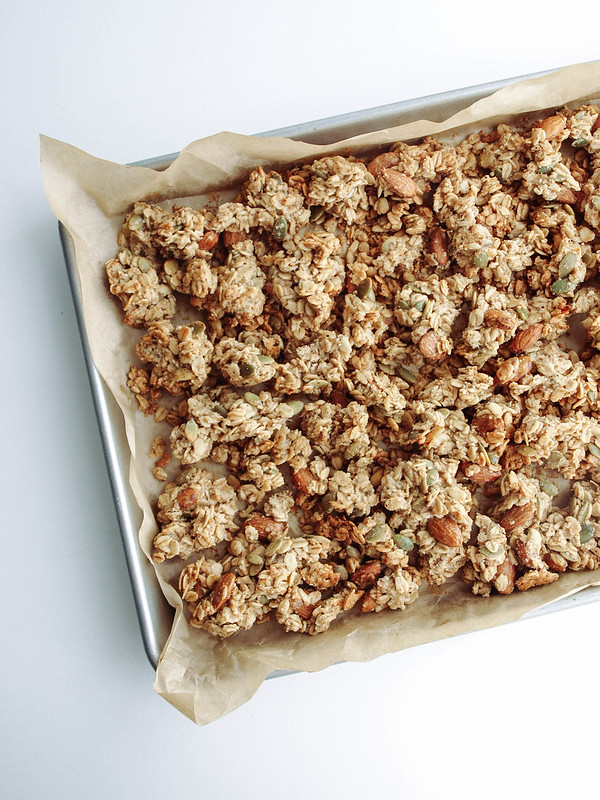
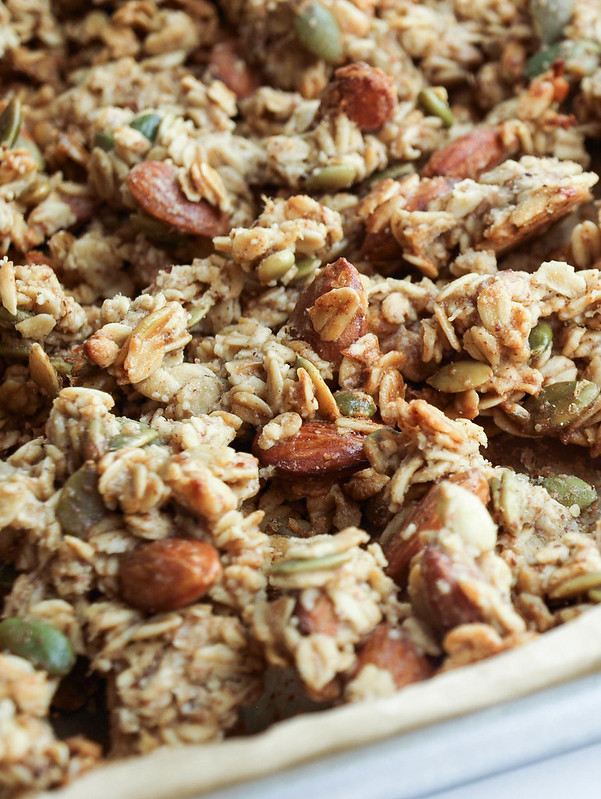
I have some granola inspiration to share with you today! While at the store a few weeks ago, I saw a package of granola from La Brea Bakery and loved that it had big chunks. I set out to recreate that in my kitchen. Initially I wanted to make a mixed fruit granola, but seeing that I had some very ripe bananas that needed to be used up I thought I'd put them into a granola with a nut butter instead. We'll save the fruit granola for another time. This combination turned out great. Not too sweet, chunky like I wanted and the nut butter will add a good amount of protein. This is a perfect snacking granola! Great to have on hand at home or pack some up and take it with on the go. You can also break it up a bit more and top it on non-dairy ice cream or yogurt. You may even like to fill a bowl full, add some milk and enjoy. However you like your granola, this will be a great addition to your granola addiction!

PEANUT BUTTER & BANANA GRANOLA SNACK CLUSTERSPEANUT BUTTER & BANANA GRANOLA SNACK CLUSTERSPEANUT BUTTER & BANANA GRANOLA SNACK CLUSTERS

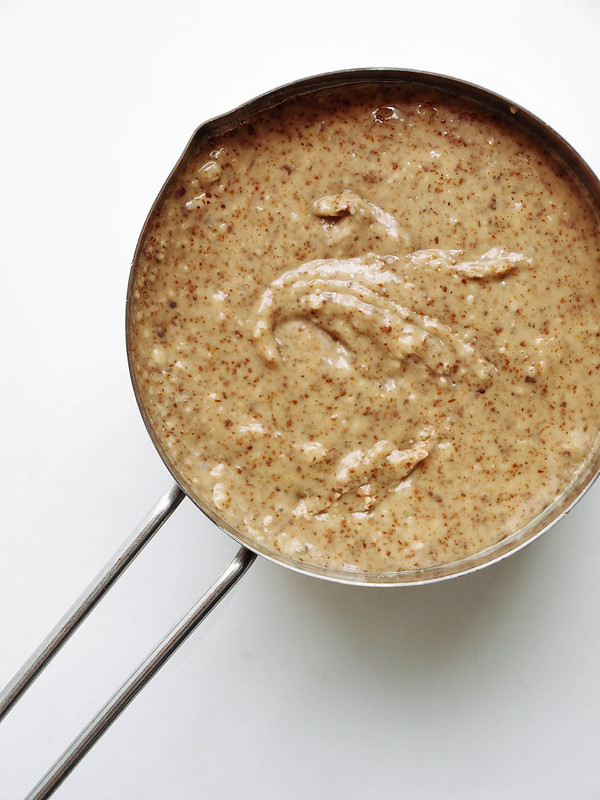
I used almond butter here but you can use any natural nut butter you like. The bananas, the riper the better...the more ripe they are the sweeter they'll be.

PEANUT BUTTER & BANANA GRANOLA SNACK CLUSTERS

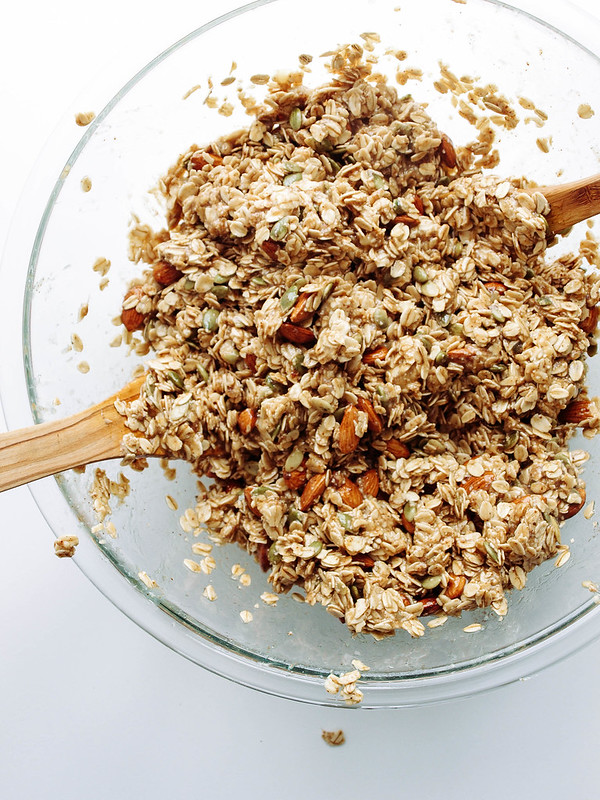
Mix your wet and dry ingredients...

PEANUT BUTTER & BANANA GRANOLA SNACK CLUSTERS

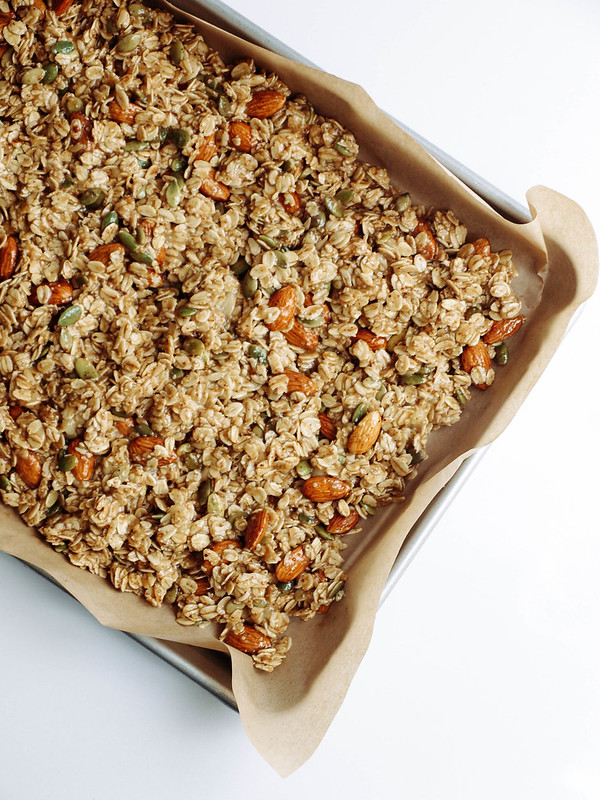
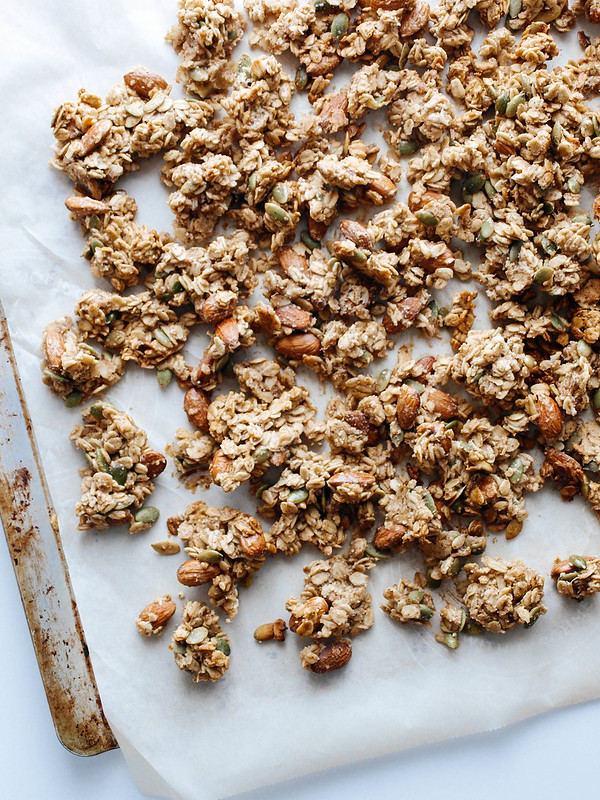
Spread on 1 extra large baking sheet or 2 smaller ones. In the picture above I spread the granola close together. I did one sheet this way and another loosely spread out (first photo). Both batches worked great but the loosely spread granola baked a little faster.

PEANUT BUTTER & BANANA GRANOLA SNACK CLUSTERS

Once cooled and broken up, you're ready to enjoy!

PEANUT BUTTER & BANANA GRANOLA SNACK CLUSTERS

PEANUT BUTTER & BANANA GRANOLA SNACK CLUSTERS

Ingredients
  • 4 cups rolled oats
  • 1 cup almonds
  • 1/2 cup pepitas (pumpkin seeds)
  • 1/2 teaspoon cinnamon
  • pinch of salt
  • 3/4 cup almond or peanut butter (I used crunchy almond butter)
  • 2 small ripe bananas, mashed (about 1 cup)
  • 2/3 cup pure maple syrup
  • 1/4 cup coconut oil, optional
  • 2 teaspoons vanilla extract

Preheat oven to 300 degrees F.

In a large bowl, mix together the oats, almonds, pepitas, cinnamon and salt.

Warm your coconut oil and maple syrup, combine with vanilla extract. Mash your bananas and measure your nut butter. Combine the wet ingredients with the oat mixture. Toss and mix to coat well.

Spread mixture evenly on a lined or lightly greased baking sheet (I used two baking sheets). You can either lightly compact the mixture or loosely spread it out a bit. If compacting, you'll want to mix the granola when rotating after 30 minutes.

Bake for 30 minutes. Turn and rotate sheet/sheets, bake an additional 25 - 30 minutes. Keep an eye towards the end so it doesn't over brown (ovens run differently). Remove from oven, granola will be somewhat soft at first. Let cool for 15 minutes, break up into chunks, especially the center part if you've compacted the mixture. Let granola cool completely to harden.

Notes:

Change up the nuts using peanuts, walnuts or pecan pieces. Use sunflower seeds in place of the pepitas.

You will most likely do just as well without any oil. If you'd like to reduce the oil, try using only 2 tablespoons. I like the flavor and addition of the coconut oil for myself.

Once cooled, if you still find your granola to not be as crunchy as you might like, bake again at 300 degrees for about 10 minutes, keep an eye so it doesn't over brown.

This granola needs to cook low and slow. My first batch I baked at 325 degrees F. for 40 minutes but it still needed extra baking time after cooling to become crunchy. I lowered the temp and added a bit more time. Be sure to watch it towards the end so it doesn't become burnt, especially if you've spread it loosely on the baking sheet.

The 1/2 teaspoon of cinnamon gives a very subtle flavor, add another 1/2 teaspoon for a more enhanced cinnamon flavor.

If you happen to have both rolled and quick oats on hand, try using 2 - 3 cups rolled oats and 1 -2 cups of quick oats (use whatever combo equals 4 cups with at least 2 cups rolled oats). This will also help to make nice clusters.

Enjoy!

    VANILLA DATE SMOOTHIE

    VANILLA DATE SMOOTHIE

    I never regret going to the gym, but I always regret not going! Case in point, I've been working very hard on a special project I have coming up and sometimes get lost in the passion of it all. It's enough to keep me from going, for which I always end up regretting. I make myself go in these times and always feel amazing when I'm done. The ideas open up and flow through me with ease, I've come up with some amazing ideas. Plus, it gives me time to break away from the intensity of the day. Even though the gym is intense in its own way, it's blood circulating and sweat producing, I find it so relaxing as well...maybe more so when it's over. ;) It really is essential to your overall good health and well-being. I agree to that 100%. Maybe some of you feel the way I do, or maybe you simply dislike it like a few people I know. Either way, I wish everyone the best of health! It's what I was thinking about today, how good it feels and I was so glad I went. Not to mention, coming home to make this vanilla date smoothie. It's a perfect sweet treat for a job well done!

    VANILLA DATE SMOOTHIE

    Earlier this month, I picked up this big beautiful box of dates from my local Indian farmers market. How could I resist?! These are the extra fancy ones and they are the most tender, soft, sweet and caramely date I've had in long time. Fresh dates are simply the best, they are sweet and ready to be put to good use. As soon as I got home from the market I put together this vanilla date smoothie and loved every sip, especially those little date pieces that are like pieces of heaven to eat. If you've got some dates and frozen bananas on hand, I suggest you treat yourself to something simple and wonderful!

    VANILLA DATE SMOOTHIEVANILLA DATE SMOOTHIEVANILLA DATE SMOOTHIEVANILLA DATE SMOOTHIE
    VANILLA DATE SMOOTHIEVANILLA DATE SMOOTHIE  

    VANILLA DATE SMOOTHIE

    Ingredients
    • 1 cup unsweetened almond milk 
    • 1 scoop vanilla protein powder, optional
    • 1 large frozen banana
    • 4 - 5 ice cubes or another frozen banana
    • 3 - 4 medjool dates, pitted (soft and fresh is best)
    • 1 teaspoon vanilla extract

    Combine ingredients in blender and blend until smooth, about two minutes. Add a splash or two of extra almond milk if needed.

    You may have visually small pieces of dates within the shake. That's ok, and even with those I had no trouble using my straw without having to clear the bottom of it maybe once or twice....Those little chunks are so caramely and delicious!

    Serves one.

    Notes:

    For the protein powder, I've been using the Garden of Life Raw Fit lately. I love the fact that Garden of Life has a few protein powders that don't contain stevia. I prefer to sweeten my shakes/smoothies with fruits and personally don't care for the stevia after taste. I'm not on a weight management program but do love the high protein amount in this powder. The Raw Fit contains 28 grams of protein, which is half my daily recommended amount. For me, one shake a day is a perfect treat! If using protein powder, you may like to add 1/4 - 1/2 cup more of milk or water.

    Enjoy!