.

Showing posts with label almond butter. Show all posts

Almond Chunky Monkey Ice Cream....It's Raw!

Almond Chunky Monkey Ice Cream

I was just gifted a new food processor as an early Christmas present. What better way to break it in then by making chunky monkey ice cream using 4 ingredients! I know it's a bit cold out for something frozen, and although this was cold it sure warmed my heart on this chilly day! Needless to say this was delicious and super healthy, much better than the Ben & Jerry's version any day. :) 

Almond Chunky Monkey Ice Cream

Almond Chunky Monkey Ice Cream

Ingredients
  • 3 frozen bananas, cut into chunks
  • 3 tablespoons almond butter, or any nut butter of choice
  • almonds, cut in half
  • dark chocolate, either in chips or bars broken into pieces*

In food processor, place frozen banana pieces and almond butter, blend until a fairly smooth consistency stopping every now and then to scrap down the sides and push the mixture to the bottom of the processor. It took mine about five minutes max, it will depend on your food processor how long yours takes. Serve in bowls and top with, or incorporate, the chocolate pieces and almonds, use as much as you like. Should be eaten right away. Makes one generous serving or two small.

Note: Never throw your bananas away. The ripper they are the much sweeter they are making them perfect for smoothies and ice creams. So just when you think you should throw them out and/or don't feel like making banana bread, unpeel them and put them in the freezer using a container of sorts (I use tupperware), and you'll have frozen banana's whenever you need all year long.

* To make 100% raw use raw cocoa chips...find recipe here.

Try adding a scoop or two of vanilla or chocolate flavor protein powder to really boost the nutritional profile! You may need to add a splash or two of unsweetened almond milk as well.


Seriously so good...Enjoy!

Make you own Almond Butter, it's really easy...find recipe here.

You may also like this Chocolate Banana Ice Cream


Oat Jam Thumbprint Cookies


Finally, a baked cookie to add to my recipes. This one is really a tasty little treat. It doesn't contain any butters or wheat flours...just oats, a few nice spices, raw or coconut sugar, coconut oil and lot's of love. This recipe even uses the food processor for easy mixing. These really remind me of a breakfast bar of sorts. They would be great in the morning, as well as after lunch, dinner or any time you just want a cookie that hits the spot with lots of wholesome goodness.


Oat Jam Thumbprint Cookies

Ingredients
  • 1 tablespoon chia seeds or flax seed meal
  • 3 tablespoons almond milk
  • 1 cup rolled oats (I used GF)
  • 1/4 cup coconut sugar, turbinado or pure cane sugar
  • 1 teaspoon cinnamon
  • 1/2 teaspoon baking soda
  • 1/2 teaspoon baking powder
  • 1/8 teaspoon himalayan salt
  • 3 tablespoons coconut oil (in it's melted state)
  • 1 tablespoon pure maple syrup
  • 2 tablespoons almond butter, optional
  • 1 teaspoon vanilla extract
  • 100% fruit jam for filling (I used strawberry & blueberry)


Preheat oven to 350 degrees.

Combine chia seeds or flax seed meal with the almond milk in a small bowl, set aside for at least 10 min.

In food processor, add oats and blend until you have a rough oat flour. Add the sugar, cinnamon, baking soda, baking powder and salt. Pulse a few times until combined. Add melted coconut oil, maple syrup, optional nut butter, chia/flax mixture and vanilla, blend until it comes together and forms a ball.

Scoop 1 tablespoon of the dough onto an ungreased cookie sheet, you should get 12 cookies. Bake for 15 minutes. 

Once removed from the oven, using a small spoon....I used the back of a teaspoon....press down gently creating a small thumb sized dent in the center of the cookie.  

Once cookies have cooled, using the same teaspoon, scoop a dollop of jam into the center.

Store in an air-tight container. In the container they will soften a bit so I suggest eating within a few days or store in the refrigerator for up to a week. 

Enjoy !

Adapted from this recipe

Simple Salad + Almond-Lime Dressing


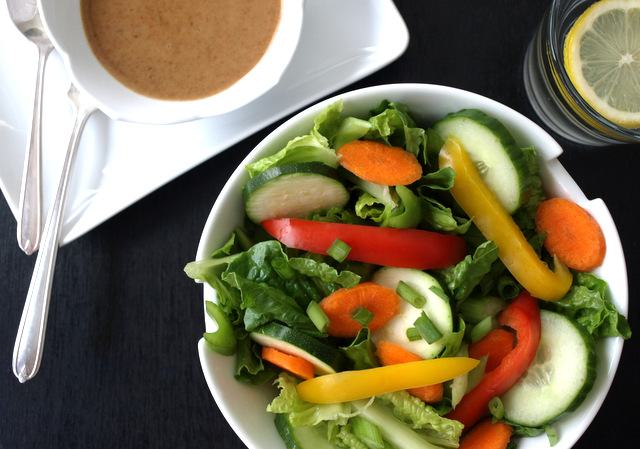
More ways to eat almond butter. I just love it...it's the best ! I go through about a jar a week these days. I make it here at home, you can find the recipe here: Raw Almond Butter. And salads, I love fresh salads...I can eat them every day. Pair this almond-lime dressing with this salad and it creates some kind of wonderful. The sweetness and coolness of the cucumbers, carrots, bell peppers, zucchini and leafy greens combined with the slightly salty, yet sweet and somewhat citrus almond flavors make this a salad I can enjoy often. I found myself tipping the bowl to get the last drops of this dressing. I think you might too. :)


All of these ingredients are alkaline based. The only questionable ingredient is the maple syrup, I find it on both the acid & alkaline list. I will be adding more meals that are 100% alkaline in the following months as I learn new habits of bringing my pH higher and maintaining a neutral level to combat some inflammation I am experiencing such as RA (explained more here: Let's Talk pH: The importance of Acid vs. Alkaline). And I plan on doing it with the most delicious meals. Eating healthy has to taste good and this hits the mark! 

Almond Butter & Lime Dressing 
  • 2 heaping tablespoons almond butter
  • 2 teaspoons tamari
  • 2 teaspoons pure maple syrup or agave
  • juice from 1 lime
  • pinch of red pepper flakes, optional

Salad
  • zucchini
  • cucumber
  • carrots
  • celery
  • bell pepper
  • scallions
  • leafy greens of choice
  • almond slices or pepitas, optional


Start with the dressing first so it can sit and let the flavors mingle while cutting up the salad mix. Combine dressing ingredients in a small bowl, mix well until creamy. Taste for flavor....more tamari? more sweetener? Add 1 tablespoon water at a time if needed if to thin. I added the extra tablespoon water this time around but prefer it on the thicker side myself, these photos reflect the thinner dressing. Dressing makes one serving.

Next, prepare your vegetables any way you like, using as much as you like. Taste dressing once more to make sure it's to your liking. Build your salad and drizzle with your perfected dressing...


Enjoy !


Make your own Raw Almond Butter ... It's very easy to do and it's a good clean food. It only has one ingredient: almonds...no sugars, fillers or junk. Spread it on apple slices, toast, put a dollop on top of your oatmeal with bananas slices & a drizzle of pure maple syrup, etc...so many ways to enjoy it!

Raw Almond Butter


I loooove raw almond butter! I eat it every day someway, somehow...whether it's on my morning toast with sliced fruit, smeared on pieces of my favorite dark chocolate bar I get from Trader Joe's or with apples slices. It's the best. I was super excited to try out my own homemade batch. After letting it cool for a bit, it was just as good as the raw almond butter I purchase from Trader Joe's, only this was better because I made it myself. It really came out perfect...I'm very pleased. I used a pound of raw almonds which cost $4.99...this is the same price for the same amount of almond butter I currently get from TJ's. I have also seen it go for upwards of $16.00. I will be making this from now on at home as I like knowing exactly what's in my almond butter plus I love the ability to add any special ingredients for special occasions or just because. 


Raw Almond Butter


Ingredients

1 pound (16 oz) raw almonds or 2 1/2 cups 
a bit of patience

optional add ins 
1/2 teaspoon or so of cinnamon
1 teaspoon vanilla extract or seeds of 1 vanilla bean


Add almonds to blender or food processor and pulse and blend until creamy. Stop frequently to push the sides down. (I found that gently shaking my food processor helped to keep the sides falling so I didn't have to stop as much. My machine has suction cups and stays put. But please, please, please use caution if doing this, I don't want you to break your appliance or hurt yourself.) 

The total time from beginning to end may take 15 to 25 min, depending on your machine. 

Notes:

To make sure you get that super creamy texture, just when you think you're done...keep the blender going for another 5 minutes or so. I've stopped to soon and had a somewhat pasty batch, it wasn't bad but the creamier it is (like in my final photos) the easier it is to spread.


After about five minutes or so it will start to bind and clump. 


This is about 10 minutes in. Finally the almonds are starting to warm up and release the oils..it's coming together now. Add any additional ingredients at this time. At this point my neighbors were probably wondering what the heck I was doing. :) 


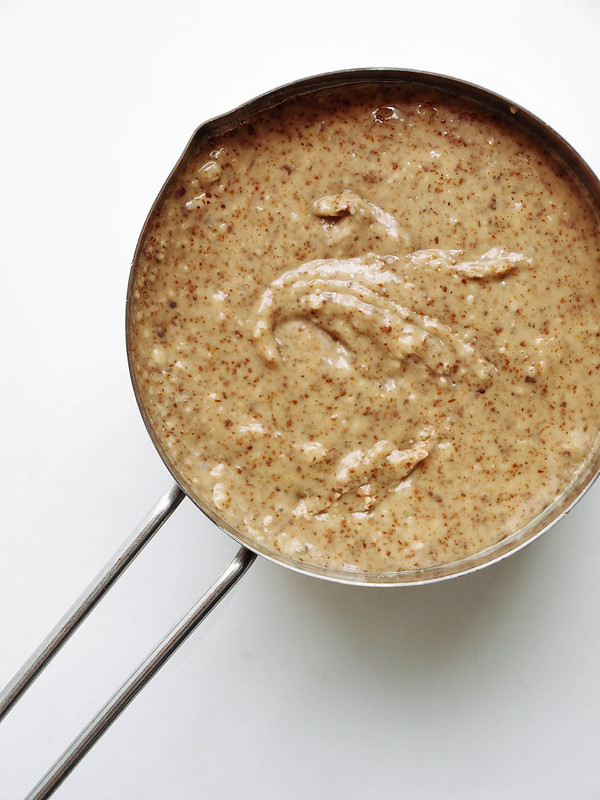
15 - 20 minutes later and voila, my end product...raw almond butter!


And now I know what that's all about...ready for some toast in the morning or some chocolate pieces smeared with the nuts of my labor. 

Enjoy !

Here's a few other options for flavored almond butter...

Maple Cinnamon Almond Butter from Running to the Kitchen

Raw Chocolate Almond Butter from Diet, Dessert & Dogs

Have fun :)

Almond Vanilla Chocolate Chip Bites

Almond Vanilla Chocolate Chips Bites

Almonds, vanilla and chocolate together...need I say any more. These are a nice easy treat anytime of day and meant to be enjoyed freely. Almonds are the most alkalizing nut, the more alkaline you eat the better. An alkaline (vs. acidic) system will help keep your system functioning at its peak! Almonds are also balancing, very nourishing, and contain high levels of potassium and vitamin E. In fact, nine almonds contain all the vitamin E you need for the day. Healthy meets delicious in these raw no-bake bites.

Almond Vanilla Chocolate Chips BitesAlmond Vanilla Chocolate Chips BitesAlmond Vanilla Chocolate Chips Bites

 Almond Vanilla Chocolate Chip Bites

Ingredients
  • 1 cup almonds
  • 1/2 cup oats (I use GF)
  • 3 tablespoons almond butter
  • 3 tablespoons pure maple syrup or agave
  • 6 medjool dates, pitted
  • 1 teaspoon vanilla
  • 1 vanilla bean, slit lengthwise and seeded
  • 2 tablespoons water, + plus more as needed
  • pinch of mineral salt
  • 1/4 cup dark chocolate chips, cacao or carob nibs, or raw chocolate

Place all ingredients in food processor except for chocolate chips. Blend, scrapping down the sides as needed, until combined. (I like to leave mine a little on the chunky side). Add 1 or 2 tablespoons more water as needed. Remove mixture and place in a medium size bowl, mix in the chocolate chips. Refrigerate for about 20 minutes, it will help the mixture stiffen a bit making it easier to handle. Roll into 1 inch balls or flatten like a cookie. If forming them into balls you may like to roll them in cacao powder, cinnamon or shredded coconut. I've done all three and all were great ! Makes approx. 12 - 18, depending on if your rolling or forming cookie shapes.

Store in fridge and enjoy within a few weeks. They also freeze well.

Optional add ins:
1/4 cup shredded coconut flakes
1/2 teaspoon or so of cinnamon

Enjoy !


PEANUT BUTTER & BANANA GRANOLA SNACK CLUSTERS

PEANUT BUTTER & BANANA GRANOLA SNACK CLUSTERS

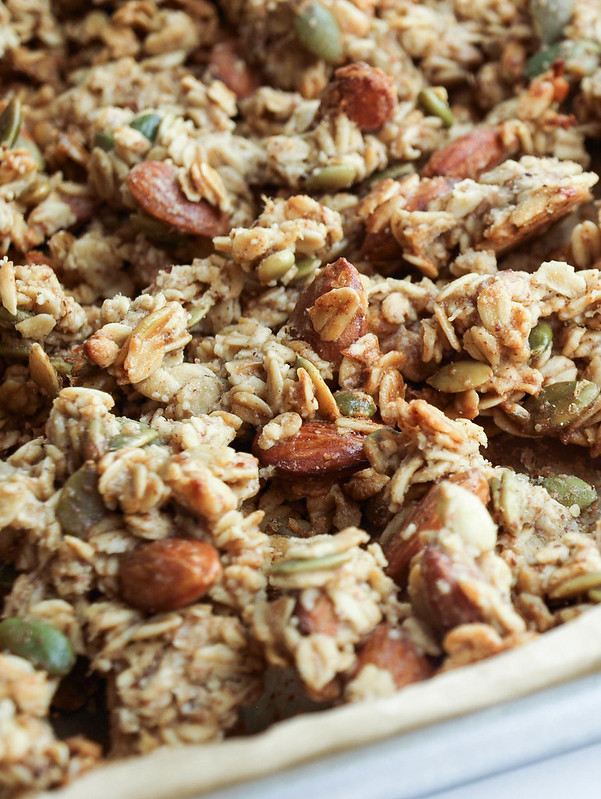
I have some granola inspiration to share with you today! While at the store a few weeks ago, I saw a package of granola from La Brea Bakery and loved that it had big chunks. I set out to recreate that in my kitchen. Initially I wanted to make a mixed fruit granola, but seeing that I had some very ripe bananas that needed to be used up I thought I'd put them into a granola with a nut butter instead. We'll save the fruit granola for another time. This combination turned out great. Not too sweet, chunky like I wanted and the nut butter will add a good amount of protein. This is a perfect snacking granola! Great to have on hand at home or pack some up and take it with on the go. You can also break it up a bit more and top it on non-dairy ice cream or yogurt. You may even like to fill a bowl full, add some milk and enjoy. However you like your granola, this will be a great addition to your granola addiction!

PEANUT BUTTER & BANANA GRANOLA SNACK CLUSTERSPEANUT BUTTER & BANANA GRANOLA SNACK CLUSTERSPEANUT BUTTER & BANANA GRANOLA SNACK CLUSTERS

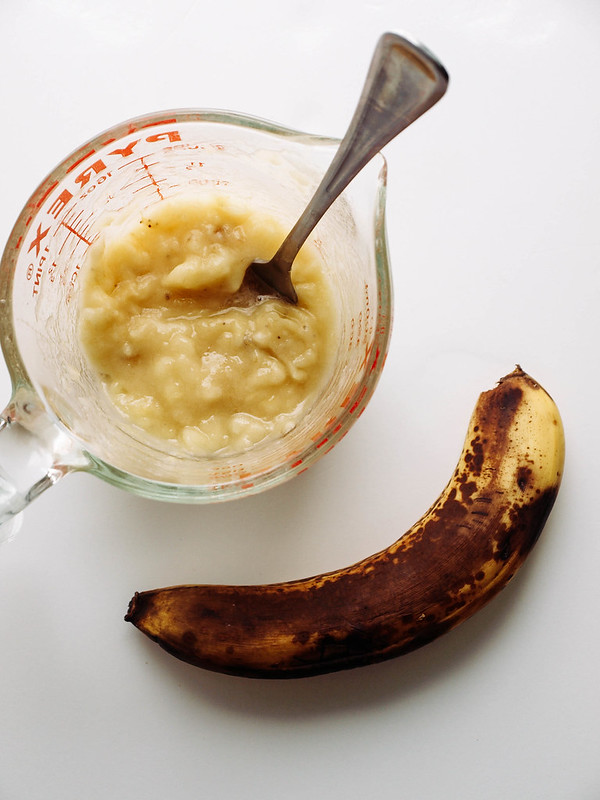
I used almond butter here but you can use any natural nut butter you like. The bananas, the riper the better...the more ripe they are the sweeter they'll be.

PEANUT BUTTER & BANANA GRANOLA SNACK CLUSTERS

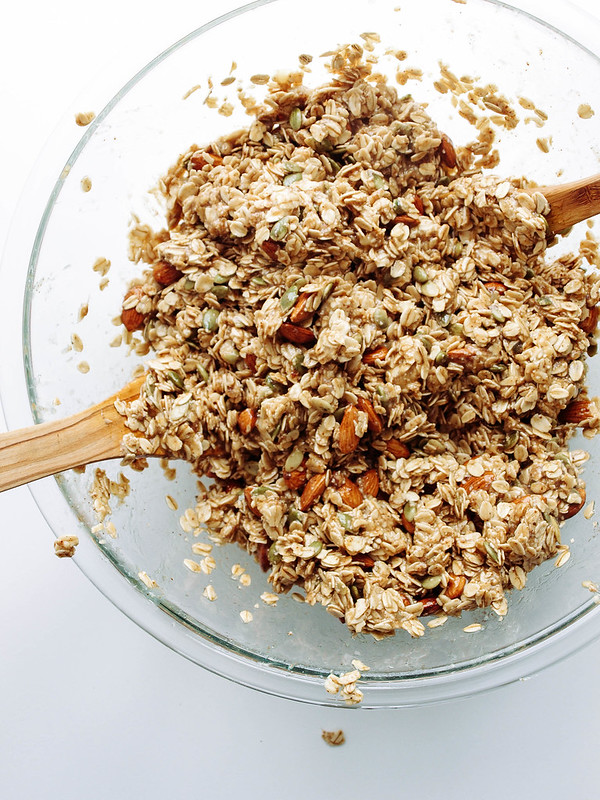
Mix your wet and dry ingredients...

PEANUT BUTTER & BANANA GRANOLA SNACK CLUSTERS

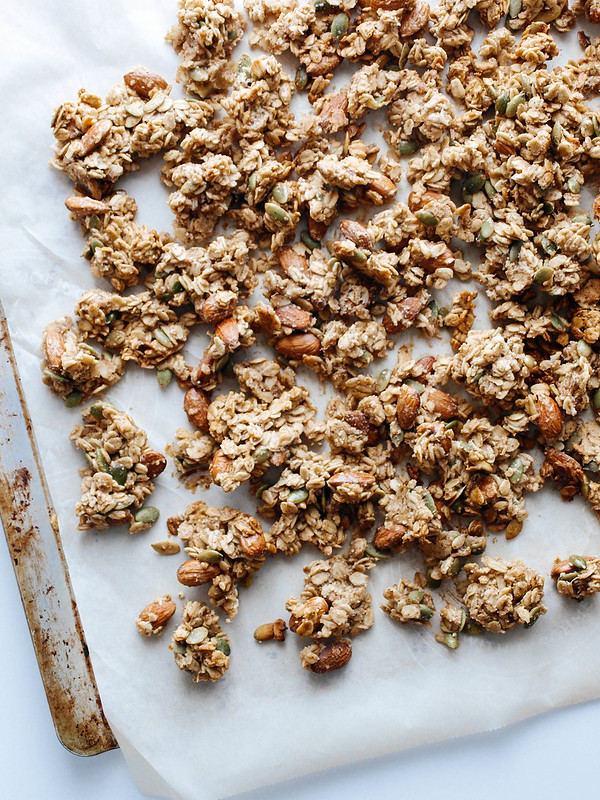
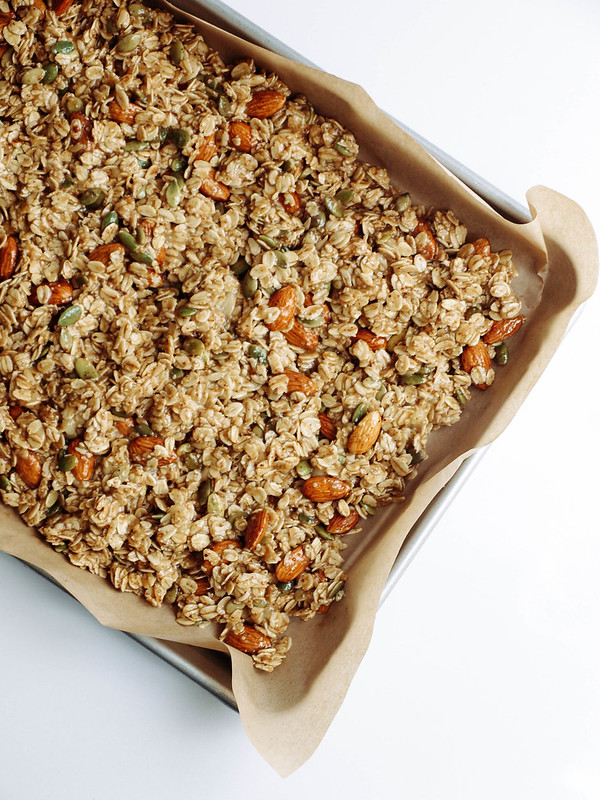
Spread on 1 extra large baking sheet or 2 smaller ones. In the picture above I spread the granola close together. I did one sheet this way and another loosely spread out (first photo). Both batches worked great but the loosely spread granola baked a little faster.

PEANUT BUTTER & BANANA GRANOLA SNACK CLUSTERS

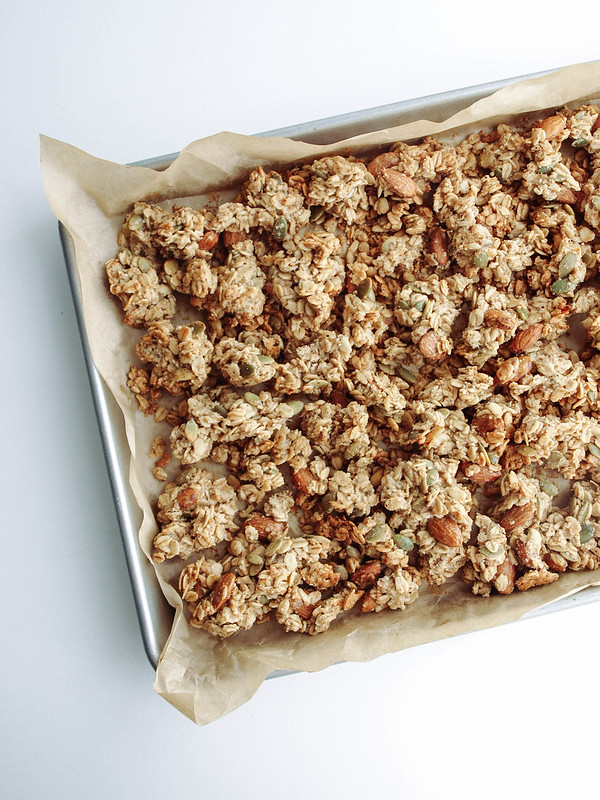
Once cooled and broken up, you're ready to enjoy!

PEANUT BUTTER & BANANA GRANOLA SNACK CLUSTERS

PEANUT BUTTER & BANANA GRANOLA SNACK CLUSTERS

Ingredients
  • 4 cups rolled oats
  • 1 cup almonds
  • 1/2 cup pepitas (pumpkin seeds)
  • 1/2 teaspoon cinnamon
  • pinch of salt
  • 3/4 cup almond or peanut butter (I used crunchy almond butter)
  • 2 small ripe bananas, mashed (about 1 cup)
  • 2/3 cup pure maple syrup
  • 1/4 cup coconut oil, optional
  • 2 teaspoons vanilla extract

Preheat oven to 300 degrees F.

In a large bowl, mix together the oats, almonds, pepitas, cinnamon and salt.

Warm your coconut oil and maple syrup, combine with vanilla extract. Mash your bananas and measure your nut butter. Combine the wet ingredients with the oat mixture. Toss and mix to coat well.

Spread mixture evenly on a lined or lightly greased baking sheet (I used two baking sheets). You can either lightly compact the mixture or loosely spread it out a bit. If compacting, you'll want to mix the granola when rotating after 30 minutes.

Bake for 30 minutes. Turn and rotate sheet/sheets, bake an additional 25 - 30 minutes. Keep an eye towards the end so it doesn't over brown (ovens run differently). Remove from oven, granola will be somewhat soft at first. Let cool for 15 minutes, break up into chunks, especially the center part if you've compacted the mixture. Let granola cool completely to harden.

Notes:

Change up the nuts using peanuts, walnuts or pecan pieces. Use sunflower seeds in place of the pepitas.

You will most likely do just as well without any oil. If you'd like to reduce the oil, try using only 2 tablespoons. I like the flavor and addition of the coconut oil for myself.

Once cooled, if you still find your granola to not be as crunchy as you might like, bake again at 300 degrees for about 10 minutes, keep an eye so it doesn't over brown.

This granola needs to cook low and slow. My first batch I baked at 325 degrees F. for 40 minutes but it still needed extra baking time after cooling to become crunchy. I lowered the temp and added a bit more time. Be sure to watch it towards the end so it doesn't become burnt, especially if you've spread it loosely on the baking sheet.

The 1/2 teaspoon of cinnamon gives a very subtle flavor, add another 1/2 teaspoon for a more enhanced cinnamon flavor.

If you happen to have both rolled and quick oats on hand, try using 2 - 3 cups rolled oats and 1 -2 cups of quick oats (use whatever combo equals 4 cups with at least 2 cups rolled oats). This will also help to make nice clusters.

Enjoy!

    Raw Pad Thai

    Raw Pad Thai

    A few weeks ago I was given a package of kelp noodles and finally found a nice dish to feature them in. I really enjoy Thai food and I've been interested in putting together a raw Pad Thai dish. I came across Ani Phyo's version using kelp noodles and that was it..inspiration hit. And I must say it came out very well considering at first I was having trouble getting the sauce to my liking. I actually had two inspirations to work with and tried them both coming up with my final version. The first was too salty, the other too oily and finally got it in the middle. Well worth the trial and errors of making the sauce. They're all simple ingredients, just tons of them. Although I prefer the minimalist approach, I felt this was to be a special dish and it was!


    Raw Pad Thai

    Kelp noodles are pretty interesting, I had no idea what to expect. They are a raw food with a neutral flavor and have a firm crunchy texture like a bean sprout. Reminds of plastic bands with their slight stretchiness. They are rich in 70 minerals and a healthy alternative to noodles containing no gluten, wheat or sugar. As an added benefit they are low in carbohydrates and calories. They can be eaten warm or cold. Find kelp noodles online and at asian grocery stores.

    Raw Pad Thai

    Ingredients
    • 1 package of kelp noodles
    • 1/2 head purple cabbage, shredded
    • 1 large carrot, julliened
    • 1 zucchini, julliened
    • 1 cup cauliflower florets
    • 4 scallions, sliced
    • 1 cup bean sprouts
    • 1/2 cup cilantro, roughly chopped
    • 1 jalapeno, sliced (optional)
    • cashews or peanuts, garnish
    • lime & orange wedges, garnish
    Sauce
    • 1/4 cup raw almond butter, I used crunchy
    • 1/4 cup tahini
    • 1/4 cup water
    • 3 tablespoons tamari, Bragg Liquid Aminos or Nama Shoyu
    • 3 tablespoon pure maple syrup or raw agave
    • 1 teaspoon garlic, minced
    • 1 teaspoon ginger, minced
    • 1/2 lime, squeezed
    • 1 orange, squeezed, optional (I just had some really sweet juicy oranges on hand and threw it in)
    Directions
    1. Place all sauce ingredients into a small/medium bowl and mix together until blended. Set aside for 30 min to let the flavors mingle. Add extra ingredients to your taste. 
    2. While sauce is setting, prepare your veggies. You could cut your kelp noodles into smaller pieces or leave as is (I left mine as is). Put kelp noodles and other vegetables in a large bowl (saving a few veggies to garnish) and add half of the sauce mixture . Toss the ingredients together until thoroughly coated. I found this was a lot of sauce and it is better to add half to see if that is enough for your liking, if not add more. I personally do not like my food drowning in sauces so I had the other half left over to use with the rest of the kelp noodles later. (See notes below.)
    3. Serve with garnishments and any extras on the side. Serves 2 - 3. 

    Notes: 
    1. If you find your left over sauce is not enough just add a small amount of water to the mixture, about 1/4 cup water, more or less should help. Or if you find you like a more thinner sauce you could add 1/2 cup or so to the starting batch as Ani Phyo calls for (she uses 3/4 cup). Or better yet, you could squeeze more oranges.
    2. If not using kelp noodles add a couple extra carrots and zucchini, or extra sprouts and cauliflower. Even add whatever veggies you may prefer. The sauce is mellow and will go with just about any vegetable.
    3. You could easily make this without the kelp noodles if you like but I do encourage trying the kelp noodles if you can, it's an experience. And a really good one at that! But there are plenty of other vegetables in this dish that will fill you up. They all add vibrant color, texture and flavor...
    Adapted from Vegangela (This sauce was too salty my taste, but I love her using all the veggies she used.) & Ani Phyo....(This was too oily so I cut out the coconut oil. Next time I will use the coriander she calls for.) You may find your own adaptations to all of ours. 

     Enjoy !


    APPLE NACHOS

    Apple Nachos

    Gather some of your favorite apples and get ready to enjoy a simple, fun and delicious treat! I'm not sure why I haven't made this yet, I guess it's true that everything has its time. I've seen apple nachos here and there on the web over the last couple years, a quick google search will pull up all kinds of similar versions, but I never put it on my immediate to do list. With all the busyness going on in life right now, I was thinking of something easy to share here and this popped into mind. I'm so glad that the time has come because these are absolutely delicious! A well loved classic, and I can see why. It's fresh, sweet (if using a sweet apple), with bits of chocolate and coconut flakes all topped with warm nut butter and cinnamon. What's not to love?! I easily ate two apples and could've eaten more if in the end I felt like slicing up more. But really two was enough, and maybe one will be enough for you, but I highly recommend going ahead and slicing up 2 per person, just in case. If you don't end up eating all the apple slices, the lemon juice will keep them from turning brown so you can make it with the leftovers the next day. This is also a great way to get in some protein that everyone seems to fuse over about a vegan diet. Where do you get your protein? How many times have I heard that. ;) Have no fear, this treat will give you about 8 grams of protein for every 2 tablespoons of nut butter you use (different butters may vary). Not too bad at all! This is a great snack for kids, as well as adults. I can see myself indulging in this quite often!

    APPLE NACHOS

    If you can circle your apples similar to this, you'll be sure to have a little of everything on every apple slice without causing too much mess when eating. But I sure didn't mind liking my fingers clean and I'm sure you won't mind either!

    Apple Nachos
    APPLE NACHOSAPPLE NACHOS

    I was asked if I'd like to try out this gourmet raw almond butter from Dastony, and being that it's from a small family business I said of course. I'm all about promoting small family run businesses, and they deliver a wonderful product that's smooth & creamy! They have a quite a few butters to choose from, even a couple sprouted ones that look delicious, all of which may work well in this recipe. Their butters are 100% organic, stone ground, raw, vegan, and free from additives and preservatives. If you're looking for that special nut butter as a gift or one for yourself to use every day, this is it!

    APPLE NACHOSAPPLE NACHOSAPPLE NACHOS

    APPLE NACHOS

    Ingredients
    • 2 apples of choice 
    • 1/4 cup natural nut butter of choice
    • small handful chocolate chips (I used Enjoy Life Mini Chips)
    • small handful shredded coconut
    • small handful slivered almonds
    • sprinkle of cinnamon
    • 1 tablespoon lemon juice

    Optional toppings:
    • hemp hearts
    • cacao nibs
    • raisins or currants
    • ground cardamom
    • pure maple syrup

    Wash, core and cut your apples into 1/4 inch slices. I like to cut mine into quarters, take a small paring knife and carefully remove the core and upper and lower end where dirt may still be collected (even after washing). Lay apple quarters on a flat surface with the inside of the apple facing up, carefully slice your apple into 1/4 inch slices, you may even be able to get them into 1/8 inch slices if your extremely patient, even 1/2 inch slices is good too. Whatever thickness you prefer, no rules here! Place apple slices in a small bowl with the lemon juice, toss to coat.

    Heat your nut butter just until warmed and somewhat runny. I like to heat mine by using a small silicon bowl placed in a small pot with just enough water to reach half way up the side of the silicon bowl, heat water on low and gently heat the nut butter until warm and drizzable.

    On a serving plate, lay your apple slices in a single layer around the outside edge, then layer another small layer over those but towards the inside center of the plate (like shown in the picture above). Drizzle the nut butter in a circular motion, from the middle of the plate to the outside edge. You can also just zig zag the almond butter from one side to the other if you like. Again, no rules...just do what you feel is best! Top with choco chips, coconut flakes, almonds and sprinkle of cinnamon (or whatever you've chosen to use as your toppings). Enjoy this simple yet delicious treat!

    Serves one generously, or two as a small plate.

    Notes: 

    Use red or green apples, you may even consider using one of each for a combination of sweet & tart.

    Make this 100% raw by using raw nut butters, raw cacao chips and unsweetened shredded coconut.

    Live well & thrive!

    I'd love to see your masterpieces...
    #thesimpleveganista


    Summer Rolls + Two Dipping Sauces

    Summer Rolls + Two Dipping Sauces

    Well hello again, I have missed you terribly! A lot has happened in the last couple weeks. After my last post Soba Noodles with Tofu, Broccoli & Carrots, I left for vacation to the beautiful Kings Canyon. The area we visited is located in the eastern sierra's located between Mammoth and Bishop just off the 395 called Rock Creek Lake. It's gorgeous up there with clean air, nice temperatures and nature all around. How does it get any better than that? You can see many of my pictures here. In that time, the 4th of July also came and went. I extreme cleaned the house, you know the unclutter, going behind closed doors and rearranging the furniture kind...feels good to be done with that! I did all those things I have put off doing while focusing my energy on this blog the last year. Speaking of which, The Simple Veganista also turned 1 on July 1st. I can't believe it's been a year already. I really wanted to do a special post for this occasion but it just didn't happen so it was a quiet celebration. When I first started this blog I had no idea where things would go but thanks to everyone who has a love for clean vegan food...this blog has done remarkably well in that short amount of time and I thank you all for following along with my passion. I intend to keep it going as long as it stays fun for me. I love all the aspects of being here...from testing and preparing the food, taking pictures, editing, writing (a few of these I'd like to improve on), sharing, getting feedback from everyone. It's truly fun for me and I'm so happy to be a part of your lives and hope you get lots of inspiration for clean, healthy eating habits along the way. And remember, that's all it is...creating NEW habits and making them healthy habits! Cheers to another year of creating those healthy habits that stick... 

    So without further ado...let's eat!

    Summer Rolls + Two Dipping Sauces

    Summer, spring or salad rolls, known as Goi Cuon in Vietnamese, are fresh, versatile and so easy to put together. You can use all kinds of vegetables to suit your taste...make them simple with just a few ingredients like the first picture or add more for a variation and rainbow effect like the picture above. I love these rolls and you can be sure that this is the first of many I will like to try out and share. The recipe today is a very basic, all around summer roll. Nothing complicated, everything should be readily available and easy to find. For a great tutorial on rolling a closed end roll like the image just above (they were cut in half) go here: How to Roll Fresh Vietnamese Spring Rolls – A Photo Tutorial

    Summer Rolls + Two Dipping SaucesSummer Rolls + Two Dipping Sauces

    You can find rice paper in the Asian section of your grocery store. There are different shapes and sizes so if you're new to this be sure to experiment with a few to see what works best for you. 

    I have included two different dipping sauces because some of you may be allergic to nuts. One will be a peanut or almond butter based dipping sauce and the other will be rice vinegar based. A sauce for everyone here. Both are excellent. I love my peanut sauce but was very pleased with the vinegar based sauce I adapted from Martha Stewart. Even though I'm not much of a vinegar lover...it was delicious! 

    Summer Rolls + Two Dipping Sauces

    Summer rolls are commonly filled with a few herbs like mint, cilantro and/or Thai basil. Feel free to use one or a combination. I find in these rolls that they all taste great together. If you can't find Thai basil, regular basil will be just as good! I especially love the basil with the peanut dipping sauce...the flavors pair so well.

    Summer Rolls + Two Dipping Sauces

    Next you can choose from a variety of greens to add to your rolls. Use one or a combination if you like. Depending on what style roll I'm making, I may use two types of greens.

    Summer Rolls + Two Dipping Sauces

    Lastly, choose your veggies and cut them into thin strips by hand or using a julienne tool. These are just a few of the veggies you can use. Try adding avocado, green onions, bean sprouts, etc. Many recipes for these rolls also use rice noodles, and you can too, but I prefer a roll full of veggies instead having one or two extra if needed. I can eat two or three of these and be completely satisfied for a few hours. 

    Adding in some sliced tofu is an option. I do like to add it to my rolls when not using the peanut sauce as it adds some protein to the meal. 

    Summer Rolls + Two Dipping Sauces

    Summer Rolls + Two Dipping Sauces 

    Ingredients (2 - 3 servings)
    • 6 rice papers (preferably the circular sheets)
    • 2-3 medium carrots, cut into match sticks or 1/4 inch sticks
    • 1/2 cucumber, cut into match sticks or 1/4 inch sticks
    • 1/2 bell pepper (yellow, red and/or orange), thinly sliced
    • 1/4 red cabbage, thinly sliced
    • greens of choice: leafy lettuce, pea shoots, spring salad mix or micro greens
    • radishes, thinly sliced (optional)
    • organic tofu (firm or extra firm), sliced (optional)
    • mint, small handful of leaves
    • cilantro, small bunch of sprigs
    • basil, small handful leaves

    Sweet Chili Sauce (2 servings)
    • 1/4 cup unseasoned rice vinegar
    • 2 tablespoons tamari or soy sauce
    • 2 tablespoons warm water
    • 2 tablespoon maple syrup
    • 1 clove garlic, minced or grated
    • 1 teaspoon red pepper flakes, or to taste
    • juice of 1 lime

    Peanut Sauce (2 servings)
    • 3 heaping tablespoons peanut or almond butter
    • 1 tablespoon tamari or soy sauce
    • 2 tablespoon maple syrup
    • 2 tablespoon warm water
    • 1 - 2 tablespoon rice vinegar, optional
    • juice of 1 lime
    • 1 teaspoon red pepper flakes, optional

    Mix your dipping sauce together first, let set so the flavors can mingle. It will taste much different after a few minutes. Taste for flavor before serving.

    This summer roll direction will be for the open end roll as shown above. For the closed end roll please see the tutorial here. 

    Fill a large shallow bowl 1/2 way with warm water...a large pie dish works great for the circular rice sheets which is what this recipe will use. Making one roll at a time, dip the rice sheet into the water making sure to get both sides and all edges, no need to let it soak until completely soft. Lay on a flat surface and fold in half, the rounded side will be the top and the flat side the bottom. The paper will still seem a bit stiff but will keep absorbing the water and soften as you layer your veggies. In the center, layer your ingredients...greens, herbs, tofu and veggies. Fold the end corner over the layer of veggies, give a nice tuck and roll. 

    Serve with choice of dipping sauce. 

    Enjoy!


      GRILLED PEANUT BUTTER & APPLE SANDWICH

      GRILLED PEANUT BUTTER & APPLE SANDWICH

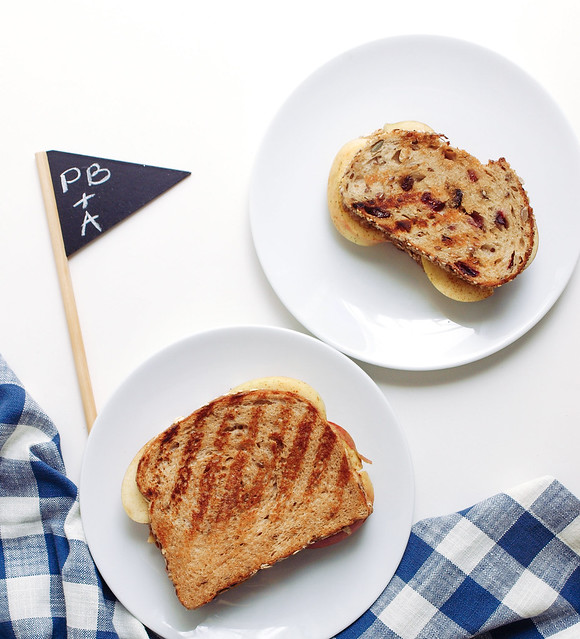
      I do love a good sandwich every now and then. And one with sweet crisp apple, warmed nut butter, hints of cinnamon and maple are right up my alley! This sandwich includes plenty of protein, fiber and other good nutritional values to keep us running and happy. I set out to put this into the collection as a nice twist on the old classic PB & J. It could also go as a PB & B if you have some bananas on hand. How great would that be? Very I think! I happen to love versatility when preparing a meal and decided to showcase it here. I've used different breads, mainly because of the various tastes we have in our home. I love the fruit, nut and seed loaf while my daughter prefers a simpler maple oat loaf. Both breads are wonderful giving their own special flavor to the sandwich. I love what the fruit and nut loaf adds to this sandwich and recommend finding one, it really adds a nice touch and pairs perfectly with the ingredients. I used fuji apples as they are our favorites. I think the tart green apples would be great here too. I also varied up the nut butters. I love my almond butter and my daughter loves her peanut butter. So it goes, we have variations and each one of us had our own special version to suit us perfectly... and it was delicious! I encourage you to use your favorite of everything here, this is more of a template than a recipe. You may also consider adding some Coconut Bacon to the middle of this sandwich. Happy creating and eating. Cheers!

      GRILLED PEANUT BUTTER & APPLE SANDWICHGRILLED PEANUT BUTTER & APPLE SANDWICH

      Spread nut butter on all slices, top with apple slices, dash or two of cinnamon and a drizzle of pure maple syrup...

      GRILLED PEANUT BUTTER & APPLE SANDWICH
      GRILLED PEANUT BUTTER & APPLE SANDWICH

      Cover with top slice and grill until nice and golden on each side...

      GRILLED PEANUT BUTTER & APPLE SANDWICHGRILLED PEANUT BUTTER & APPLE SANDWICHGRILLED PEANUT BUTTER & APPLE SANDWICH

      Slice in half and enjoy the simples!

      GRILLED PEANUT BUTTER & APPLE SANDWICH

      GRILLED PEANUT BUTTER & APPLE SANDWICH

      Ingredients
      • 2 apples of choice 
      • nut butter of choice
      • cinnamon
      • maple syrup
      • 4 slices bread of choice 
      • coconut oil

      Wash your apples and slice in half. Using a teaspoon, scoop out the core. Remove any area from the stem and calyx (bottom indentation) of the apple. Place sliced apple half in standing position and cut into 1/4 inch slices. You should get 3 or 4 slices per half, depending on the size of your apple. Cut the slices in half, vertically.

      Add a nice layer of nut butter to both slices of your sandwich, layer one slice with apples, sprinkle with cinnamon and add a light drizzle of maple syrup over top. Place top half on sandwich.

      Grease your griddle/skillet with coconut oil and heat over medium. You can also add a very light coating of coconut oil to the top of your bread slice using a silicon brush, or whatever method you prefer. Place sandwich, oil side down, and cook for about 2 - 4 minutes. Brush top half lightly with coconut oil, flip and cook another 2 - 4 minutes. Remove from heat and serve with any remaining fresh apple slices on the side.

      Serves two.

      Notes:

      This would be great with a little Coconut Bacon in the middle.

      Make gluten free by using your favorite gluten free bread.

      This sandwich can be breakfast, lunch or dinner.

      Enjoy the simples!


      I'd love to see your masterpeices!
      #thesimpleveganista