.

Showing posts with label garlic. Show all posts

SMOKY CHIPOTLE MAPLE T.L.T.

SMOKY CHIPOTLE T.L.T SANDWICH

This is reminiscent of a B.L.T in some ways, minus the crunchiness of the bacon, but I rather prefer this one! So my version will be called a T.L.T., or better yet, Smoky Chipotle T.L.T. If you've followed my blog long enough, you will know I love adding a little spice to my foods whenever I can! 
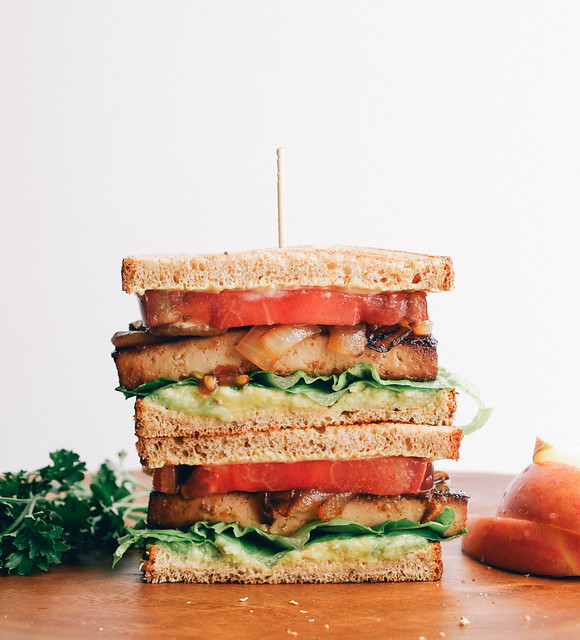
SMOKY CHIPOTLE T.L.T SANDWICH

I've had my eye on this recipe from I Love Vegan for a while and finally got around to putting it together. Let me tell you, it did not disappoint! My only additions were adding a little bit of ground chipotle pepper and using a bit more of each ingredient than what is called for in the original recipe. I love the caramelized onions and the avocado mash as the condiment...so good! I tend to use avocado or a light flavored thin hummus as a sandwich spread all the time now. They both are wonderful!  A hummus spread would be great here too. If you use the avocado, I ensure you that you will not miss the old standard spreads. The tomato will also lend some nice juices into the mix. This was a great find and a keeper! Plus, it will leave your home smelling delicious. :)
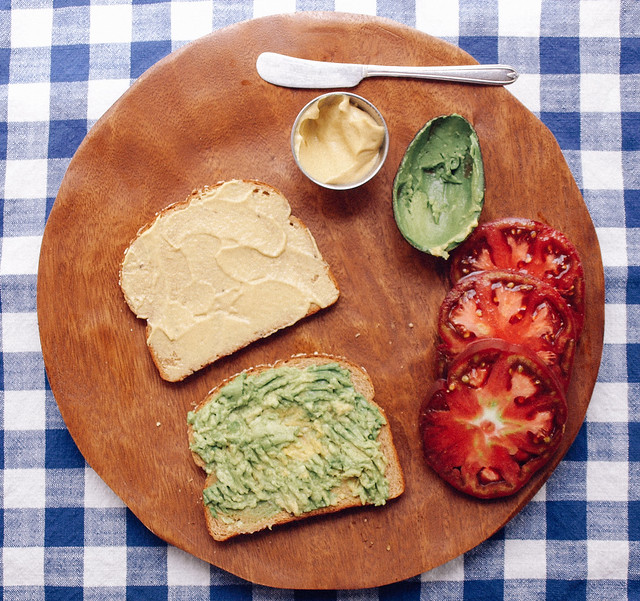
SMOKY CHIPOTLE T.L.T SANDWICH

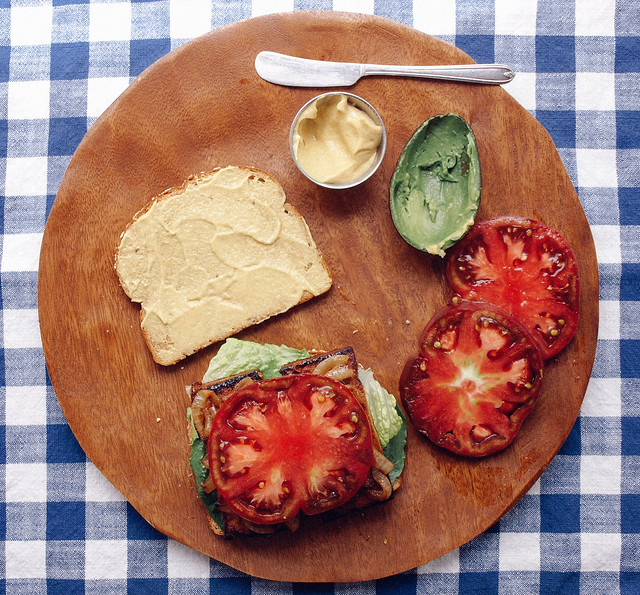
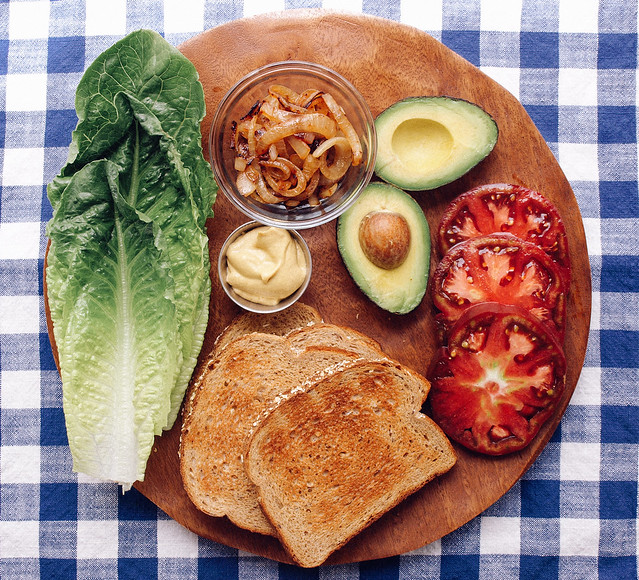
Start by spreading your mustard and mashed avocado...
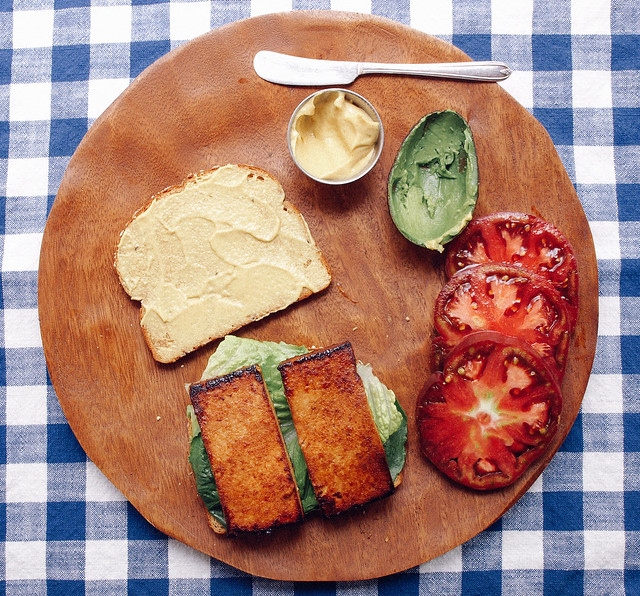
SMOKY CHIPOTLE T.L.T SANDWICH

Add your leafy greens and tofu slices...
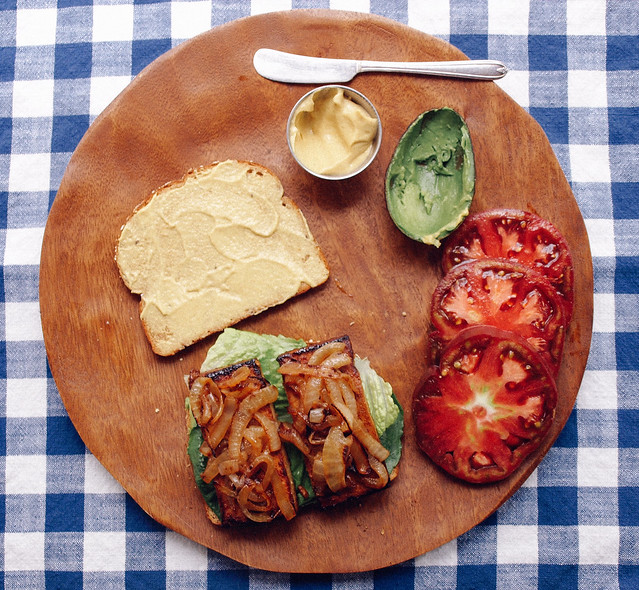
SMOKY CHIPOTLE T.L.T SANDWICH

Top with grilled onions...

SMOKY CHIPOTLE T.L.T SANDWICH

Lastly, add tomato, I used a large deep red heirloom tomato I had on hand. Place remaining slice of bread on top and slice in half. 

Pairs great with fresh sliced apples!
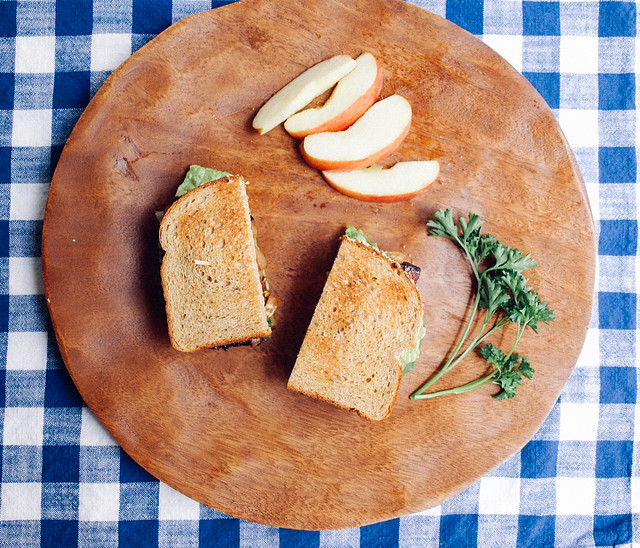
SMOKY CHIPOTLE T.L.T SANDWICH

SMOKY CHIPOTLE MAPLE T.L.T.

Ingredients
  • 1 block (15oz) organic firm or extra firm tofu
  • 1 onion, thinly sliced
  • 2 tablespoons sesame or olive oil, divided
  • 1 medium to large tomato, sliced thin
  • Dijon or stoneground mustard, to spread
  • 1 1/2 avocados, mashed, to spread
  • a few leaves of your favorite sandwich greens, red or green leaf, romaine, iceberg, etc...
  • salt to taste
  • 6 slices bread of choice
Marinade
  • 2 tablespoons pure maple syrup
  • 1 tablespoon tamari, bragg's liquid amino's, coconut amino's or soy sauce
  • 1 tablespoon water 
  • 1/4 teaspoon liquid smoke
  • generous dash of garlic powder or 1 clove garlic, minced
  • dash chipotle powder, to taste

Remove tofu from the package. Turn tofu on its side and slice in thirds, creating 3 large slabs. Gently press each slab between a clean dish towel or paper towels to remove some of the excess water. Cut the slabs in half. You should have six pieces that look like large domino (rectangular) shapes. 

In a medium sized shallow dish, mix together the marinade. Place tofu in the dish and let soak for about 1 hour turning carefully once or twice in between. 

Once the hour is almost up, caramelize your onions using 1 tablespoon oil. Heat oil over medium heat, add onions, turn down heat to medium low, stir often and cook until they start to brown and caramelize. May take 10 to 15 minutes or so. Once done, set aside.

In same skillet, heat remaining oil and cook tofu over medium high heat. Once tofu has browned, about 5 minutes, gently flip and brown the other side. It's ok if it gets a little crispy too! If you feel it is drying out too much, add some of the juices from the bowl it marinated in for extra moisture. When done, remove from heat.

Toast your bread. Spread one side of toast with mustard and the other with a layer of mashed avocado, about 1/2 avocado. Over the avocado, layer your lettuce, tofu, onions and tomato. Top with your other slice of bread. 

Serves three.

Enjoy! 

I'd love to see your masterpieces!
#thesimpleveganista

PASTA AND BEAN SOUP WITH KALE

Pasta and Bean Soup with Kale

I awoke from my slumber this morning and felt it was a soup kind of day. I don't know about you, but I love my soups! They can be so hearty and filling. This is one of those soups you can count on to leave you feeling satisfied. All the ingredients come together for a flavorful and hearty soup that you will come back to again and again. The recipe will make enough to feed a large family, or if not feeding a large family you will have leftovers to easily reheat and enjoy. I highly recommend using a stock pot since it will yield a lot of soup. You'll be happy to have leftovers as it's gets better as it sets!

Pasta and Bean Soup with Kale

I chose to use black eyed peas here but you can use whatever beans you prefer, just be sure to take a look at the bean cooking guide for your cooking times if using dried beans. Black eyed peas are a high protein and fiber bean, containing 11 grams of protein per serving and 5 grams of fiber. After soaking overnight, they took just under 1 1/2 hours to finish up. For the pasta I have used this quinoa & brown rice fusilli pasta from Trader Joe's. Again, use whatever paste you prefer. The pasta adds more protein and fiber making this a great hearty soup full of all the nutritious essentials to keep you healthy and feeling your best.

Pasta and Bean Soup with Kale

Kale is king of the leafy greens and is packed full of goodness! We all know by now that it's a powerhouse of vital nutrients like vitamin K, A & C. It also has high levels of manganese, copper, fiber and calcium. Plus it has a good amount of protein for a leafy green. I used Tuscan kale (aka, lacinato or dinosaur kale) for this recipe and it was delicious. It has such a rich deep green color and is one of my favorite kale varieties.

Pasta and Bean Soup with Kale

Warm and hearty, it's an all-around wonderful soup to enjoy throughout the year!

Pasta and Bean Soup with Kale

PASTA AND BEAN SOUP WITH KALE

Ingredients
  • 1 pound dried  beans (black eyed peas, cranberry or great northern beans) or 3 cans (15 oz) various beans, drained and rinsed
  • 1 tablespoon grapeseed or olive oil or 3 tablespoons water (for water saute)
  • 1 medium yellow onion, diced
  • 2 garlic cloves, minced
  • 2 large carrots, sliced
  • 1 bunch Tuscan kale (about 4 loose cups),  center stems removed and roughly chopped
  • 2 large organic tomatoes, diced (I leave the skin on) or 1 can (15oz) crushed canned tomatoes with juice
  • 8 cups vegetable broth, water or combo
  • 1 tablespoon dried thyme or 2 tablespoons fresh 
  • 2 teaspoons dried sage or 3 -5 leaves, chopped
  • 2 -3 teaspoons smoked paprika, optional
  • 3 bay leaves
  • a pinch or two of red pepper flakes
  • himalayan salt & cracked pepper, to taste
  • 8 oz of pasta of choice, cooked
  • almond parmesan and lemon, for serving

1. If starting with dried beans. Pre-soak your beans overnight, or at least 8 hours, in a large pot of water filled two to three inches above the beans. Drain and rinse well, set aside. After pre-soaking, different beans will need to cook and simmer for different times. Cranberry beans need 45 minutes or so cooking time, while northern beans & black eyed peas need about 1 - 2 hours. Follow this guide for further cooking times depending on your beans of choice: Cooking Beans

2. In same pot you pre-soaked your beans in, add oil/water and heat over medium heat. Add onion and cook until translucent, about 5 minutes. Add in garlic, carrots, thyme and sage cook another minute or so. Add in broth/water, beans, bay leaves, tomatoes, kale and red pepper flakes, bring to a boil, cover, reduce heat to low and simmer until beans are done (time varies depending on beans...my black eyed peas took just under 1 1/2 hours), stirring occasionally. If using canned beans, add in when beans are called for and cook for 30 - 40 minutes, stirring occasionally.

3. While the soup is simmering cook your pasta according to package, set aside. Once soup is ready, remove bay leaves, add in pasta and cook 5 more minutes, taste for seasoning adding salt and pepper to taste. Serve with a dusting of almond parmesan and a squeeze of lemon for brightness. Pairs great with crusty artisan bread or warmed corn tortillas.

Serves 6 generously.

Notes:

Feel free to use 3 cans (15oz) beans such as kidney, cannellini, pinto or northern in place of dried beans. Just be sure to drain and rinse them. Skip the first step and go right into step 2 instead. 

I've made this and added the smoked paprika and it was delicious! It is now an option in the recipe. I've also used a mix of canned kidney beans, pinto beans and black beans, and have even added in some mushrooms and used quinoa pasta...just goes to show this a very versatile recipe...almost anything goes and it's still delicious...gotta love it!

Use any pasta type you like from shells, macaroni, penne, bowtie, ditalini, etc. My pasta grain of choice is spelt, quinoa or rice pasta. The latter two being gluten free. If you're not gluten intolerant you can use spelt and whole wheat. If you're not following any sort of diet, use whatever pasta you prefer. 

If you don't have garlic on hand, use 1/2 teaspoon garlic powder when adding the other herbs and spices.

Enjoy!


Winner! Mac & Cheese Bake

Vegan Mac & Cheese Bake

Winner, Winner....Mac & Cheese Dinner!

Vegan Mac & Cheese Bake

First off, let me say that this was a supreme hit with my 12 year old daughter who usually turns her nose up at almost everything I make! As a matter of fact, I hear her in the kitchen right now nibbling on the left overs...this is a good day. We have a winner here...this mac & cheese bake will hit the spot for the kids, just don't say a word about what's in it. ;) Now had I added veggies in the bake, it would not have passed which is why this is just a simple recipe. Feel free to add in veggies like broccoli, kale, etc...whatever you may usually add into a mac & cheese bake! 

Vegan Mac & Cheese Bake

As for myself, I seriously could have sat there and ate this whole thing myself. I haven't had a mac & cheese bake in I don't know how long. The cheese is just great! I especially love the bread crumbs and the light dusting of smoked paprika I added on top of my portion. I paired mine with some sauteed Tuscan kale which was terrific! 

Vegan Mac & Cheese Bake

Vegan Mac & Cheese Bake

Ingredients
  • 16 oz. package pasta of choice (I used rice penne pasta) (works with an 8oz package too)
  • paprika, garnish

For the bread crumb topping
  • two pieces of bread or 1 cup bread crumbs 
  • tablespoon olive oil
  • twist or two of the salt grinder

Cheese Sauce
  • 1 1/2 cup raw cashews, preferably soaked for a 2 -3 hours (aides in digestion)
  • 1 3/4 cups water or unsweetened almond milk, or combo like I did
  • 1/3 cup nutritional yeast
  • juice of one large lemon or 1 tablespoon vinegar
  • 1 clove garlic
  • 2 tablespoons of extra virgin olive oil
  • 1 tablespoon white miso
  • 1 teaspoon onion powder
  • 1 teaspoon sea salt, or to taste
  • 1/4 to 1/2 teaspoon chili powder, to taste*
  • 1/8 teaspoon turmeric
  • dash of cayenne powder 

    Preheat oven to 350 degrees.

    Bring a large pot of water to a boil, cook your noodles al dente and set aside.

    While waiting for the water to boil, start with your bread topping first. I toasted two pieces of bread we had on hand really well and processed them in the food processor until crumbly, a high speed blender will work too. Place the crumbs in a small bowl, drizzle with olive oil and a twist or two of the salt grinder, mix well and set aside. Quickly rinse the processor/blender bowl and move on to the cheese sauce.

    For the cheese sauce: In food processor/blender, combine all of the cheese sauce ingredients except for about 1/2 of the water/milk and blend until creamy. Add remaining water/milk and blend again. Taste for flavor adding anything extra to suit your taste.

    Once pasta is cooked and drained. Add pasta back to the pot it was cooked in, add the cheese sauce and combine well. It may seem like too much liquid but the pasta will take care of most of it.

    In baking dish, pour mac & cheese and top with bread crumbs. Bake for 25 - 30 minutes, check after 15 minutes if crumbs are darkening too much for your liking, cover with foil.

    When done, let cool about 10 minutes and serve. The sauce will thicken upon standing.

    * The chili pepper adds a really nice flavor without being too powerful. If your worried about the spiciness, especially for the little ones, I would suggest using the smaller amount, taste and add more if desired.

    Notes: If you use a smaller baking dish or use ramekins, lessen the cooking time to 10 - 20 minutes depending on the size of dish you use.


    Enjoy!

    Why I ♥ this cheese so much is not only does it taste fantastic and its easy to make, but also because not one cow was harmed, or had their baby taken away, or just simply had to live a life of misery in order to satisfy a taste we have come accustomed to without even realizing how these animals are handled, especially through factory farming. That in itself makes all dairy products undesirable to me. I began my vegan journey for health reasons and soon found out just how unpleasant the meat and dairy industry really is. It is not a question of whether it's wrong or right to consume animals and their products...that depends on your circumstances. But I do believe that in this day and age we live in we simply do not need them to survive, and we definitely do not need to factory farm them the way it is being done.

    Veganism for me is liberation for ALL sentient beings! And it most certainly starts with my fork. :)

    To find out more about the life of factory farmed animals and animal rights you can visit PETA.org for more information.

    Spaghetti Squash & Italian Bean Balls

    Spaghetti Squash & Italian Bean Balls

    If you've never had spaghetti squash, you are in for a surprise. It really is a great replacement for pasta for those looking for a change, or just wanting to stay away from the wheat and rice pasta alternatives. It does have a little crunch but it's very pleasant, the texture reminds me a little of kelp noodles if you're familiar with those. Spaghetti squash contains lots of nutrients, including folic acid, potassium, vitamin A & C, and it's low in calories containing about 42 calories per serving. It's just so colorful too. I can definitely get used to this and incorporate it into my meal rotations every now and then.

    Spaghetti Squash & Italian Bean Balls

    This is my second time having spaghetti squash. The first time was with just sauce and that was delicious by itself. But I decided if I was going to do a recipe it would be best to add in some bean balls as well just to make it a more rounded meal. And it was, this was very filling and the bean balls came out great. They definitely added more protein per serving to this meal and left me completely content for quite a few hours.

    Spaghetti Squash & Italian Bean BallsSpaghetti Squash & Italian Bean Balls

    I really wanted the bean ball recipe to be easy, using things you may already keep on hand so you can whip these up without too much planning and/or work involved. I also wanted to make this with an option for being low fat, as well as for people with nut allergies, you can add the nuts/seeds if you wish. I did this batch without any nuts/seeds. Adding them into the mixture will give an extra dose of protein, texture and hardiness to the bean balls. You may think they look a little dry coming from the oven (dipping them in sauce right before serving will greatly help that), but once you put some sauce on top they come to life. Honestly, I actually found myself munching on the leftover bean balls the rest of the day without any sauce. They held together extremely well too!

    Spaghetti Squash & Italian Bean Balls

    Spaghetti Squash & Italian Bean Balls

    Ingredients
    • 1 large or 2 small spaghetti squash, seeds removed
    • 1 jar (25oz.) organic pasta sauce of choice
    Bean Balls
    • 1 heaping cup of mushrooms (about 4 oz), sliced (I used cremini)
    • 1 small yellow onion, diced
    • 2 cloves garlic, minced
    • 1 tablespoon olive or grapeseed oil, to saute
    • 1/2 cup walnuts or sunflower seeds, optional
    • 1 can (15oz) cannellini, kidney or black beans, drained and rinsed (I used cannellini)
    • 1 cup of quick oats
    • 1 tablespoon dried oregano, basil, thyme or Italian seasonings (or a mixture of these)
    • 1/2 teaspoon garlic powder
    • dash or two of cayenne pepper or red pepper flakes, to taste
    • sea salt and cracked pepper, to taste

    Preheat oven to 375 degrees.

    Cut spaghetti squash in half lengthwise, remove seeds and place in roasting pan or baking dish, cut side up. If you like you can coat with a thin layer of olive oil and a sprinkle of salt & pepper. Add about 1/4 inch of water to the dish and bake on bottom rack for 45 - 50 minutes. (You will be adding the bean balls to the middle rack about half way through.) EDIT: Alternately, you can place squash cut side down (without oil and seasonings), add 1/4 inch of water to the dish and bake the same as above (this has been my preferred method lately). 

    Start assembling the bean balls. Saute onions, mushrooms and garlic over medium heat for 5 minutes and let cool. If using the nuts/seeds, place in food processor first and pulse until coarsely ground, and continue. Also, if using old fashioned oats place them in the with the nuts to chop then up a bit. In food processor place beans, sauteed veggies, oats and herbs and spices. Pulse until just combined. Taste for seasoning adding anything extra you may like. I added in some fresh chopped basil I had on hand.

    Roll into balls, about 1 1/2 - 2 inches, and place on a baking sheet. I was able to get 9 jumbo sized bean balls. Put in the oven on the middle rack for the remaining 25-30 minutes of the squash cooking time, they should get at least 20 minutes. Remove both when time is up and let cool. OR...you can also cook the balls in a saute pan using a little olive oil over medium to medium high heat, turning often enough so that all sides brown (I used the oven method here).
    spaghetti squash

    In the meantime, heat your sauce. When ready to assemble, using a fork scrape the insides of the squash horizontally all the way around. It will pull easily from the sides resembling 'noodles'. You will have more squash noodles than you might expect, enough to serve two with one good sized squash.

    Serve squash 'noodles' topped with bean balls, sauce, fresh cracked pepper, salt and some chopped fresh parsley or basil. A nice dusting of Almond Parmesan will also enhance this dish!

    Serves 3 - 4. Store leftovers in an air tight container for up to five days. Leftovers were great!

    Notes:

    If you don't have quick oats, use regular oats but process gently into a very rough flour. Also, replace the oats with breadcrumbs if you prefer.

    Try dipping your bean balls in the sauce just before serving, this will greatly enhance the visual appeal as well giving it a nice flavorful coating.

    Sub in zucchini noodles, gently heated, or any pasta of choice if spaghetti squash is not available. 

    Spaghetti Squash & Italian Bean Balls

    Enjoy!

    Adapted from these recipes: Whole Foods and The Vegan Stoner

    Roasted Garlic, Miso & Greens Soup

    roasted garlic, miso & greens soup

    This will be the new 'Chicken Soup' in terms of healing and building the immune system when you are feeling under the weather. The real trick is to keep from getting sick in the first place...adding this to your diet may be good preventative medicine. Garlic, miso and greens are all super foods to help maintain and restore your body's immune system. Lemon and red pepper flakes also aid in healing in their own way. This is a very simple soup with wonderful flavors coming from the few ingredients this recipe calls for. It doesn't need much making this an even better go to soup when feeling under the weather or just because you simply love roasted garlic. You could also add some cubed organic tofu for added protein. I really enjoyed this soup and hope you find it as good as I did.

    Roasted Garlic, Miso & Greens Soup

    Do not be turned off by the amount of garlic listed. Roasting garlic in the oven dramatically mellows out the intense garlicky flavor leaving behind a very pleasant mellow flavor. It will become mild, sweet, nutty, almost caramel like. It will squeeze out of the skins like butter. No peeling necessary. You can use less garlic if you are uncomfortable with this amount. Also, to lessen energy use I would suggest roasting garlic along with other vegetables to be used in another dish or alongside this one. Here's a great visual tutorial from Oh She Glows on how to roast garlic.

    Roasted Garlic, Miso & Greens Soup

    Ingredients
    • 2 heads of garlic
    • 2 tablespoons olive oil
    • 6 cups water or vegetable broth (I used water)
    • 3 to 4 tablespoons white miso, to taste
    • 4 cups greens of choice, chopped (I used tuscan kale)
    • pinch of red pepper flakes, garnish
    • squeeze of lemon, optional
    • himalayan salt to taste

    Preheat oven to 400 degrees. 

    Remove most outer layer of skin from bulbs of garlic, leaving the most inner layer so they will stay together. Cut off the tops of the garlic bulbs. Place bulbs cut side up on a piece of tin foil large enough to fold over and close tight at the top when done. Drizzle one tablespoon olive oil over each bulb. Close the tin foil by folding up the edges and squeezing them together at the top and fold over, or bring up the sides and fold over while pinching and folding the ends. Bake for 45-50 minutes. Let cool for 10 minutes. 

    In large pot, squeeze garlic bulbs into the pan and mush it a bit with the back of a wooden spoon. Add liquids, turn heat to medium. Add your miso and stir to incorporate the paste. Once broth has warmed for about 20 minutes, add in greens and let wilt. Serve with a slice of lemon and a pinch of red pepper flakes. I topped mine with a few colorful purple micro greens. Serves six.


    Notes: 

    ~ If using tofu, add in after adding the miso paste. Use soft or firm tofu that has been pressed to remove excess moisture. To press you can either use your palms by using paper towels in between to soak up the moisture. Or place the tofu under a somewhat heavy book with paper towels on each side of the tofu for 10 minutes or so.

    ~If staying away from soy, try using brown rice or chickpea miso.

    ~ Adding wakame (sea weed) as your green would also add great nutrition. Seaweed is full of essential minerals and vitamins that the body needs. You can find wakame dehydrated so it will last in the pantry a long time. Simply crumble some in your soup, wait a few minutes and it will add lots of valuable trace minerals. Here is a site that offers a bit of information and many recipes using wakame: Wakame: Health & Healing from the Sea

    Great for the mind, body and soul...Enjoy!


    Raw Veggie Chili with Taco Nut Meat

    Raw Veggie Chili with Taco Nut Meat

    This is a welcome meal after all the Thanksgiving festivities. Nothing like adding a raw meal into the mix and this was superb! I have to hand it to Ani Phyo for not being afraid to use spices, this packs great flavor with fresh produce to create a raw chili that I absolutely adore and am craving already. Adapted from this recipe 'Fresh Tomato Chili with Taco Nut Meat'. I will definitely be adding this to my to go lunches as well as my at home meals. Feel free to add/subtract any vegetable you wish. Get in as many as you can to really make this a well rounded garden chili recipe. Use as much or as little as you like of each ingredient. This could've really used a dollop of raw Sour Cream or this flavorful Lime Cilantro Cashew 'Sour Cream', it would've added that final touch.

    Raw Veggie Chili with Taco Nut Meat

    Mine didn't seem to come out with as much soupyness as Ani's photo shows. But never the less, this is so very fresh, hearty and delicious...simply great! Be sure to take a peek at her photo to see what I mean. You can find it here, just scroll down a bit. She also has other recipes you may be interested in. Her focus in on raw food only.

    Raw Veggie Chili with Taco Nut Meat

    Dice up your vegetables and fresh oregano (if using fresh)...

    Raw Veggie Chili with Taco Nut Meat

    Combine with seasoning, I also added in some cilantro as an after thought...

    Raw Veggie Chili with Taco Nut Meat

    Using a food processor, puree half of the mixture... 

    Raw Veggie Chili with Taco Nut Meat

    Bring back pureed vegetables to diced vegetables and combine. Then, onto your nut meat...

    Raw Veggie Chili with Taco Nut Meat

    Add nut meat ingredients to food processor and pulse just until crumbly...

    Fairly simple...just slicing, dicing, pureeing and pulsing. So fresh and good. I always feel the best after eating meals like this! Don't forget to add some raw Sour Cream or Lime Cilantro Cashew 'Sour Cream' on top for even more added deliciousness, or simply add some avocado slices to round it out even more.

    Raw Veggie Chili with Taco Nut Meat

    Vegetable Chili
    • 3 cups tomatoes (I used roma and grape)
    • 1 small red bell pepper (orange would be great too), diced
    • 1 large celery stalk, diced
    • 1/2 yellow or red onion, diced
    • 1 small zucchini, diced
    • 1 corn off the cob
    • 1 - 2 garlic cloves, minced
    • cilantro (as much as you like), chopped
    • 1 - 2 teaspoon chili powder, to taste
    • 1 teaspoon cumin
    • 3/4 teaspoon oregano, fresh or dried
    • 1/4 teaspoon sea salt, to taste

    Prepare vegetables and combine all ingredients in large size bowl. Place 1/2 or so of the mix into a food processor and blend until pureed. Return puree to diced vegetables and toss well.


    Nut Meat
    • 1 cup walnuts
    • 1 cup mushrooms
    • 1 tablespoon cumin
    • 2 teaspoons coriander
    • 1 teaspoon tamari, bragg's or nama shoyu, or 1/4 teaspoon sea salt, to taste

    Place all ingredients into food processor and pulse until crumbly. You don't want to over blend or it will be a paste.

    To serve, place vegetable chili in bowls and top with nut meat adding any additional garnishes you like. Serves four, or two generously. Store left overs, if there is any, in an air tight container in the refrigerator. Chili will last for five to six days. Nut meat will last up to two to three days, depending on the freshness of the mushrooms. Before eating let sit at room temp as it tastes best this way.


    Enjoy the freshness!


    The Ultimate Tempeh Chili

    The Ultimate Tempeh Chili

    I've wanted to do a tempeh chili for a while now, and with the temperatures steadily on the low here in So Cal it's the perfect time of year to bring out the chili recipes. Tempeh makes for a great addition to any chili giving it an extra hearty feel and enhancing the protein & fiber content. With almost 20 grams of protein per 100 grams (about 3.5 oz.) of tempeh, add that to the high protein beans called for in this recipe and you've got yourself a great high protein chili to keep you feeling full while meeting your daily protein requirements easily. I've been trying to incorporate an extra dose of protein into my diet lately without having to use protein smoothies and this chili has been on my weekly rotation. I've played around with the recipe and have kept it fairly simple. Please keep in mind that tempeh is a soy product, and although it is a good soy product for you unlike some soy products it is best in moderation...once or twice a week is fine. You can feel good about having this once a week or every now and then. Gather your ingredients and make yourself a bowl of chili that will warm you up and keep you feeling great!

    The Ultimate Tempeh ChiliThe Ultimate Tempeh Chili

    I did include a bottle of dark beer and loved the flavor it gave it. This Negra Modelo is perfect for cooking with and it's vegan friendly! This can be optional but well worth the added flavor, it rounds out the chili beautifully making it one of the best chili's I've ever had. The alcohol will for the most part burn off while simmering leaving the delicate characteristics behind. If your looking to minimize the alcohol content, take a look at the Alcohol Burn Off Rate Chart to find how long you should simmer your chili. If you've never made chili with beer before I recommend trying it, at least once! I used Negra Modelo here but you could also try a chocolate stout like Boatswain Chocolate Stout which is also vegan friendly. Whatever liquids you choose just be sure it equals about 2 cups.

    The Ultimate Tempeh Chili

    A great go to one pot, hearty, high protein chili to enjoy anytime the craving calls!

    The Ultimate Tempeh Chili
    The Ultimate Tempeh Chili

    Ingredients
    • 1 8oz. package tempeh (I used this three grain tempeh), crumbled
    • 1 large onion, chopped
    • 3 large cloves garlic, minced
    • 2 tablespoons olive oil or 1/4 cup water, for sauteing
    • 1 can (15 oz.) red kidney beans, drained and rinsed
    • 1 can (15 oz.) pinto beans, drained and rinsed
    • 1 can (15 oz.) black beans, drained and rinsed
    • 1 can (28 oz.) diced fire roasted tomatoes and juices or 3 cups fresh diced tomatoes
    • 1 can (4 oz.) diced mild green chilies or 1 green bell pepper, cored, seeded and diced
    • 2 tablespoons chili powder
    • 1 teaspoon cumin
    • 1/2 - 1 teaspoon garlic powder, optional
    • 1/2 teaspoon chipotle powder, optional
    • Salt & freshly cracked pepper to taste
    • 1 bottle dark beer (Negra Modelo 1 bottle = 1 1/2 cups) plus 1/2 cup additional water or 2 cups water
    • scallions, for garnish

    In a large dutch oven or stock pot, heat your oil/water over medium heat. Add onions, garlic, spices and tempeh and cook for 5 minutes stirring frequently. Add beans, tomatoes, green chili/bell pepper and dark beer/water, bring to a boil, reduce heat to low, partially cover and simmer for 1 hour.

    This would be fantastic with a dollop of this Basic Cashew Sour Cream or Lime-Cilantro Cashew 'Sour Cream'. Serve with green onions and/or cilantro as well.

    Serves 4 to 6.

    Notes:

    Mix the beans up however you like using all of one type or your favorite combination. If you would rather use only 2 cans of beans, that's great too! I like adding more ingredients as it makes the chili go further. If using your own cooked beans you'll need about 4 1/2 cups.

    Feel free to use 2 packages tempeh instead of just 1. At times I like the extra dose of protein the tempeh adds and will double the amount making for an extra hearty chili. So good! 

    For those who do not care for the taste of tempeh, I recommend making this a day ahead so the flavors really meld into the tempeh masking most of its natural flavor. Or try using the three grain tempeh as its flavor is not as strong.

    If you find you added to much heat from the chipotle, try adding a teaspoon or so of cocoa/cacao powder or organic sugar.

    Enjoy!

    PARSNIP & SPLIT PEA SOUP: SLOW COOKER OR STOVE TOP


    Split pea soup is always welcome soup in my home. I remember growing up eating it often. Back then I ate it mostly out of the can...gasp...but gladly today I enjoy preparing my meals from scratch. Making your own soups is so much more rewarding and flavorful. These days, I definitely like to control what goes into my food. This soup is easy to put together, delicious and hearty enough to fill you up. The recipe is adapted from Robin Robertson's book entitled 'Fresh From the Vegetarian Slow Cooker'. I added the carrots and garlic because I love them both. I also added in the poultry seasoning that I'm finishing off. If you don't have poultry seasoning you could add herbes de provence which is a great all-around herb blend for soups as well (I always keep this one on hand). With soup season under way, this recipe will be adapted to what I have on hand and used often!

    SPLIT PEA

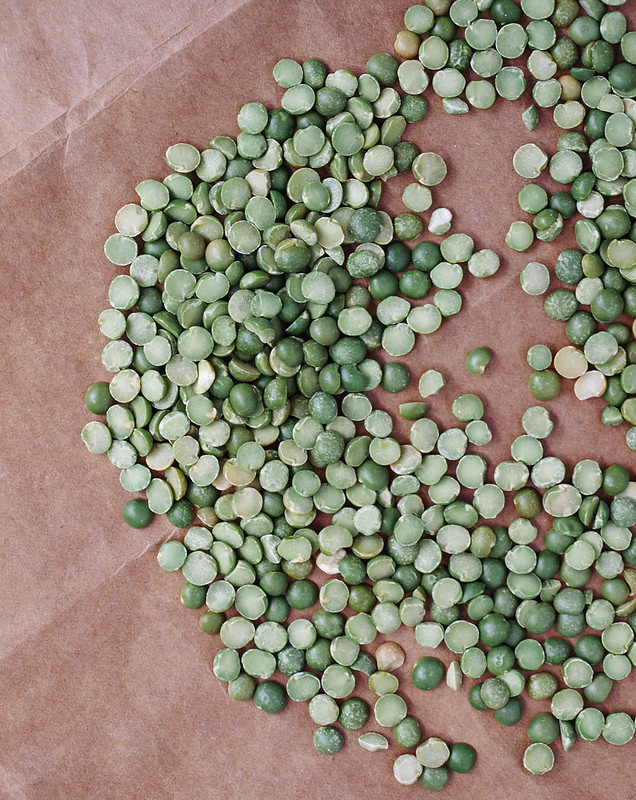
    Full of protein and fiber, split peas are a great way to meet your daily requirements of these important nutrients. As a new vegan, I'm always looking for plant-based protein rich sources and these fit the bill with 8 grams of protein and fiber per 1/2 cup cooked. They're also a great source of  manganese, copper, folate and vitamin B1. To top it off, they are low in fat. However you can get in your peas, enjoy them often!

    Parsnip & Split Pea Soup>

    PARSNIP & SPLIT PEA SOUP: SLOW COOKER OR STOVE TOP

    Ingredients
    • 1 tablespoon olive oil
    • 1 medium onion, diced
    • 2 - 3 garlic cloves, minced
    • 2 large parsnips, quartered and chopped
    • 2 large carrots, quartered and chopped
    • 1 pound dried green split peas (about 2 1/4 cup), picked over and rinsed 
    • 1 teaspoon dried thyme
    • 1 teaspoon poultry seasoning or herb de provence, optional
    • 2 bay leaves
    • 6 cups water or vegetable broth, + more as needed
    • 1 teaspoon liquid smoke, optional (I didn't use any)
    • mineral salt & fresh cracked pepper to taste

    This soup can be prepared either of two ways along with a fat free, no oil option. One is in a slow cooker and the other on the stove which is how I prepared it...

    Slow Cooker method:

    Saute onions, garlic, carrots and parsnips with olive oil until onions are translucent, about 4 minutes. Place sauteed vegetables in slow cooker and add the remaining ingredients. Slow cook on low for 8 hours. Remove bay leafs and using a submersion blender, blend until desired consistency...blending more for creamy and less for chunky. Taste for seasoning....

    Stove top method:

    In large pot or stock pot, heat olive oil and saute onions, garlic, carrots and parsnips until onions are translucent, about 4 minutes. Add remaining ingredients, bring to a boil, reduce heat, cover and simmer for  one hour stirring occasionally. Remove bay leafs and using a submersion blender, blend until desired consistency...blending more for creamy and less for chunky. Taste for seasoning...

    Oil Free, Fat Free Method:

    If you don't want to saute, just add your lentils, vegetables, spices and liquids in the crock pot and turn on low, cook for 8 hours. If using stove top method, place all ingredients in pot, bring to boil and simmer for an hour.


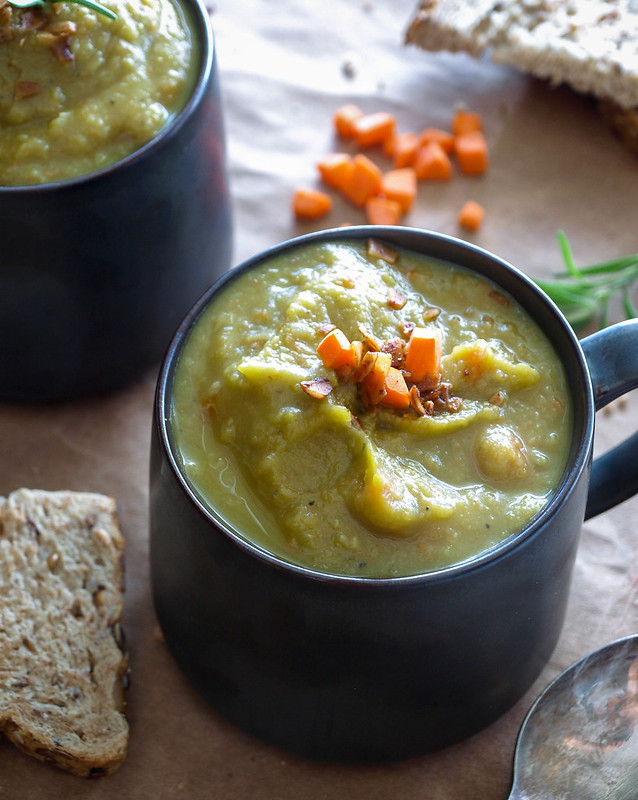
    Serve with whole grain or artisan bread. I just paired mine with some good seeded bread I had on hand and added some diced raw carrots on top which gave a nice freshness and crunch to the soup. Crumbled Coconut Bacon is also a nice topping.

    Serves 4 - 6,

    Notes:

    This soup pictured here is what the consistency looks like the next day. Your soup right after cooking will be slightly thinner but still delicious! You could start with 5 cups of water if you'd like it really thick from the start, adding water as needed. Even the next day, I added a bit more more water as it was really thick after being in the refrigerator. 

    If you don't have parsnips on hand, dice up a couple red, yukon gold or small russet potatoes. You could also use a couple extra carrots or add 2 stalks of celery instead.


    APPLE, FENNEL + SAGE LENTIL LOAF

    APPLE, FENNEL + SAGE LENTIL LOAF

    It's been two years since my last lentil loaf recipe. I thought this time I'd create something with a whole new flavor profile. I love this flavor combination and think it's a perfect fall/winter loaf or one you can rotate for variation all year long. All the flavors come through making every bite just as good as the last! A little sweetness from the apple, it's not overpowering at all. The fennel and sage are a perfect pairing of herbs. The walnuts give a little extra texture. I've kept the glaze super simple with just organic ketchup, apple cider vinegar and pure maple syrup. The glaze is tangy which is a nice contrast to the other flavors. Simple worked great here (at least I think so). I'd love to know what you think! I've adapted this new lentil loaf from my other one, The Ultimate Vegetable Lentil Loaf, which was a big hit, it's a great all-around loaf and I hope you all find this new one just as delicious!

    A note on the fennel seeds. In case you're wondering what to do with your fennel seeds, I've used them in a few recipes like this Cannellini Bean & Fennel Flatbread, Mushroom and Buckwheat Soup and the Rustic Cabbage, Potato & White Bean Soup. If they are new to your pantry, you can purchase them knowing you can use them in other recipes. I love the flavor they give in each of these recipes!

    APPLE FENNEL SAGE LENTIL LOAFAPPLE, FENNEL + SAGE LENTIL LOAF

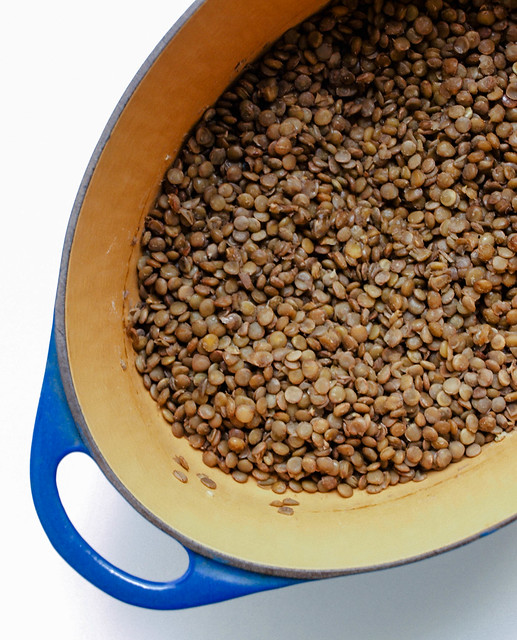
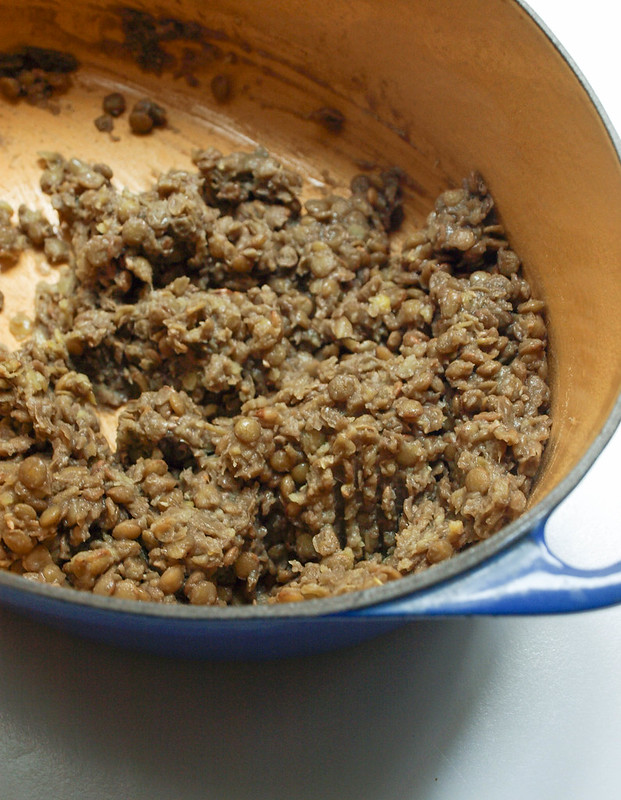
    Cook your lentils, let set for about 15 minutes, most of the liquid should be absorbed. Mash or puree about 3/4 of the mixture. You should be able to easily mash the lentils with a back of a fork.

    APPLE, FENNEL + SAGE LENTIL LOAFAPPLE, FENNEL + SAGE LENTIL LOAF

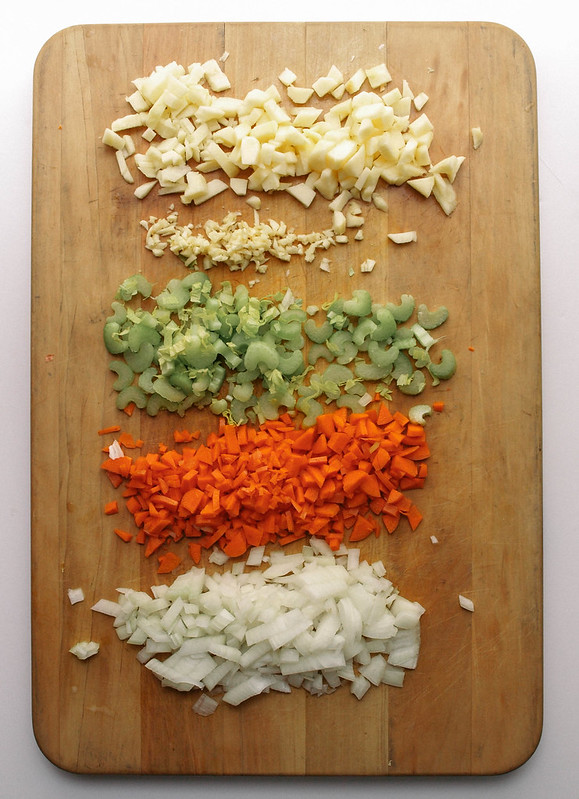
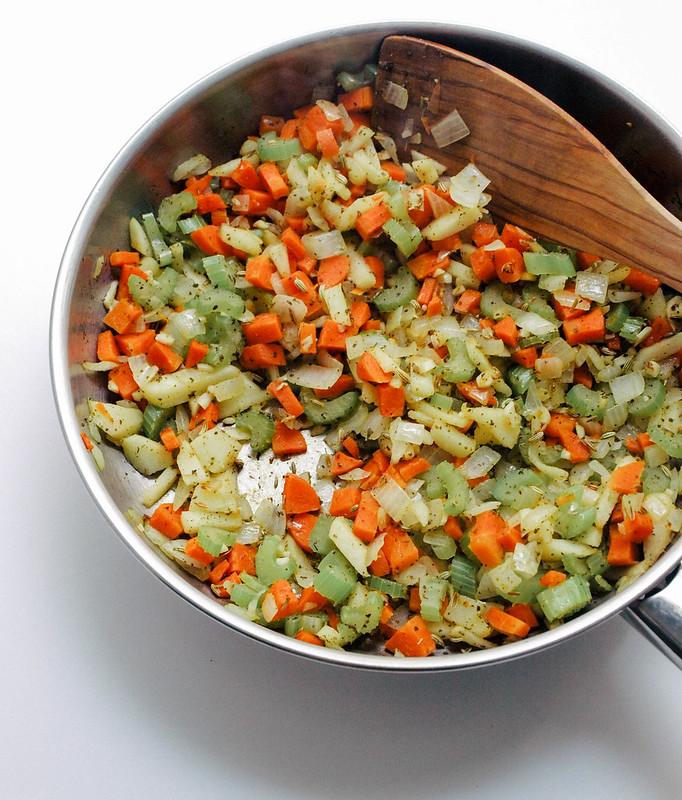
    While you're working on the lentils, prepare your vegetables and apple and saute with herbs.

    APPLE, FENNEL + SAGE LENTIL LOAFAPPLE FENNEL SAGE LENTIL LOAF

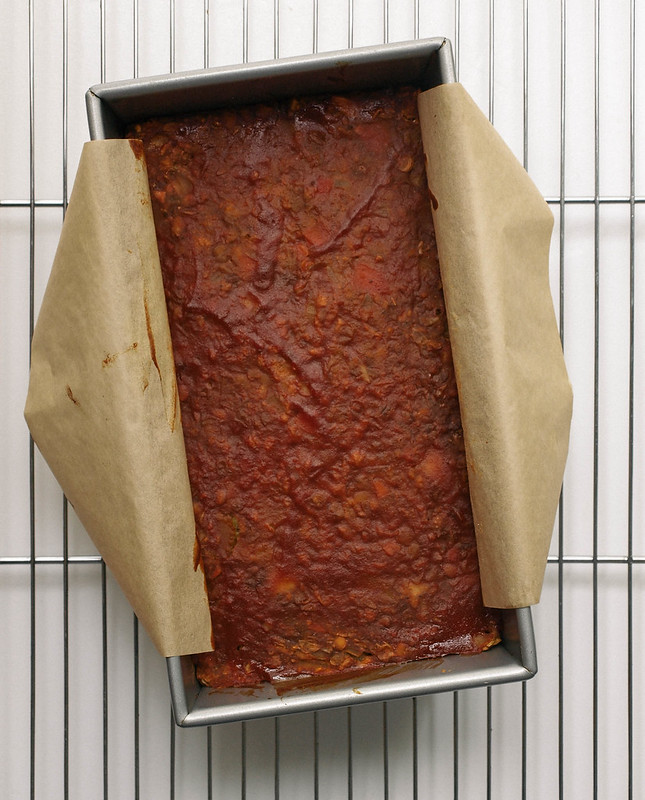
    Once everything is mixed, pack mixture into a 9 x 5 loaf pan. Spread glaze over top and bake.

    APPLE, FENNEL + SAGE LENTIL LOAF

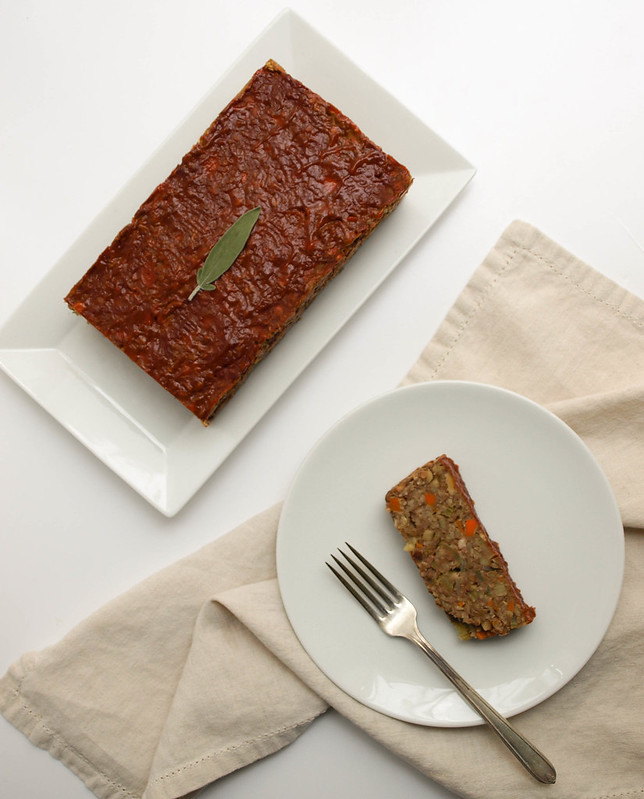
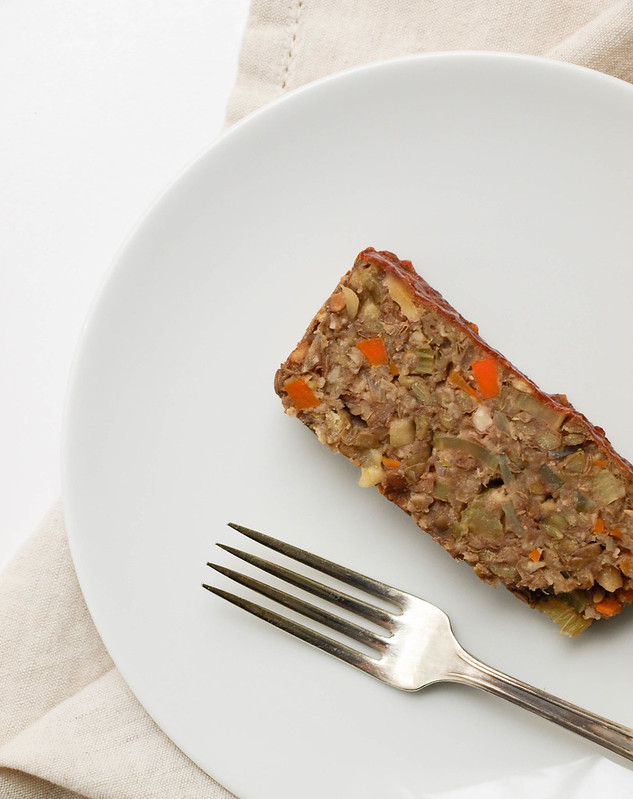
    Remove from oven and let cool. You may like to add a fresh layer of glaze over top like I have in the first picture.

    APPLE, FENNEL + SAGE LENTIL LOAF

    APPLE, FENNEL + SAGE LENTIL LOAF

    Ingredients
    • 1 cup green/brown lentils, rinsed
    • 2 1/4 cups vegetable broth or water
    • 3 garlic cloves, minced
    • 1 small onion, diced (about 1 1/4 cup)
    • 2 celery stalks, diced (about 1 cup)
    • 2 carrots, diced or grated (about 1 cup)
    • 1 small apple, cored, peeled and diced or grated (use firm crisp like fuji or gala) (about 1 cup)
    • 1 1/2 teaspoons fennel seeds, use whole or lightly crushed
    • 1 1/2 teaspoons sage or 2 tablespoons fresh minced
    • 3/4 cup oats, quick or rolled (I used quick) or bread crumbs
    • 1/4 cup flour (splet, almond, oat, GF all-purpose, etc.)
    • 1/2 - 3/4 cup unsweetened organic apple sauce
    • 3/4 cup finely chopped walnuts, optional
    • salt & pepper to taste (I used white pepper)
    Glaze
    • 6 tablespoons organic ketchup
    • 3 tablespoons apple cider vinegar
    • 1 tablespoon pure maple syrup

    Cook lentils: In a dutch oven or large pot, add vegetable broth and lentils, bring to a boil, cover, reduce heat to low and simmer for 40 - 45 minutes, most to all liquid should be absorbed. Lentils should be overcooked and tender. Set aside to cool, uncovered, for 15 minutes. Mash lentils with the back of a spoon or fork, or roughly puree using an immersion blender or food processor, about 2/3 - 3/4 of the lentil mixture.

    Preheat oven to 350 degrees F.

    Toast walnuts: Spread walnuts on a small rimmed baking pan, place in oven and toast until they are fragrant, about 10 -15 minutes. Set aside to cool..

    Prepare vegetables and apple: Heat oil in a medium size pan over medium heat, add onion, celery and carrot, saute for about 5 minutes. Add apple, fennel, sage salt & pepper, heat for another 3 - 4 minutes.

    Combine everything: Add the sauteed mixture with the lentils and mix. Add flour, oats, walnuts and 1/2 cup apple sauce, mix well to combine. If mixture seems to dry, add a little more apple sauce, mix again. Taste for seasoning adding extra herbs, salt and pepper as needed. 

    Line a 9 x 5 loaf pan with parchment paper, (this will make for easy removal later), add mixture and press down gently but firmly filling in along the edges as well. 

    Make glaze: In small bowl, mix together the glaze and spread over top lentil loaf as evenly as you can. Here you can even add a fresh sage leaf in the center of the loaf, it won't burn, it may roll a bit on the edges, and will add a nice decoration (the sage leaf I have shown was fresh). 

    Bake: Place loaf in oven, on middle rack, and bake for 45 - 50 minutes. Remove from oven, let cool 10 minutes, remove from pan using the edges of the parchment paper. You may like to mix a bit more sauce and spread over top. Place loaf on serving dish, cut and serve individual slices.

    Serving suggestions: Serve with roasted or mashed potatoes, or potato & cauliflower mash, a side of green beans or any combo of roasted brussels sprouts, carrots, butternut squash and beets. A simple fresh green salad with a light vinaigrette is also a great side! Left overs make for great sandwiches!

    Makes 8 slices. 

    Notes:

    If you don't use a good vegetable broth while cooking the lentils, I recommend add in 1/2 teaspoon of onion and garlic powder, along with a big pinch of salt. The lentils are the base of the recipe and should have good flavor.

    If mixture is too wet, add a tad more flour or oats/bread crumbs. If mixture is too dry, add a tad more apple sauce.

    I've used both oats and bread crumbs. Both were great. I didn't notice that the oat flavor came through at all (or maybe I'm just adapted to them).

    I don't recommend reheating the entire loaf at once. It will most likely become too dry, as the heat will take to long to reach the center. I recommend cutting slices and reheating, this way. If you need, you can make your lentil loaf the day before and store uncooked until ready to heat, bring to room temperature if possible, and heat according to instructions above.

    If you love fennel and sage, by all means add an extra 1/2 teaspoon of each! Or an extra tablespoon of fresh minced sage.