.

Showing posts with label cannellini beans. Show all posts

Spaghetti Squash & Italian Bean Balls

Spaghetti Squash & Italian Bean Balls

If you've never had spaghetti squash, you are in for a surprise. It really is a great replacement for pasta for those looking for a change, or just wanting to stay away from the wheat and rice pasta alternatives. It does have a little crunch but it's very pleasant, the texture reminds me a little of kelp noodles if you're familiar with those. Spaghetti squash contains lots of nutrients, including folic acid, potassium, vitamin A & C, and it's low in calories containing about 42 calories per serving. It's just so colorful too. I can definitely get used to this and incorporate it into my meal rotations every now and then.

Spaghetti Squash & Italian Bean Balls

This is my second time having spaghetti squash. The first time was with just sauce and that was delicious by itself. But I decided if I was going to do a recipe it would be best to add in some bean balls as well just to make it a more rounded meal. And it was, this was very filling and the bean balls came out great. They definitely added more protein per serving to this meal and left me completely content for quite a few hours.

Spaghetti Squash & Italian Bean BallsSpaghetti Squash & Italian Bean Balls

I really wanted the bean ball recipe to be easy, using things you may already keep on hand so you can whip these up without too much planning and/or work involved. I also wanted to make this with an option for being low fat, as well as for people with nut allergies, you can add the nuts/seeds if you wish. I did this batch without any nuts/seeds. Adding them into the mixture will give an extra dose of protein, texture and hardiness to the bean balls. You may think they look a little dry coming from the oven (dipping them in sauce right before serving will greatly help that), but once you put some sauce on top they come to life. Honestly, I actually found myself munching on the leftover bean balls the rest of the day without any sauce. They held together extremely well too!

Spaghetti Squash & Italian Bean Balls

Spaghetti Squash & Italian Bean Balls

Ingredients
  • 1 large or 2 small spaghetti squash, seeds removed
  • 1 jar (25oz.) organic pasta sauce of choice
Bean Balls
  • 1 heaping cup of mushrooms (about 4 oz), sliced (I used cremini)
  • 1 small yellow onion, diced
  • 2 cloves garlic, minced
  • 1 tablespoon olive or grapeseed oil, to saute
  • 1/2 cup walnuts or sunflower seeds, optional
  • 1 can (15oz) cannellini, kidney or black beans, drained and rinsed (I used cannellini)
  • 1 cup of quick oats
  • 1 tablespoon dried oregano, basil, thyme or Italian seasonings (or a mixture of these)
  • 1/2 teaspoon garlic powder
  • dash or two of cayenne pepper or red pepper flakes, to taste
  • sea salt and cracked pepper, to taste

Preheat oven to 375 degrees.

Cut spaghetti squash in half lengthwise, remove seeds and place in roasting pan or baking dish, cut side up. If you like you can coat with a thin layer of olive oil and a sprinkle of salt & pepper. Add about 1/4 inch of water to the dish and bake on bottom rack for 45 - 50 minutes. (You will be adding the bean balls to the middle rack about half way through.) EDIT: Alternately, you can place squash cut side down (without oil and seasonings), add 1/4 inch of water to the dish and bake the same as above (this has been my preferred method lately). 

Start assembling the bean balls. Saute onions, mushrooms and garlic over medium heat for 5 minutes and let cool. If using the nuts/seeds, place in food processor first and pulse until coarsely ground, and continue. Also, if using old fashioned oats place them in the with the nuts to chop then up a bit. In food processor place beans, sauteed veggies, oats and herbs and spices. Pulse until just combined. Taste for seasoning adding anything extra you may like. I added in some fresh chopped basil I had on hand.

Roll into balls, about 1 1/2 - 2 inches, and place on a baking sheet. I was able to get 9 jumbo sized bean balls. Put in the oven on the middle rack for the remaining 25-30 minutes of the squash cooking time, they should get at least 20 minutes. Remove both when time is up and let cool. OR...you can also cook the balls in a saute pan using a little olive oil over medium to medium high heat, turning often enough so that all sides brown (I used the oven method here).
spaghetti squash

In the meantime, heat your sauce. When ready to assemble, using a fork scrape the insides of the squash horizontally all the way around. It will pull easily from the sides resembling 'noodles'. You will have more squash noodles than you might expect, enough to serve two with one good sized squash.

Serve squash 'noodles' topped with bean balls, sauce, fresh cracked pepper, salt and some chopped fresh parsley or basil. A nice dusting of Almond Parmesan will also enhance this dish!

Serves 3 - 4. Store leftovers in an air tight container for up to five days. Leftovers were great!

Notes:

If you don't have quick oats, use regular oats but process gently into a very rough flour. Also, replace the oats with breadcrumbs if you prefer.

Try dipping your bean balls in the sauce just before serving, this will greatly enhance the visual appeal as well giving it a nice flavorful coating.

Sub in zucchini noodles, gently heated, or any pasta of choice if spaghetti squash is not available. 

Spaghetti Squash & Italian Bean Balls

Enjoy!

Adapted from these recipes: Whole Foods and The Vegan Stoner

Roasted Vegetables + Chickpeas with Lemon-Cannellini Sauce

Roasted Vegetables + Chickpeas with Lemon-Cannellini Sauce

This recipe is adapted from one of the very first vegan meals I used to make on a regular basis when starting my new lifestyle. This was before I started blogging and then was off trying everything else I could. Nice to come back to this recipe once again. I have only slightly changed it from the original by adding chickpeas for boost of protein and texture, as well as mixing up the veggies a bit. The original recipe can be found here on One Green Planet by its author Robin Robertson. I love this recipe because of the versatility and ease. The vegetables can be pretty much anything you like. Use red or Yukon gold potatoes in place the sweet potato, just be sure to use about 2 cups worth. You can add, or sub in, butternut squash, pumpkin or any other winter squash you might like. You may like to add earthiness by using cubed beets. Try cauliflower florets in place of broccoli. Really anything goes here. As for the sauce, I find it's not something to write home about on its own but that changes once added like gravy to the top of your vegetables and grain, all the flavors come together and you'll be in comfort food heaven! This recipe is easy to pull together and makes for a great hearty meal in these cooler months. It's full of protein and fiber, is low in fat and has plenty of essential nutrients needed to maintain a healthy plant based diet! 

Roasted Vegetables + Chickpeas with Lemon-Cannellini Sauce

Clean, vibrant, healthy and satisfying!

By all means load your plate with two to three times the vegetables you see here. Enjoy freely!

Roasted Vegetables + Chickpeas with Lemon-Cannellini Sauce

Roasted Vegetables + Chickpeas with Lemon-Cannellini Sauce

Ingredients (serves 4-6)
  • 1 large sweet potato, cut into 1 inch cubes
  • 2 cups broccoli florets
  • 2 large carrots, sliced
  • 2 cups brussels sprouts, halved lengthwise
  • 1 onion, sliced (use your favorite onion or what you have on hand)
  • 1 can (15 oz.) garbanzo beans (chickpeas), drained  and rinsed
  • 1 tablespoon olive oil
  • mineral salt & fresh cracked pepper or lemon-pepper, to taste
  • 2 -3 cups cooked quinoa or grain of choice (about 1/2 cup per person)
Sauce
  • 2 cans (15 oz.) cannellini beans, drained and rinsed
  • 1/4 cup nutritional yeast
  • 1 teaspoon garlic powder
  • 3/4 - 1 cup vegetable broth (start low and add as needed)
  • juice of 1 good size lemon
  • generous pinch of red pepper flakes
  • mineral salt, to taste
  • 1 tablespoon fresh chopped basil, thyme, parsley, chives, sage, tarragon 

Preheat oven to 425 degrees F.

Line roasting pan/baking dish with silpat, parchment paper or grease lightly with neutral oil. Add vegetables to roasting pan and toss to coat with olive oil. Arrange vegetables in a single layer (as much as possible), sprinkle with salt and pepper to taste. Roast vegetables until tender and lightly browned, about 45 minutes, mixing once halfway through.

Start your grain of choice while vegetables are cooking. Quinoa will take about 30 minutes.

Prepare your sauce by placing all the ingredients into your food processor/blender, except for the herbs, and process until smooth. Add extra broth as needed to thin. Add in herbs and pulse once or twice. Place sauce in a small saucepan and heat over low heat, uncovered, until warm, stirring occasionally.

Serve vegetables over grain of choice with a nice helping of sauce over top. Serve warm.

Serves 4 generously.

Store leftovers in refrigerator for up to a week. Leftovers are just as delicious!

Enjoy!


Pan Bagnat (White Bean Niçoise Salad Sandwich)

Pan Bagnat (White Bean Niçoise Salad Sandwich)

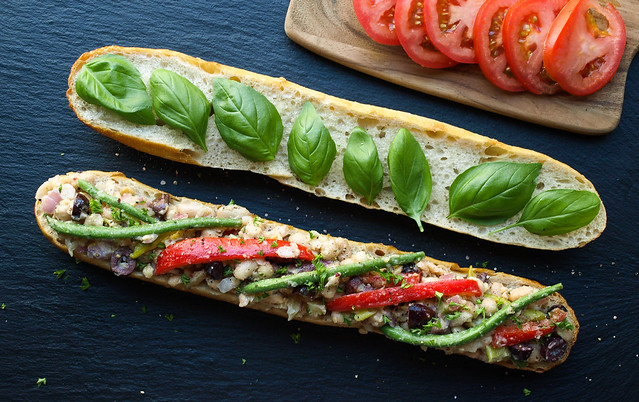
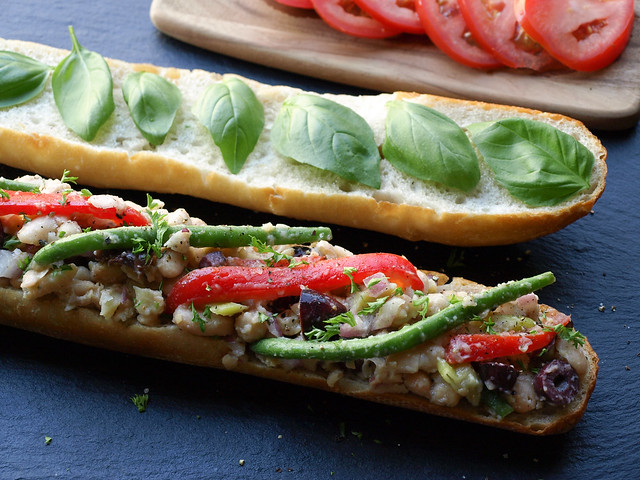
This recipe was inspired by a recent post on BuzzFeed for 27 Awesome Easy Lunches To Bring To Work. I'm thrilled to have been included in the roundup with the Mashed Chickpea Salad Sandwich! There is also a few other great vegan options as well so be sure to take a look. In it I saw a Pan Bagnat from Food 52 and had to recreate it for us plant powered lovers. I love Food 52, and have always been inspired by the simplicity and beauty of their photography. And of course the recipes are great too! I have a few in my collection that were inspired from there like this Mushroom Bourguignon and these Gluten Free Banana Flap Jacks. It's a great community if you haven't heard of it yet! In fact, they have a vegan column called The New Veganism with Gena Hamshaw of Choosing Raw as the recipe creator. Be sure to take a look and be inspired by both the recipes and photography!

Pan Bagnat (White Bean Niçoise Salad Sandwich)

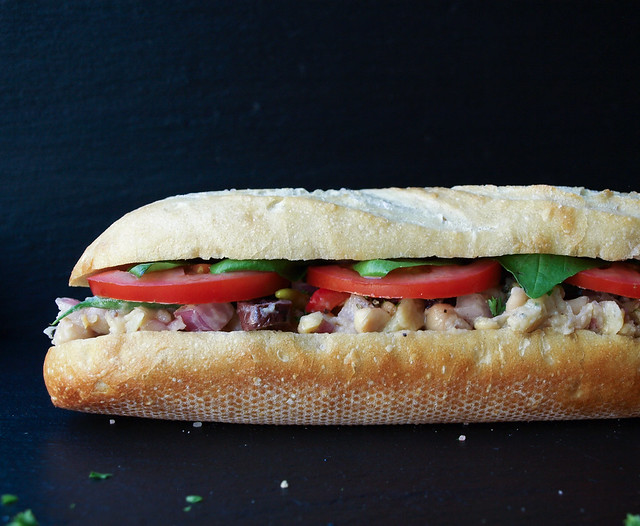
The pan bagnat (meaning 'bathed bread') is a classic specialty sandwich served in and around the region of Nice, France. It's a sandwich version of the salade niçoise which is a combination of tuna, anchovies and/or sliced hard boiled egg mixed with raw vegetables like red bell pepper, green beans, radishes, olives and onion. You will also find there to be olive oil and possibly vinegar, salt and pepper. Here we'll be using a few of these traditional ingredients but veganizing this classic using white beans as our protein. And I can guarantee you this is just as delicious if not better than the traditional version! Not only does the salad make for a great sandwich filler but it would be just as good on a bed of leafy greens as well. This recipe may give you leftovers, and that's a good thing because it only gets better in the next day. One day make a sandwich for work, home or a picnic and the next top it on some leafy greens or just eat as is. It's pretty amazing on its own!

Pan Bagnat (White Bean Niçoise Salad Sandwich)Pan Bagnat (White Bean Niçoise Salad Sandwich)
Pan Bagnat (White Bean Niçoise Salad Sandwich)

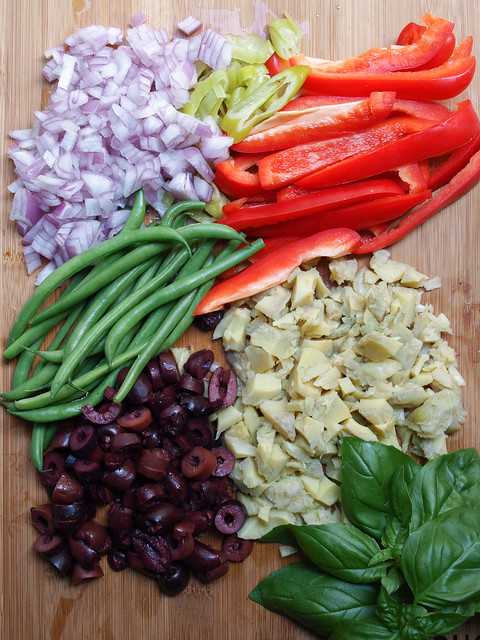
I love the saltiness from the olives here, you can add a tablespoon of capers if you like. The fresh bell pepper and blanched green beans add a nice crunch and sweetness while the onion and artichokes add another layer of flavor. Tie the vegetables together with the white beans, dressing made of olive oil, lemon and mustard, add a good sprinkling of mineral salt & plenty of cracked pepper and this salad will be another favorite to come back to time and time again!

Pan Bagnat (White Bean Niçoise Salad Sandwich)

To create the traditional pan bagnet you'll first want to hollow out the insides of your bread. I left the top on this alone but from now on will hollow it out as well. It gives more room for your salad, helping to hold it together better while using less bread at the same time which is great too. Brush the insides of the bread with olive oil. Layer your bottom half with the salad. Since we're going to press the sandwich you can pile it on pretty good making a very hearty sandwich. Add your tomatoes across the top. Then layer basil, top with mineral salt & cracked pepper and remaining slice.

Pan Bagnat (White Bean Niçoise Salad Sandwich)

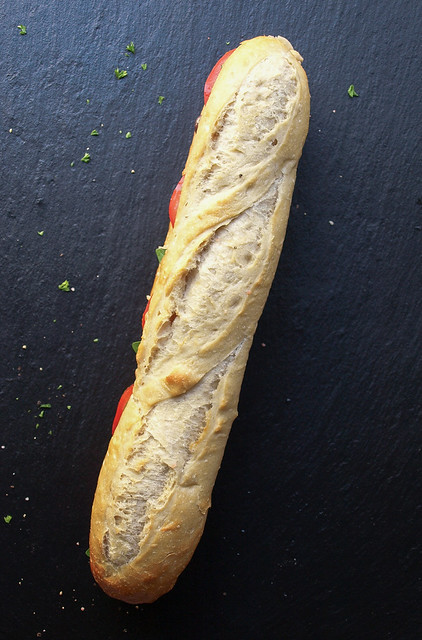
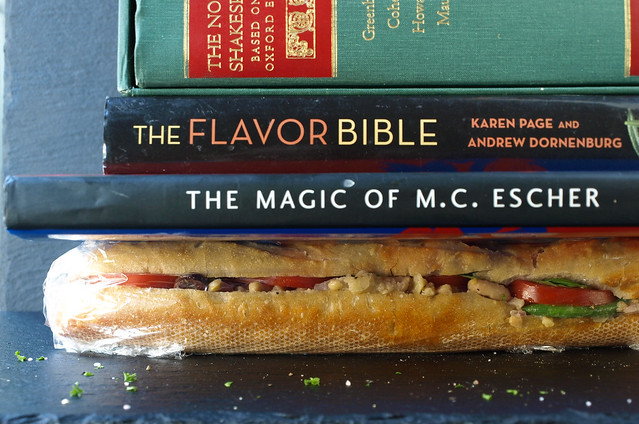
Wrap your sandwich tightly in saran wrap, fold ends under and press with a few heavy books or pots. This is an important part or your sandwich will be very messy and fall all over. Trust me, I know this from first hand experience. Plus, this helps the bread soak up the moisture of the salad dressing making for 'bathing the bread'. So be sure to press your sandwich, even if just for an hour, it will make all the difference...although overnight is even better. This makes a perfect grab and go sandwich for lunches and picnics, once pressed it's ready to go!

Pan Bagnat (White Bean Niçoise Salad Sandwich)

 Pan Bagnat (White Bean Niçoise Salad Sandwich) 

Ingredients 
  • 1 can (15 oz.) cannellini or chickpeas (garbanzo beans), drained and rinsed well or 1 1/2 cups cooked white beans
  • 1/2 red bell pepper, thinly sliced
  • 1/4 cup blanched French green beans, cut into half or thirds
  • 1 jar artichoke hearts in water, drained and chopped
  • 1/2 red onion, diced
  • 3/4 cup kalamata olives, pitted and sliced
  • 2 tablespoons parsley, finely chopped
  • 1 -2 greek pepperoncinis, diced (optional, not a traditional ingredient)
  • mineral salt & fresh cracked pepper, to taste
Dressing
  • 2 - 3 tablespoons extra virgin olive oil
  • juice of 1 large lemon (about 2 tablespoons)
  • 1 heaping teaspoon Dijon mustard
To assemble
  • 1 French baguette, ciabatta loaf, Pain de campagne, boule or artisan loaf of choice (even good sized rolls would be great)
  • extra virgin olive oil, to brush
  • 8 - 10 basil leaves
  • 1 medium tomato, thinly sliced
  • mineral salt & cracked pepper

Cut bread in half lengthwise. Remove some of the insides of each half making a trough for the filling (this will help keep the filling inside the sandwich when eating). Brush both halves with extra virgin olive oil.

In a small bowl, mix the dressing ingredients together until dijon has emulsified. Set aside to let the flavors develop.

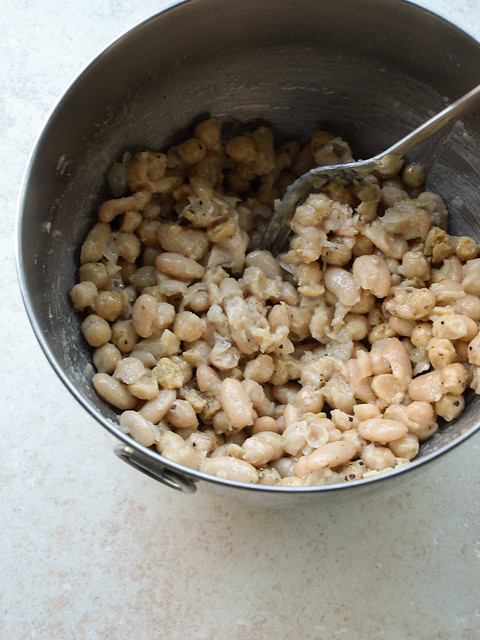
In a medium/large mixing bowl, add beans and roughly mash leaving about 2/3 whole beans. Add in dressing to the beans and mix well. Add in the bell pepper, green beans, artichokes, red onion, olives, parsley, optional pepperoncini and salt & pepper. Mix to combine.

Layer your bottom half of bread with a good serving of the mixed salad. Add tomatoes across the top, then top with basil leaves and salt & pepper. Top with other slice of bread. (You can also vice versa this layer order starting with the basil and tomato on the bottom and salad on top.)

Wrap sandwich tightly in saran wrap and press with a few heavy books/pots for at least an hour to overnight. If overnight, be sure to press in the refrigerator.

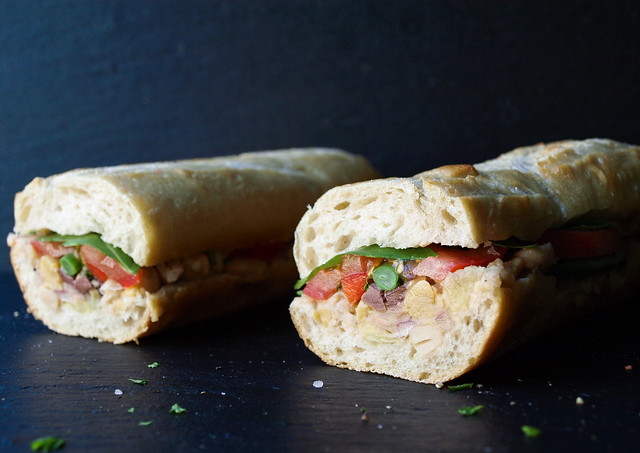
When ready to serve, slice in half or make as many slices as you like. Serve chilled or at room temperature.

Store any leftover salad mixture covered in the refrigerator for up to 5 days. 

Notes:

The cannellini beans have more protein and fiber than chickpeas so if that is a priority use them. Otherwise use your preferred white bean.

Try adding a splash of red or white wine vinegar to the dressing if you like.

As with all my recipes, add/subtract ingredients to your liking. Try adding a tablespoon or so of capers. I've had someone sub in asparagus for the green beans. Add sliced radishes along the top.

I edited this recipe on 11/10/13 at 12:15pm so it wouldn't make so much leftovers. The old recipe called for 2 cans white beans, 1 red bell pepper, 1/2 cup French green beans, 1 cup kalamata olives and 4 tablespoons olive oil. The old recipe was delicious, it just made a bit too much but of course feel free to use the old version instead so you'll have plenty of leftovers!

Enjoy!


Stuffed Acorn Squash + Wild Rice Medley

Stuffed Acorn Squash + Wild Rice Medley [Revisited]

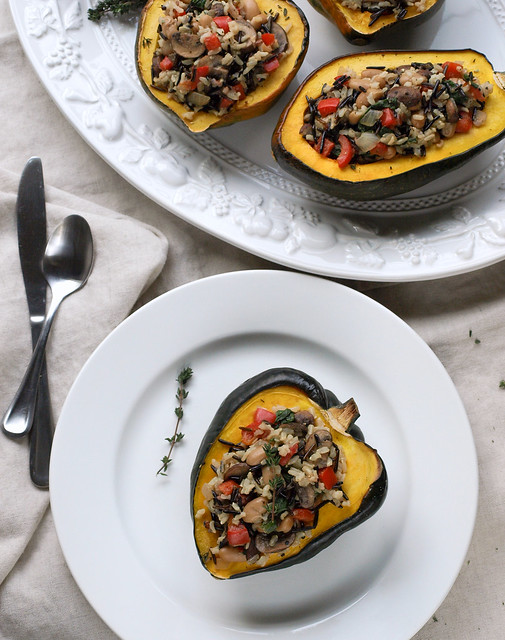
If you've never had a stuffed acorn squash, you really should give it a try. They are just so good and surprisingly filling. I love them unstuffed too with simple seasonings, but this is a tasty and satisfying meal with a good nutritional profile. I'm a big eater and one of these filled me up. Not too hard to put together either. It does take three separate cooking sections but it comes together pretty smoothly, unless your like me...the burner on the rice went out without me knowing so I had to add an additional 45 min onto my cooking time. But no harm done...there were dishes to do and cleaning around the house to keep my mind busy and off the mishap. All in all it's fairly easy, the rice and squash cook themselves, so the vegetables are the only real work which isn't much. This is also one of those recipes that can be tailored to your preference of veggies or beans. To top it all off, you just gotta love eating out of an acorn squash...it's pretty fun!

Stuffed Acorn Squash + Wild Rice Medley

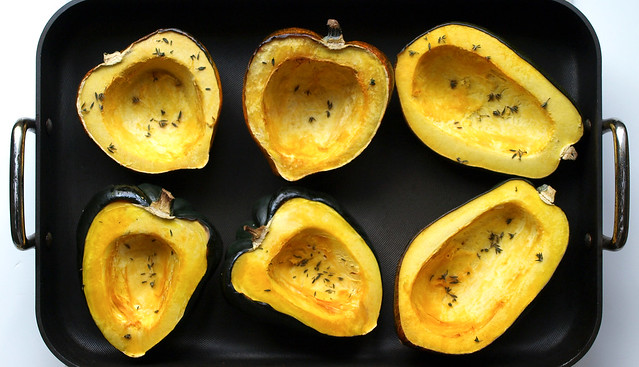
Start by slicing your acorn squash and scraping out the seeds. The seeds scrape out very easily with a sharper edged spoon. Here you can either brush your acorn squash with a little olive oil or leave it out. I go either way as I don't find it makes too much of a difference, so it just depends on how I'm feeling if I want to add extra oil to the meal. Sprinkle with fresh or dried thyme leaves and mineral salt. You can even add a few fresh thyme sprigs inside each squash, just remove before eating. Cook until fork tender.

Stuffed Acorn Squash + Wild Rice MedleyStuffed Acorn Squash + Wild Rice Medley

Cook your rice and set aside. Prepare your vegetables and add in the rice once done. 

Stuffed Acorn Squash + Wild Rice Medley

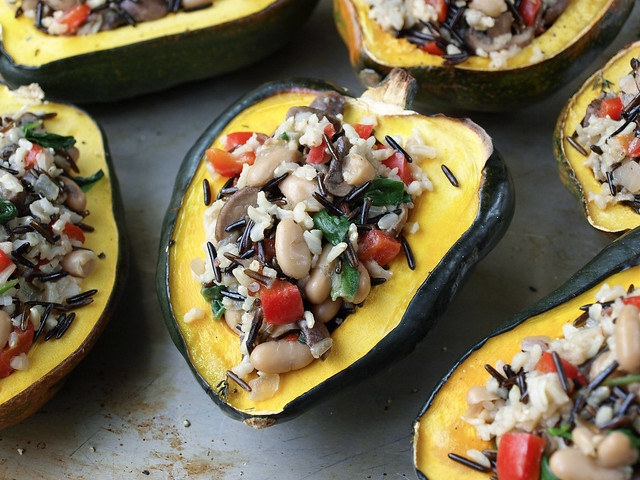
Fill your acorn squashes and serve! 

Stuffed Acorn Squash + Wild Rice Medley

Stuffed Acorn Squash + Wild Rice Medley

Ingredients

Acorn Squash
  • 3 acorn squashes, cut in half lengthwise and seeded
  • 1 1/2 teaspoons thyme, divided
  • sea salt

Wild Rice Medley
  • 1 cup rice, dry (I used half black wild rice and half long grain brown rice)
  • 2 tablespoons extra virgin olive oil
  • 1 small red bell pepper, diced
  • 1 large shallot or small onion, diced
  • 2 cloves garlic, minced
  • 2 cups mushrooms, sliced
  • 2 large handfuls greens (I used a 5 oz. combo package of baby kale, baby chard and baby spinach)
  • 1 can cannellini beans (15 oz), drained and rinsed
  • 1 tablespoon thyme
  • 1 teaspoon red pepper flakes, optional
  • sea salt and cracked pepper to taste
sriracha or hot sauce, to taste as garnish

Directions

Preheat oven to 400 degrees F.

In an oven proof sauce pan, fill half way with water and place on the bottom rack (this will give a little steam to your squash). Cut and seed your squash, place on baking sheet with cut side up. Season each squash with about 1/4 teaspoon thyme along with a few twists of the mineral salt grinder. Bake for 40-45 minutes, until tender...knife should easily pierce the flesh.

Cook your rice according to package. Wild rice will take about the same time as the squash to cook, about 40-45 min. (Quinoa or quinoa/rice combo would be great too and add even more protein per serving.)

Once the squash and rice are cooked, set aside to cool and begin with the vegetables.

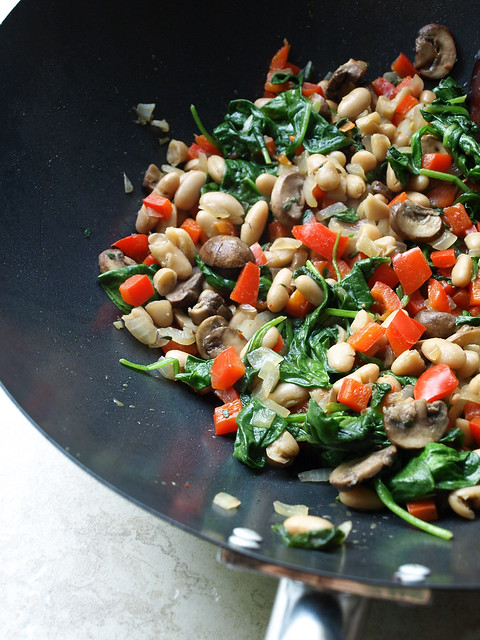
In large wok or saute pan, heat oil on medium heat. Add shallots, garlic and bell peppers, saute for about three minutes. Add mushrooms, beans, one tablespoon thyme, red pepper flakes, a few twists of salt and pepper, cook for another three minutes. Add leafy greens, stir frequently until they are wilted (you may also want to use a cover in between stirring to help soften the greens). Combine rice and sauteed vegetables in the larger of the two pots. Taste for seasoning adding additional salt and pepper as needed.

Scoop mixture into each acorn squash half and serve with any additional seasonings. I like to top mine with some sriracha for that extra heat and flavor I love so much. So very good with this meal. Serves six, or three for the hearty eaters.

Store leftovers in an air tight container in fridge for up to a week.

Enjoy!


RUSTIC CABBAGE, POTATO & WHITE BEAN SOUP

RUSTIC CABBAGE, POTATO & WHITE BEAN SOUP

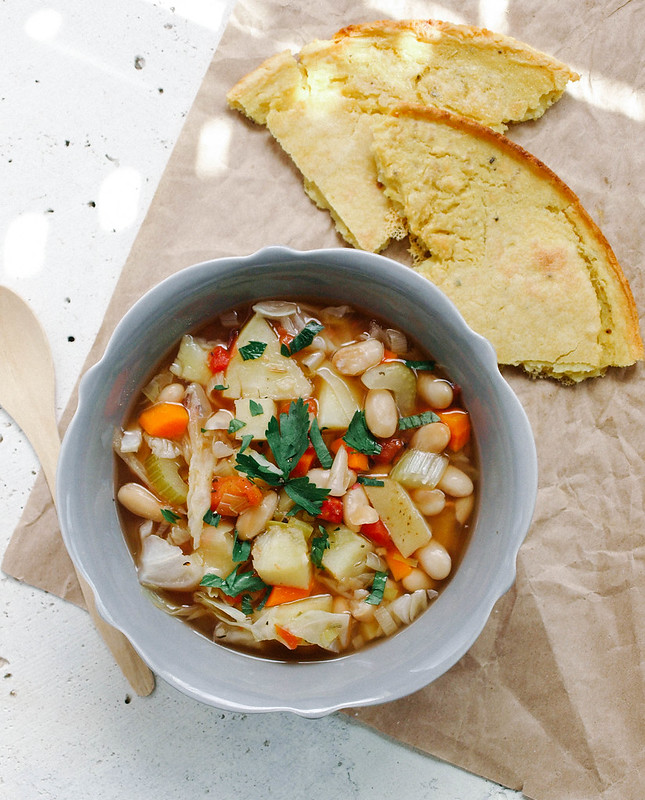
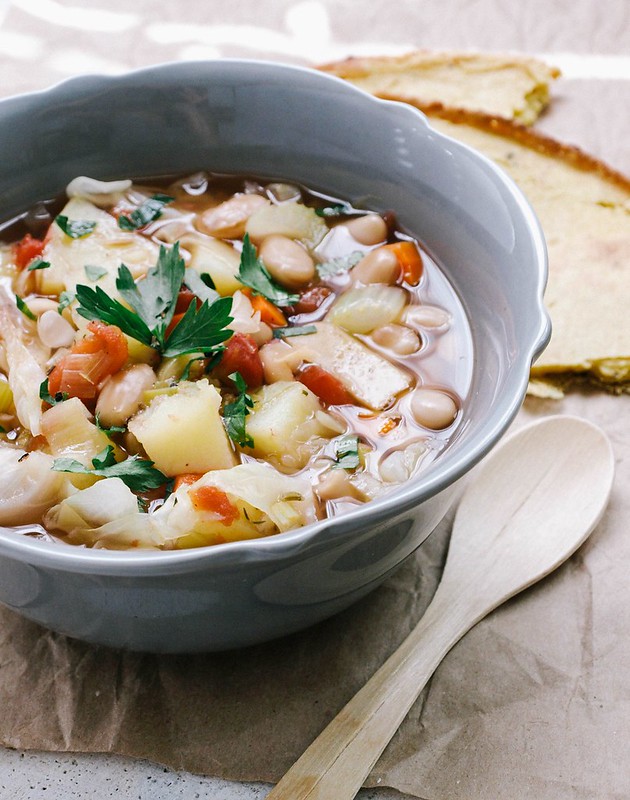
Wondering what to do with a half head of cabbage and potatoes I had sitting around brought about this hearty soup. It's brimming with vegetables, white beans and spices and is enough to feed a small crowd. Add some socca or crusty bread to the meal and you're all set. The socca I made here was seasoned simply with salt & pepper and can be whipped up while the soup is cooking. It's a nice accompaniment, not so much of a soaking bread like crusty bread, but delicious and filling. The soup in itself makes for a complete, nutritious meal with the beans adding a good amount of protein. I used leeks in this recipe, they lend a nice mellow onion flavor, but you can sub in an onion if you like. This turned out to be a great place to use up the leftover produce. I love cabbage in soups, this will be made many times to come. I'm happy to share another hearty soup for the recipe collection to inspire your senses, keeping you plant strong and loving it! 

RUSTIC CABBAGE, POTATO & WHITE BEAN SOUP

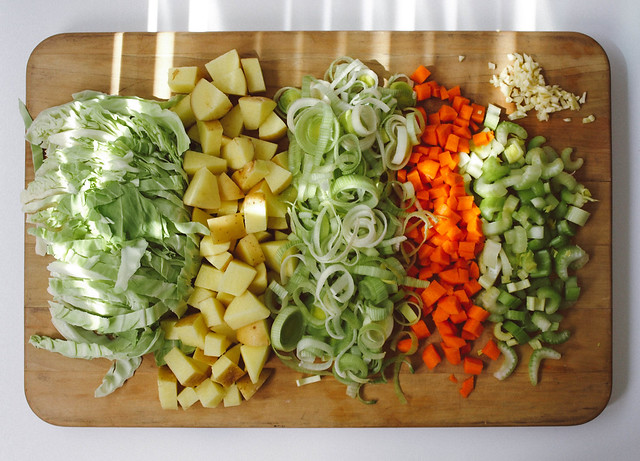
Feel free to change up the vegetables. If you're missing one or two, you can still pull this together and have a wonderful soup. If you can't find leeks, use 1 medium onion, diced, in its place. For the cabbage, use your favorite here. I happen to have regular green cabbage on hand but savoy cabbage would be great too. 

RUSTIC CABBAGE, POTATO & WHITE BEAN SOUP

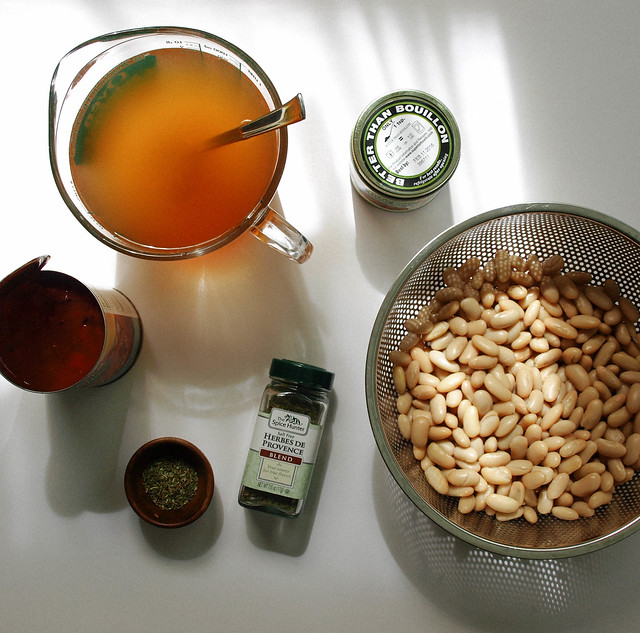
For this time around I chose to use herbes de provence. I love the combination of spices, especially the fennel that I find in this blend from The Spice Hunter. I also added in a teaspoon of fennel here because I love it. Feel free to use any spices you like as most of them will work well here. You can use 2 - 3 teaspoons of an Italian blend or combine a few herbs using 1 teaspoon each: thyme, oregano, rosemary. You can also use sage, marjoram or parsley, savory, etc...in any combination as long it equals about 1 tablespoon. 

When using Better Than Bouillon vegetable broth base, I never use the recommended serving size. I use just enough to flavor the water. For this recipe I used just under 2 teaspoons. This makes my jar last a lot longer and reduces the 'would be' sodium content per recipe. I've just recently (the last six months or so) been using their vegetable broth base and love it!

RUSTIC CABBAGE, POTATO & WHITE BEAN SOUPRUSTIC CABBAGE, POTATO & WHITE BEAN SOUP

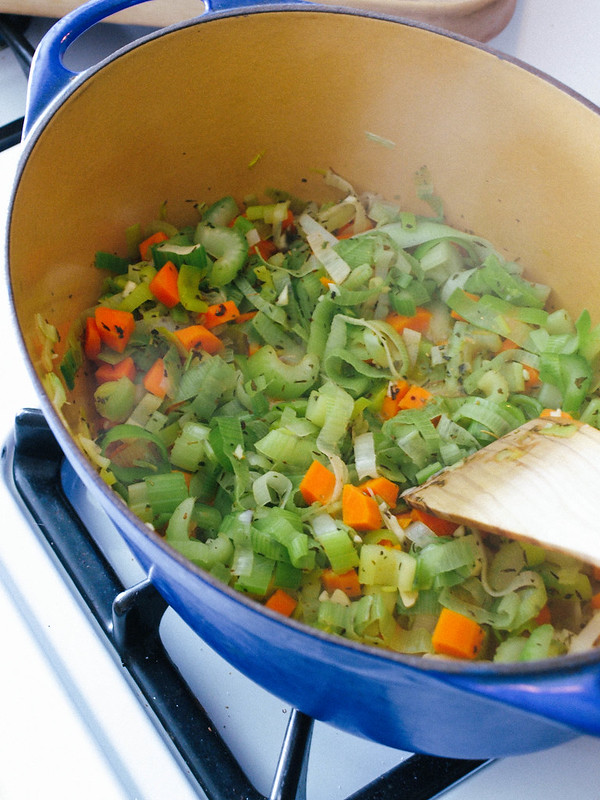
This is a one pot soup that's so easy to pull together. Saute the leeks, celery and carrots, add spices and garlic, cook a bit more. Add remaining ingredients ending with cabbage and white beans last as pictured above. Cover and simmer until cabbage and potatoes are tender, about 30 minutes. Serve with bread of choice. Enjoy often!

RUSTIC CABBAGE, POTATO & WHITE BEAN SOUP

RUSTIC CABBAGE, POTATO & WHITE BEAN SOUP


Ingredients
  • 1/4 cup water or 2 tablespoons olive or grapeseed oil (for sauteing)
  • 2 leeks (use white & pale green parts), sliced and rinsed 
  • 2 carrots, diced
  • 2 stalks celery, diced
  • 2 - 3 cloves garlic, minced
  • 1 tablespoon herbs de Provence OR 1 teaspoon each thyme, rosemary, oregano
  • 1 can (15oz) diced tomatoes 
  • 6 - 7 cups vegetable broth or water
  • 2 medium gold potatoes, diced
  • 1/2 head large cabbage, sliced (savoy or green)
  • 3 cups cooked white beans or 2 cans (15oz), drained and rinsed (use cannellini, great northern or navy) 
  • mineral salt & fresh cracked pepper, to taste
  • 1/4 cup chopped parsley, to garnish

Prepare your vegetables. After slicing your leeks, be sure to place them in a colander and rinse them well under cool running water to remove any dirt and sand that may have collected between the leaf sheaths. If there's a lot of dirt, place sliced leeks in a bowl of cool water and gently swish the leeks around to dislodge any unwanted remnants. Drain water by gently tilting the bowl with one hand and holding your hand over the leeks with the other so they don't fall out, or simply drain into a colander. Repeat until leeks are clear of dirt and sand. Here is a good tutorial from, The Kitchn, on how to wash and prep your leeks. Lastly, another method you may try is this: Slice off the root and the dark green parts. Slice in half vertically. Run under cold running water, opening up the layers as you rinse. Lay on flat surface and slice thinly hortizontally. 

In a large dutch oven or stock pot, heat water/oil over medium to medium-high heat, add leeks, carrots and celery, saute for 5 minutes. Smells delicious already! Add garlic and spices, saute for 1 minute more or until fragrant. Add tomatoes, broth, potatoes, cabbage and beans, bring to a boil, cover, reduce heat to low and simmer for 30 minutes, until potatoes and cabbage are tender. Taste for seasoning adding salt & pepper as needed. 

Serve topped with parsley and a serving of socca or crusty bread. Enjoy!

Serves 6 - 8.

Notes: 

As noted above, change the herbs to whatever you have on hand. You could also use an Italian blend seasoning if you like. I also like to add in a sprinkle of red pepper flakes.

I would suggest using the biggest pot you have for ease, this makes quite a bit of soup.

If leeks are not available, sub in 1 medium onion, diced.

High Protein White Bean & Cauliflower Alfredo Sauce

High Protein White Bean & Cauliflower Alfredo Sauce

 This is just an awesome sauce all around! I say if you don't like it you must be crazy...but that's just me. :) It's not the high saturated fat and high calorie alfredo sauce that you may be used too...no, no, no...this is much better and in my opinion tastes better too! This whole meal is high protein and high fiber with wonderful flavors to match. I really love using the kale and sun-dried tomatoes with this as well for their added benefits...the sun-dried tomatoes add a nice sweetness to the dish. Did you know that sun-dried tomatoes contain 12 times the amount of Lycopene as raw tomatoes ounce for ounce. Lycopene is a phytochemical and proven antioxidant that fights free radicals in the body. More reason to add a few sun-dried tomatoes to your dishes.

Pair all this goodness on top of this wonderful pasta I found and this meal is as healthy as it can get!

High Protein White Bean & Cauliflower Alfredo Sauce

Bella Terra 100% Organic 8 Whole Grain Pasta with Milled Flaxseed - Penne Rigate

High Protein White Bean & Cauliflower Alfredo Sauce

Per serving it has...190 calories...1 gram fat...7 grams protein...7 grams fiber...those are great numbers! Along with this high protein, high fiber white bean alfredo sauce...plus a little kale, sun-dried tomatoes and mushrooms you have a nutritionally dense meal that tastes great! I promise :)

I will be using this sauce over and over again varying the added vegetables...you could also use broccoli, peas, spinach, etc...or even serve this sauce over rice quinoa using some of  the leftovers. 

Now lets' make some awesome Alfredo sauce that you will come back to again and again making it your own each time...

High Protein White Bean & Cauliflower Alfredo Sauce

High Protein White Bean & Cauliflower Alfredo Sauce

Ingredients

Alfredo Sauce (makes approx. 4 cups)
  • 1 can cannellini beans (15oz), drained and rinsed
  • 1/2 cauliflower
  • 1 to 1 1/4 cup unsweetened almond milk
  • 3 tablespoon olive oil, divided
  • 1 large shallot or 1/2 onion, diced
  • 1/4 teaspoon nutmeg
  • himalayan sea salt & pepper to taste
  • 1 or 2 tablespoon nutritional yeast, optional (I didn't use any)

additional veggies
  • a few kale leaves
  • 1/4 cup sun-dried tomatoes
  • 1/2 cup mushrooms, sliced
  • 1 or 2 teaspoons red pepper flakes, to taste
  • 1 tablespoon olive oil
  • whole grain pasta, cooked
  • adjust these measurements to suit your needs

Cut cauliflower into large florets and place in pot of boiling water. Cook for about 20 minutes, or until soft, drain. While Cauliflower is cooking, heat 1 tablespoon of olive oil in saute pan over medium to medium high heat, add shallots and cook until soft and lightly browned.

Place cooked cauliflower in blender/food processor along with beans, milk, shallots and nutmeg. Blend until creamy. Taste for flavor adding salt, pepper and any other spice you might like. Also if sauce is too thick add a splash or so more milk as needed, blend again.

And now for the veggies. In same saute pan as you cooked the shallots, heat 1 tablespoon olive oil over medium heat. Add mushrooms, kale, sun-dried tomatoes and red pepper flakes. Saute kale until it has sweated down, approx 5 min. You could use a cover to help. Turn off heat when done. 

Bring pasta back to the same pot as cooked in, add as much sauce as you like to coat the pasta. Add the veggie mix and gently stir. Add a tad more sauce if needed. Turn heat to low and cook until warmed through adding a splash or so of milk if needed to keep from drying out. We want to keep it moist and creamy! 

Best served right away. I've been working on a loaf of french bread I bought last week so I paired mine with a well toasted piece drizzled with a bit of olive oil. Heavenly!

Keep remaining sauce or any leftovers in an airtight container in the fridge. Will last up to a week. When reheating, add more non-dairy milk to maintain creaminess if needed.


Enjoy !


Inspired by this recipe from Cupcakes and Kale 


Simple White Bean Hummus


Hummus is a staple in our house. I love it for almost anything from a dip for veggies and crackers/chips to a sandwich spread. Use it as a binder for recipes like my 'Chickpea of the Sea' Salad Sandwich, Mashed Chickpea Salad, or Stuffed Avocados or as a spread on my Favorite Summer Sandwich. Traditionally hummus is prepared with chickpeas but cannellini beans are even more nutritious with more protein and fiber per serving. The cannellini bean have a smooth and creamy texture...it is my favorite white bean. In the past, I usually went for the traditional chickpea hummus but this will a great alternative from now on...it's everything I could ask for with many ways to dress it up! You may also like to try my favorite Chickpea Hummus as well.

Simple White Bean Hummus

Ingredients
  • 1 can cannellini beans (15 oz), drained and rinsed
  • 2 heaping tablespoons tahini
  • 2 tablespoons extra virgin olive oil
  • juice of 1 or 2 lemons
  • 1 clove garlic, minced or 1/2 teaspoon garlic powder
  • 1/2 teaspoon onion powder, optional
  • a couple twists of himalayan salt grinder
  • a couple tablespoons of water as needed to thin

vary up your hummus with these optional add ins or toppers:
  • dash of cayenne pepper
  • 1/4 teaspoon or so of cumin and/or coriander
  • 1/2 teaspoon or so dijon mustard
  • herbs like chives or basil
  • roasted garlic
  • sun-dried tomatoes
  • roasted bell pepper
  • paprika, smoked or plain

Place ingredients in food processor, except water, and blend until desired consistency. Taste for flavor adding anything more to your liking...more garlic? more lemon? more tahini? more salt? blend again. Add water one tablespoon at a time to thin if needed (when using as a sandwich spread or binder I prefer a thinner hummus and will add a few extra tablespoons of water to thin it out nicely). Serve however you like it! It's great either at room temp or chilled. Makes 1 1/2 cups. Store in airtight container in refrigerator for up to a week or so.

Enjoy !

Quinoa & White Bean Veggie Burger

Quinoa & White Bean Veggie Burger

It's burger time...

Quinoa & White Bean Veggie Burger

Quinoa & White Bean Veggie BurgerQuinoa & White Bean Veggie Burger
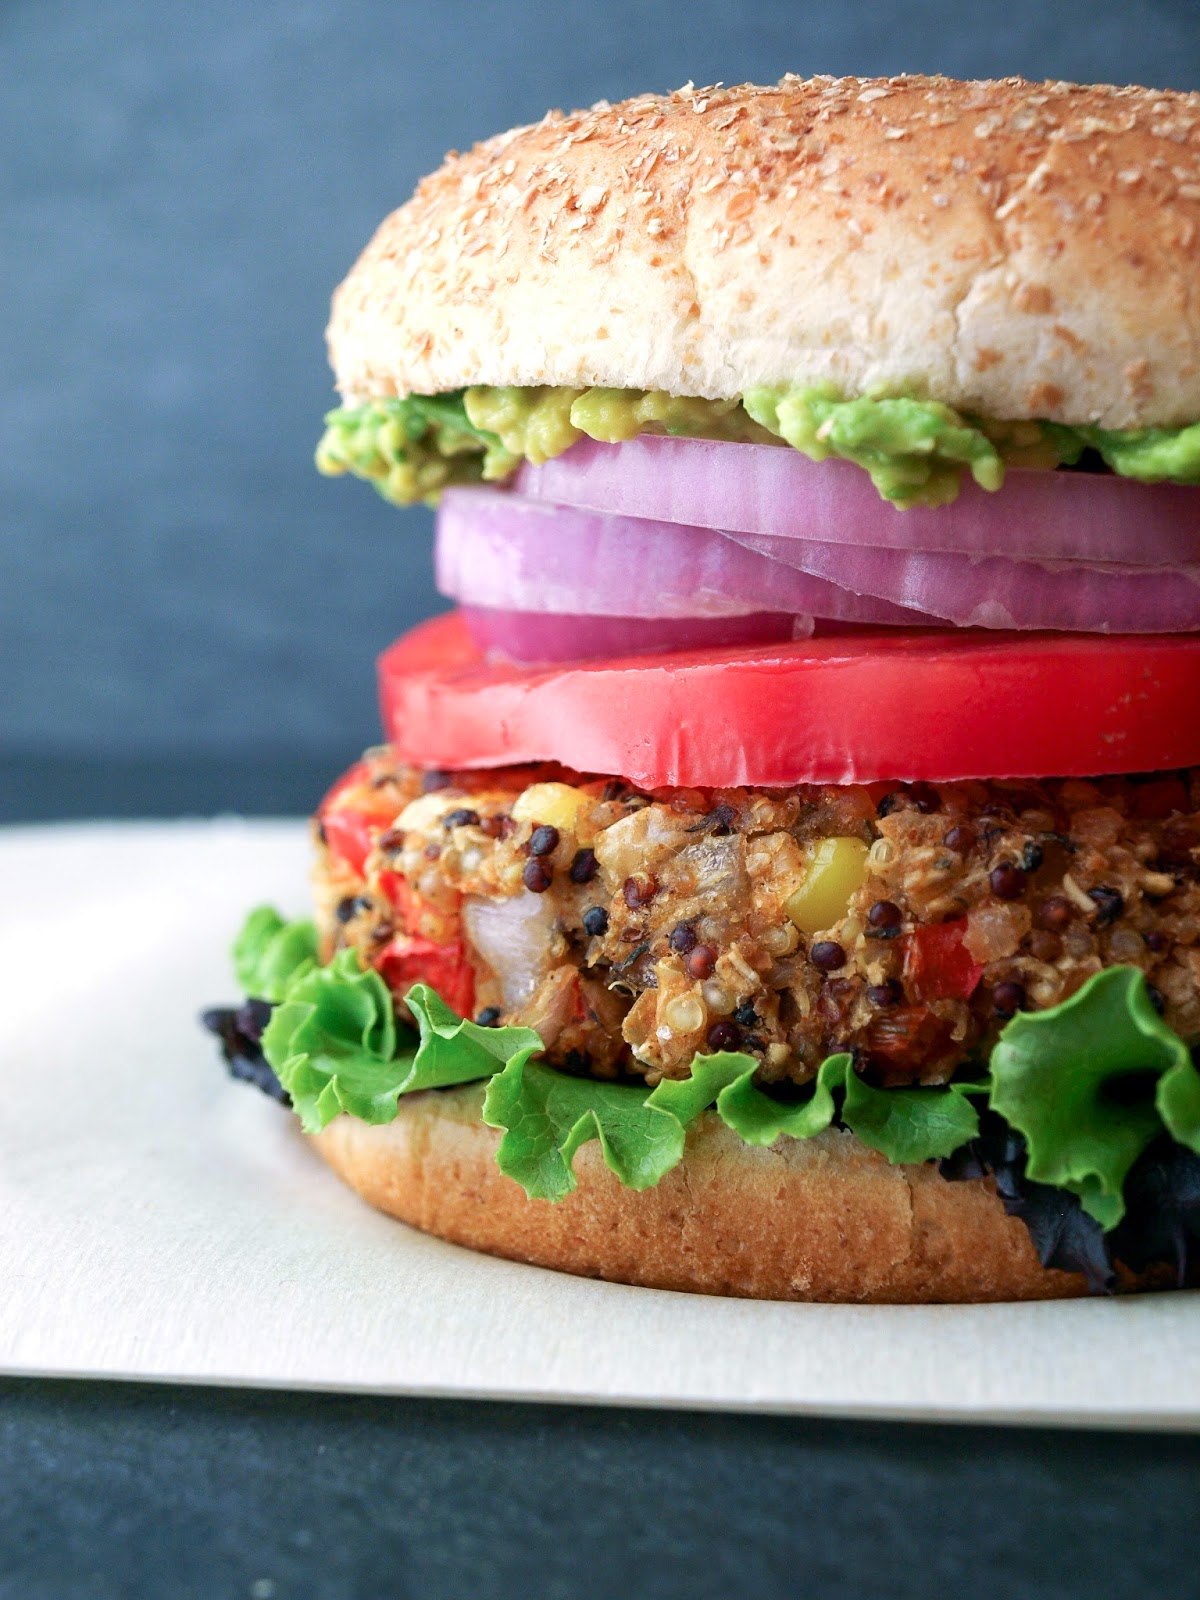
I haven't done a veggie burger in almost a year. It was time to add a new one to the list and this one is as delicious as it gets. These patties are loaded with protein and fiber as well as other beneficial nutrients, and they are very filling. As far as veggie burgers go this is fairly easy. I have to admit that I'm a pretty lazy cook and don't like a lot of steps. I prefer to spend as little time as possible preparing a meal as well as cleaning it up. Fyi, you can make this recipe even simpler by using a pre-made flour instead of processing oats like I did. The patties came out fantastic and held up great without falling apart, and they were not dry at all, nor were they mushy. The texture, taste and visual appeal all hit the mark. Once layered with all the extra goodies this burger was supreme and the best veggie burger I've ever had...am I biased...maybe, but these were divine! And, if you don't feel like having it on a bun, by all means top your veggie burger on a bed of fresh leafy greens with a squeeze of lemon, some avocado, salt and pepper...so good just like that! 

Quinoa & White Bean Veggie Burger

I loaded this beauty up with leafy greens, slice of heirloom tomato, sliced red onion, whole grain mustard, mashed avocado and a nice drizzle of sriracha. Lot's of flavors going on and I loved it. As the saying goes, "Eat like you mean it!" 

Quinoa & White Bean Veggie BurgerQuinoa & White Bean Veggie Burger

Quinoa & White Bean Veggie BurgerQuinoa & White Bean Veggie Burger

Quinoa & White Bean Veggie BurgerQuinoa & White Bean Veggie Burger

And now for the money shot! Having fun with my iphone and the VSCO Cam app (it's free), managed to create this final mouthwatering picture...veggie love at first sight!

Choose your cooking style...stove top

Quinoa & White Bean Veggie Burger

Ingredients (makes four patties)
  • 1/2 cup quinoa (I used tri-color)
  • 1 cup water
  • 1 teaspoon garlic powder
  • 3 teaspoons thyme, divided (oregano would be good too)
  • 1/2 - 1 teaspoon smoked paprika 
  • 1/2 teaspoon ground chipotle pepper, optional
  • 1 can (15 oz.) white beans (I used cannellini), drained and rinsed
  • 1/2 cup corn, fresh or frozen (about 1/2 fresh corn off the cob)
  • 1/2 cup red bell pepper, finely diced (about 1/2 bell pepper)
  • 1/2 cup shallot, finely diced (about 1 medium) or red onion
  • juice of one lemon
  • 1/3 cup oat flour, or flour of choice 
  • 1 Ener-G egg replacer or 1 flax egg (1 Tbs flaxseed meal + 3 Tbs water), optional*
  • mineral salt & cracked pepper, to taste
  • coconut or olive oil, to grease

To Serve:
  • tomato, sliced
  • leafy greens
  • avocado, sliced or mashed
  • red onion, sliced
  • whole grain or dijon mustard (hummus or vegan mayo is great too)
  • sriracha or Sriracha Cashew Cream (use the sriracha cream in place of mustard)
  • burger buns of choice

Start by making your flax egg or ener-g egg replacer and set aside. If baking in the oven, turn oven to 375 degrees F. (It's helpful to read instructions first before making the patties)  

In a medium pot, bring water, quinoa, garlic powder and 1 teaspoon thyme to a boil. Cover, reduce heat and simmer for 15 minutes. Once done, remove cover and let set for 10 minutes.

While quinoa is cooking, prepare your corn, shallot and red pepper. Be sure to dice your onion and red pepper fairly fine, they should be about the same size as the corn kernels.

Next, mash your beans. I mashed about 3/4 of the beans leaving a quarter of the batch whole or somewhat whole.

Once quinoa is ready, add the quinoa to the beans along with the shallots, red pepper, corn, remaining 2 teaspoons thyme, smoked paprika and optional chipotle powder and lemon juice. Mix well. Add in the flour and egg replacer, mix well again. Season to taste with salt, pepper and more of the other spices. We all vary on how strong we like our spices...you can't take out but you can always put in.

Now to divide and make your patties. I like to pat my mixture into the bowl a little and divide it with a knife into 4 sections, making a plus sign if you will. Take each section and pack it tightly into a ball in the palm of your hands. It should be about the size of your hand. Flatten with your palms and place on hard surface. Cup the edges with your palms and tighten them in a bit and flatten the top to the desired size. Mine were about 1/2 inch thick by 3 1/2 - 4 inches.

Cook one of two ways:

In the oven at 375 degrees on a greased or parchment lined cookie sheet for 30 minutes, turning once after 15 minutes. I also added a sprinkle of himalayan salt to the top before baking.

OR

In a large skillet, heat 1 tablespoon coconut oil or olive oil over medium to medium high heat. Cook patties about 4 - 5 minutes on each side.

I cooked both ways and had no preference. They both held up well and cooked great. (pic shows skillet cooked)

Serve on bun or bed of leafy greens with choice of toppings!

Notes:

The patties can be made ahead of time and stored covered in the refrigerator for a couple days prior to cooking.

*I have a sneaky feeling that this can be made without the use of any egg replacer if you don't have it available. I have it here for good measure until I try without (in the comments you will see that it has been done). If you decide not to use an egg replacer, when adding the flour, just try adding two - three tablespoons of water instead if needed...the amount may depend on the flour you're using.

For mashed avocado, cut open avocado, remove seed and using a fork, mash the flesh right in the skin...it's like a bowl. Spread on bun for a great creamy condiment!

I hope this makes you want to get in the kitchen and cook.
I encourage you to make these soon and often...

Enjoy!

Roasted Butternut Squash w/ Spinach, Beans & Barley


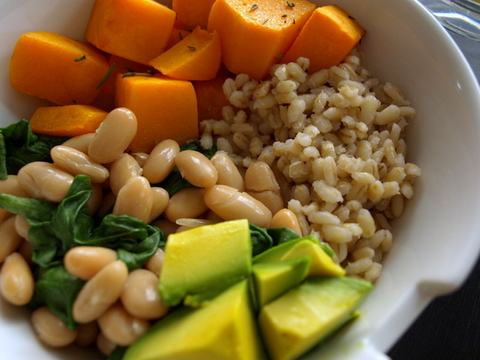
 A life uncomplicated. That is the way to live. Tonight's dinner was a perfect example of simplicity and elegance. At least I see it that way ! Colorful, tasty and extremely satisfying. This is a wonderful complete meal including lots of protein from the beans & barley, as well as tons of fiber. The butternut squash with its sweet roasted flavor gives life and warmth to the dish while adding its benefits of iron, potassium and vitamin C. Add spinach, some avocado, a touch of rosemary and thyme, and this has rounded out nicely without breaking the bank either. These simple easy dishes are so many times overlooked. 


Roasted Butternut Squash w/ Spinach, Beans & Barley

Ingredients
  • 1 butternut squash, cubed
  • 1 cup pearl barley
  • 1 can (15oz.) cannellini beans
  • two handfuls of fresh spinach
  • 1/2  teaspoon rosemary, chopped
  • 1/2 teaspoon thyme
  • avocado, diced
  • Himalayan salt & cracked pepper to taste

Preheat oven to 400 degrees F.

Cook your barley according to directions, will take apprx. 45 min. 

While your barley is simmering, prepare your butternut squash by cubing into 1 inch pieces. Place on roasting pan lined with parchment paper, silpat or lightly greased. Lightly brush the squash with olive oil and sprinkle with the rosemary, thyme and salt. Cook in oven for 25-30 min, turning once. When be ready when fork pierces easily.

In a medium size pot, add your beans and spinach, and cook over medium heat until beans are warmed and spinach has wilted.

Once everything is ready, serve with diced avocado and season to taste with salt & pepper. 

Serves 2 -3.
    Enjoy the simples !