.

Showing posts with label bell pepper. Show all posts

Yukon Gold and Sweet Potato Home Fries


Home fries are always a welcome addition to any cozy morning in the cool fall and winter months. These have a nice combination of a sweet and spice going on. The addition of a little chipotle powder brings an added warmth to the potatoes. This dish is easy to put together and will surely be enjoyed with those whom are so lucky to be apart of your meal. They were delicious!

On a side note, I was gifted these wonderful wooden utensils for Christmas from my son's girlfriend of two years. Time flies...it's hard to believe they have been together that long. My high school sweethearts they are! You never know what the future holds, my parents were high school sweet hearts and are still together after almost 45 years. These are lovely, and much appreciated, utensils from a lovely girl. And they worked wonders for dishing out these home fries. :)


Yukon Gold & Sweet Potato Home Fries 

Ingredients
  • 5 or 6 Yukon gold potatoes, cut into 1 inch cubes
  • 2 large sweet potatoes, cut into 1 inch cubes
  • 1 red bell pepper, chopped 
  • 1 onion, chopped 
  • 2 tablespoons olive oil or sesame oil 
  • 1 tablespoon thyme, dried or fresh 
  • 1 teaspoon garlic powder 
  • 1/2 teaspoon chipotle powder, or to taste 
  • dash or two allspice or nutmeg, optional 
  •  Himalayan salt & cracked pepper, to taste 

In large skillet over medium heat, heat oil and cook onions and bell peppers until onions are softened, about five minutes. Add potatoes, herbs and spices, cook on medium to medium low heat, uncovered, for about 25 - 30 minutes stirring occasionally. The sweet potatoes may take longer than the Yukon golds, covering the skillet with the lid ajar will help. You want your potatoes to brown and crisp a little on the edges. Be sure to scrap the bottom of the skillet as well to get all the pieces that may stick to the bottom...they will add nice flavor and some crispy texture to your dish. Serve right away. 

Serves 4 generously.

 • • • • • 

I paired mine with a tofu scramble which included sun-dried tomatoes, onions, thyme, garlic powder, turmeric, dash of chili powder, sea salt, cracked pepper and a little bit of chopped parsley. Just simple and easy, using what I had on hand. Spices make all the difference in the world. Hope this inspires something wonderful within. :)


 Enjoy! 

Adapted from this recipe at Epicurious

Raw Veggie Chili with Taco Nut Meat

Raw Veggie Chili with Taco Nut Meat

This is a welcome meal after all the Thanksgiving festivities. Nothing like adding a raw meal into the mix and this was superb! I have to hand it to Ani Phyo for not being afraid to use spices, this packs great flavor with fresh produce to create a raw chili that I absolutely adore and am craving already. Adapted from this recipe 'Fresh Tomato Chili with Taco Nut Meat'. I will definitely be adding this to my to go lunches as well as my at home meals. Feel free to add/subtract any vegetable you wish. Get in as many as you can to really make this a well rounded garden chili recipe. Use as much or as little as you like of each ingredient. This could've really used a dollop of raw Sour Cream or this flavorful Lime Cilantro Cashew 'Sour Cream', it would've added that final touch.

Raw Veggie Chili with Taco Nut Meat

Mine didn't seem to come out with as much soupyness as Ani's photo shows. But never the less, this is so very fresh, hearty and delicious...simply great! Be sure to take a peek at her photo to see what I mean. You can find it here, just scroll down a bit. She also has other recipes you may be interested in. Her focus in on raw food only.

Raw Veggie Chili with Taco Nut Meat

Dice up your vegetables and fresh oregano (if using fresh)...

Raw Veggie Chili with Taco Nut Meat

Combine with seasoning, I also added in some cilantro as an after thought...

Raw Veggie Chili with Taco Nut Meat

Using a food processor, puree half of the mixture... 

Raw Veggie Chili with Taco Nut Meat

Bring back pureed vegetables to diced vegetables and combine. Then, onto your nut meat...

Raw Veggie Chili with Taco Nut Meat

Add nut meat ingredients to food processor and pulse just until crumbly...

Fairly simple...just slicing, dicing, pureeing and pulsing. So fresh and good. I always feel the best after eating meals like this! Don't forget to add some raw Sour Cream or Lime Cilantro Cashew 'Sour Cream' on top for even more added deliciousness, or simply add some avocado slices to round it out even more.

Raw Veggie Chili with Taco Nut Meat

Vegetable Chili
  • 3 cups tomatoes (I used roma and grape)
  • 1 small red bell pepper (orange would be great too), diced
  • 1 large celery stalk, diced
  • 1/2 yellow or red onion, diced
  • 1 small zucchini, diced
  • 1 corn off the cob
  • 1 - 2 garlic cloves, minced
  • cilantro (as much as you like), chopped
  • 1 - 2 teaspoon chili powder, to taste
  • 1 teaspoon cumin
  • 3/4 teaspoon oregano, fresh or dried
  • 1/4 teaspoon sea salt, to taste

Prepare vegetables and combine all ingredients in large size bowl. Place 1/2 or so of the mix into a food processor and blend until pureed. Return puree to diced vegetables and toss well.


Nut Meat
  • 1 cup walnuts
  • 1 cup mushrooms
  • 1 tablespoon cumin
  • 2 teaspoons coriander
  • 1 teaspoon tamari, bragg's or nama shoyu, or 1/4 teaspoon sea salt, to taste

Place all ingredients into food processor and pulse until crumbly. You don't want to over blend or it will be a paste.

To serve, place vegetable chili in bowls and top with nut meat adding any additional garnishes you like. Serves four, or two generously. Store left overs, if there is any, in an air tight container in the refrigerator. Chili will last for five to six days. Nut meat will last up to two to three days, depending on the freshness of the mushrooms. Before eating let sit at room temp as it tastes best this way.


Enjoy the freshness!


Pan Bagnat (White Bean Niçoise Salad Sandwich)

Pan Bagnat (White Bean Niçoise Salad Sandwich)

This recipe was inspired by a recent post on BuzzFeed for 27 Awesome Easy Lunches To Bring To Work. I'm thrilled to have been included in the roundup with the Mashed Chickpea Salad Sandwich! There is also a few other great vegan options as well so be sure to take a look. In it I saw a Pan Bagnat from Food 52 and had to recreate it for us plant powered lovers. I love Food 52, and have always been inspired by the simplicity and beauty of their photography. And of course the recipes are great too! I have a few in my collection that were inspired from there like this Mushroom Bourguignon and these Gluten Free Banana Flap Jacks. It's a great community if you haven't heard of it yet! In fact, they have a vegan column called The New Veganism with Gena Hamshaw of Choosing Raw as the recipe creator. Be sure to take a look and be inspired by both the recipes and photography!

Pan Bagnat (White Bean Niçoise Salad Sandwich)

The pan bagnat (meaning 'bathed bread') is a classic specialty sandwich served in and around the region of Nice, France. It's a sandwich version of the salade niçoise which is a combination of tuna, anchovies and/or sliced hard boiled egg mixed with raw vegetables like red bell pepper, green beans, radishes, olives and onion. You will also find there to be olive oil and possibly vinegar, salt and pepper. Here we'll be using a few of these traditional ingredients but veganizing this classic using white beans as our protein. And I can guarantee you this is just as delicious if not better than the traditional version! Not only does the salad make for a great sandwich filler but it would be just as good on a bed of leafy greens as well. This recipe may give you leftovers, and that's a good thing because it only gets better in the next day. One day make a sandwich for work, home or a picnic and the next top it on some leafy greens or just eat as is. It's pretty amazing on its own!

Pan Bagnat (White Bean Niçoise Salad Sandwich)Pan Bagnat (White Bean Niçoise Salad Sandwich)
Pan Bagnat (White Bean Niçoise Salad Sandwich)

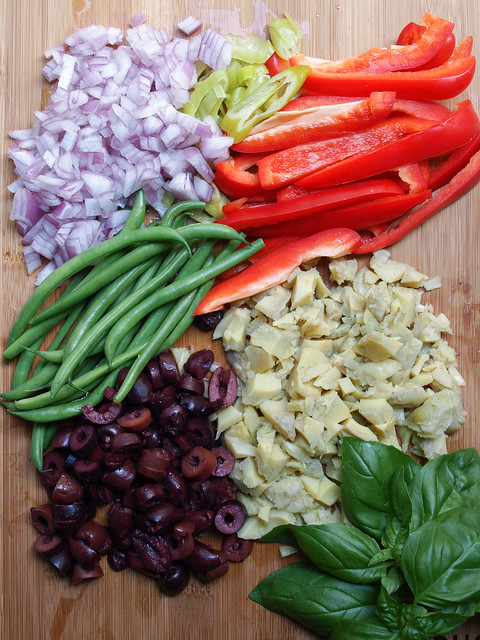
I love the saltiness from the olives here, you can add a tablespoon of capers if you like. The fresh bell pepper and blanched green beans add a nice crunch and sweetness while the onion and artichokes add another layer of flavor. Tie the vegetables together with the white beans, dressing made of olive oil, lemon and mustard, add a good sprinkling of mineral salt & plenty of cracked pepper and this salad will be another favorite to come back to time and time again!

Pan Bagnat (White Bean Niçoise Salad Sandwich)

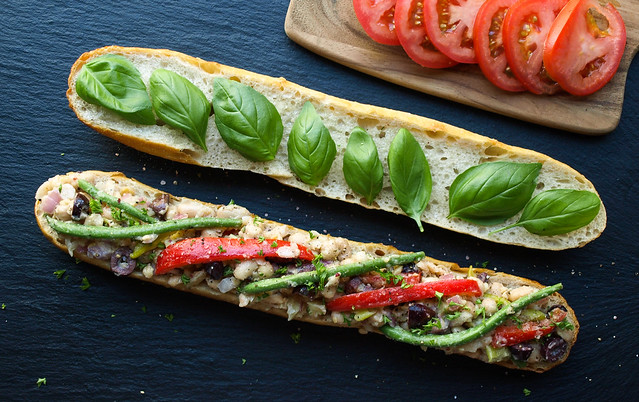
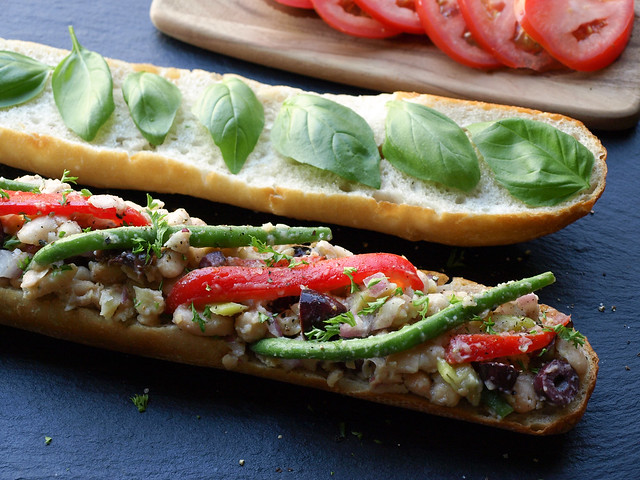
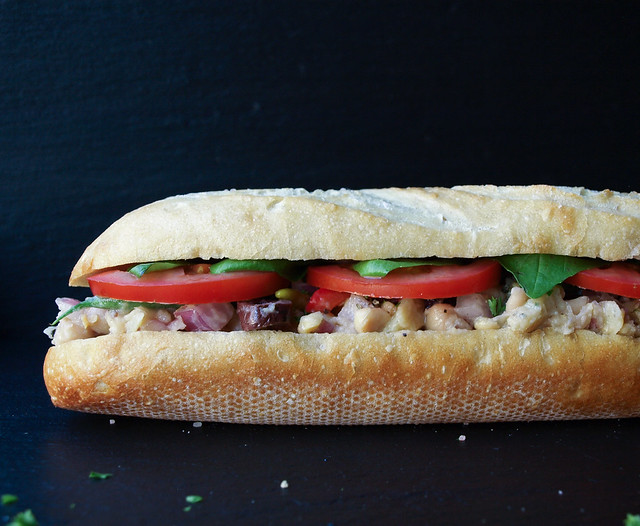
To create the traditional pan bagnet you'll first want to hollow out the insides of your bread. I left the top on this alone but from now on will hollow it out as well. It gives more room for your salad, helping to hold it together better while using less bread at the same time which is great too. Brush the insides of the bread with olive oil. Layer your bottom half with the salad. Since we're going to press the sandwich you can pile it on pretty good making a very hearty sandwich. Add your tomatoes across the top. Then layer basil, top with mineral salt & cracked pepper and remaining slice.

Pan Bagnat (White Bean Niçoise Salad Sandwich)

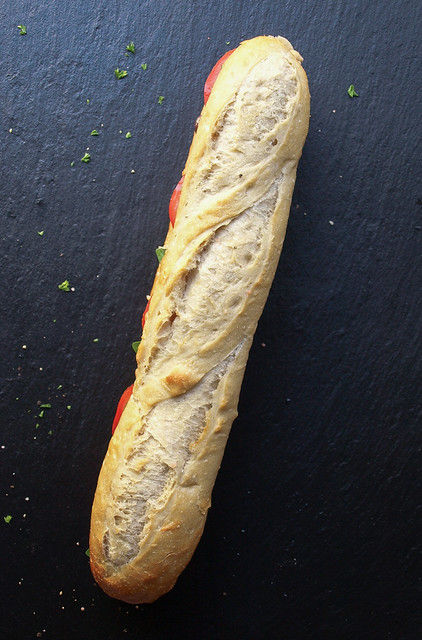
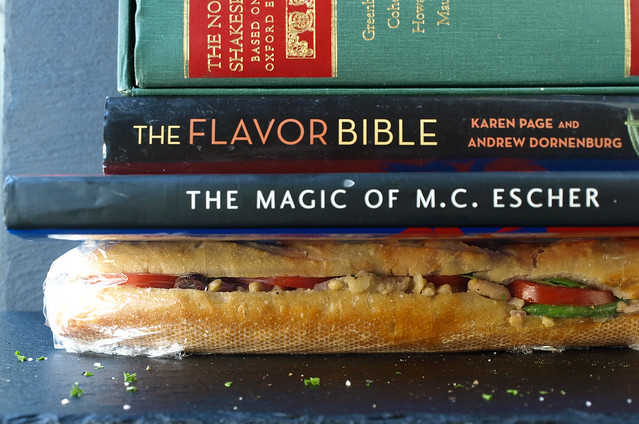
Wrap your sandwich tightly in saran wrap, fold ends under and press with a few heavy books or pots. This is an important part or your sandwich will be very messy and fall all over. Trust me, I know this from first hand experience. Plus, this helps the bread soak up the moisture of the salad dressing making for 'bathing the bread'. So be sure to press your sandwich, even if just for an hour, it will make all the difference...although overnight is even better. This makes a perfect grab and go sandwich for lunches and picnics, once pressed it's ready to go!

Pan Bagnat (White Bean Niçoise Salad Sandwich)

 Pan Bagnat (White Bean Niçoise Salad Sandwich) 

Ingredients 
  • 1 can (15 oz.) cannellini or chickpeas (garbanzo beans), drained and rinsed well or 1 1/2 cups cooked white beans
  • 1/2 red bell pepper, thinly sliced
  • 1/4 cup blanched French green beans, cut into half or thirds
  • 1 jar artichoke hearts in water, drained and chopped
  • 1/2 red onion, diced
  • 3/4 cup kalamata olives, pitted and sliced
  • 2 tablespoons parsley, finely chopped
  • 1 -2 greek pepperoncinis, diced (optional, not a traditional ingredient)
  • mineral salt & fresh cracked pepper, to taste
Dressing
  • 2 - 3 tablespoons extra virgin olive oil
  • juice of 1 large lemon (about 2 tablespoons)
  • 1 heaping teaspoon Dijon mustard
To assemble
  • 1 French baguette, ciabatta loaf, Pain de campagne, boule or artisan loaf of choice (even good sized rolls would be great)
  • extra virgin olive oil, to brush
  • 8 - 10 basil leaves
  • 1 medium tomato, thinly sliced
  • mineral salt & cracked pepper

Cut bread in half lengthwise. Remove some of the insides of each half making a trough for the filling (this will help keep the filling inside the sandwich when eating). Brush both halves with extra virgin olive oil.

In a small bowl, mix the dressing ingredients together until dijon has emulsified. Set aside to let the flavors develop.

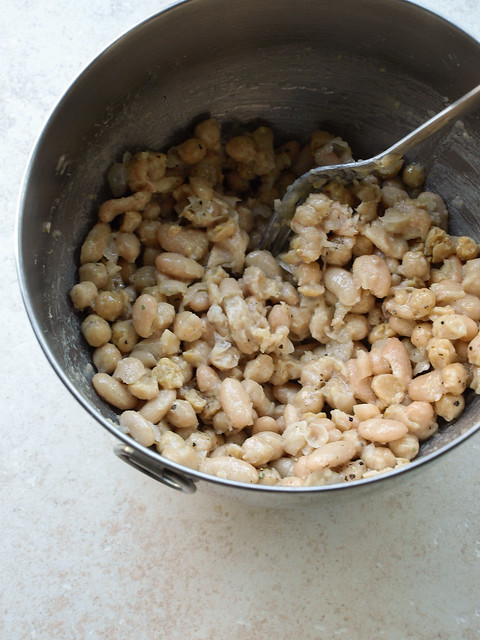
In a medium/large mixing bowl, add beans and roughly mash leaving about 2/3 whole beans. Add in dressing to the beans and mix well. Add in the bell pepper, green beans, artichokes, red onion, olives, parsley, optional pepperoncini and salt & pepper. Mix to combine.

Layer your bottom half of bread with a good serving of the mixed salad. Add tomatoes across the top, then top with basil leaves and salt & pepper. Top with other slice of bread. (You can also vice versa this layer order starting with the basil and tomato on the bottom and salad on top.)

Wrap sandwich tightly in saran wrap and press with a few heavy books/pots for at least an hour to overnight. If overnight, be sure to press in the refrigerator.

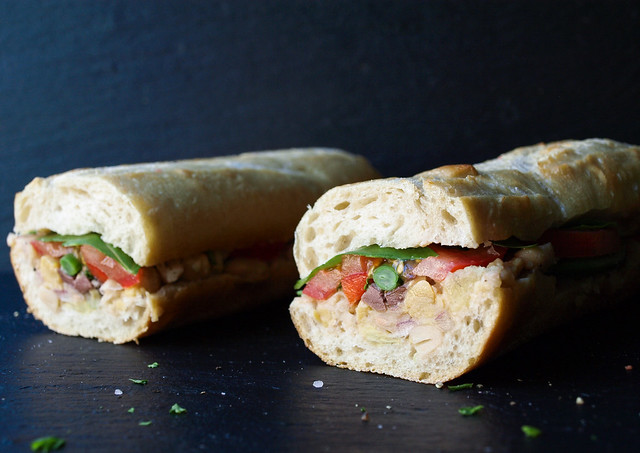
When ready to serve, slice in half or make as many slices as you like. Serve chilled or at room temperature.

Store any leftover salad mixture covered in the refrigerator for up to 5 days. 

Notes:

The cannellini beans have more protein and fiber than chickpeas so if that is a priority use them. Otherwise use your preferred white bean.

Try adding a splash of red or white wine vinegar to the dressing if you like.

As with all my recipes, add/subtract ingredients to your liking. Try adding a tablespoon or so of capers. I've had someone sub in asparagus for the green beans. Add sliced radishes along the top.

I edited this recipe on 11/10/13 at 12:15pm so it wouldn't make so much leftovers. The old recipe called for 2 cans white beans, 1 red bell pepper, 1/2 cup French green beans, 1 cup kalamata olives and 4 tablespoons olive oil. The old recipe was delicious, it just made a bit too much but of course feel free to use the old version instead so you'll have plenty of leftovers!

Enjoy!


The Ultimate Vegetable Lentil Loaf

The Ultimate Vegetable Lentil Loaf

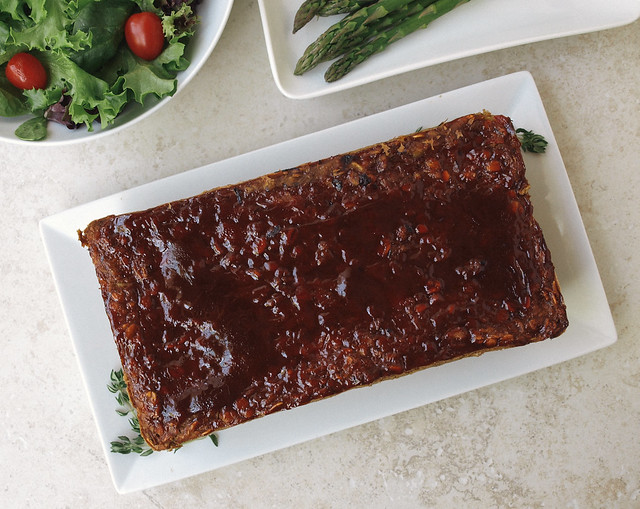
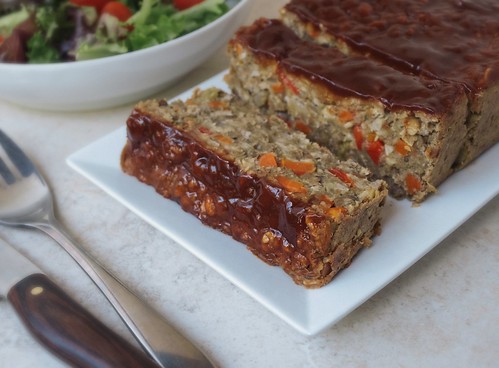
After a few attempts (five to be exact) at making this lentil loaf, I have finally come up with a veggie version that tastes pretty darn good and is extremely filling. I wanted to keep this easy with ingredients you may already have in your pantry. After doing a little digging I was able to piece this together from a few resources like the one from Made to Create which is wonderfully simple and also had good reviews from when I shared it on my Facebook page! And also this one from Oh She Glows which is a walnut version using apples and raisins but I wanted one with all veggies (Hers looks delicious and I will be trying it too). Last but not least, I referenced this recipe at My Vegan Cookbook

I especially love the glaze for the top of this loaf. You could serve some extra on the side, or double the amount if you like and put a little extra on. And if you like spicy, you'll love the ground chipotle pepper in this recipe with the glaze, such a nice combo of sweet and spice! I found the higher amount of chipotle listed below to be just perfect for myself, adjust to your liking starting with the smaller amount if you're not a fan of spice. Be prepared, one slice will most likely fill you up, it does for me! I'm not kidding when I tell you this is one hearty and filling lentil loaf. Leftovers make for great sandwiches. Store the loaf in the refrigerator for up to a 5 - 6 days. Sub in other veggies if you like. Some have left comments of adding in zucchini for the bell pepper. You get the idea, you can adjust to what you have on hand or prefer. Now on with the recipe...make a loaf and share the love!

The Ultimate Vegetable Lentil Loaf

The Ultimate Vegetable Lentil Loaf

Ingredients

Loaf
1 cup dry lentils (use green/brown)
2 1/2 cups water or vegetable broth
3 tablespoons flaxseed meal (ground flaxseeds)
1/3 cup water (6 tablespoons)
2 tablespoons olive oil for sauteing or steam saute using 1/4 cup water
3 garlic cloves, minced
1 small onion, finely diced
1 small red bell pepper, finely diced
1 carrot, finely diced or grated
1 celery stalk, finely diced
3/4 cup oats (I used GF oats)
1/2 cup oat flour or finely ground oats (any flour of choice will work here too)
1 heaping teaspoon dried thyme
1/2 heaping teaspoon cumin
1/2 teaspoon each garlic powder & onion powder...for good measure!
1/4 - 1/2 teaspoon ground chipotle pepper, optional
cracked pepper & sea salt to taste

Glaze
3 tablespoons organic ketchup
1 tablespoon balsamic vinegar
1 tablespoon pure maple syrup


Rinse lentils. In large pot add 2 1/2 cups water with lentils. Bring to a boil, reduce heat, cover and simmer for about 40 minutes, stirring occasionally. It's ok if they get mushy, we are going to roughly puree 3/4 of the mixture when cooled. Once done, remove lid and set aside to cool (do not drain), they will thicken a bit upon standing, about 15 minutes is good.

Preheat oven to 350 degrees.

In small bowl combine flaxseed meal and 1/3 cup water, set aside for at least 10 minutes, preferably in the refrigerator. This will act as a binder and will thicken nicely upon sitting.

Prepare vegetables. In saute pan heat oil or water over medium heat. Saute garlic, onion, bell pepper, carrots and celery for about 5 minutes. Add spices mixing well to incorporate. Set aside to cool.

Using an immersion blender or food processor, blend 3/4 of the lentil mixture. For me this was an important part, I tried it other ways and this worked to help as a binder. If using an immersion blender, tilt your pot slightly to the side for easier blending. Alternately, you can mash the lentils with a potato masher or fork.

Combine sauteed vegetables with the lentils, oats, oat flour and flax egg, mix well. Taste, adding salt and pepper as needed, or any other herb or spice you might like. Place mixture into a loaf pan lined with parchment paper, leaving it overlapping for easy removal later. Press down firmly filling in along the edges too.

Prepare your glaze by combining all ingredients in a small bowl, mix until incorporated. I recommend making each tablespoon heaping so you have plenty of this great sauce on top. Spread over top of loaf and bake in oven for about 45 - 50 minutes. Let cool a bit before slicing.

Serves 8.

 Your work is done...except for the dishes...maybe you can delegate that to someone else. :)

The Ultimate Vegetable Lentil Loaf

Enjoy!

Stuffed Acorn Squash + Wild Rice Medley

Stuffed Acorn Squash + Wild Rice Medley [Revisited]

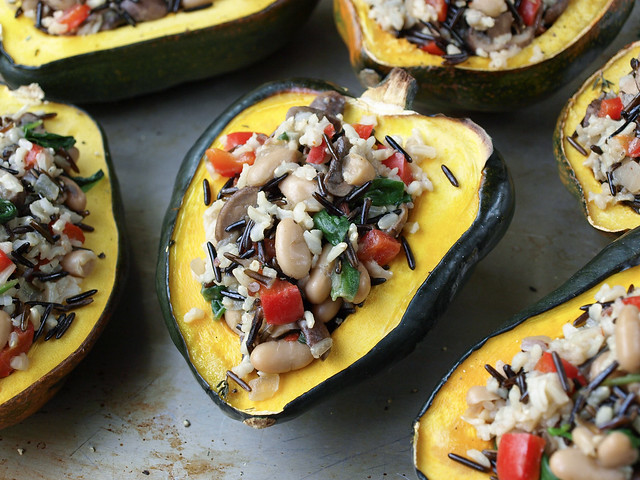
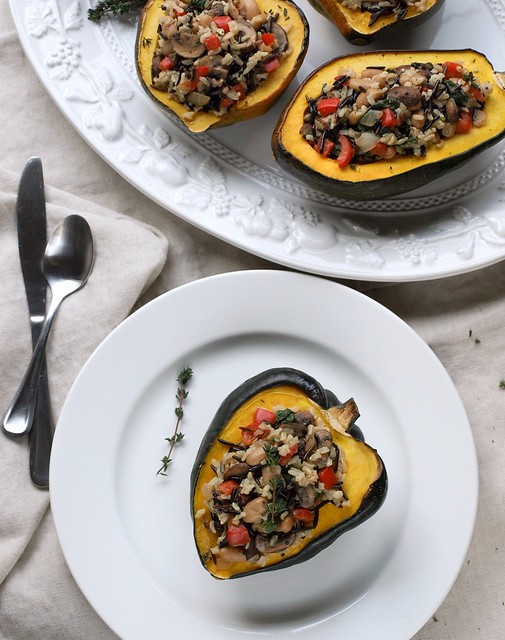
If you've never had a stuffed acorn squash, you really should give it a try. They are just so good and surprisingly filling. I love them unstuffed too with simple seasonings, but this is a tasty and satisfying meal with a good nutritional profile. I'm a big eater and one of these filled me up. Not too hard to put together either. It does take three separate cooking sections but it comes together pretty smoothly, unless your like me...the burner on the rice went out without me knowing so I had to add an additional 45 min onto my cooking time. But no harm done...there were dishes to do and cleaning around the house to keep my mind busy and off the mishap. All in all it's fairly easy, the rice and squash cook themselves, so the vegetables are the only real work which isn't much. This is also one of those recipes that can be tailored to your preference of veggies or beans. To top it all off, you just gotta love eating out of an acorn squash...it's pretty fun!

Stuffed Acorn Squash + Wild Rice Medley

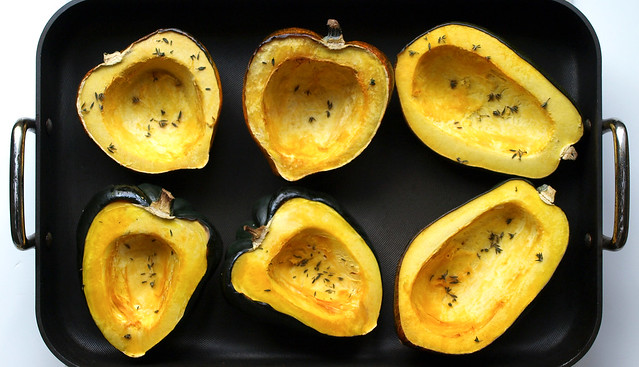
Start by slicing your acorn squash and scraping out the seeds. The seeds scrape out very easily with a sharper edged spoon. Here you can either brush your acorn squash with a little olive oil or leave it out. I go either way as I don't find it makes too much of a difference, so it just depends on how I'm feeling if I want to add extra oil to the meal. Sprinkle with fresh or dried thyme leaves and mineral salt. You can even add a few fresh thyme sprigs inside each squash, just remove before eating. Cook until fork tender.

Stuffed Acorn Squash + Wild Rice MedleyStuffed Acorn Squash + Wild Rice Medley

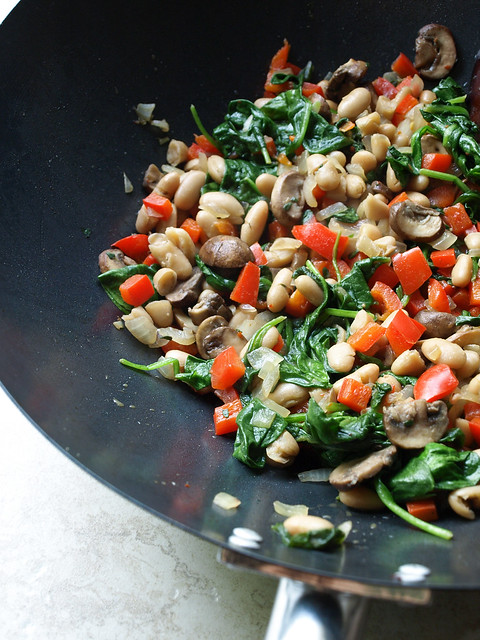
Cook your rice and set aside. Prepare your vegetables and add in the rice once done. 

Stuffed Acorn Squash + Wild Rice Medley

Fill your acorn squashes and serve! 

Stuffed Acorn Squash + Wild Rice Medley

Stuffed Acorn Squash + Wild Rice Medley

Ingredients

Acorn Squash
  • 3 acorn squashes, cut in half lengthwise and seeded
  • 1 1/2 teaspoons thyme, divided
  • sea salt

Wild Rice Medley
  • 1 cup rice, dry (I used half black wild rice and half long grain brown rice)
  • 2 tablespoons extra virgin olive oil
  • 1 small red bell pepper, diced
  • 1 large shallot or small onion, diced
  • 2 cloves garlic, minced
  • 2 cups mushrooms, sliced
  • 2 large handfuls greens (I used a 5 oz. combo package of baby kale, baby chard and baby spinach)
  • 1 can cannellini beans (15 oz), drained and rinsed
  • 1 tablespoon thyme
  • 1 teaspoon red pepper flakes, optional
  • sea salt and cracked pepper to taste
sriracha or hot sauce, to taste as garnish

Directions

Preheat oven to 400 degrees F.

In an oven proof sauce pan, fill half way with water and place on the bottom rack (this will give a little steam to your squash). Cut and seed your squash, place on baking sheet with cut side up. Season each squash with about 1/4 teaspoon thyme along with a few twists of the mineral salt grinder. Bake for 40-45 minutes, until tender...knife should easily pierce the flesh.

Cook your rice according to package. Wild rice will take about the same time as the squash to cook, about 40-45 min. (Quinoa or quinoa/rice combo would be great too and add even more protein per serving.)

Once the squash and rice are cooked, set aside to cool and begin with the vegetables.

In large wok or saute pan, heat oil on medium heat. Add shallots, garlic and bell peppers, saute for about three minutes. Add mushrooms, beans, one tablespoon thyme, red pepper flakes, a few twists of salt and pepper, cook for another three minutes. Add leafy greens, stir frequently until they are wilted (you may also want to use a cover in between stirring to help soften the greens). Combine rice and sauteed vegetables in the larger of the two pots. Taste for seasoning adding additional salt and pepper as needed.

Scoop mixture into each acorn squash half and serve with any additional seasonings. I like to top mine with some sriracha for that extra heat and flavor I love so much. So very good with this meal. Serves six, or three for the hearty eaters.

Store leftovers in an air tight container in fridge for up to a week.

Enjoy!


MUSHROOM, BELL PEPPER & BASIL STIR FRY

Mushroom, Pepper & Basil Stir Fry

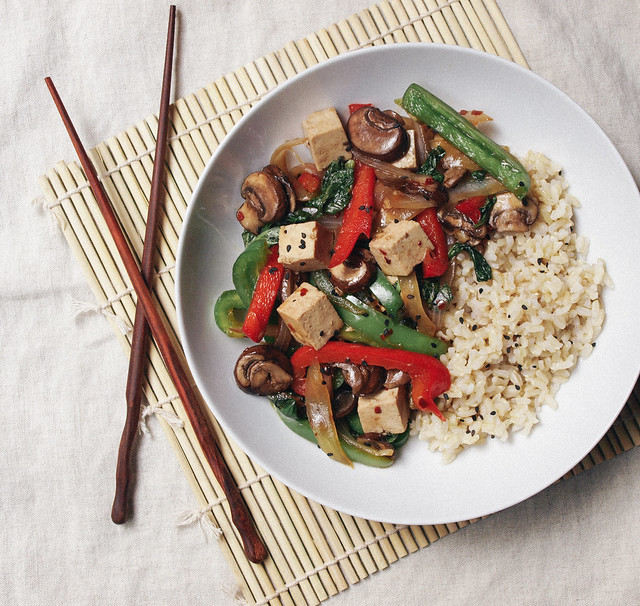
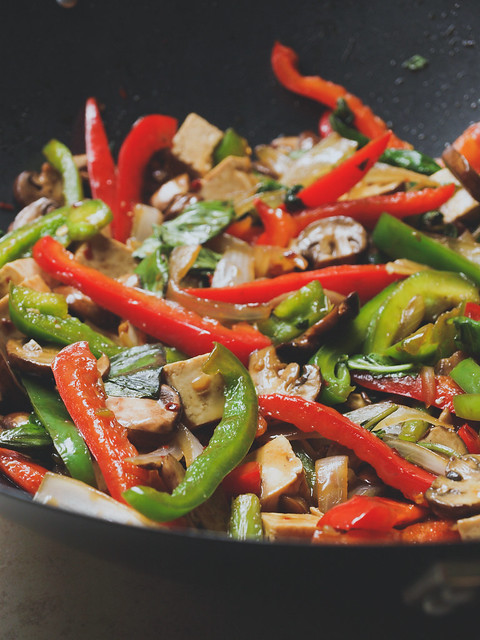
This recipe is one of those on a whim recipes that just came about from cleaning out the fridge. I had all the ingredients in my kitchen, put them together and even shared my dish on Facebook and Instagram last week. It went well and I decided to put it into the recipe collection. I originally made this without any oil, using water to stir fry my vegetables. I simply forget that you can do that with great tasting results and will do it more often from now on. You could also use veggie broth for extra flavor if you like. In this recipe you'll have the option to either use oil or the water as you like. Since then I've been buying the ingredients to make this because it's just that good. I love basil and this stir fry is really all about the basil! I'm lucky enough to live in So Cal and have access to fresh basil year round. I use two cups in this recipe but feel free to add more if you like! I hope you're able to find it readily available too. As for the other vegetables, you can mix them up using whatever you like. That's what I love about stir-fry's is that they are so versatile. Try using different colored bell peppers, zucchini, bean sprouts, broccoli or carrots adding or replacing anything you don't care for...pretty much anything will work here. 

Mushroom, Pepper & Basil Stir FryMushroom, Pepper & Basil Stir Fry

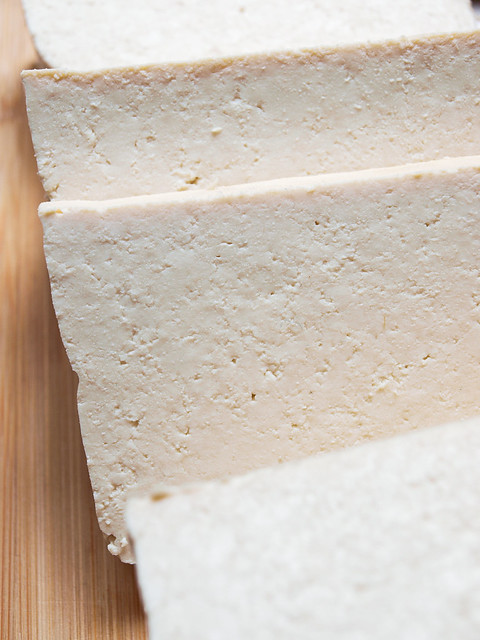
Lately, I've been buying tofu labeled either 'Sproutofu' from Wildwood or 'High Protein' from Trader Joe's. Both are high protein and extra firm. I find these do not need to be pressed making them a bit easier to work with in that you can skip the pressing process. They are so dense that there is no room for water to collect. Simply open your package, cut as desired and cook. It takes on the flavors surrounding it very well and has a nice tender texture. If you can find these in your local store, I highly recommend giving them a try. If you can't find these then you will still want to press your tofu for this recipe to release as much water as possible. 

Mushroom, Pepper & Basil Stir Fry

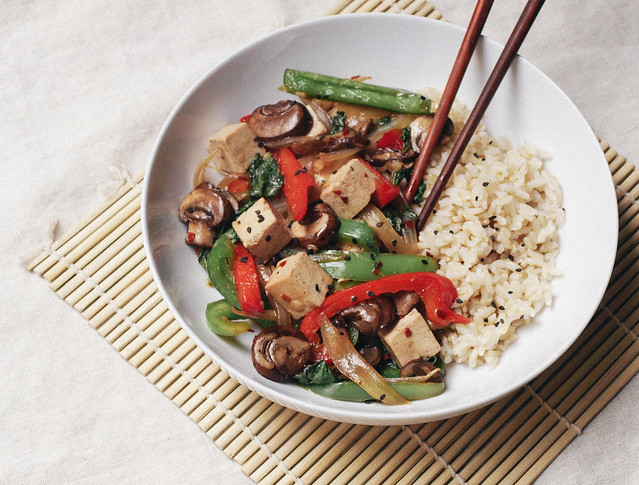
So simple to assemble and serve!

Mushroom, Pepper & Basil Stir Fry

MUSHROOM, BELL PEPPER & BASIL STIR FRY

Ingredients
  • 8 oz. mushrooms, sliced
  • 1 red & green bell pepper, julienned
  • 1 large onion, sliced
  • 3 cloves garlic, chopped
  • 2 cups basil, lightly packed
  • 1/4 cup tamari, coconut aminos or soy sauce
  • 1 tablespoon maple syrup
  • 1 tablespoon corn starch
  • red pepper flakes, to taste (I used 2 teaspoons)
  • 1 - 2 tablespoons sesame, coconut, olive or grapeseed oil OR water stir fry (see notes)
  • 10 oz. extra firm tofu, cubed (high protein pref), cut into 3/4 inch cubes
  • cooked grain of choice to serve (brown, basmati or jasmine rice...quinoa or soba noodles would be great too)
  • black or white sesame seeds, for garnish

If using non-high protein tofu, start by pressing your tofu (if using high protein tofu as mentioned above there is no need to press). Place your block of tofu either between a few sheets/or folded paper towel OR between a clean folded dish cloth. Place a heavy book, or pot, on top and let sit for about 20 minutes. Remove weight and cube your tofu. 

Prepare your vegetables. In a small bowl, combine the tamari, maple syrup, corn starch and red pepper flakes. Set aside.

In large skillet/wok, heat oil/water over medium high, add onions, garlic, bell peppers and mushrooms. Stir fry for 5 minutes. Add in the wet mixture and toss to coat. Add in basil and tofu, mix well and cook another 5 minutes, or until vegetables are just softened, tofu is warmed and sauce has thickened. Add more tamari and pepper flakes to taste.

Serve over grain of choice (I used a sprouted brown rice here) with a sprinkle of sesame seeds on top.

Notes:

Feel free to use a larger block of tofu if you like. No need to buy a larger block and not use it all. It will just make your meal more protein packed. Feel free to omit the tofu all together if you like!

Try doing a water or vegetable broth stir fry in place of using oil. Use 1/4 cup water/broth in place of the 1-2 tablespoon oil.

Bon Appetit!


Chickpea Ratatouille Niçoise

Chickpea Ratatouille Niçoise

Ratatouille, a rustic farm to table style dish. It's a summer/early fall recipe for those who appreciate big flavor and simplicity while using the seasons harvestOriginating in Nice, it's a traditional French Provençal stewed vegetable dish. Ratatouille is often served as a side dish but it is a recipe that can undoubtedly stand alone, especially with the addition of chickpeas adding a fair amount of protein to this colorful array of garden vegetables. There is much debate as to how to prepare ratatouille, but I chose to adapt my recipe from this one at La Tartine Gourmade, she also has a nice story with hers. It's a fairly simple approach to preparing this dish involving sauteeing and stewing on the stove top which resulted in a wonderful finish. And it tastes even better the next day! You may also like to see other cooking styles of ratatouille, I recommend looking at these for more inspiration: Saveur (I'll for sure be doing this one, it's perfectly old world rustic and comfy looking),  86 Lemons (a simple roasted version using chickpeas as well) and Olives For Dinner (a 'confit byaldi', a little more tidy looking making for a beautiful presentation). 

I know ratatouille isn't anything new but this classic sure deserves a place in the simple veganista collection!

Chickpea Ratatouille Niçoise

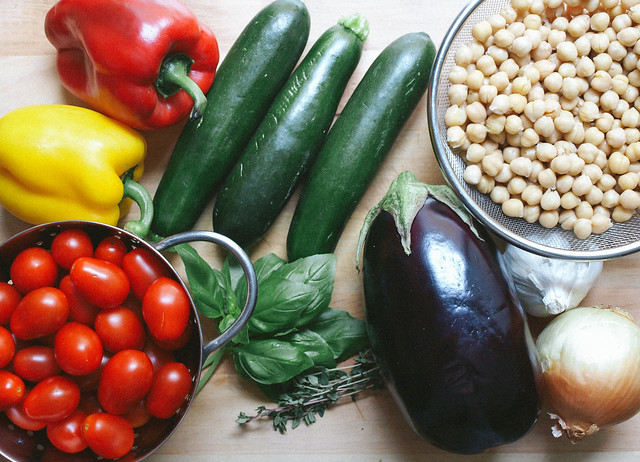
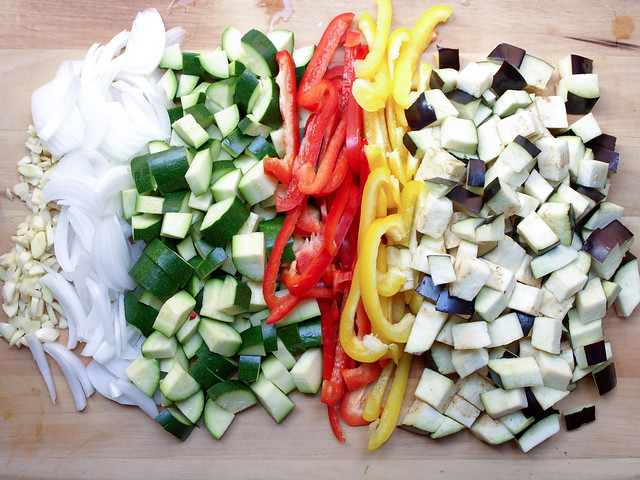
Gather your ingredients. These are all common vegetables, and fruits ie, tomato, and available year round here in Southern California. Eggplant is the only produce that seems to be more seasonal here, or maybe I just don't notice it as much as I don't use it often. For the garbanzo beans, you can start with dried beans cooking them according to this guide or use canned for extra ease. Herbs can be varied to suit your taste. Bea, author of the original recipe, uses a bay leaf and tarragon in her recipe. Here I have used fresh basil, thyme and some herbes de Provence. I even threw in some red pepper flakes. Go with what you feel, there is no wrong way to season your ratatouille as long as you like it! It's also a great way to change it up. I think I'll try some tarragon next time myself.

Chickpea Ratatouille Niçoise

Dice your vegetables. Next time, I'll be sure to chop the bell peppers the same size as the zucchini and eggplant, about 1/2 inch cubes. It makes it a bit easier to eat when they are uniform in size. I do like the onion sliced here but feel free to dice that instead too. It may seem as though you have too much produce (the tomatoes aren't even shown) and won't fit in the pot but the eggplant will shrink down and the rest of the veggies will soften and you'll be fine. You may even consider adding extra next time to make sure you have leftovers.

Chickpea Ratatouille Niçoise

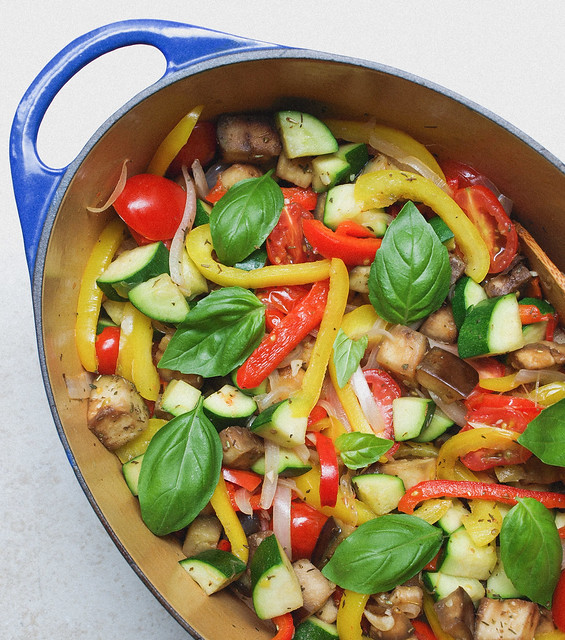
Vegetables have been sauteed and the ratatouille is ready for the first round of simmering before adding in the chickpeas. Still nice and colorful.

Chickpea Ratatouille Niçoise


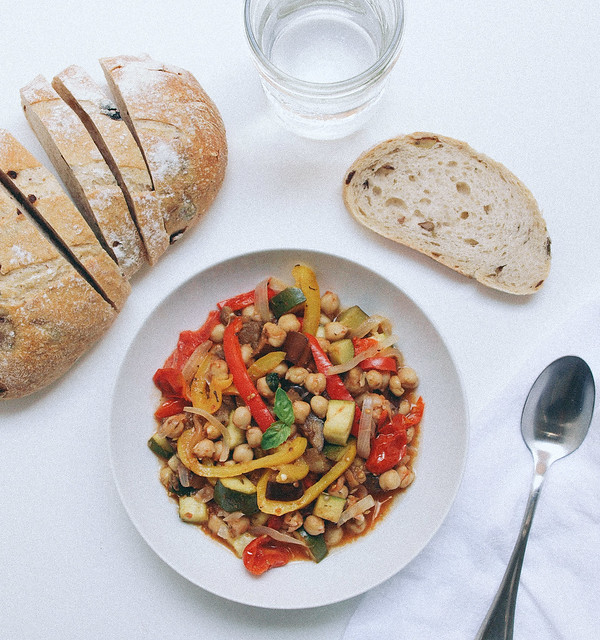
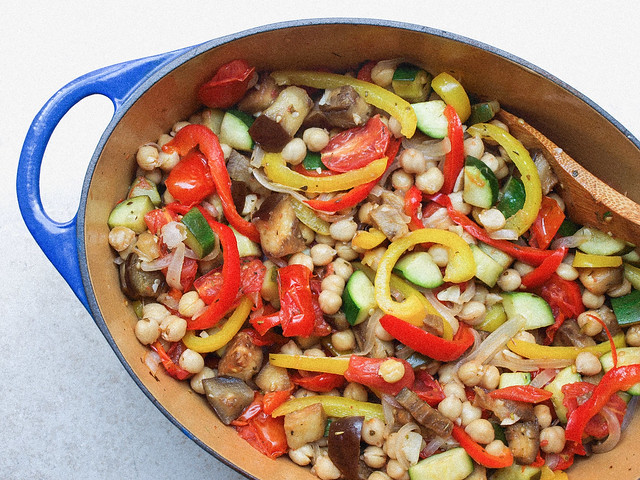
Chickpeas have been added and will simmer awhile longer. Depending on how you like your vegetables will depend on the length of time you allow your ratatouille to simmer. The longer you leave it, the more juices will form making for a great dipping sauce for a slice of good artisan bread. I preferred simmering mine for a total of about 35 minutes, I like the color and crisper texture but I didn't get as much of the juices. Go for a full hour or more to really let the ingredients sweat and get the juices going. Again, still colorful here. Your colors may become muted the longer you stew but the result with be delicious!

Chickpea Ratatouille Niçoise

Chickpea Ratatouille Niçoise

Ingredients
  • 3 cups cooked chickpeas (2 cans (15oz) garbanzo beans, drained and rinsed)
  • 4 tablespoon olive oil, divided
  • 1 eggplant, diced
  • 3 small zucchini or 2 medium, diced
  • 2 bell peppers (1 yellow & 1 red pref.), seeds removed, sliced
  • 1 onion, sliced
  • 4 garlic cloves, chopped
  • 1 lb. grape tomatoes, cut in half 
  • 2 teaspoons herbes de Provence or fresh thyme (I added a bit of both)
  • a few fresh basil leaves (left whole or chopped)
  • mineral salt, to taste
  • pinch of red pepper flakes, optional

In a heavy bottom pot or dutch oven, heat 2 tablespoons olive oil over medium heat, add eggplant and zucchini, saute for 5 minutes. Remove from pot and set aside.

Heat remaining 2 tablespoons olive oil over medium heat, add onions, garlic and bell peppers, saute for 3-4 minutes. Add tomatoes, mix well and cook 5 minutes. Add in eggplant, zucchini, herbs, spices and season with salt and pepper. Reduce heat to a low and simmer uncovered for 15 minutes. Add in chickpeas and simmer anywhere from 45 minutes to 1 hour, depending on your personal preference (less time for crisper vegetables, more time for softer vegetables and more juices). Stir occasionally until ready.

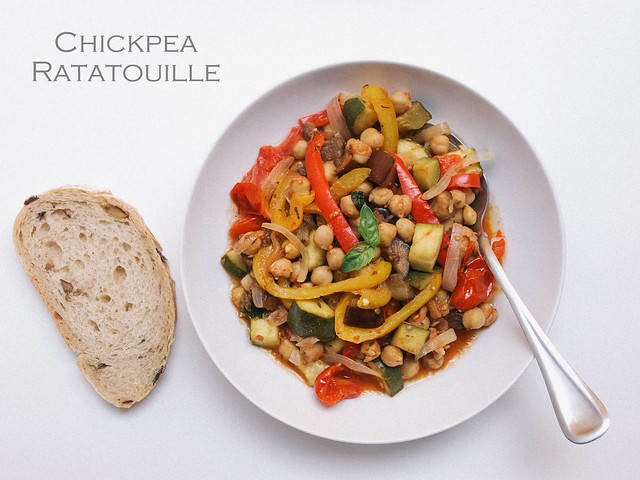
Serve topped with chopped fresh herbs. Pair it with a gluten free or favorite artisan loaf of bread. I have it here with a wonderful olive loaf. Try serving it on a bed of quinoa, rice or pasta to make it go further.

Serve warm, cold or at room temperature.

Notes:

To make this virtually fat free, try water sauteeing your vegetables using about 3 - 4 tablespoons of water instead of oil. Total amount of water for this recipe would be 6 - 8 tablespoons, divided.

I would dice my bell peppers next time, it's easier to eat them when they are the same size as the zucchini and eggplant pieces.

For the spices, try mixing and matching marjoram, thyme, rosemary, fennel and/or savory. Or use a bay leaf and tarragon.

The longer you simmer the more juices will accumulate.

Enjoy!

Butternut Squash and Black Bean Chili

Butternut Squash and Black Bean Chili [Revisited]

This chili is a great way to get the wholesome goodness of butternut squash and black beans into your diet!

Butternut Squash and Black Bean Chili [Revisited]Butternut Squash and Black Bean Chili [Revisited]

Butternut squash with its beautiful orange colored flesh is full of nutrients like carotenoids, which help against the spread of cancer and developing arthritis. And it contains plenty of beta carotene which is converted into vitamin A, helpful to boost the immune system, protect cells and keep the reproductive system healthy. You'll also get half the daily recommended dose of antioxidant rich vitamin C with just one cup. They're a good source of fiber, potassium, manganese, magnesium, iron, copper and B6. And on top of it all they are low in calories with only 75 calories per cup.

Black beans are a great source of plant based protein and will help keep the digestive tract in good working condition. They are a filling and low fat food, containing about 113 calories and 8 grams of protein & fiber per 1/2 cup with less than 1 gram of fat. Black beans are high in folic acid, magnesium, potassium and iron. All these are essential nutrients and key factors to help keep you feeling healthy and at your best. 

Butternut Squash and Black Bean Chili [Revisited]

Here you have a fantastic one pot meal that will surely please all types of eaters. It's adapted from Cookie & Kate. Easy to put together and ready in about 1 1/2 hours from start to finish. The little bit of cinnamon in this makes it feel like a true autumn meal and pairs well with the warm chili and chipotle spices, and if using the cocoa you will add another depth to the dish. Simple, delicious & hearty! If you have leftovers, even better because as it sets the flavors mingle making for a great meal the next day. In fact, it was too dark to take photos yesterday so these are the leftovers...I had this bowl of chili for breakfast and it was delicious. To top it off I sliced some corn tortillas into thin strips, placed them on a cookie sheet, added a bit of olive oil, dusted them lightly with chipotle powder and put them under the broiler on high until they were crisp. It made for a nice crunchy topper. Avocado would also be fabulous adding a nice creaminess here and there!

Butternut Squash and Black Bean Chili [Revisited]

Butternut Squash and Black Bean Chili

Ingredients
  • 1/4 cup water, for water saute
  • 1 butternut squash (about 3 - 4 cups), peeled, seeded & diced
  • 1 medium red onion or 2 large shallots, diced
  • 2 red bell peppers, cored, seeded and diced
  • 3 large cloves garlic, minced
  • 2 tablespoons chili powder
  • 1 teaspoon chipotle powder, or to taste
  • 1 teaspoon cumin
  • 1/4 - 1/2 teaspoon cinnamon, start small
  • 1/2 teaspoon cocoa powder, optional
  • 3 cans (15 oz) black beans, drained and rinsed, or 4-5 cups home cooked black beans
  • 2 cans (15 oz) fire roasted tomatoes + juice or 3 to 4 fresh tomatoes, diced
  • 2 cups water or vegetable broth
  • himalayan salt, to taste
garnish options
  • avocado
  • fresh made tortilla strips
  • cilantro
  • diced onions

In large stock pot over medium high heat, heat water and saute the butternut squash, onion, bell peppers and garlic until onions are soft and translucent, about 5-7 minutes. Add your spices, beans, tomatoes and vegetable broth, bring to a boil, reduce heat, cover and simmer for about 1 hour, stirring occasionally and tasting for flavor along the way. Will be done when the butternut squash is tender.

Serve with garnish of choice and freshly warmed corn tortillas.

Serves 6 - 8.

Notes:

Pictures reflect the use of 3 cups of water, a bit by accident. I prefer 2 cups myself for a thicker chili but the juiciness of this chili is delicious and I didn't mind the extra liquids here. Feel free to add more liquids to suit your taste.

This recipe was revisited on 11/12/13 with minor recipe changes and new photos. The changes made to the recipe was adding another can of beans...instead of 2 cans, it now calls for 3. Feel free to use less beans if you wish. I added the extra beans as a way to make the recipe go further. I also only call for 3 cloves garlic instead of 6. Feel free to add/subtract ingredients to suit your preference.

You can sub in diced sweet potato in place of the butternut squash for variation. Would be delicious too!

Enjoy!


Simple Salad + Almond-Lime Dressing


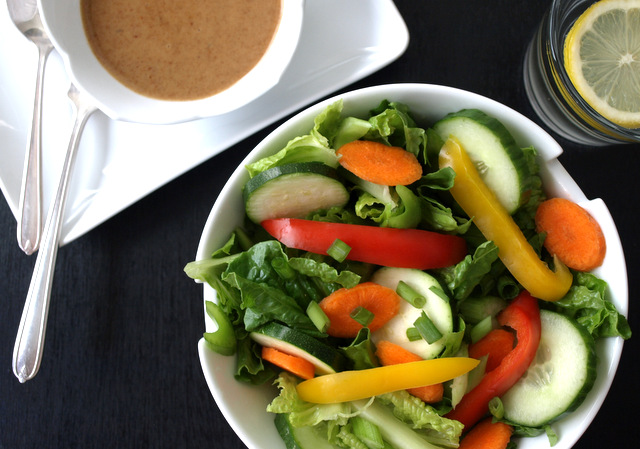
More ways to eat almond butter. I just love it...it's the best ! I go through about a jar a week these days. I make it here at home, you can find the recipe here: Raw Almond Butter. And salads, I love fresh salads...I can eat them every day. Pair this almond-lime dressing with this salad and it creates some kind of wonderful. The sweetness and coolness of the cucumbers, carrots, bell peppers, zucchini and leafy greens combined with the slightly salty, yet sweet and somewhat citrus almond flavors make this a salad I can enjoy often. I found myself tipping the bowl to get the last drops of this dressing. I think you might too. :)


All of these ingredients are alkaline based. The only questionable ingredient is the maple syrup, I find it on both the acid & alkaline list. I will be adding more meals that are 100% alkaline in the following months as I learn new habits of bringing my pH higher and maintaining a neutral level to combat some inflammation I am experiencing such as RA (explained more here: Let's Talk pH: The importance of Acid vs. Alkaline). And I plan on doing it with the most delicious meals. Eating healthy has to taste good and this hits the mark! 

Almond Butter & Lime Dressing 
  • 2 heaping tablespoons almond butter
  • 2 teaspoons tamari
  • 2 teaspoons pure maple syrup or agave
  • juice from 1 lime
  • pinch of red pepper flakes, optional

Salad
  • zucchini
  • cucumber
  • carrots
  • celery
  • bell pepper
  • scallions
  • leafy greens of choice
  • almond slices or pepitas, optional


Start with the dressing first so it can sit and let the flavors mingle while cutting up the salad mix. Combine dressing ingredients in a small bowl, mix well until creamy. Taste for flavor....more tamari? more sweetener? Add 1 tablespoon water at a time if needed if to thin. I added the extra tablespoon water this time around but prefer it on the thicker side myself, these photos reflect the thinner dressing. Dressing makes one serving.

Next, prepare your vegetables any way you like, using as much as you like. Taste dressing once more to make sure it's to your liking. Build your salad and drizzle with your perfected dressing...


Enjoy !


Make your own Raw Almond Butter ... It's very easy to do and it's a good clean food. It only has one ingredient: almonds...no sugars, fillers or junk. Spread it on apple slices, toast, put a dollop on top of your oatmeal with bananas slices & a drizzle of pure maple syrup, etc...so many ways to enjoy it!

TOFU SCRAMBLE STUFFED POBLANO PEPPERS

Tofu Scramble Stuffed Poblano Peppers

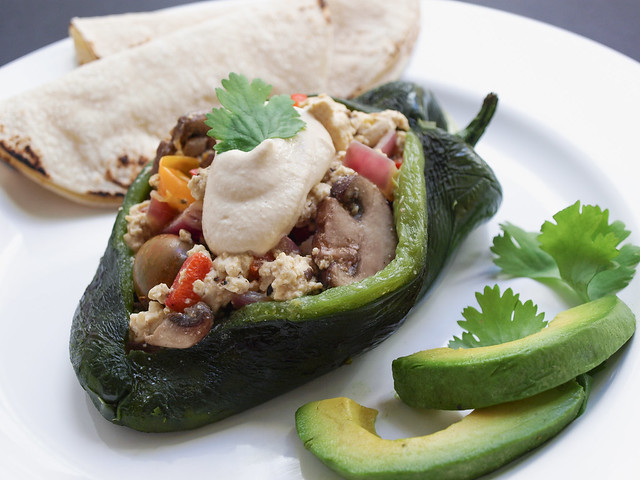
What to do with those poblano peppers? I bought a couple of them a few days ago, not quite knowing what I was going to do with them, and decided to try stuffing them with a breakfast tofu scramble. It worked great! Let's not keep these just for breakfast and brunch though, these can be eaten any time of day. They happen to be my lunch and dinner the day I cooked these up. This was fairly simple to prepare and absolutely delicious! The peppers were soft and tender, not too hot and the combination of everything filled me up perfectly. Feel free to sub in whatever veggies you prefer or have available in the fridge. I love tofu scrambles because they are so versatile, you can add pretty much whatever you like as the tofu will take on the flavors of all the other ingredients and pairs well with most vegetables. I kept the seasoning very minimal, using only nutritional yeast, garlic powder, salt and pepper. It really didn't need much and I was happy with the simplicity, letting the poblano come through, just be sure to season it well with the ingredients listed. Topping this with a bit of sriracha cashew cream or other cashew based cheese sauce lends another level of wonderfulness. Or simply top with salsa or any hot sauce you like. I also paired mine with some warmed corn tortillas and sliced avocado. Keep it simple or go all out!

Tofu Scramble Stuffed Poblano Peppers

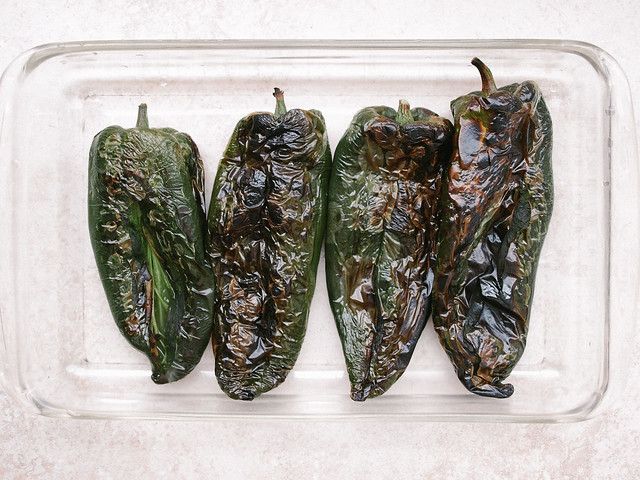
A look at after roasting the peppers, before peeling the skin off. I roasted my peppers under the broiler. These happen to be really nice sized peppers. The glass dish on the right is a 9x13, giving you the idea of just how big they were. If you only have smaller ones, use 6 to 8 depending on the size. The scramble filled up all four of these with a few bites left over.

Tofu Scramble Stuffed Poblano Peppers

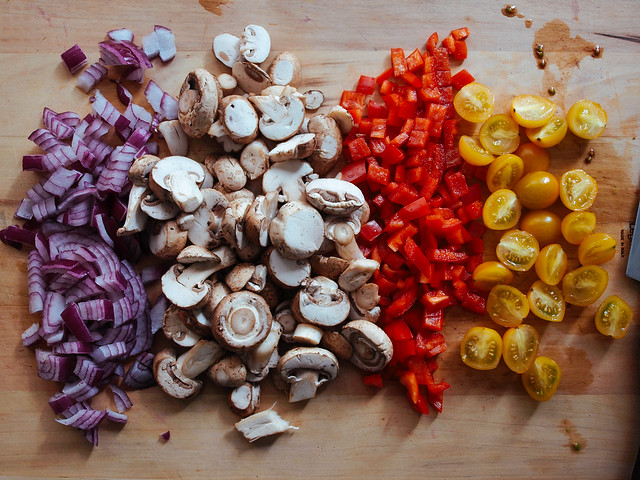
Change up the vegetables to suit your personal taste. Sub in zucchini, yellow squash, spinach, green onions, softened sun-dried tomatoes to name a few. You can never have enough vegetables in my opinion. Use as much as you like of everything!

Tofu Scramble Stuffed Poblano Peppers

 TOFU SCRAMBLE STUFFED POBLANO PEPPERS

Ingredients
  • 4 large poblano peppers or 6 small
  • 1 block (15 oz) firm or extra firm organic tofu, drained and pressed
  • 1 tablespoon olive oil
  • 1 small onion, diced (use any color you prefer or have on hand)
  • 8 oz mushrooms, sliced (I used baby bella)
  • 1 small bell pepper, diced (any color)
  • handful grape tomatoes, sliced in half
  • 1 teaspoon garlic powder
  • 1/4 cup nutritional yeast
  • mineral salt & cracked pepper, to taste
  • sriracha cashew cream, to serve
  • avocado slices, to serve

Roast your poblano peppers one of two ways.
  1. Roast in pre-heated oven at 450 degrees for 20 minutes or so on a cookie sheet, turning half way in between to flip peppers over.
  2. Roast your peppers in the broiler on low for 7 - 10 minutes on each side. Or until the skin of the peppers are lightly charred and bubbly. Ovens may very so keep watch and adjust times to suit your needs. (This was my preferred method of roasting as shown in the photo above.)

Once done, remove from oven. Let cool a few minutes in a baking dish covered with saran wrap. Remove any loose skin off the peppers. Gently slice each poblano pepper, making a slit down the center of one side, without cutting into the other side. Remove seeds, leave a few for heat if you like. Careful not to touch the seeds with your hands, use rubber gloves if you can. (The capsaicin will linger on your fingers and may burn, do not touch your eyes. Rub fingers in olive oil for one minute and rinse to help remove the capsaicin). Let peppers sit covered tightly until ready to stuff.

While peppers are roasting, drain and press your tofu. To press tofu, place block of tofu in a clean kitchen towel that is folded at least doubled, place on hard surface and top with a heavy pot/book for about 15 minutes.

In a large skillet/wok, heat oil over medium heat. Add onions, cook for 4-5 minutes, add in mushrooms, bell pepper, tomatoes and garlic powder, cook for another 4 minutes or so. Add tofu while crumbling with your fingers. Add in the nutritional yeast, salt and pepper. Be sure to taste and add plenty more garlic powder, nutritional yeast, salt and pepper to taste. Gently toss and cook another 3 - 4 minutes until tofu is heated through.

Scoop tofu mixture into peppers. If the peppers need to be heated, using the same baking dish you cooled the peppers in, place under broiler on low for a minute or two, watching closely so nothing burns.

Serve with a drizzle or dollop of cashew cream and avocado slices. Salsa would also be great. I also loved having some warmed corn tortillas on the side as well. Might I also suggest pairing it with some Perfect Hash Browns from Olives For Dinner. Lot's of ways to make it great...

Enjoy!