.

Showing posts with label tomato. Show all posts

SMOKY CHIPOTLE MAPLE T.L.T.

SMOKY CHIPOTLE T.L.T SANDWICH

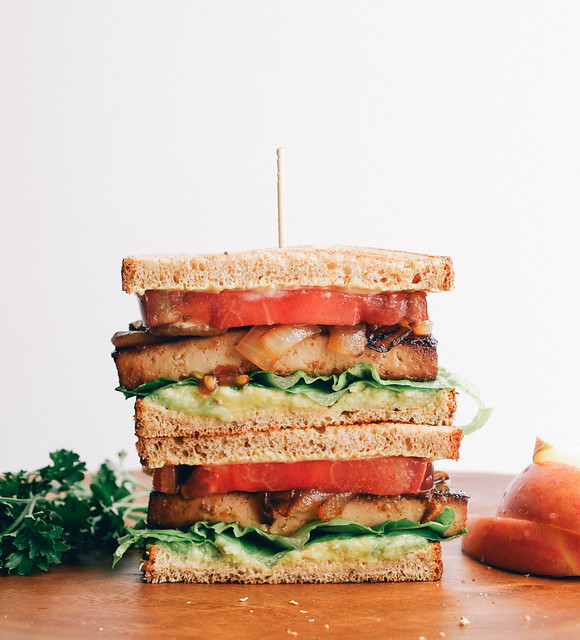
This is reminiscent of a B.L.T in some ways, minus the crunchiness of the bacon, but I rather prefer this one! So my version will be called a T.L.T., or better yet, Smoky Chipotle T.L.T. If you've followed my blog long enough, you will know I love adding a little spice to my foods whenever I can! 
SMOKY CHIPOTLE T.L.T SANDWICH

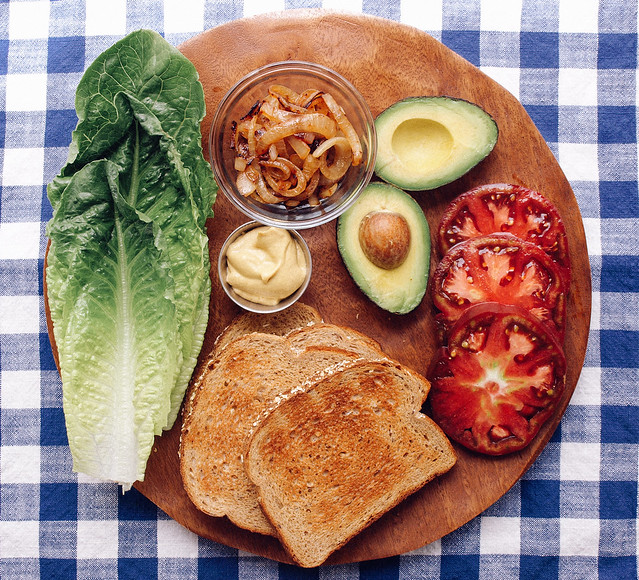
I've had my eye on this recipe from I Love Vegan for a while and finally got around to putting it together. Let me tell you, it did not disappoint! My only additions were adding a little bit of ground chipotle pepper and using a bit more of each ingredient than what is called for in the original recipe. I love the caramelized onions and the avocado mash as the condiment...so good! I tend to use avocado or a light flavored thin hummus as a sandwich spread all the time now. They both are wonderful!  A hummus spread would be great here too. If you use the avocado, I ensure you that you will not miss the old standard spreads. The tomato will also lend some nice juices into the mix. This was a great find and a keeper! Plus, it will leave your home smelling delicious. :)
SMOKY CHIPOTLE T.L.T SANDWICH

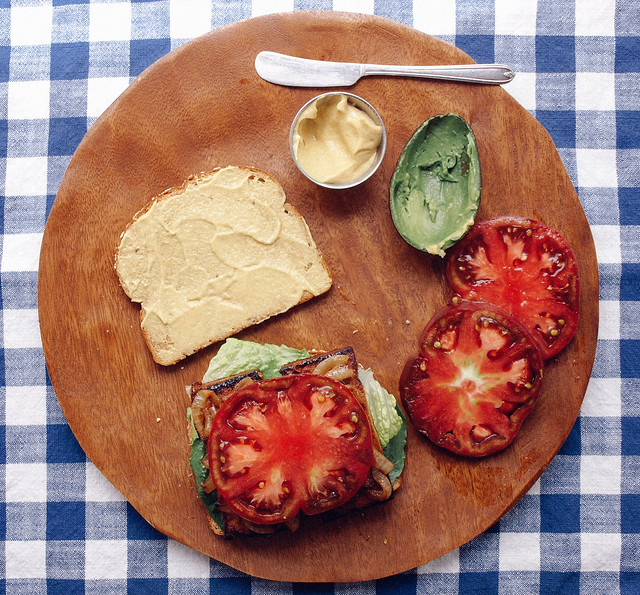
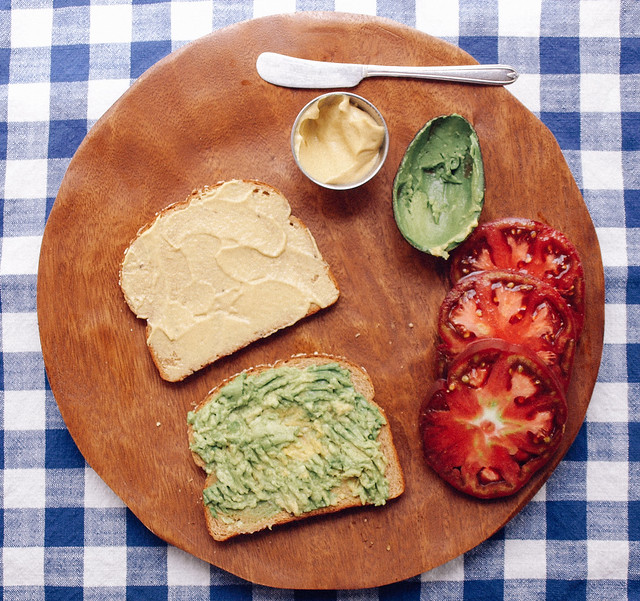
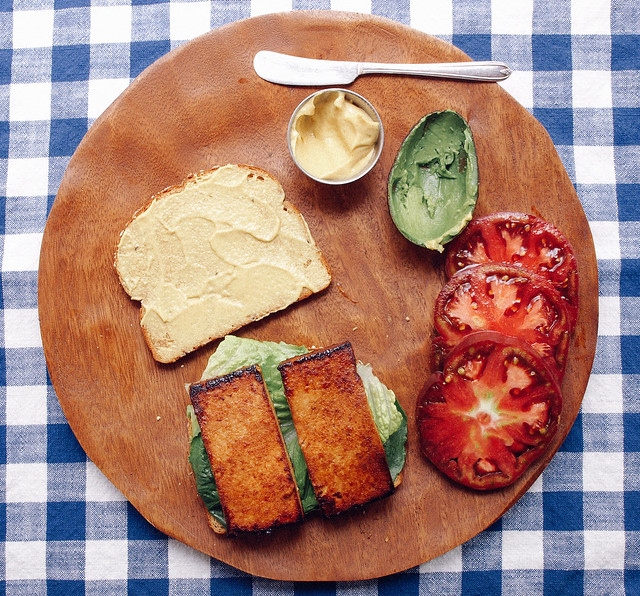
Start by spreading your mustard and mashed avocado...
SMOKY CHIPOTLE T.L.T SANDWICH

Add your leafy greens and tofu slices...
SMOKY CHIPOTLE T.L.T SANDWICH

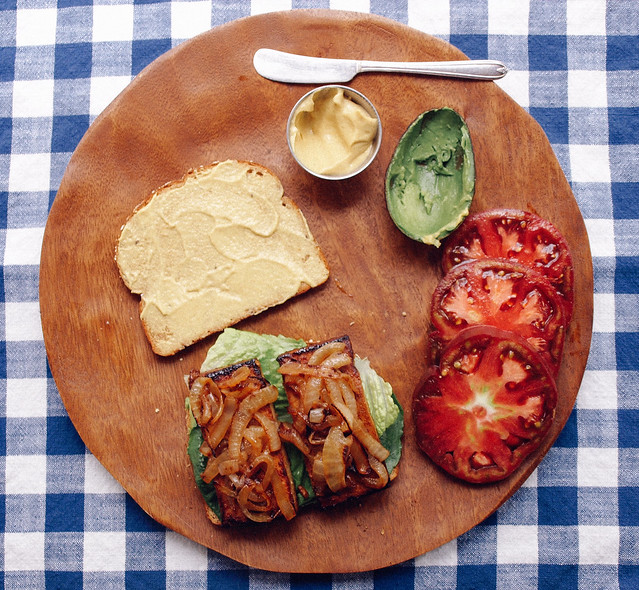
Top with grilled onions...

SMOKY CHIPOTLE T.L.T SANDWICH

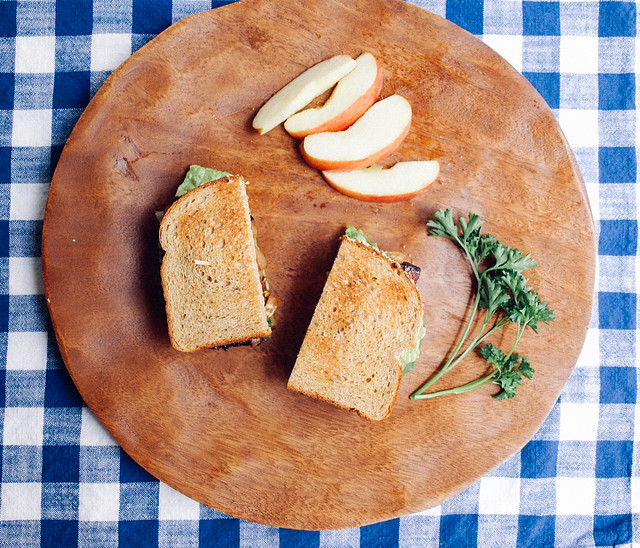
Lastly, add tomato, I used a large deep red heirloom tomato I had on hand. Place remaining slice of bread on top and slice in half. 

Pairs great with fresh sliced apples!
SMOKY CHIPOTLE T.L.T SANDWICH

SMOKY CHIPOTLE MAPLE T.L.T.

Ingredients
  • 1 block (15oz) organic firm or extra firm tofu
  • 1 onion, thinly sliced
  • 2 tablespoons sesame or olive oil, divided
  • 1 medium to large tomato, sliced thin
  • Dijon or stoneground mustard, to spread
  • 1 1/2 avocados, mashed, to spread
  • a few leaves of your favorite sandwich greens, red or green leaf, romaine, iceberg, etc...
  • salt to taste
  • 6 slices bread of choice
Marinade
  • 2 tablespoons pure maple syrup
  • 1 tablespoon tamari, bragg's liquid amino's, coconut amino's or soy sauce
  • 1 tablespoon water 
  • 1/4 teaspoon liquid smoke
  • generous dash of garlic powder or 1 clove garlic, minced
  • dash chipotle powder, to taste

Remove tofu from the package. Turn tofu on its side and slice in thirds, creating 3 large slabs. Gently press each slab between a clean dish towel or paper towels to remove some of the excess water. Cut the slabs in half. You should have six pieces that look like large domino (rectangular) shapes. 

In a medium sized shallow dish, mix together the marinade. Place tofu in the dish and let soak for about 1 hour turning carefully once or twice in between. 

Once the hour is almost up, caramelize your onions using 1 tablespoon oil. Heat oil over medium heat, add onions, turn down heat to medium low, stir often and cook until they start to brown and caramelize. May take 10 to 15 minutes or so. Once done, set aside.

In same skillet, heat remaining oil and cook tofu over medium high heat. Once tofu has browned, about 5 minutes, gently flip and brown the other side. It's ok if it gets a little crispy too! If you feel it is drying out too much, add some of the juices from the bowl it marinated in for extra moisture. When done, remove from heat.

Toast your bread. Spread one side of toast with mustard and the other with a layer of mashed avocado, about 1/2 avocado. Over the avocado, layer your lettuce, tofu, onions and tomato. Top with your other slice of bread. 

Serves three.

Enjoy! 

I'd love to see your masterpieces!
#thesimpleveganista

PASTA AND BEAN SOUP WITH KALE

Pasta and Bean Soup with Kale

I awoke from my slumber this morning and felt it was a soup kind of day. I don't know about you, but I love my soups! They can be so hearty and filling. This is one of those soups you can count on to leave you feeling satisfied. All the ingredients come together for a flavorful and hearty soup that you will come back to again and again. The recipe will make enough to feed a large family, or if not feeding a large family you will have leftovers to easily reheat and enjoy. I highly recommend using a stock pot since it will yield a lot of soup. You'll be happy to have leftovers as it's gets better as it sets!

Pasta and Bean Soup with Kale

I chose to use black eyed peas here but you can use whatever beans you prefer, just be sure to take a look at the bean cooking guide for your cooking times if using dried beans. Black eyed peas are a high protein and fiber bean, containing 11 grams of protein per serving and 5 grams of fiber. After soaking overnight, they took just under 1 1/2 hours to finish up. For the pasta I have used this quinoa & brown rice fusilli pasta from Trader Joe's. Again, use whatever paste you prefer. The pasta adds more protein and fiber making this a great hearty soup full of all the nutritious essentials to keep you healthy and feeling your best.

Pasta and Bean Soup with Kale

Kale is king of the leafy greens and is packed full of goodness! We all know by now that it's a powerhouse of vital nutrients like vitamin K, A & C. It also has high levels of manganese, copper, fiber and calcium. Plus it has a good amount of protein for a leafy green. I used Tuscan kale (aka, lacinato or dinosaur kale) for this recipe and it was delicious. It has such a rich deep green color and is one of my favorite kale varieties.

Pasta and Bean Soup with Kale

Warm and hearty, it's an all-around wonderful soup to enjoy throughout the year!

Pasta and Bean Soup with Kale

PASTA AND BEAN SOUP WITH KALE

Ingredients
  • 1 pound dried  beans (black eyed peas, cranberry or great northern beans) or 3 cans (15 oz) various beans, drained and rinsed
  • 1 tablespoon grapeseed or olive oil or 3 tablespoons water (for water saute)
  • 1 medium yellow onion, diced
  • 2 garlic cloves, minced
  • 2 large carrots, sliced
  • 1 bunch Tuscan kale (about 4 loose cups),  center stems removed and roughly chopped
  • 2 large organic tomatoes, diced (I leave the skin on) or 1 can (15oz) crushed canned tomatoes with juice
  • 8 cups vegetable broth, water or combo
  • 1 tablespoon dried thyme or 2 tablespoons fresh 
  • 2 teaspoons dried sage or 3 -5 leaves, chopped
  • 2 -3 teaspoons smoked paprika, optional
  • 3 bay leaves
  • a pinch or two of red pepper flakes
  • himalayan salt & cracked pepper, to taste
  • 8 oz of pasta of choice, cooked
  • almond parmesan and lemon, for serving

1. If starting with dried beans. Pre-soak your beans overnight, or at least 8 hours, in a large pot of water filled two to three inches above the beans. Drain and rinse well, set aside. After pre-soaking, different beans will need to cook and simmer for different times. Cranberry beans need 45 minutes or so cooking time, while northern beans & black eyed peas need about 1 - 2 hours. Follow this guide for further cooking times depending on your beans of choice: Cooking Beans

2. In same pot you pre-soaked your beans in, add oil/water and heat over medium heat. Add onion and cook until translucent, about 5 minutes. Add in garlic, carrots, thyme and sage cook another minute or so. Add in broth/water, beans, bay leaves, tomatoes, kale and red pepper flakes, bring to a boil, cover, reduce heat to low and simmer until beans are done (time varies depending on beans...my black eyed peas took just under 1 1/2 hours), stirring occasionally. If using canned beans, add in when beans are called for and cook for 30 - 40 minutes, stirring occasionally.

3. While the soup is simmering cook your pasta according to package, set aside. Once soup is ready, remove bay leaves, add in pasta and cook 5 more minutes, taste for seasoning adding salt and pepper to taste. Serve with a dusting of almond parmesan and a squeeze of lemon for brightness. Pairs great with crusty artisan bread or warmed corn tortillas.

Serves 6 generously.

Notes:

Feel free to use 3 cans (15oz) beans such as kidney, cannellini, pinto or northern in place of dried beans. Just be sure to drain and rinse them. Skip the first step and go right into step 2 instead. 

I've made this and added the smoked paprika and it was delicious! It is now an option in the recipe. I've also used a mix of canned kidney beans, pinto beans and black beans, and have even added in some mushrooms and used quinoa pasta...just goes to show this a very versatile recipe...almost anything goes and it's still delicious...gotta love it!

Use any pasta type you like from shells, macaroni, penne, bowtie, ditalini, etc. My pasta grain of choice is spelt, quinoa or rice pasta. The latter two being gluten free. If you're not gluten intolerant you can use spelt and whole wheat. If you're not following any sort of diet, use whatever pasta you prefer. 

If you don't have garlic on hand, use 1/2 teaspoon garlic powder when adding the other herbs and spices.

Enjoy!


Raw Veggie Chili with Taco Nut Meat

Raw Veggie Chili with Taco Nut Meat

This is a welcome meal after all the Thanksgiving festivities. Nothing like adding a raw meal into the mix and this was superb! I have to hand it to Ani Phyo for not being afraid to use spices, this packs great flavor with fresh produce to create a raw chili that I absolutely adore and am craving already. Adapted from this recipe 'Fresh Tomato Chili with Taco Nut Meat'. I will definitely be adding this to my to go lunches as well as my at home meals. Feel free to add/subtract any vegetable you wish. Get in as many as you can to really make this a well rounded garden chili recipe. Use as much or as little as you like of each ingredient. This could've really used a dollop of raw Sour Cream or this flavorful Lime Cilantro Cashew 'Sour Cream', it would've added that final touch.

Raw Veggie Chili with Taco Nut Meat

Mine didn't seem to come out with as much soupyness as Ani's photo shows. But never the less, this is so very fresh, hearty and delicious...simply great! Be sure to take a peek at her photo to see what I mean. You can find it here, just scroll down a bit. She also has other recipes you may be interested in. Her focus in on raw food only.

Raw Veggie Chili with Taco Nut Meat

Dice up your vegetables and fresh oregano (if using fresh)...

Raw Veggie Chili with Taco Nut Meat

Combine with seasoning, I also added in some cilantro as an after thought...

Raw Veggie Chili with Taco Nut Meat

Using a food processor, puree half of the mixture... 

Raw Veggie Chili with Taco Nut Meat

Bring back pureed vegetables to diced vegetables and combine. Then, onto your nut meat...

Raw Veggie Chili with Taco Nut Meat

Add nut meat ingredients to food processor and pulse just until crumbly...

Fairly simple...just slicing, dicing, pureeing and pulsing. So fresh and good. I always feel the best after eating meals like this! Don't forget to add some raw Sour Cream or Lime Cilantro Cashew 'Sour Cream' on top for even more added deliciousness, or simply add some avocado slices to round it out even more.

Raw Veggie Chili with Taco Nut Meat

Vegetable Chili
  • 3 cups tomatoes (I used roma and grape)
  • 1 small red bell pepper (orange would be great too), diced
  • 1 large celery stalk, diced
  • 1/2 yellow or red onion, diced
  • 1 small zucchini, diced
  • 1 corn off the cob
  • 1 - 2 garlic cloves, minced
  • cilantro (as much as you like), chopped
  • 1 - 2 teaspoon chili powder, to taste
  • 1 teaspoon cumin
  • 3/4 teaspoon oregano, fresh or dried
  • 1/4 teaspoon sea salt, to taste

Prepare vegetables and combine all ingredients in large size bowl. Place 1/2 or so of the mix into a food processor and blend until pureed. Return puree to diced vegetables and toss well.


Nut Meat
  • 1 cup walnuts
  • 1 cup mushrooms
  • 1 tablespoon cumin
  • 2 teaspoons coriander
  • 1 teaspoon tamari, bragg's or nama shoyu, or 1/4 teaspoon sea salt, to taste

Place all ingredients into food processor and pulse until crumbly. You don't want to over blend or it will be a paste.

To serve, place vegetable chili in bowls and top with nut meat adding any additional garnishes you like. Serves four, or two generously. Store left overs, if there is any, in an air tight container in the refrigerator. Chili will last for five to six days. Nut meat will last up to two to three days, depending on the freshness of the mushrooms. Before eating let sit at room temp as it tastes best this way.


Enjoy the freshness!


The Ultimate Tempeh Chili

The Ultimate Tempeh Chili

I've wanted to do a tempeh chili for a while now, and with the temperatures steadily on the low here in So Cal it's the perfect time of year to bring out the chili recipes. Tempeh makes for a great addition to any chili giving it an extra hearty feel and enhancing the protein & fiber content. With almost 20 grams of protein per 100 grams (about 3.5 oz.) of tempeh, add that to the high protein beans called for in this recipe and you've got yourself a great high protein chili to keep you feeling full while meeting your daily protein requirements easily. I've been trying to incorporate an extra dose of protein into my diet lately without having to use protein smoothies and this chili has been on my weekly rotation. I've played around with the recipe and have kept it fairly simple. Please keep in mind that tempeh is a soy product, and although it is a good soy product for you unlike some soy products it is best in moderation...once or twice a week is fine. You can feel good about having this once a week or every now and then. Gather your ingredients and make yourself a bowl of chili that will warm you up and keep you feeling great!

The Ultimate Tempeh ChiliThe Ultimate Tempeh Chili

I did include a bottle of dark beer and loved the flavor it gave it. This Negra Modelo is perfect for cooking with and it's vegan friendly! This can be optional but well worth the added flavor, it rounds out the chili beautifully making it one of the best chili's I've ever had. The alcohol will for the most part burn off while simmering leaving the delicate characteristics behind. If your looking to minimize the alcohol content, take a look at the Alcohol Burn Off Rate Chart to find how long you should simmer your chili. If you've never made chili with beer before I recommend trying it, at least once! I used Negra Modelo here but you could also try a chocolate stout like Boatswain Chocolate Stout which is also vegan friendly. Whatever liquids you choose just be sure it equals about 2 cups.

The Ultimate Tempeh Chili

A great go to one pot, hearty, high protein chili to enjoy anytime the craving calls!

The Ultimate Tempeh Chili

Ingredients
  • 1 8oz. package tempeh (I used this three grain tempeh), crumbled
  • 1 large onion, chopped
  • 3 large cloves garlic, minced
  • 2 tablespoons olive oil or 1/4 cup water, for sauteing
  • 1 can (15 oz.) red kidney beans, drained and rinsed
  • 1 can (15 oz.) pinto beans, drained and rinsed
  • 1 can (15 oz.) black beans, drained and rinsed
  • 1 can (28 oz.) diced fire roasted tomatoes and juices or 3 cups fresh diced tomatoes
  • 1 can (4 oz.) diced mild green chilies or 1 green bell pepper, cored, seeded and diced
  • 2 tablespoons chili powder
  • 1 teaspoon cumin
  • 1/2 - 1 teaspoon garlic powder, optional
  • 1/2 teaspoon chipotle powder, optional
  • Salt & freshly cracked pepper to taste
  • 1 bottle dark beer (Negra Modelo 1 bottle = 1 1/2 cups) plus 1/2 cup additional water or 2 cups water
  • scallions, for garnish

In a large dutch oven or stock pot, heat your oil/water over medium heat. Add onions, garlic, spices and tempeh and cook for 5 minutes stirring frequently. Add beans, tomatoes, green chili/bell pepper and dark beer/water, bring to a boil, reduce heat to low, partially cover and simmer for 1 hour.

This would be fantastic with a dollop of this Basic Cashew Sour Cream or Lime-Cilantro Cashew 'Sour Cream'. Serve with green onions and/or cilantro as well.

Serves 4 to 6.

Notes:

Mix the beans up however you like using all of one type or your favorite combination. If you would rather use only 2 cans of beans, that's great too! I like adding more ingredients as it makes the chili go further. If using your own cooked beans you'll need about 4 1/2 cups.

Feel free to use 2 packages tempeh instead of just 1. At times I like the extra dose of protein the tempeh adds and will double the amount making for an extra hearty chili. So good! 

For those who do not care for the taste of tempeh, I recommend making this a day ahead so the flavors really meld into the tempeh masking most of its natural flavor. Or try using the three grain tempeh as its flavor is not as strong.

If you find you added to much heat from the chipotle, try adding a teaspoon or so of cocoa/cacao powder or organic sugar.

Enjoy!

Pan Bagnat (White Bean Niçoise Salad Sandwich)

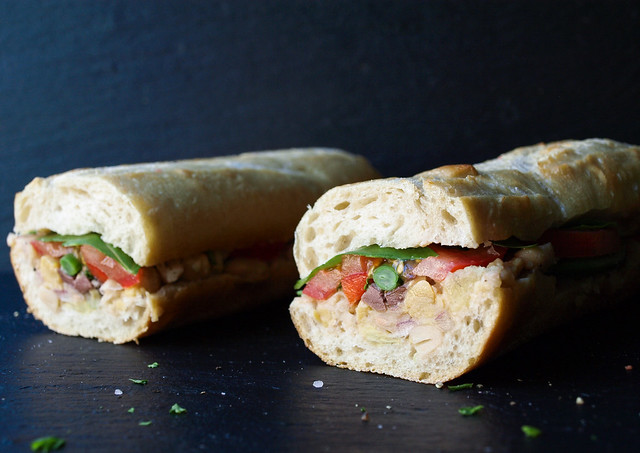
Pan Bagnat (White Bean Niçoise Salad Sandwich)

This recipe was inspired by a recent post on BuzzFeed for 27 Awesome Easy Lunches To Bring To Work. I'm thrilled to have been included in the roundup with the Mashed Chickpea Salad Sandwich! There is also a few other great vegan options as well so be sure to take a look. In it I saw a Pan Bagnat from Food 52 and had to recreate it for us plant powered lovers. I love Food 52, and have always been inspired by the simplicity and beauty of their photography. And of course the recipes are great too! I have a few in my collection that were inspired from there like this Mushroom Bourguignon and these Gluten Free Banana Flap Jacks. It's a great community if you haven't heard of it yet! In fact, they have a vegan column called The New Veganism with Gena Hamshaw of Choosing Raw as the recipe creator. Be sure to take a look and be inspired by both the recipes and photography!

Pan Bagnat (White Bean Niçoise Salad Sandwich)

The pan bagnat (meaning 'bathed bread') is a classic specialty sandwich served in and around the region of Nice, France. It's a sandwich version of the salade niçoise which is a combination of tuna, anchovies and/or sliced hard boiled egg mixed with raw vegetables like red bell pepper, green beans, radishes, olives and onion. You will also find there to be olive oil and possibly vinegar, salt and pepper. Here we'll be using a few of these traditional ingredients but veganizing this classic using white beans as our protein. And I can guarantee you this is just as delicious if not better than the traditional version! Not only does the salad make for a great sandwich filler but it would be just as good on a bed of leafy greens as well. This recipe may give you leftovers, and that's a good thing because it only gets better in the next day. One day make a sandwich for work, home or a picnic and the next top it on some leafy greens or just eat as is. It's pretty amazing on its own!

Pan Bagnat (White Bean Niçoise Salad Sandwich)Pan Bagnat (White Bean Niçoise Salad Sandwich)
Pan Bagnat (White Bean Niçoise Salad Sandwich)

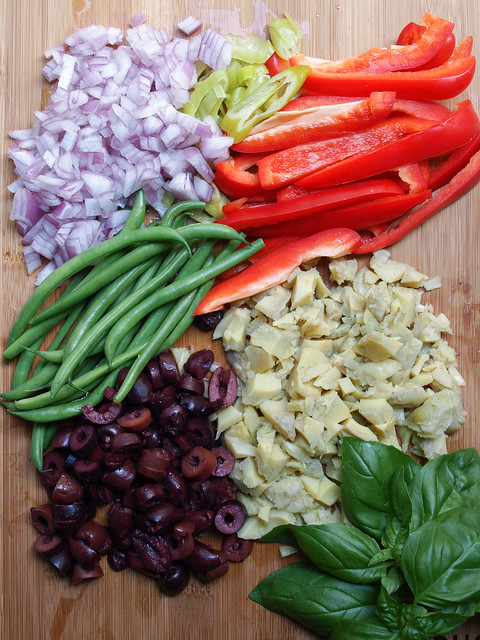
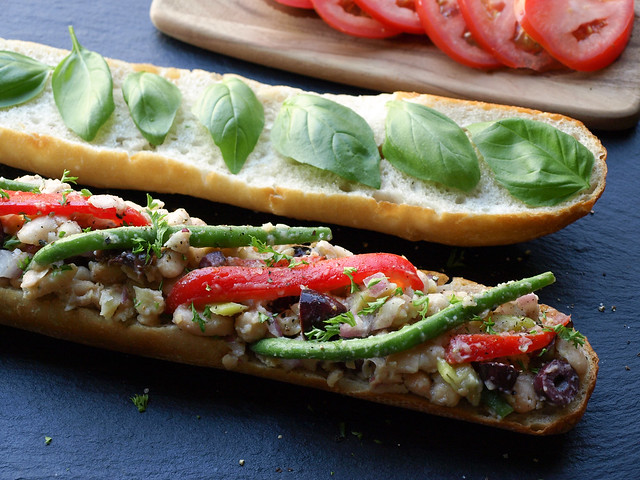
I love the saltiness from the olives here, you can add a tablespoon of capers if you like. The fresh bell pepper and blanched green beans add a nice crunch and sweetness while the onion and artichokes add another layer of flavor. Tie the vegetables together with the white beans, dressing made of olive oil, lemon and mustard, add a good sprinkling of mineral salt & plenty of cracked pepper and this salad will be another favorite to come back to time and time again!

Pan Bagnat (White Bean Niçoise Salad Sandwich)

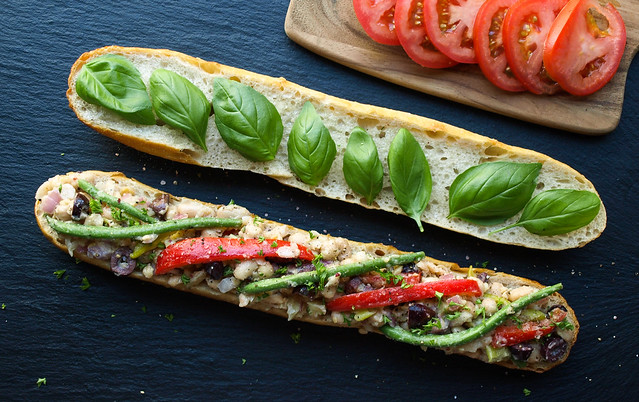
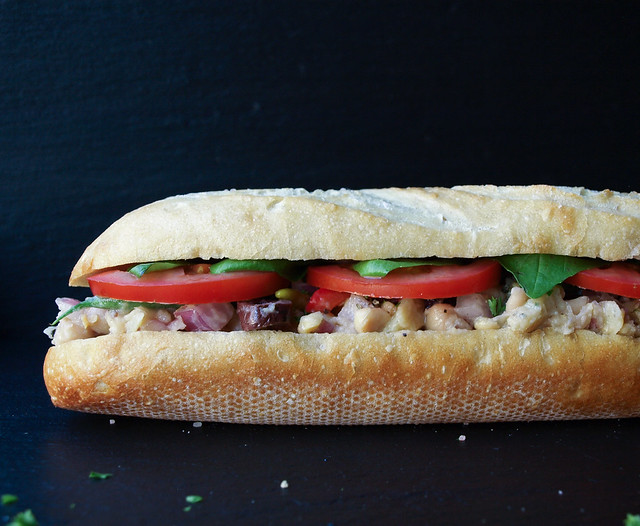
To create the traditional pan bagnet you'll first want to hollow out the insides of your bread. I left the top on this alone but from now on will hollow it out as well. It gives more room for your salad, helping to hold it together better while using less bread at the same time which is great too. Brush the insides of the bread with olive oil. Layer your bottom half with the salad. Since we're going to press the sandwich you can pile it on pretty good making a very hearty sandwich. Add your tomatoes across the top. Then layer basil, top with mineral salt & cracked pepper and remaining slice.

Pan Bagnat (White Bean Niçoise Salad Sandwich)

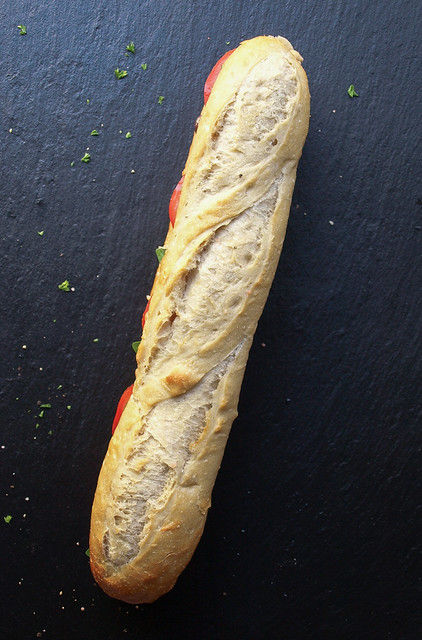
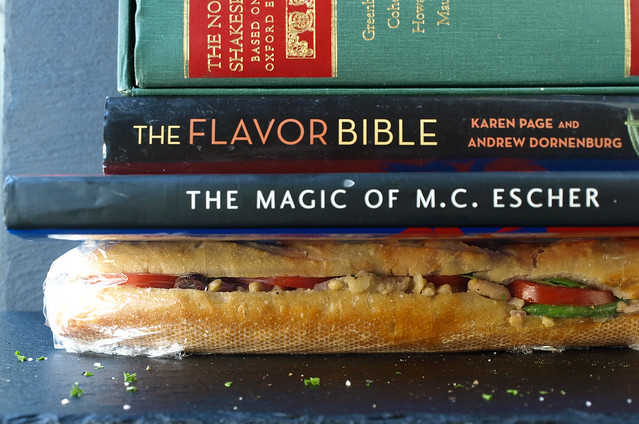
Wrap your sandwich tightly in saran wrap, fold ends under and press with a few heavy books or pots. This is an important part or your sandwich will be very messy and fall all over. Trust me, I know this from first hand experience. Plus, this helps the bread soak up the moisture of the salad dressing making for 'bathing the bread'. So be sure to press your sandwich, even if just for an hour, it will make all the difference...although overnight is even better. This makes a perfect grab and go sandwich for lunches and picnics, once pressed it's ready to go!

Pan Bagnat (White Bean Niçoise Salad Sandwich)

 Pan Bagnat (White Bean Niçoise Salad Sandwich) 

Ingredients 
  • 1 can (15 oz.) cannellini or chickpeas (garbanzo beans), drained and rinsed well or 1 1/2 cups cooked white beans
  • 1/2 red bell pepper, thinly sliced
  • 1/4 cup blanched French green beans, cut into half or thirds
  • 1 jar artichoke hearts in water, drained and chopped
  • 1/2 red onion, diced
  • 3/4 cup kalamata olives, pitted and sliced
  • 2 tablespoons parsley, finely chopped
  • 1 -2 greek pepperoncinis, diced (optional, not a traditional ingredient)
  • mineral salt & fresh cracked pepper, to taste
Dressing
  • 2 - 3 tablespoons extra virgin olive oil
  • juice of 1 large lemon (about 2 tablespoons)
  • 1 heaping teaspoon Dijon mustard
To assemble
  • 1 French baguette, ciabatta loaf, Pain de campagne, boule or artisan loaf of choice (even good sized rolls would be great)
  • extra virgin olive oil, to brush
  • 8 - 10 basil leaves
  • 1 medium tomato, thinly sliced
  • mineral salt & cracked pepper

Cut bread in half lengthwise. Remove some of the insides of each half making a trough for the filling (this will help keep the filling inside the sandwich when eating). Brush both halves with extra virgin olive oil.

In a small bowl, mix the dressing ingredients together until dijon has emulsified. Set aside to let the flavors develop.

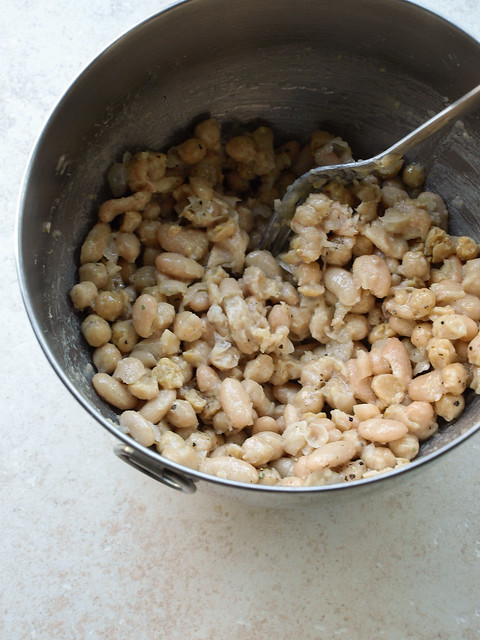
In a medium/large mixing bowl, add beans and roughly mash leaving about 2/3 whole beans. Add in dressing to the beans and mix well. Add in the bell pepper, green beans, artichokes, red onion, olives, parsley, optional pepperoncini and salt & pepper. Mix to combine.

Layer your bottom half of bread with a good serving of the mixed salad. Add tomatoes across the top, then top with basil leaves and salt & pepper. Top with other slice of bread. (You can also vice versa this layer order starting with the basil and tomato on the bottom and salad on top.)

Wrap sandwich tightly in saran wrap and press with a few heavy books/pots for at least an hour to overnight. If overnight, be sure to press in the refrigerator.

When ready to serve, slice in half or make as many slices as you like. Serve chilled or at room temperature.

Store any leftover salad mixture covered in the refrigerator for up to 5 days. 

Notes:

The cannellini beans have more protein and fiber than chickpeas so if that is a priority use them. Otherwise use your preferred white bean.

Try adding a splash of red or white wine vinegar to the dressing if you like.

As with all my recipes, add/subtract ingredients to your liking. Try adding a tablespoon or so of capers. I've had someone sub in asparagus for the green beans. Add sliced radishes along the top.

I edited this recipe on 11/10/13 at 12:15pm so it wouldn't make so much leftovers. The old recipe called for 2 cans white beans, 1 red bell pepper, 1/2 cup French green beans, 1 cup kalamata olives and 4 tablespoons olive oil. The old recipe was delicious, it just made a bit too much but of course feel free to use the old version instead so you'll have plenty of leftovers!

Enjoy!


CURRY LENTIL & GREENS SOUP

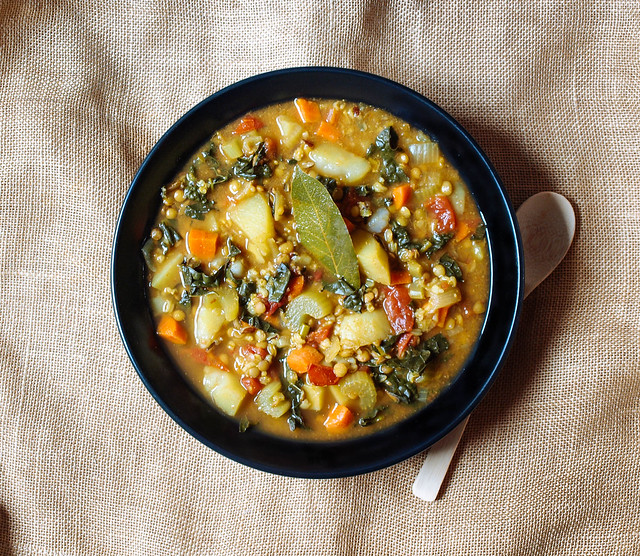
Curry Lentil & Greens Soup

Soup season is underway. Still a little warm here but the sun is going down early making for cooler nights. This is a most delicious and nutritious meal on these cool nights, great for afternoons too. Use whatever greens you like...spinach, rainbow chard, beet greens...I had kale on hand for this round. Easy one pot dish ready in about an hour from start to finish. Will definitely be having this again....very flavorful with a hint of spiciness. Simply a lovely hearty soup for everyone to enjoy!

Edit: I have finally updated the pictures and recipe for this soup on 11/12/14. I didn't change much about the recipe except use less cumin. If you love cumin feel free to add 1 tablespoon. As an after thought I added a handful of currants to the soup. It was just what it needed, adding a bit of sweetness gives a nice contrast to the curry making it perfect! 

CURRY LENTIL & GREENS SOUP

CURRY LENTIL & GREENS SOUP

Ingredients
  • 2 tablespoon extra virgin olive oil or 1/4 cup water (for water saute)
  • 1 small onion, diced
  • 2 stalks celery, diced
  • 2 carrots, diced
  • 1 tablespoon red curry paste or tomato paste
  • 3 garlic cloves, minced or 1 teaspoon garlic powder
  • 2 tablespoons curry powder
  • 1 - 2 teaspoons cumin 
  • 1/2 teaspoon red pepper flakes
  • 4 organic roma tomatoes, diced or 1 can (15 oz) diced tomatoes with juice
  • 3 bay leaves
  • 1 cup uncooked lentils or 2/3 cup lentils + 1/3 cup wild or black rice
  • mineral salt & fresh cracked pepper to taste
  • 6 cups water or vegetable broth (or combo)
  • 3 potatoes, diced 
  • 1 bunch or package greens (I used kale, julienned)
  • raisins or currants, to garnish, optional

In large stock pot, heat olive oil/water over medium heat. Add carrots, celery and onions, saute for 5 minutes. Add the curry/tomato paste and garlic, stir to combine and cook for 3 minutes. Add the curry, cumin and red pepper, mix to combine and cook for 3 more minutes. Add lentils, tomatoes, potatoes, then water/broth (in this order the tomatoes and potatoes won't splash), bay leaves, salt and pepper, bring to boil over medium high heat. Turn heat to low, cover and simmer for 35 min. Add the greens after the soup has been cooking for 15 minutes and continue to cook stir occasionally. Add additional water as needed, maybe up to 1 cup.

Serve with crusty bread.

Serves 4 - 6.

Notes:

Use any dark leafy greens you like....spinach, kale, swiss chard, broccoli raab greens, beet greens ect. Just be sure to julienne your greens if they are large leafy ones.

Discard the bay leaves, or at least don't eat them. I have one shown in the soup just for the photo.

Add in a handful of raisins or currants for some sweetness at the end of cooking. Or, you may rather add some to the top of your individual servings. It's highly recommended!

If you're a big fan of cumin, add 1 tablespoon like the original recipe calls for.


Chickpea Ratatouille Niçoise

Chickpea Ratatouille Niçoise

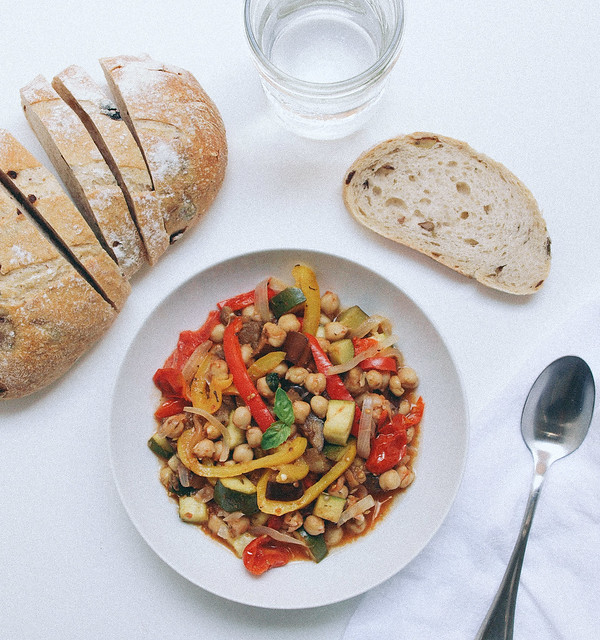
Ratatouille, a rustic farm to table style dish. It's a summer/early fall recipe for those who appreciate big flavor and simplicity while using the seasons harvestOriginating in Nice, it's a traditional French Provençal stewed vegetable dish. Ratatouille is often served as a side dish but it is a recipe that can undoubtedly stand alone, especially with the addition of chickpeas adding a fair amount of protein to this colorful array of garden vegetables. There is much debate as to how to prepare ratatouille, but I chose to adapt my recipe from this one at La Tartine Gourmade, she also has a nice story with hers. It's a fairly simple approach to preparing this dish involving sauteeing and stewing on the stove top which resulted in a wonderful finish. And it tastes even better the next day! You may also like to see other cooking styles of ratatouille, I recommend looking at these for more inspiration: Saveur (I'll for sure be doing this one, it's perfectly old world rustic and comfy looking),  86 Lemons (a simple roasted version using chickpeas as well) and Olives For Dinner (a 'confit byaldi', a little more tidy looking making for a beautiful presentation). 

I know ratatouille isn't anything new but this classic sure deserves a place in the simple veganista collection!

Chickpea Ratatouille Niçoise

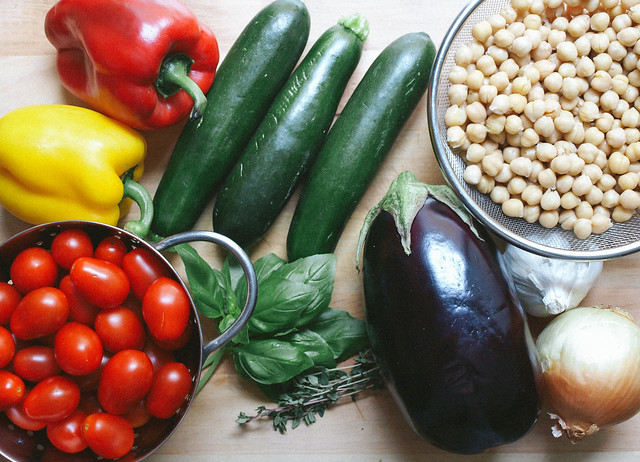
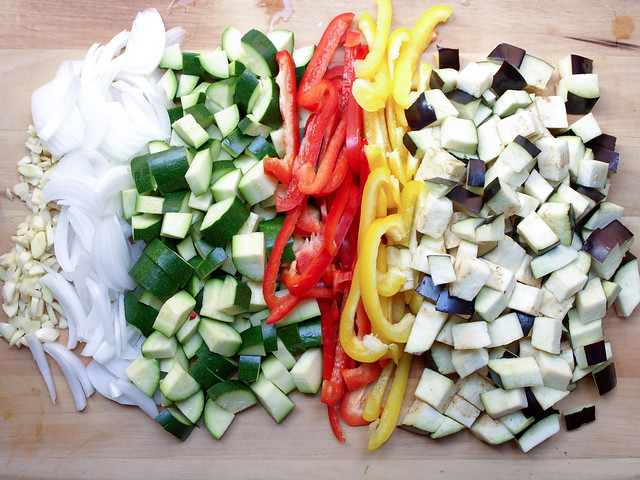
Gather your ingredients. These are all common vegetables, and fruits ie, tomato, and available year round here in Southern California. Eggplant is the only produce that seems to be more seasonal here, or maybe I just don't notice it as much as I don't use it often. For the garbanzo beans, you can start with dried beans cooking them according to this guide or use canned for extra ease. Herbs can be varied to suit your taste. Bea, author of the original recipe, uses a bay leaf and tarragon in her recipe. Here I have used fresh basil, thyme and some herbes de Provence. I even threw in some red pepper flakes. Go with what you feel, there is no wrong way to season your ratatouille as long as you like it! It's also a great way to change it up. I think I'll try some tarragon next time myself.

Chickpea Ratatouille Niçoise

Dice your vegetables. Next time, I'll be sure to chop the bell peppers the same size as the zucchini and eggplant, about 1/2 inch cubes. It makes it a bit easier to eat when they are uniform in size. I do like the onion sliced here but feel free to dice that instead too. It may seem as though you have too much produce (the tomatoes aren't even shown) and won't fit in the pot but the eggplant will shrink down and the rest of the veggies will soften and you'll be fine. You may even consider adding extra next time to make sure you have leftovers.

Chickpea Ratatouille Niçoise

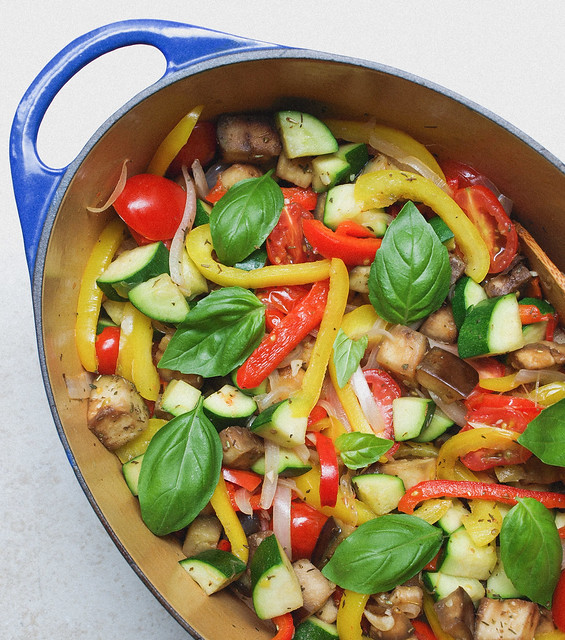
Vegetables have been sauteed and the ratatouille is ready for the first round of simmering before adding in the chickpeas. Still nice and colorful.

Chickpea Ratatouille Niçoise


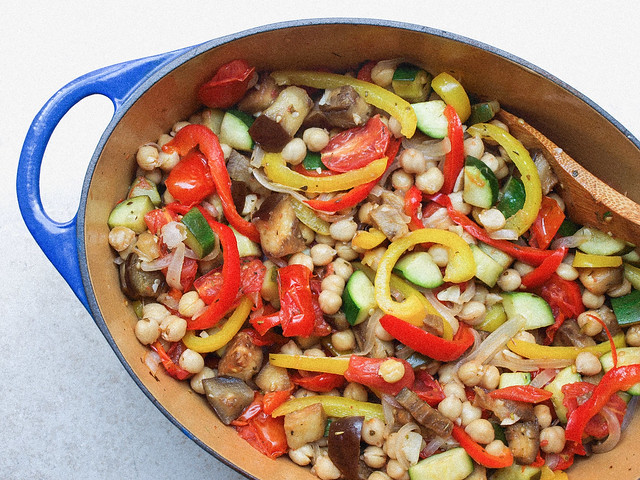
Chickpeas have been added and will simmer awhile longer. Depending on how you like your vegetables will depend on the length of time you allow your ratatouille to simmer. The longer you leave it, the more juices will form making for a great dipping sauce for a slice of good artisan bread. I preferred simmering mine for a total of about 35 minutes, I like the color and crisper texture but I didn't get as much of the juices. Go for a full hour or more to really let the ingredients sweat and get the juices going. Again, still colorful here. Your colors may become muted the longer you stew but the result with be delicious!

Chickpea Ratatouille Niçoise

Chickpea Ratatouille Niçoise

Ingredients
  • 3 cups cooked chickpeas (2 cans (15oz) garbanzo beans, drained and rinsed)
  • 4 tablespoon olive oil, divided
  • 1 eggplant, diced
  • 3 small zucchini or 2 medium, diced
  • 2 bell peppers (1 yellow & 1 red pref.), seeds removed, sliced
  • 1 onion, sliced
  • 4 garlic cloves, chopped
  • 1 lb. grape tomatoes, cut in half 
  • 2 teaspoons herbes de Provence or fresh thyme (I added a bit of both)
  • a few fresh basil leaves (left whole or chopped)
  • mineral salt, to taste
  • pinch of red pepper flakes, optional

In a heavy bottom pot or dutch oven, heat 2 tablespoons olive oil over medium heat, add eggplant and zucchini, saute for 5 minutes. Remove from pot and set aside.

Heat remaining 2 tablespoons olive oil over medium heat, add onions, garlic and bell peppers, saute for 3-4 minutes. Add tomatoes, mix well and cook 5 minutes. Add in eggplant, zucchini, herbs, spices and season with salt and pepper. Reduce heat to a low and simmer uncovered for 15 minutes. Add in chickpeas and simmer anywhere from 45 minutes to 1 hour, depending on your personal preference (less time for crisper vegetables, more time for softer vegetables and more juices). Stir occasionally until ready.

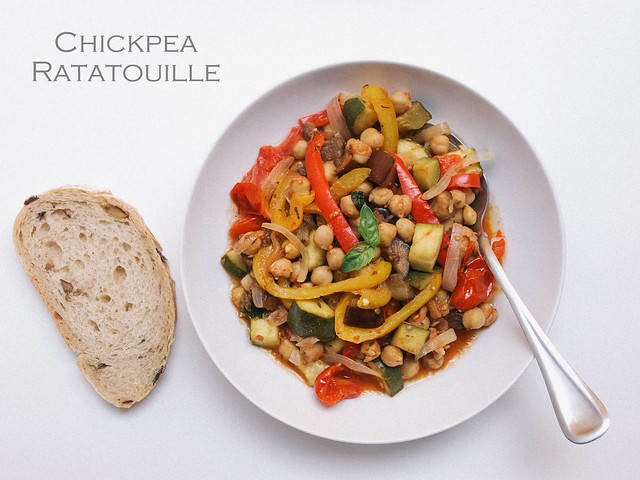
Serve topped with chopped fresh herbs. Pair it with a gluten free or favorite artisan loaf of bread. I have it here with a wonderful olive loaf. Try serving it on a bed of quinoa, rice or pasta to make it go further.

Serve warm, cold or at room temperature.

Notes:

To make this virtually fat free, try water sauteeing your vegetables using about 3 - 4 tablespoons of water instead of oil. Total amount of water for this recipe would be 6 - 8 tablespoons, divided.

I would dice my bell peppers next time, it's easier to eat them when they are the same size as the zucchini and eggplant pieces.

For the spices, try mixing and matching marjoram, thyme, rosemary, fennel and/or savory. Or use a bay leaf and tarragon.

The longer you simmer the more juices will accumulate.

Enjoy!

Butternut Squash and Black Bean Chili

Butternut Squash and Black Bean Chili [Revisited]

This chili is a great way to get the wholesome goodness of butternut squash and black beans into your diet!

Butternut Squash and Black Bean Chili [Revisited]Butternut Squash and Black Bean Chili [Revisited]

Butternut squash with its beautiful orange colored flesh is full of nutrients like carotenoids, which help against the spread of cancer and developing arthritis. And it contains plenty of beta carotene which is converted into vitamin A, helpful to boost the immune system, protect cells and keep the reproductive system healthy. You'll also get half the daily recommended dose of antioxidant rich vitamin C with just one cup. They're a good source of fiber, potassium, manganese, magnesium, iron, copper and B6. And on top of it all they are low in calories with only 75 calories per cup.

Black beans are a great source of plant based protein and will help keep the digestive tract in good working condition. They are a filling and low fat food, containing about 113 calories and 8 grams of protein & fiber per 1/2 cup with less than 1 gram of fat. Black beans are high in folic acid, magnesium, potassium and iron. All these are essential nutrients and key factors to help keep you feeling healthy and at your best. 

Butternut Squash and Black Bean Chili [Revisited]

Here you have a fantastic one pot meal that will surely please all types of eaters. It's adapted from Cookie & Kate. Easy to put together and ready in about 1 1/2 hours from start to finish. The little bit of cinnamon in this makes it feel like a true autumn meal and pairs well with the warm chili and chipotle spices, and if using the cocoa you will add another depth to the dish. Simple, delicious & hearty! If you have leftovers, even better because as it sets the flavors mingle making for a great meal the next day. In fact, it was too dark to take photos yesterday so these are the leftovers...I had this bowl of chili for breakfast and it was delicious. To top it off I sliced some corn tortillas into thin strips, placed them on a cookie sheet, added a bit of olive oil, dusted them lightly with chipotle powder and put them under the broiler on high until they were crisp. It made for a nice crunchy topper. Avocado would also be fabulous adding a nice creaminess here and there!

Butternut Squash and Black Bean Chili [Revisited]

Butternut Squash and Black Bean Chili

Ingredients
  • 1/4 cup water, for water saute
  • 1 butternut squash (about 3 - 4 cups), peeled, seeded & diced
  • 1 medium red onion or 2 large shallots, diced
  • 2 red bell peppers, cored, seeded and diced
  • 3 large cloves garlic, minced
  • 2 tablespoons chili powder
  • 1 teaspoon chipotle powder, or to taste
  • 1 teaspoon cumin
  • 1/4 - 1/2 teaspoon cinnamon, start small
  • 1/2 teaspoon cocoa powder, optional
  • 3 cans (15 oz) black beans, drained and rinsed, or 4-5 cups home cooked black beans
  • 2 cans (15 oz) fire roasted tomatoes + juice or 3 to 4 fresh tomatoes, diced
  • 2 cups water or vegetable broth
  • himalayan salt, to taste
garnish options
  • avocado
  • fresh made tortilla strips
  • cilantro
  • diced onions

In large stock pot over medium high heat, heat water and saute the butternut squash, onion, bell peppers and garlic until onions are soft and translucent, about 5-7 minutes. Add your spices, beans, tomatoes and vegetable broth, bring to a boil, reduce heat, cover and simmer for about 1 hour, stirring occasionally and tasting for flavor along the way. Will be done when the butternut squash is tender.

Serve with garnish of choice and freshly warmed corn tortillas.

Serves 6 - 8.

Notes:

Pictures reflect the use of 3 cups of water, a bit by accident. I prefer 2 cups myself for a thicker chili but the juiciness of this chili is delicious and I didn't mind the extra liquids here. Feel free to add more liquids to suit your taste.

This recipe was revisited on 11/12/13 with minor recipe changes and new photos. The changes made to the recipe was adding another can of beans...instead of 2 cans, it now calls for 3. Feel free to use less beans if you wish. I added the extra beans as a way to make the recipe go further. I also only call for 3 cloves garlic instead of 6. Feel free to add/subtract ingredients to suit your preference.

You can sub in diced sweet potato in place of the butternut squash for variation. Would be delicious too!

Enjoy!


RUSTIC CABBAGE, POTATO & WHITE BEAN SOUP

RUSTIC CABBAGE, POTATO & WHITE BEAN SOUP

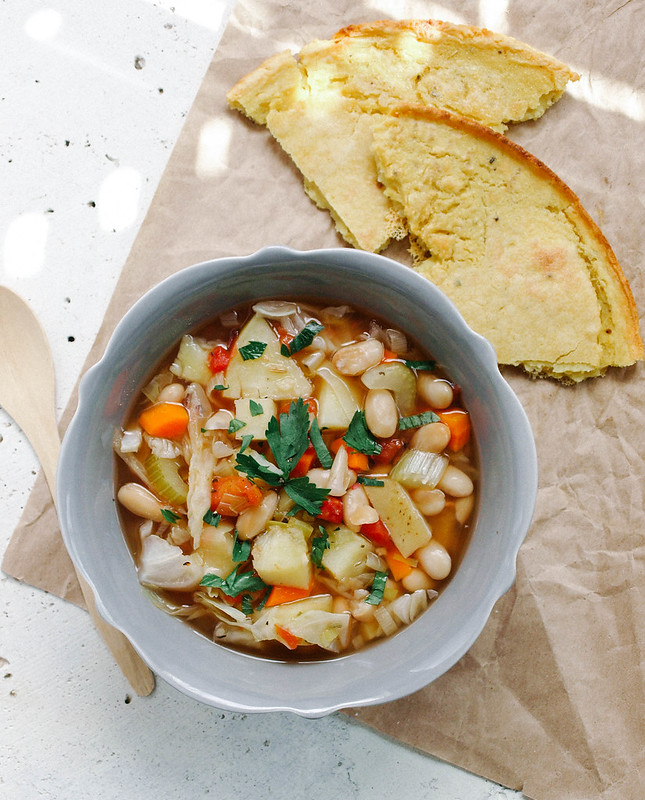
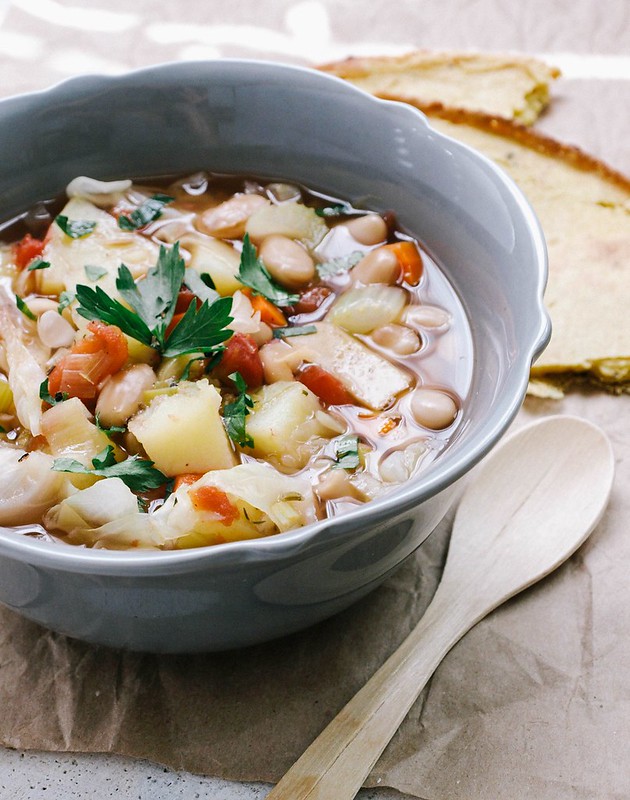
Wondering what to do with a half head of cabbage and potatoes I had sitting around brought about this hearty soup. It's brimming with vegetables, white beans and spices and is enough to feed a small crowd. Add some socca or crusty bread to the meal and you're all set. The socca I made here was seasoned simply with salt & pepper and can be whipped up while the soup is cooking. It's a nice accompaniment, not so much of a soaking bread like crusty bread, but delicious and filling. The soup in itself makes for a complete, nutritious meal with the beans adding a good amount of protein. I used leeks in this recipe, they lend a nice mellow onion flavor, but you can sub in an onion if you like. This turned out to be a great place to use up the leftover produce. I love cabbage in soups, this will be made many times to come. I'm happy to share another hearty soup for the recipe collection to inspire your senses, keeping you plant strong and loving it! 

RUSTIC CABBAGE, POTATO & WHITE BEAN SOUP

Feel free to change up the vegetables. If you're missing one or two, you can still pull this together and have a wonderful soup. If you can't find leeks, use 1 medium onion, diced, in its place. For the cabbage, use your favorite here. I happen to have regular green cabbage on hand but savoy cabbage would be great too. 

RUSTIC CABBAGE, POTATO & WHITE BEAN SOUP

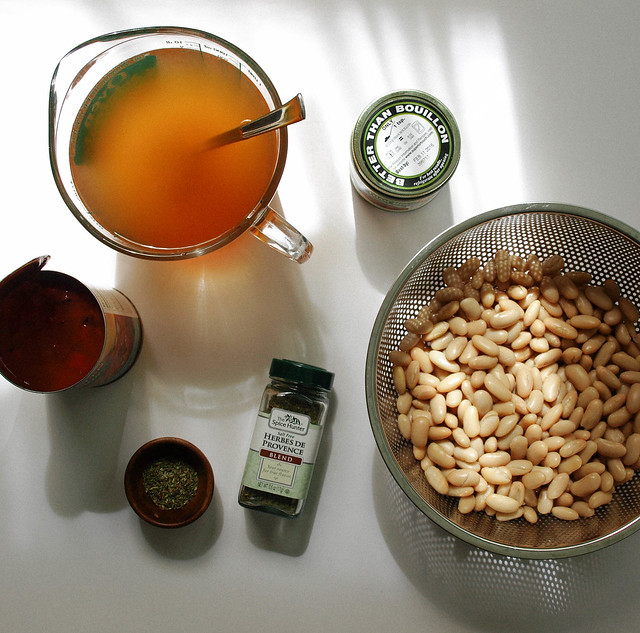
For this time around I chose to use herbes de provence. I love the combination of spices, especially the fennel that I find in this blend from The Spice Hunter. I also added in a teaspoon of fennel here because I love it. Feel free to use any spices you like as most of them will work well here. You can use 2 - 3 teaspoons of an Italian blend or combine a few herbs using 1 teaspoon each: thyme, oregano, rosemary. You can also use sage, marjoram or parsley, savory, etc...in any combination as long it equals about 1 tablespoon. 

When using Better Than Bouillon vegetable broth base, I never use the recommended serving size. I use just enough to flavor the water. For this recipe I used just under 2 teaspoons. This makes my jar last a lot longer and reduces the 'would be' sodium content per recipe. I've just recently (the last six months or so) been using their vegetable broth base and love it!

RUSTIC CABBAGE, POTATO & WHITE BEAN SOUPRUSTIC CABBAGE, POTATO & WHITE BEAN SOUP

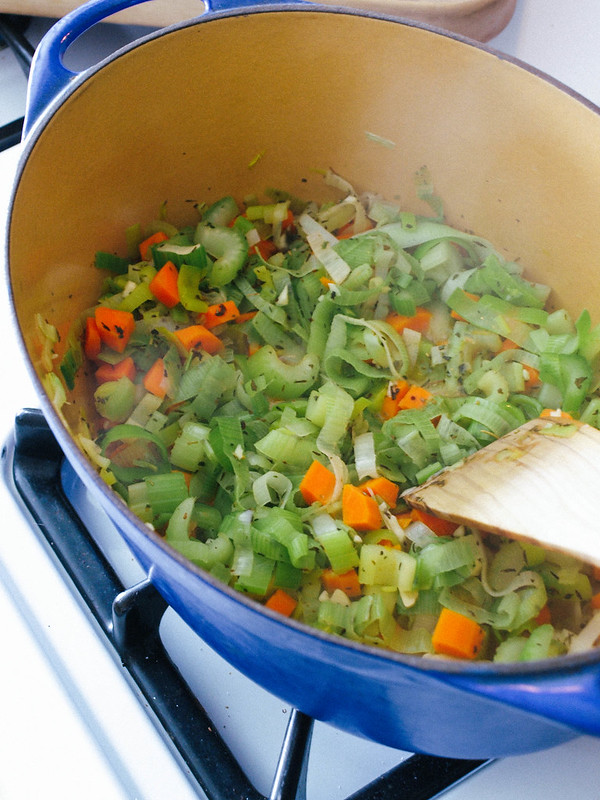
This is a one pot soup that's so easy to pull together. Saute the leeks, celery and carrots, add spices and garlic, cook a bit more. Add remaining ingredients ending with cabbage and white beans last as pictured above. Cover and simmer until cabbage and potatoes are tender, about 30 minutes. Serve with bread of choice. Enjoy often!

RUSTIC CABBAGE, POTATO & WHITE BEAN SOUP

RUSTIC CABBAGE, POTATO & WHITE BEAN SOUP


Ingredients
  • 1/4 cup water or 2 tablespoons olive or grapeseed oil (for sauteing)
  • 2 leeks (use white & pale green parts), sliced and rinsed 
  • 2 carrots, diced
  • 2 stalks celery, diced
  • 2 - 3 cloves garlic, minced
  • 1 tablespoon herbs de Provence OR 1 teaspoon each thyme, rosemary, oregano
  • 1 can (15oz) diced tomatoes 
  • 6 - 7 cups vegetable broth or water
  • 2 medium gold potatoes, diced
  • 1/2 head large cabbage, sliced (savoy or green)
  • 3 cups cooked white beans or 2 cans (15oz), drained and rinsed (use cannellini, great northern or navy) 
  • mineral salt & fresh cracked pepper, to taste
  • 1/4 cup chopped parsley, to garnish

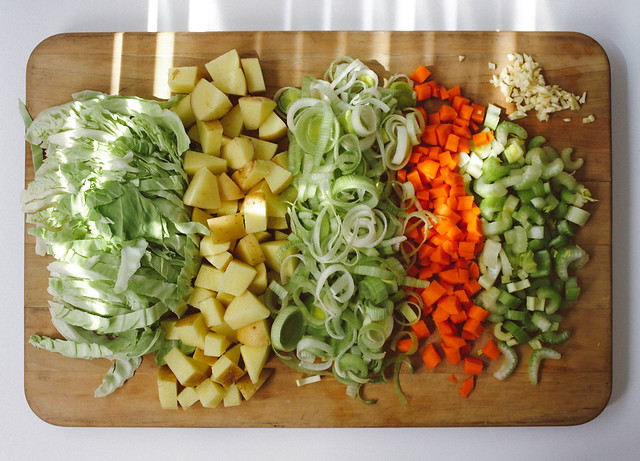
Prepare your vegetables. After slicing your leeks, be sure to place them in a colander and rinse them well under cool running water to remove any dirt and sand that may have collected between the leaf sheaths. If there's a lot of dirt, place sliced leeks in a bowl of cool water and gently swish the leeks around to dislodge any unwanted remnants. Drain water by gently tilting the bowl with one hand and holding your hand over the leeks with the other so they don't fall out, or simply drain into a colander. Repeat until leeks are clear of dirt and sand. Here is a good tutorial from, The Kitchn, on how to wash and prep your leeks. Lastly, another method you may try is this: Slice off the root and the dark green parts. Slice in half vertically. Run under cold running water, opening up the layers as you rinse. Lay on flat surface and slice thinly hortizontally. 

In a large dutch oven or stock pot, heat water/oil over medium to medium-high heat, add leeks, carrots and celery, saute for 5 minutes. Smells delicious already! Add garlic and spices, saute for 1 minute more or until fragrant. Add tomatoes, broth, potatoes, cabbage and beans, bring to a boil, cover, reduce heat to low and simmer for 30 minutes, until potatoes and cabbage are tender. Taste for seasoning adding salt & pepper as needed. 

Serve topped with parsley and a serving of socca or crusty bread. Enjoy!

Serves 6 - 8.

Notes: 

As noted above, change the herbs to whatever you have on hand. You could also use an Italian blend seasoning if you like. I also like to add in a sprinkle of red pepper flakes.

I would suggest using the biggest pot you have for ease, this makes quite a bit of soup.

If leeks are not available, sub in 1 medium onion, diced.