.

Showing posts with label kale. Show all posts

PASTA AND BEAN SOUP WITH KALE

Pasta and Bean Soup with Kale

I awoke from my slumber this morning and felt it was a soup kind of day. I don't know about you, but I love my soups! They can be so hearty and filling. This is one of those soups you can count on to leave you feeling satisfied. All the ingredients come together for a flavorful and hearty soup that you will come back to again and again. The recipe will make enough to feed a large family, or if not feeding a large family you will have leftovers to easily reheat and enjoy. I highly recommend using a stock pot since it will yield a lot of soup. You'll be happy to have leftovers as it's gets better as it sets!

Pasta and Bean Soup with Kale

I chose to use black eyed peas here but you can use whatever beans you prefer, just be sure to take a look at the bean cooking guide for your cooking times if using dried beans. Black eyed peas are a high protein and fiber bean, containing 11 grams of protein per serving and 5 grams of fiber. After soaking overnight, they took just under 1 1/2 hours to finish up. For the pasta I have used this quinoa & brown rice fusilli pasta from Trader Joe's. Again, use whatever paste you prefer. The pasta adds more protein and fiber making this a great hearty soup full of all the nutritious essentials to keep you healthy and feeling your best.

Pasta and Bean Soup with Kale

Kale is king of the leafy greens and is packed full of goodness! We all know by now that it's a powerhouse of vital nutrients like vitamin K, A & C. It also has high levels of manganese, copper, fiber and calcium. Plus it has a good amount of protein for a leafy green. I used Tuscan kale (aka, lacinato or dinosaur kale) for this recipe and it was delicious. It has such a rich deep green color and is one of my favorite kale varieties.

Pasta and Bean Soup with Kale

Warm and hearty, it's an all-around wonderful soup to enjoy throughout the year!

Pasta and Bean Soup with Kale

PASTA AND BEAN SOUP WITH KALE

Ingredients
  • 1 pound dried  beans (black eyed peas, cranberry or great northern beans) or 3 cans (15 oz) various beans, drained and rinsed
  • 1 tablespoon grapeseed or olive oil or 3 tablespoons water (for water saute)
  • 1 medium yellow onion, diced
  • 2 garlic cloves, minced
  • 2 large carrots, sliced
  • 1 bunch Tuscan kale (about 4 loose cups),  center stems removed and roughly chopped
  • 2 large organic tomatoes, diced (I leave the skin on) or 1 can (15oz) crushed canned tomatoes with juice
  • 8 cups vegetable broth, water or combo
  • 1 tablespoon dried thyme or 2 tablespoons fresh 
  • 2 teaspoons dried sage or 3 -5 leaves, chopped
  • 2 -3 teaspoons smoked paprika, optional
  • 3 bay leaves
  • a pinch or two of red pepper flakes
  • himalayan salt & cracked pepper, to taste
  • 8 oz of pasta of choice, cooked
  • almond parmesan and lemon, for serving

1. If starting with dried beans. Pre-soak your beans overnight, or at least 8 hours, in a large pot of water filled two to three inches above the beans. Drain and rinse well, set aside. After pre-soaking, different beans will need to cook and simmer for different times. Cranberry beans need 45 minutes or so cooking time, while northern beans & black eyed peas need about 1 - 2 hours. Follow this guide for further cooking times depending on your beans of choice: Cooking Beans

2. In same pot you pre-soaked your beans in, add oil/water and heat over medium heat. Add onion and cook until translucent, about 5 minutes. Add in garlic, carrots, thyme and sage cook another minute or so. Add in broth/water, beans, bay leaves, tomatoes, kale and red pepper flakes, bring to a boil, cover, reduce heat to low and simmer until beans are done (time varies depending on beans...my black eyed peas took just under 1 1/2 hours), stirring occasionally. If using canned beans, add in when beans are called for and cook for 30 - 40 minutes, stirring occasionally.

3. While the soup is simmering cook your pasta according to package, set aside. Once soup is ready, remove bay leaves, add in pasta and cook 5 more minutes, taste for seasoning adding salt and pepper to taste. Serve with a dusting of almond parmesan and a squeeze of lemon for brightness. Pairs great with crusty artisan bread or warmed corn tortillas.

Serves 6 generously.

Notes:

Feel free to use 3 cans (15oz) beans such as kidney, cannellini, pinto or northern in place of dried beans. Just be sure to drain and rinse them. Skip the first step and go right into step 2 instead. 

I've made this and added the smoked paprika and it was delicious! It is now an option in the recipe. I've also used a mix of canned kidney beans, pinto beans and black beans, and have even added in some mushrooms and used quinoa pasta...just goes to show this a very versatile recipe...almost anything goes and it's still delicious...gotta love it!

Use any pasta type you like from shells, macaroni, penne, bowtie, ditalini, etc. My pasta grain of choice is spelt, quinoa or rice pasta. The latter two being gluten free. If you're not gluten intolerant you can use spelt and whole wheat. If you're not following any sort of diet, use whatever pasta you prefer. 

If you don't have garlic on hand, use 1/2 teaspoon garlic powder when adding the other herbs and spices.

Enjoy!


Roasted Garlic, Miso & Greens Soup

roasted garlic, miso & greens soup

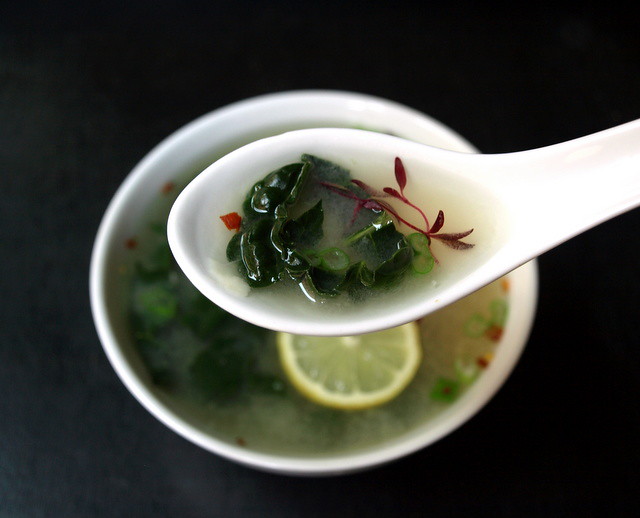
This will be the new 'Chicken Soup' in terms of healing and building the immune system when you are feeling under the weather. The real trick is to keep from getting sick in the first place...adding this to your diet may be good preventative medicine. Garlic, miso and greens are all super foods to help maintain and restore your body's immune system. Lemon and red pepper flakes also aid in healing in their own way. This is a very simple soup with wonderful flavors coming from the few ingredients this recipe calls for. It doesn't need much making this an even better go to soup when feeling under the weather or just because you simply love roasted garlic. You could also add some cubed organic tofu for added protein. I really enjoyed this soup and hope you find it as good as I did.

Roasted Garlic, Miso & Greens Soup

Do not be turned off by the amount of garlic listed. Roasting garlic in the oven dramatically mellows out the intense garlicky flavor leaving behind a very pleasant mellow flavor. It will become mild, sweet, nutty, almost caramel like. It will squeeze out of the skins like butter. No peeling necessary. You can use less garlic if you are uncomfortable with this amount. Also, to lessen energy use I would suggest roasting garlic along with other vegetables to be used in another dish or alongside this one. Here's a great visual tutorial from Oh She Glows on how to roast garlic.

Roasted Garlic, Miso & Greens Soup

Ingredients
  • 2 heads of garlic
  • 2 tablespoons olive oil
  • 6 cups water or vegetable broth (I used water)
  • 3 to 4 tablespoons white miso, to taste
  • 4 cups greens of choice, chopped (I used tuscan kale)
  • pinch of red pepper flakes, garnish
  • squeeze of lemon, optional
  • himalayan salt to taste

Preheat oven to 400 degrees. 

Remove most outer layer of skin from bulbs of garlic, leaving the most inner layer so they will stay together. Cut off the tops of the garlic bulbs. Place bulbs cut side up on a piece of tin foil large enough to fold over and close tight at the top when done. Drizzle one tablespoon olive oil over each bulb. Close the tin foil by folding up the edges and squeezing them together at the top and fold over, or bring up the sides and fold over while pinching and folding the ends. Bake for 45-50 minutes. Let cool for 10 minutes. 

In large pot, squeeze garlic bulbs into the pan and mush it a bit with the back of a wooden spoon. Add liquids, turn heat to medium. Add your miso and stir to incorporate the paste. Once broth has warmed for about 20 minutes, add in greens and let wilt. Serve with a slice of lemon and a pinch of red pepper flakes. I topped mine with a few colorful purple micro greens. Serves six.


Notes: 

~ If using tofu, add in after adding the miso paste. Use soft or firm tofu that has been pressed to remove excess moisture. To press you can either use your palms by using paper towels in between to soak up the moisture. Or place the tofu under a somewhat heavy book with paper towels on each side of the tofu for 10 minutes or so.

~If staying away from soy, try using brown rice or chickpea miso.

~ Adding wakame (sea weed) as your green would also add great nutrition. Seaweed is full of essential minerals and vitamins that the body needs. You can find wakame dehydrated so it will last in the pantry a long time. Simply crumble some in your soup, wait a few minutes and it will add lots of valuable trace minerals. Here is a site that offers a bit of information and many recipes using wakame: Wakame: Health & Healing from the Sea

Great for the mind, body and soul...Enjoy!


Stuffed Acorn Squash + Wild Rice Medley

Stuffed Acorn Squash + Wild Rice Medley [Revisited]

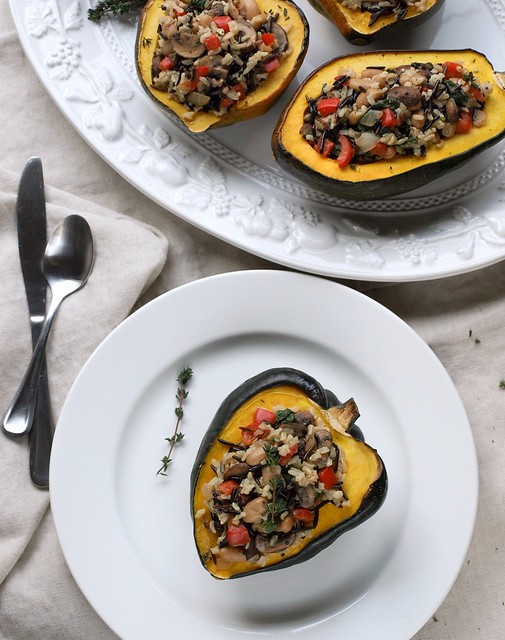
If you've never had a stuffed acorn squash, you really should give it a try. They are just so good and surprisingly filling. I love them unstuffed too with simple seasonings, but this is a tasty and satisfying meal with a good nutritional profile. I'm a big eater and one of these filled me up. Not too hard to put together either. It does take three separate cooking sections but it comes together pretty smoothly, unless your like me...the burner on the rice went out without me knowing so I had to add an additional 45 min onto my cooking time. But no harm done...there were dishes to do and cleaning around the house to keep my mind busy and off the mishap. All in all it's fairly easy, the rice and squash cook themselves, so the vegetables are the only real work which isn't much. This is also one of those recipes that can be tailored to your preference of veggies or beans. To top it all off, you just gotta love eating out of an acorn squash...it's pretty fun!

Stuffed Acorn Squash + Wild Rice Medley

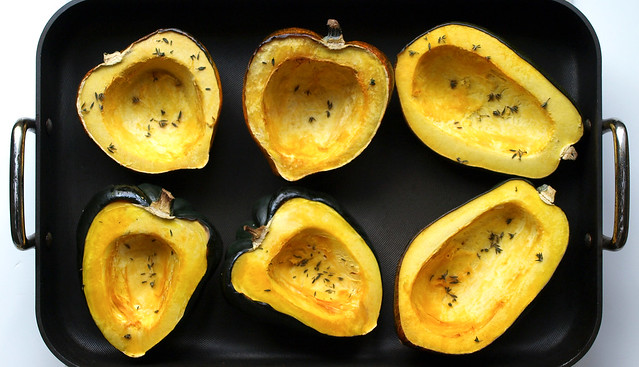
Start by slicing your acorn squash and scraping out the seeds. The seeds scrape out very easily with a sharper edged spoon. Here you can either brush your acorn squash with a little olive oil or leave it out. I go either way as I don't find it makes too much of a difference, so it just depends on how I'm feeling if I want to add extra oil to the meal. Sprinkle with fresh or dried thyme leaves and mineral salt. You can even add a few fresh thyme sprigs inside each squash, just remove before eating. Cook until fork tender.

Stuffed Acorn Squash + Wild Rice MedleyStuffed Acorn Squash + Wild Rice Medley

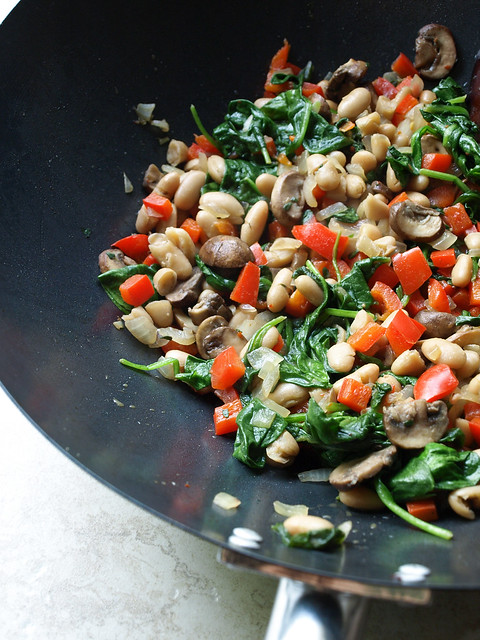
Cook your rice and set aside. Prepare your vegetables and add in the rice once done. 

Stuffed Acorn Squash + Wild Rice Medley

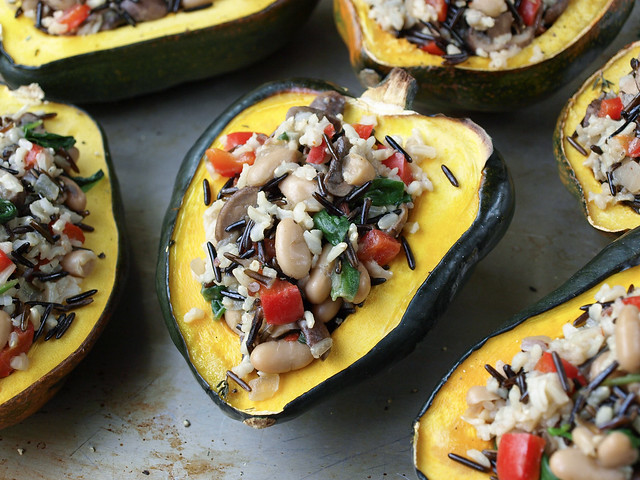
Fill your acorn squashes and serve! 

Stuffed Acorn Squash + Wild Rice Medley

Stuffed Acorn Squash + Wild Rice Medley

Ingredients

Acorn Squash
  • 3 acorn squashes, cut in half lengthwise and seeded
  • 1 1/2 teaspoons thyme, divided
  • sea salt

Wild Rice Medley
  • 1 cup rice, dry (I used half black wild rice and half long grain brown rice)
  • 2 tablespoons extra virgin olive oil
  • 1 small red bell pepper, diced
  • 1 large shallot or small onion, diced
  • 2 cloves garlic, minced
  • 2 cups mushrooms, sliced
  • 2 large handfuls greens (I used a 5 oz. combo package of baby kale, baby chard and baby spinach)
  • 1 can cannellini beans (15 oz), drained and rinsed
  • 1 tablespoon thyme
  • 1 teaspoon red pepper flakes, optional
  • sea salt and cracked pepper to taste
sriracha or hot sauce, to taste as garnish

Directions

Preheat oven to 400 degrees F.

In an oven proof sauce pan, fill half way with water and place on the bottom rack (this will give a little steam to your squash). Cut and seed your squash, place on baking sheet with cut side up. Season each squash with about 1/4 teaspoon thyme along with a few twists of the mineral salt grinder. Bake for 40-45 minutes, until tender...knife should easily pierce the flesh.

Cook your rice according to package. Wild rice will take about the same time as the squash to cook, about 40-45 min. (Quinoa or quinoa/rice combo would be great too and add even more protein per serving.)

Once the squash and rice are cooked, set aside to cool and begin with the vegetables.

In large wok or saute pan, heat oil on medium heat. Add shallots, garlic and bell peppers, saute for about three minutes. Add mushrooms, beans, one tablespoon thyme, red pepper flakes, a few twists of salt and pepper, cook for another three minutes. Add leafy greens, stir frequently until they are wilted (you may also want to use a cover in between stirring to help soften the greens). Combine rice and sauteed vegetables in the larger of the two pots. Taste for seasoning adding additional salt and pepper as needed.

Scoop mixture into each acorn squash half and serve with any additional seasonings. I like to top mine with some sriracha for that extra heat and flavor I love so much. So very good with this meal. Serves six, or three for the hearty eaters.

Store leftovers in an air tight container in fridge for up to a week.

Enjoy!


KIMCHI BREAKFAST TACOS

KIMCHI TOFU SCRAMBLE TACOS

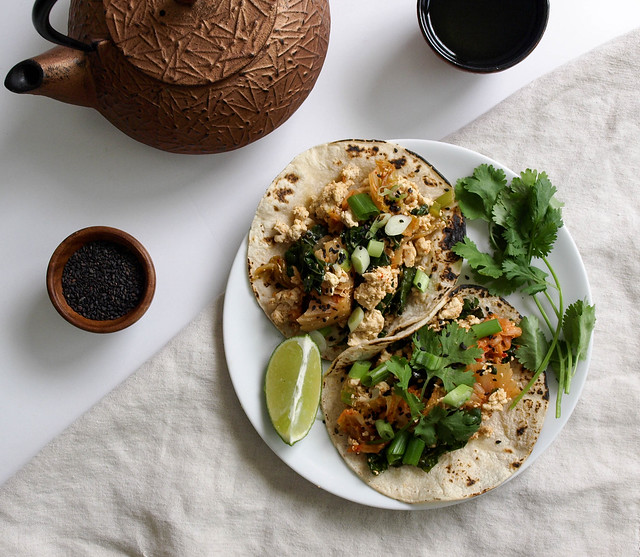
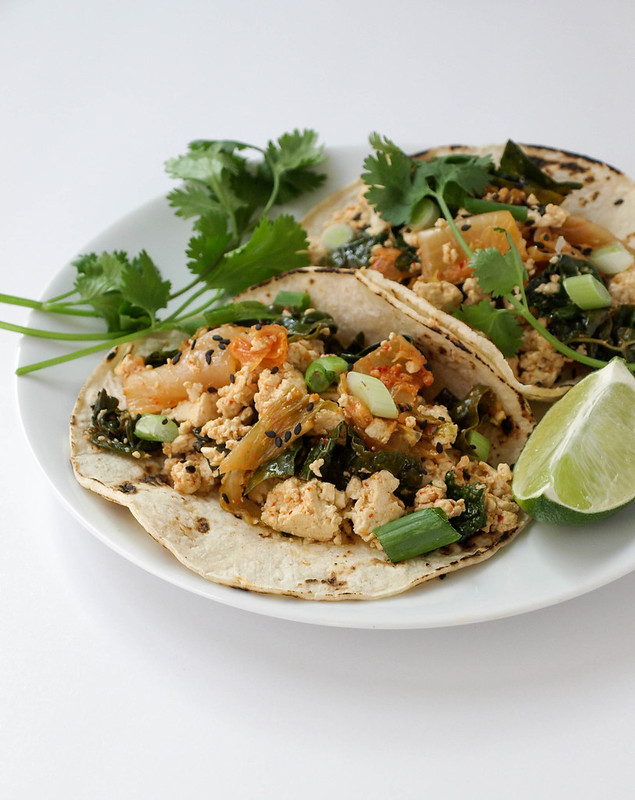
Now that kimchi has been added to the recipe collection, it's time to experiment with this spicy, tangy mixture. What better way than to add this spiciness to a tofu scramble. Tofu at times can use a little help, kimchi is a perfect addition and will whip that tofu into shape. This is my vegan version of a recipe I saw for a kimchi scramble using eggs. My tofu interpretation came out amazing and I'm very happy with the results. If you're a kimchi lover and tofu appreciator, than I think you'll agree! I first made this recipe using spinach (which tasted great, of course!) but ultimately decided to use kale here as we try to use the most nutrient dense foods possible whenever we can. I loved the kale, it cooks down beautifully adding a nice pop of green to the scramble. I've kept the seasoning super simple, it doesn't need much as the kimchi will shine through. Best to use your most fermented batch of kimchi, the ripened flavors will work best when cooking with kimchi. These tacos can be eaten any time of day. It pairs great with green tea. If having these for lunch or dinner and you're a beer drinker, I think an Asian or Mexican beer would be great too. Beers like Kirin Ichiban, Sapporo, Corona and Dos Esquis are vegan friendly. To see if your favorite beer or alcohol is vegen, check this great guide: Barnivore. Whatever your drink of choice is, you're going to love every bite of these kimchi tacos! 

KIMCHI TOFU SCRAMBLE TACOS
KIMCHI TOFU SCRAMBLE TACOSKIMCHI TOFU SCRAMBLE TACOS
KIMCHI TOFU SCRAMBLE TACOS

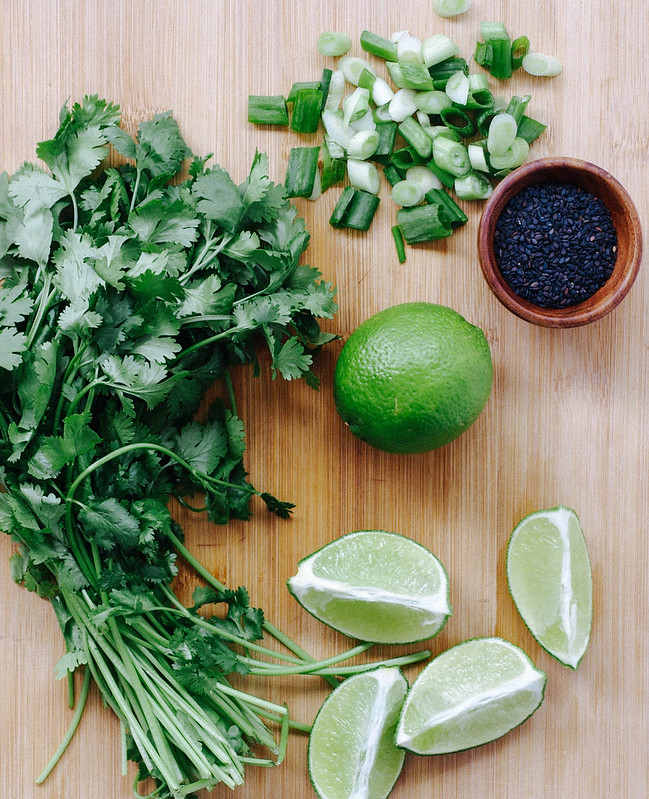
All cooked and ready to go. I could eat it just like you see it above...so good! But we're making tacos here, so fill your warmed tortillas (I used corn), you may like to use two if your mixture is very wet. Top with cilantro sprigs, scallions, sesame seeds and a squeeze of lime. Enjoy to the fullest!

KIMCHI TOFU SCRAMBLE TACOS

KIMCHI TOFU SCRAMBLE TACOS


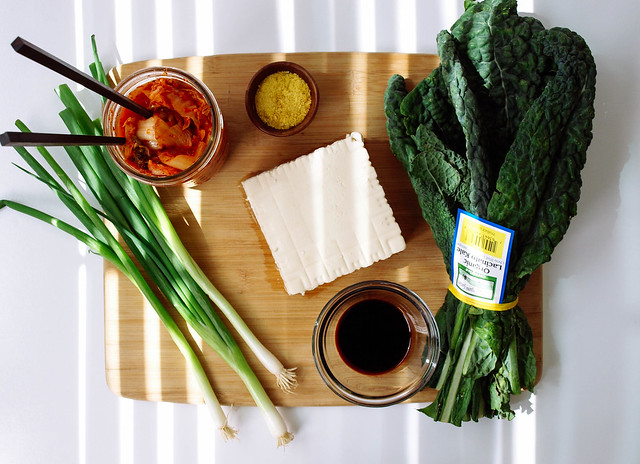
Ingredients
  • 1 tablespoon sesame seed oil, optional
  • 1 block (14 - 16 oz) organic tofu, firm or extra-firm
  • 4-5 large leaves of kale, center stem removed and julienned
  • 3 scallions, sliced (divided)
  • 1-2 tablespoons tamari
  • 1/2 teaspoon garlic powder
  • 1-2 tablespoons nutritional yeast, optional
  • 1 cup kimchi
  • cilantro sprigs, for garnish
  • sesame seeds (toasted, black or white), for garnish
  • lime wedges, to serve
  • 6 corn or flour tortillas, to serve

Measure out 1 cup kimchi and let come to room temp.

Open and drain tofu. You may like to give it a quick press to remove moisture if not using a vacuum packed brand. 

In a large wok/skillet, heat oil over medium high heat. Add tofu, crumbling between your fingers, cook, stirring occasionally, for about 2 -3 minutes. Turn heat to medium, carefully add tamari and garlic powder, give a good stir. Add kale and 2/3 - 3/4 of the scallions, cook, stirring occasionally until kale becomes soft and wilts, cover partially to help with the process, about 5 - 7 minutes. Lastly, add the nutritional yeast and kimchi, mix and cook just until kimchi has warmed through, about 1 minute or so. We don't want to overcook the kimchi or it will destroy some of the health benefits of the probiotics. 

Heat your tortillas. I like to heat mine carefully over a gas burner until lightly charred in spots. Use your preferred method.

Layer your tortillas with the scramble mixture, add a few sprigs of cilantro, some of the reserved scallions, a sprinkle of sesame seeds and a squeeze of lime. 

Serves 3

Notes: 

Use spinach in place of kale.

Use ripened kimchi, the flavors will be more pronounced. You may prefer fresher kimchi, in which case use your favorite.

You may like to chop your kimchi a bit before adding it to the tofu. I kept it as it was but it's an optiona.

Try adding a drizzle of this Garlic Miso Cashew Sauce, or for extra heat try the Dynamite Sauce or Sriracha Cashew Cream. You can control the heat when adding the spice to each of these condiments. 


CURRY LENTIL & GREENS SOUP

Curry Lentil & Greens Soup

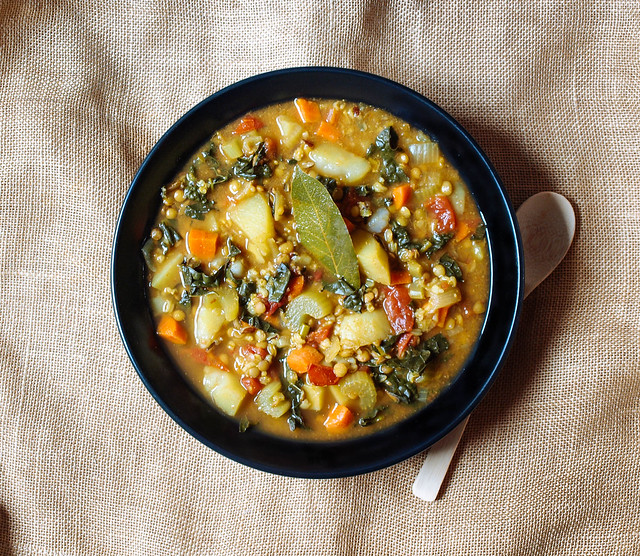
Soup season is underway. Still a little warm here but the sun is going down early making for cooler nights. This is a most delicious and nutritious meal on these cool nights, great for afternoons too. Use whatever greens you like...spinach, rainbow chard, beet greens...I had kale on hand for this round. Easy one pot dish ready in about an hour from start to finish. Will definitely be having this again....very flavorful with a hint of spiciness. Simply a lovely hearty soup for everyone to enjoy!

Edit: I have finally updated the pictures and recipe for this soup on 11/12/14. I didn't change much about the recipe except use less cumin. If you love cumin feel free to add 1 tablespoon. As an after thought I added a handful of currants to the soup. It was just what it needed, adding a bit of sweetness gives a nice contrast to the curry making it perfect! 

CURRY LENTIL & GREENS SOUP

CURRY LENTIL & GREENS SOUP

Ingredients
  • 2 tablespoon extra virgin olive oil or 1/4 cup water (for water saute)
  • 1 small onion, diced
  • 2 stalks celery, diced
  • 2 carrots, diced
  • 1 tablespoon red curry paste or tomato paste
  • 3 garlic cloves, minced or 1 teaspoon garlic powder
  • 2 tablespoons curry powder
  • 1 - 2 teaspoons cumin 
  • 1/2 teaspoon red pepper flakes
  • 4 organic roma tomatoes, diced or 1 can (15 oz) diced tomatoes with juice
  • 3 bay leaves
  • 1 cup uncooked lentils or 2/3 cup lentils + 1/3 cup wild or black rice
  • mineral salt & fresh cracked pepper to taste
  • 6 cups water or vegetable broth (or combo)
  • 3 potatoes, diced 
  • 1 bunch or package greens (I used kale, julienned)
  • raisins or currants, to garnish, optional

In large stock pot, heat olive oil/water over medium heat. Add carrots, celery and onions, saute for 5 minutes. Add the curry/tomato paste and garlic, stir to combine and cook for 3 minutes. Add the curry, cumin and red pepper, mix to combine and cook for 3 more minutes. Add lentils, tomatoes, potatoes, then water/broth (in this order the tomatoes and potatoes won't splash), bay leaves, salt and pepper, bring to boil over medium high heat. Turn heat to low, cover and simmer for 35 min. Add the greens after the soup has been cooking for 15 minutes and continue to cook stir occasionally. Add additional water as needed, maybe up to 1 cup.

Serve with crusty bread.

Serves 4 - 6.

Notes:

Use any dark leafy greens you like....spinach, kale, swiss chard, broccoli raab greens, beet greens ect. Just be sure to julienne your greens if they are large leafy ones.

Discard the bay leaves, or at least don't eat them. I have one shown in the soup just for the photo.

Add in a handful of raisins or currants for some sweetness at the end of cooking. Or, you may rather add some to the top of your individual servings. It's highly recommended!

If you're a big fan of cumin, add 1 tablespoon like the original recipe calls for.


High Protein White Bean & Cauliflower Alfredo Sauce

High Protein White Bean & Cauliflower Alfredo Sauce

 This is just an awesome sauce all around! I say if you don't like it you must be crazy...but that's just me. :) It's not the high saturated fat and high calorie alfredo sauce that you may be used too...no, no, no...this is much better and in my opinion tastes better too! This whole meal is high protein and high fiber with wonderful flavors to match. I really love using the kale and sun-dried tomatoes with this as well for their added benefits...the sun-dried tomatoes add a nice sweetness to the dish. Did you know that sun-dried tomatoes contain 12 times the amount of Lycopene as raw tomatoes ounce for ounce. Lycopene is a phytochemical and proven antioxidant that fights free radicals in the body. More reason to add a few sun-dried tomatoes to your dishes.

Pair all this goodness on top of this wonderful pasta I found and this meal is as healthy as it can get!

High Protein White Bean & Cauliflower Alfredo Sauce

Bella Terra 100% Organic 8 Whole Grain Pasta with Milled Flaxseed - Penne Rigate

High Protein White Bean & Cauliflower Alfredo Sauce

Per serving it has...190 calories...1 gram fat...7 grams protein...7 grams fiber...those are great numbers! Along with this high protein, high fiber white bean alfredo sauce...plus a little kale, sun-dried tomatoes and mushrooms you have a nutritionally dense meal that tastes great! I promise :)

I will be using this sauce over and over again varying the added vegetables...you could also use broccoli, peas, spinach, etc...or even serve this sauce over rice quinoa using some of  the leftovers. 

Now lets' make some awesome Alfredo sauce that you will come back to again and again making it your own each time...

High Protein White Bean & Cauliflower Alfredo Sauce

High Protein White Bean & Cauliflower Alfredo Sauce

Ingredients

Alfredo Sauce (makes approx. 4 cups)
  • 1 can cannellini beans (15oz), drained and rinsed
  • 1/2 cauliflower
  • 1 to 1 1/4 cup unsweetened almond milk
  • 3 tablespoon olive oil, divided
  • 1 large shallot or 1/2 onion, diced
  • 1/4 teaspoon nutmeg
  • himalayan sea salt & pepper to taste
  • 1 or 2 tablespoon nutritional yeast, optional (I didn't use any)

additional veggies
  • a few kale leaves
  • 1/4 cup sun-dried tomatoes
  • 1/2 cup mushrooms, sliced
  • 1 or 2 teaspoons red pepper flakes, to taste
  • 1 tablespoon olive oil
  • whole grain pasta, cooked
  • adjust these measurements to suit your needs

Cut cauliflower into large florets and place in pot of boiling water. Cook for about 20 minutes, or until soft, drain. While Cauliflower is cooking, heat 1 tablespoon of olive oil in saute pan over medium to medium high heat, add shallots and cook until soft and lightly browned.

Place cooked cauliflower in blender/food processor along with beans, milk, shallots and nutmeg. Blend until creamy. Taste for flavor adding salt, pepper and any other spice you might like. Also if sauce is too thick add a splash or so more milk as needed, blend again.

And now for the veggies. In same saute pan as you cooked the shallots, heat 1 tablespoon olive oil over medium heat. Add mushrooms, kale, sun-dried tomatoes and red pepper flakes. Saute kale until it has sweated down, approx 5 min. You could use a cover to help. Turn off heat when done. 

Bring pasta back to the same pot as cooked in, add as much sauce as you like to coat the pasta. Add the veggie mix and gently stir. Add a tad more sauce if needed. Turn heat to low and cook until warmed through adding a splash or so of milk if needed to keep from drying out. We want to keep it moist and creamy! 

Best served right away. I've been working on a loaf of french bread I bought last week so I paired mine with a well toasted piece drizzled with a bit of olive oil. Heavenly!

Keep remaining sauce or any leftovers in an airtight container in the fridge. Will last up to a week. When reheating, add more non-dairy milk to maintain creaminess if needed.


Enjoy !


Inspired by this recipe from Cupcakes and Kale 


Blackened Tofu, Stir Fried Kale & Quinoa


 My new favorite way of eating kale is stir frying it in my wok. I actually crave this stuff and make a whole bundle and eat it all by itself for dinner. I know I eat a lot of things some people would think is weird but this is really delicious in my book! I also know many of you who have a love of kale will just love this stir fry. For tonight's dinner I decided to serve it with some blacken tofu....now we're really cooking! Blackened tofu, kale and quinoa....I'm loving these Superfoods. :)

Let's begin with the kale...the king of the leafy greens!


Stir Fried Kale

Ingredients
  • kale, I used 10oz organic package from Trader Joe's
  • 2 tablespoon of nutritional yeast, fine ground
  • 1 teaspoon garlic powder
  • 2 tablespoons sesame oil
  • salt to taste
  • sesame seeds to garnish

In large wok or saute pan heat oil on medium high. Add kale and stir fry for about a minute. Sprinkle nutritional yeast and garlic powder over top, turning and moving the kale around to get all the spices mixed well throughout the kale. Continue stir frying for another four to five minutes. You may leave a cover on for a minute here and there in between stir frying to help soften the kale. When kale turns bright green it's about ready to be removed from heat. Test a piece and see if it's too your liking, if not stir fry a little longer. Some may like it crisp and some may like it softer. Serve with a sprinkle of sesame seeds on top.

On to the blackened tofu that was such a nice accompaniment...


Blackened Tofu

Ingredients
  • one block firm or extra firm organic tofu
  • 2 tablespoons tamari, bragg's liquid amino's or soy sauce
  • 1 tablespoon sesame oil

Spice Blend
  • 2 teaspoons paprika
  • 1 teaspoon black or white pepper
  • 1 teaspoon cornstarch
  • 1 teaspoon garlic powder
  • 1 teaspoon onion powder
  • 1/2 teaspoon salt
  • 1/4 teaspoon thyme
  • 1/8 teaspoon cayenne pepper

Open and drain tofu. Slice tofu into slabs, whatever size you prefer. Press tofu between paper towels or cloth to remove excess moisture. In a shallow dish place tofu and tamari, bragg's or soy sauce and let set a few minutes, turn after a few minutes to let the other side soak.

In medium size bowl, combine all spice blend ingredients and mix until blended. This is fairly spicy so you may consider using less black pepper and/or cayenne.

In saute pan, heat oil on medium high heat. Place tofu pieces in spice blend, press gently to get a good coating, turn and repeat on the other side. Place coated tofu onto saute pan and cook a few minutes on each side. They will  blacken nicely as they should and be so tasty! Serve with quinoa, rice, kale or anything that calls to you. Serves four. I used half a block and kept the spice measurements the same.

Let's do some quinoa, another Superfood! I finally got the right way to cook it that I like...


Quinoa

Ingredients
  • 1 cup quinoa, I used tri-color from Trader Joe's
  • 1 1/2 cups water
  • 1/2 teaspoon garlic powder
  • salt to taste

Rinse your quinoa under cool running water for about a minute or two to remove any dust. If you forego this step your quinoa will have a bitter taste. Well worth the step. In medium to large pot add quinoa and water, bring to a boil. Cover and simmer for 15-20 min. Once done stir and let set for 10 minutes uncovered to rest and soak up any excess water. Stir once again before serving. It will be a perfect quinoa, fluffy and sprouted.

I love quinoa, it can be eaten alone or served with so many other veggies and fruits. Season for the dish you are serving it with, or don't use any seasoning at all...it's really good all by itself. The other day I had some left over quinoa and black beans in the fridge and decided to mix them together and serve it cold with lots of strawberries in the mix....sounds weird but it was so good! Anyhow tonight it is served with blackened tofu and kale. :)


Enjoy !

Blackened tofu inspired by this recipe at Daily Garnish....Great visual instructions as well!

CRUNCHY KALE SALAD + CITRUS DRESSING

CRUNCHY KALE SALAD + CITRUS DRESSING

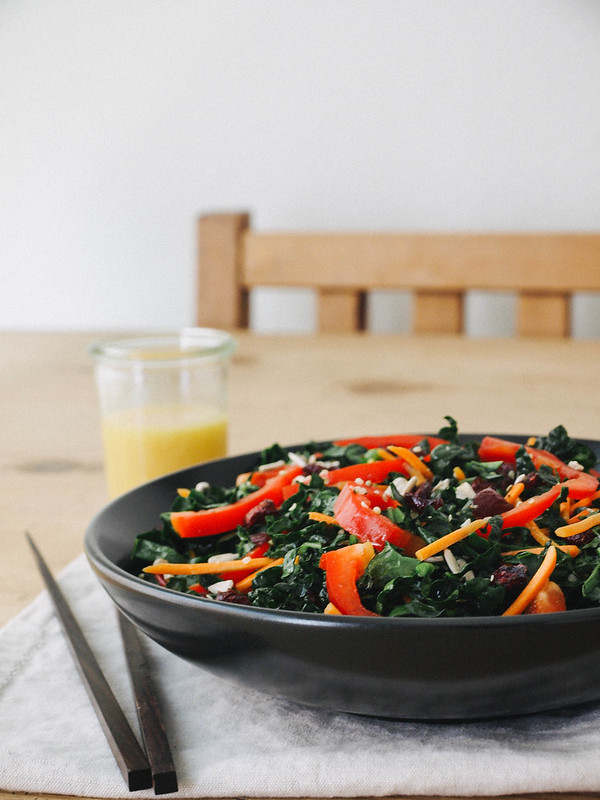
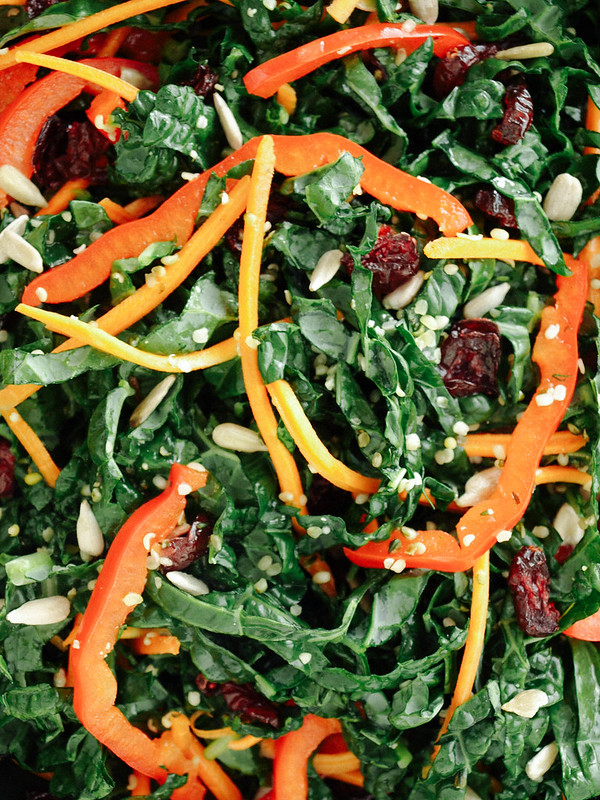
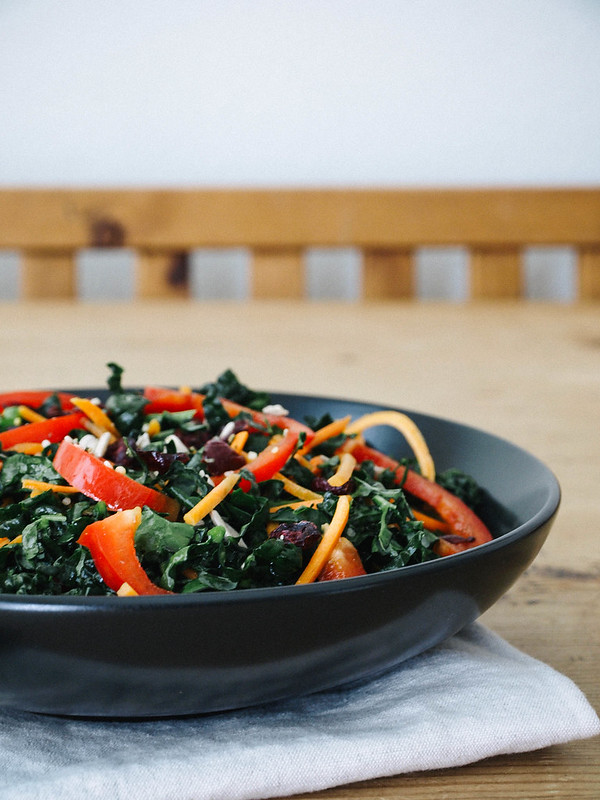
This salad featuring the king of leafy greens has been a perfect match for my lighter fare cravings. It's sweet with the cranberries and bell pepper, a bit citrusy from the dressing and crunchy from the carrots, kale and sunflower seeds. Everything adds up to nice flavor and texture. My favorite way to enjoy a kale salad is to let the kale marinate with the dressing for about an hour. This will help relax the kale and take some of the bitterness away. Making your salad this way makes for a great pack-n-go lunch option. Your salad will be softened and ready by the time lunch comes. When your looking to add some freshness into your diet, I think you'll find this to be a great inspiration!

If you don't already know, KALE is a power house of nutrients. It's loaded with anti-oxidants and anti-inflammatory support as well as being rich in calcium, iron and vitamin K, A & C. It aids in the body's detoxifying process and offers cardiovascular support. But even with all this goodness, you may have heard that too much kale is not so good. That is true for some. Kale is a green that may be best consumed moderately, especially for those with kidney and gallbladder issues because of the high amounts of oxalates. If you're in good health, kale can be consumed on a fairly regular basis without much concern. Look for organic kale whenever possible. The 'dirty dozen' list has been revised to be the 'dirty dozen plus' with kale/collards greens coming in at #16 of produce with highest amounts of pesticide residue.

CRUNCHY KALE SALAD + CITRUS DRESSINGCRUNCHY KALE SALAD + CITRUS DRESSINGCRUNCHY KALE SALAD + CITRUS DRESSING

CRUNCHY KALE SALAD + CITRUS DRESSING

Ingredients
  • 1 bunch kale, julienned
  • 1/2 cup shredded carrots
  • 1 red bell pepper, julienned
  • 1/2 cup dried cranberries
  • 1/4 cup sunflower seeds (toasted or raw)
  • 1/4 cup hemp hearts
Dressing
  • 3 tablespoons orange juice
  • 1 tablespoon lemon juice
  • 2 tablespoons apple cider vinegar
  • 1 -2 teaspoons pure maple syrup
  • 1 teaspoon dijon mustard, optional

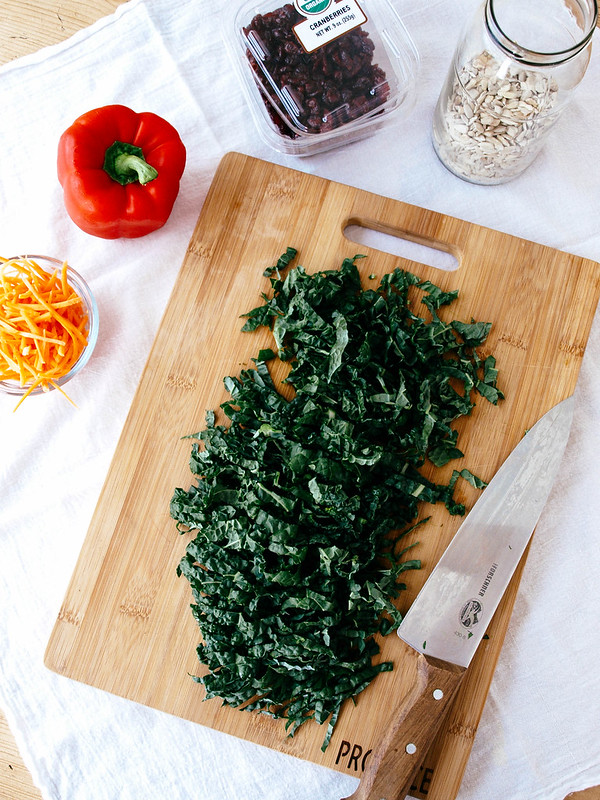
Prepare your vegetables and gather your cranberries and seeds. 

Mix kale, carrots, bell peppers and dressing together. Let set for about an hour at room temp or in the refrigerator (this will soften the kale nicely and reduce the bitterness). Serve in individual bowls topped with cranberries and seeds. If you don't have time to let the kale marinate with the dressing, the salad will still be great! 

Serves 2

Notes:

Use orange, lemon, lime and/or grapefruit as your citrus juice. Mix and match your citrus flavors using whatever you have on hand or is available.

Make this a creamy dressing by adding 1 - 2 tablespoon tahini when mixing the dressing.

The dijon is optional, I found that I preferred it with a small amount. Try it both ways and see what you think.


MEDITERRANEAN KALE SALAD

MEDITERRANEAN KALE SALAD

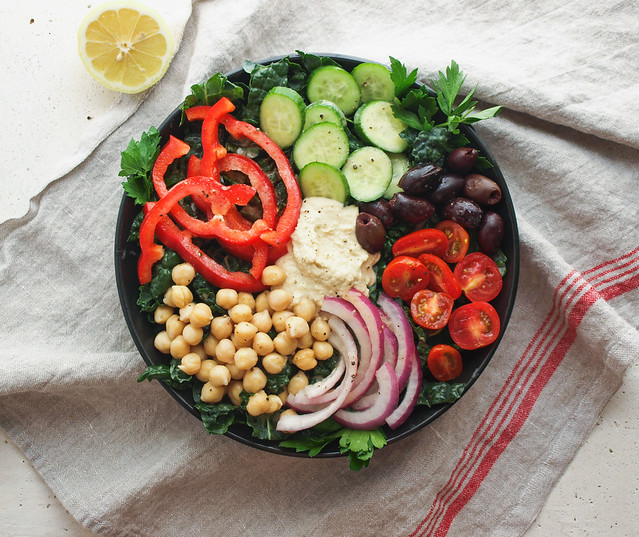
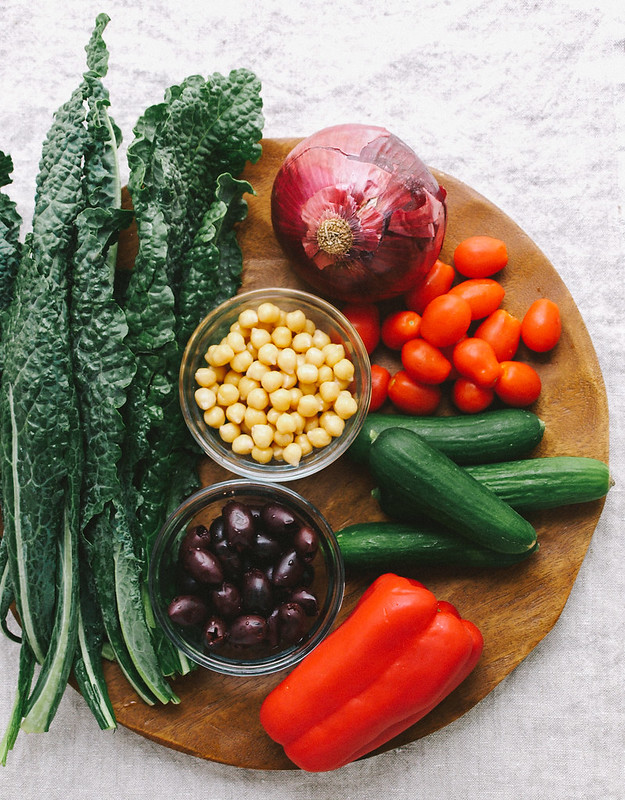
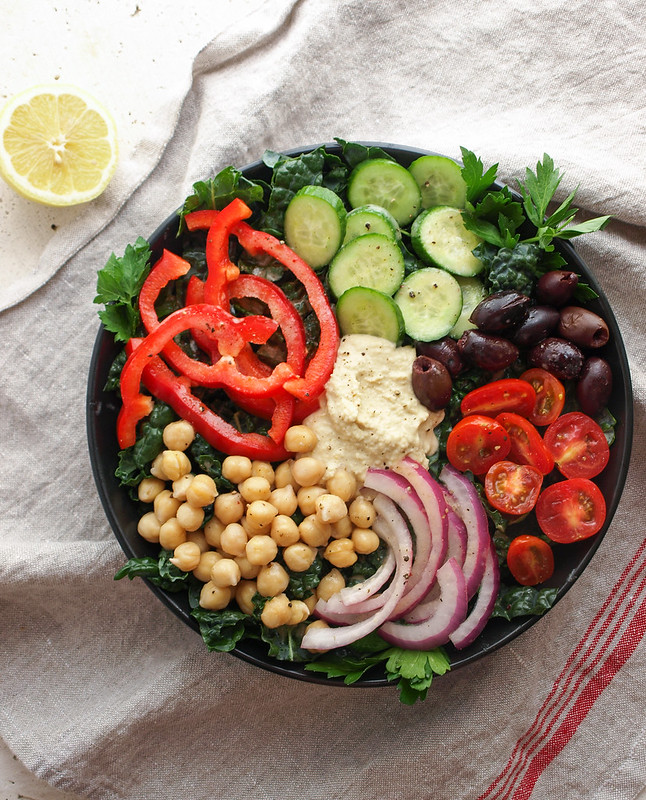
Summer in California is setting in, the temperatures are rising and salads are always welcome. I've been on an olive loving kick lately, as well as a chickpea kick (I'll tell you why soon), so this salad hit the spot with some salty olives, fresh sweet grape tomatoes & red bell peppers, refreshing cucumbers, red onion and fresh cooked chickpeas. All dressed up with a light vinaigrette and nice dollop of hummus. This salad didn't start with a dollop of hummus, but half way through eating I added a scoop and decided it needed to be included in the recipe (and photo), although I list it as optional. It adds such nice creaminess and rounds it out the salad well. If you find raw kale too hard to eat, even after letting it relax in lemon juice, a dollop of hummus will definitely do a world of good for you. It adds a nice creaminess to the overall salad while masking some of kale's bitterness. Similar to the Every Day Nourish Bowl, we now have another option of whole hearted goodness to choose from when a craving for salads occur! It's simple, accessible, not too expensive and good for you. Cheers to all of those things! :)

I have some fun news to share! I'm going to be immersed in all things chickpeas the next few months. I figured this post is a great place to introduce a project I've been working so hard on called, CHICKPEA: THE CHICKPEA HANDBOOK/COOKBOOK. It's all you need to know about chickpeas, with chapters containing information on nutrition, history, types, sprouting, growing (gardening), storing & selecting, flour, cooking and a few other relevant chapters. Plus, it will include upwards of 100+ recipes (not sure where to stop since there's so many good ones I want to add), including pictures of each one. It will include all of the favorite chickpea recipes from the blog and a ton of new ones. I'm excited out of my mind for this project! I was asked a few months ago what was the one ingredient that was important in my kitchen and my answer was chickpeas. They are so versatile and I use them often, especially for my hummus which is so much more than just a dip. After toying around with a couple cookbook ideas, doing a chickpea cookbook seemed so right. I want to celebrate the chickpea in all its glory and showcase its versatility, all the way from breakfast to desserts. It's a perfect fit for me and I know it will be a useful addition to any kitchen library! It's meant to be used often and will have my signature simplicity with a few recipes to kick it up a notch. I'm shooting for the end of the year but am really in no hurry as I want this book to be amazing. I ♥ chickpeas and think we should all eat more of them!

Enjoy the salad, and of course, this will be in the book! :)

MEDITERRANEAN  KALE SALADkale MEDITERRANEAN KALE SALADMEDITERRANEAN KALE SALADMEDITERRANEAN KALE SALAD

MEDITERRANEAN  KALE SALAD

Ingredients 
  • 3/4 bunch kale, stems removed and julienned
  • 1 large lemon, juice of
  • 1/2 small red bell pepper, sliced
  • 1/8 small red onion, sliced
  • 1/4 cucumber, sliced
  • small handful cup cherry tomatoes, sliced in half or campari tomatoes, quartered
  • small handful cup kalamata olives, pitted
  • 1/2 cup cooked chickpeas (garbanzo beans)
  • dollop of hummus, optional (but so good!), to serve
  • fresh chopped parsley, to serve
Vinaigrette
  • 2 tablespoons red wine vinegar
  • juice of one lemon
  • 1 heaping teaspoon dijon mustard
  • 1/4 teaspoon dried oregano, optional
  • 1 tablespoon extra virgin olive oil
  • salt & pepper, to taste

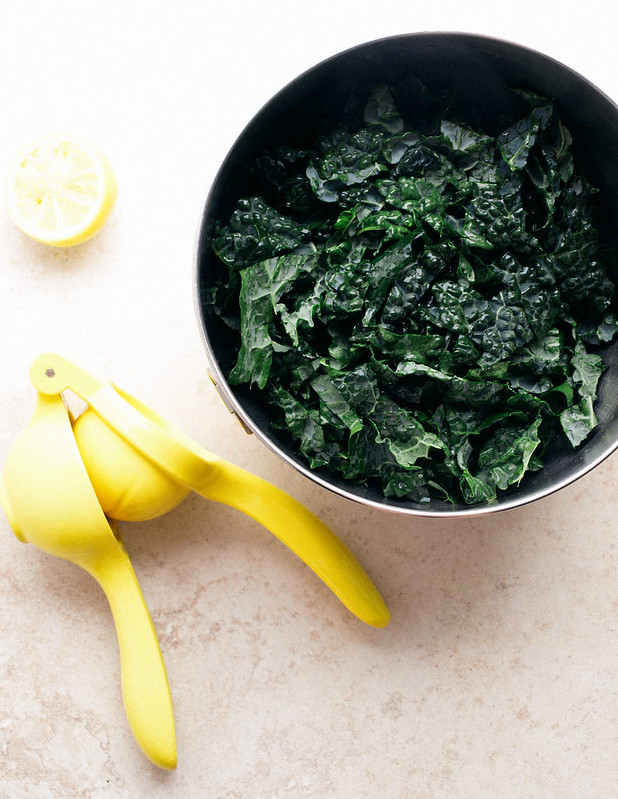
Remove the stems from the center of the kale leaves, as least the thickest parts. Julienne kale leaves and place in a medium size bowl, add lemon juice, mix to coat the leaves and let set while you prepare the rest of the ingredients. The lemon juice will help soften the kale leaves. Toss every few minutes or so.

In a small bowl, add the ingredients for the vinaigrette. Whisk together until emulsified. It usually takes me about one minute, set aside.

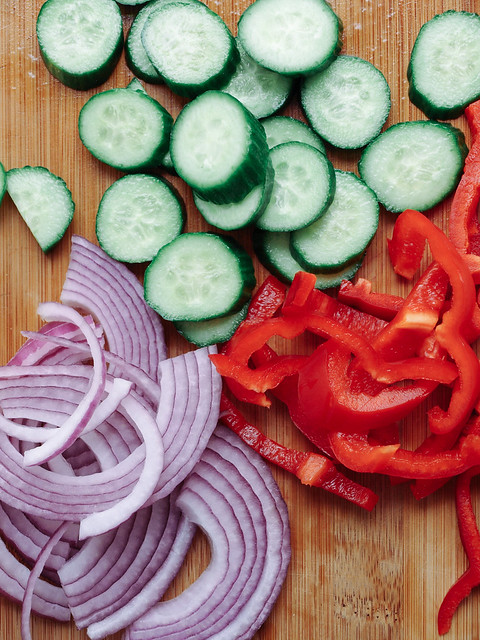
Once you've prepped your other ingredients you're ready to assemble your salad. In a serving dish, add kale and top with bell pepper, onion, cucumber, tomatoes, olives and chickpeas. Add your vinaigrette over top and a dollop of hummus anywhere you like.

Serves one generously.

Notes:

Depending on the size of your produce, amounts will vary. Adjust accordingly to suit your taste and situation. For instance, I used small Persian cucumbers here but used a whole small one. Typically, you'll be using a regular or English cucumber and will only use about 1/4 of it, as per the recipe.


Enjoy!


Simple Kale Chips


One of my favorite ways of eating kale. I picked up 5 bunches of organic kale for $5 and decided to play with ingredients. I made two batches, one with 'cayenne pepper & himalayan salt' and the other with a 'garlic sea salt blend'...both were pretty amazing! I've also seen recipes using nutritional yeast, brown sugar, etc...be creative and have fun... 


Start by washing and removing the stems. Shred your kale in whatever size or shape you like. 


In a large mixing bowl, coat leaves with oil, add some spices, place on cookie sheet and bake...so easy and delicious!


Ingredients
  • 1 bunch of kale (I used curly kale & lacinato kale)
  • 1 tbsp olive oil (I usually use a little less)
  • Use one or more of the following: Himalayan salt, pepper, spice blend, herb, nutritional yeast or whatever you feel like using. 

Directions
  • Preheat oven to 325
  • Wash kale thoroughly and let dry.
  • Remove leaves from stem and break up into the size chips you would like. Put leaves into a large bowl and drizzle with olive oil. Massage until coated.
  • At this point you can either add your spices in the bowl and mix, or you can lay them on a cookie sheet lined with parchment paper and sprinkle what you want to use, which is what I did. 
  • I put them in the oven for about 10 min. Since I put both types of kale in the oven at the same time, the lacinato kale was crispy and the curly kale was a little softer (which I really liked). So please note that the different types of kale cook differently and you should watch your oven after 10 min until you have perfected your chip.
Enjoy !

HUMMUS VEGGIE WRAP

HUMMUS VEGGIE WRAP

Wraps have been my thing lately! They're easy, economical and travel well. And let's not forget how versatile they are. Change up the spread using flavored hummus of your choice. Vary up the veggies, add spices and herbs to suit your taste. Layer and roll. Done and done!

HUMMUS VEGGIE WRAP

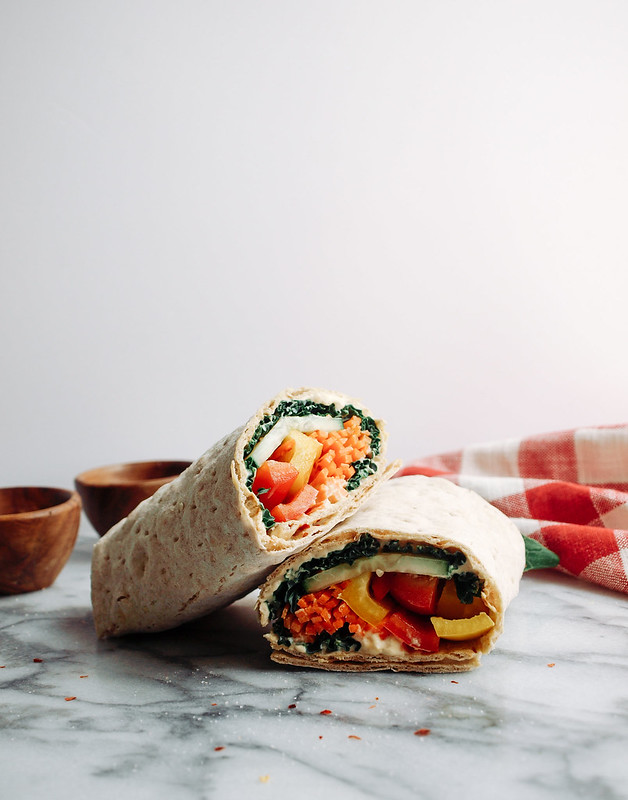
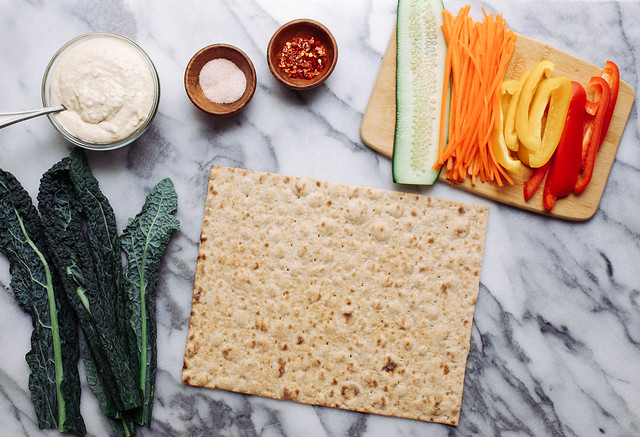
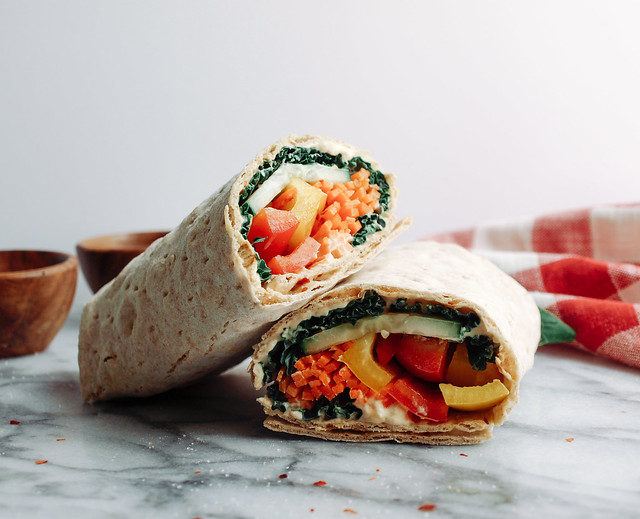
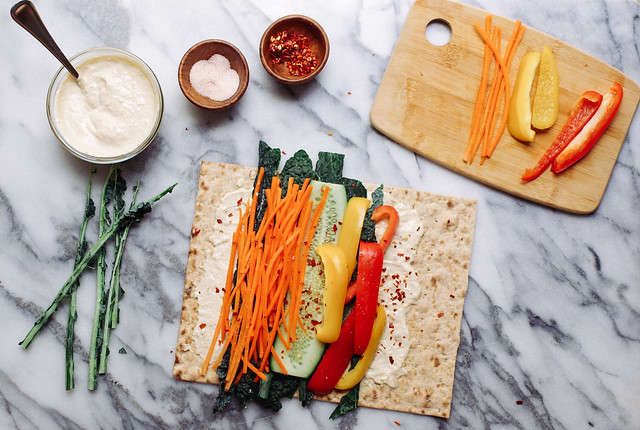
I used kale, plain hummus, bell peppers, carrots, cucumber, mineral salt and red pepper flakes. All on top of lavash bread. You could easily use shredded cabbage (green or purple) in place of the kale, or any other leafy greens you prefer. I think these are a good combination of veggies here. You could try adding in some sliced avocado to the mix if you like. This just gives you an idea, you can take it from here and make it your own, or use this one...it was delicious!

HUMMUS VEGGIE WRAP

Layer and roll...

HUMMUS VEGGIE WRAP: BROWN BAG LUNCH

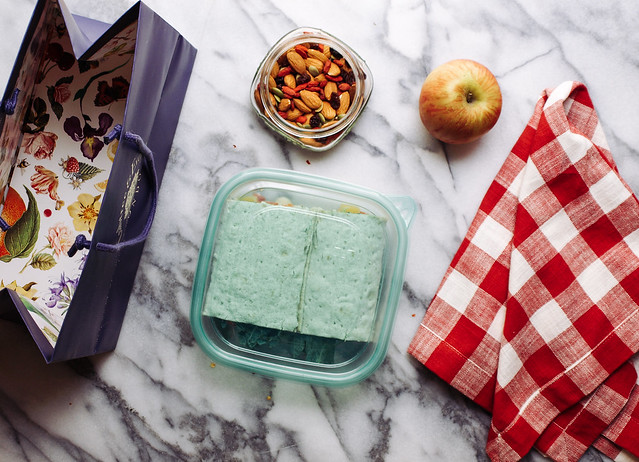
Take it with you for a brown bag lunch! In this case, a blue bag since I like to recycle, reduce and reuse my paper shopping bags. It's kind of girly, so guys you can tote around your usual uni-sex lunch bag. It fits perfectly in this little reusable plastic container, they usually come in a set of four so you could make a few and tuck them away in the refrigerator for later. I paired my wrap with some mixed nuts & dried fruits along with a fresh apple. I eat at least one apple everyday, sometimes two or three and I always carry one with me. My favorite is the sweet, juicy Fuji apples. They are convenient, fit right in my purse along with my Nalgene water bottle. Next time I share a brown bag lunch I'll break it out for you. And if you doubt that I always carry an apple with me, I swear just look in my purse!

HUMMUS VEGGIE WRAP

HUMMUS VEGGIE WRAP

Ingredients
  • lavash bread (or large flour tortilla)
  • kale or other leafy greens of choice
  • red bell pepper, sliced
  • yellow bell pepper, sliced
  • 1- 2 carrots, sliced lengthwise or julienned
  • cucumber slices
  • hummus, to spread 
  • salt, to taste
  • red pepper flakes, to taste

Lay lavash bread (or tortilla) on a flat surface, spread hummus over 2/3 - 3/4 of the wrap leaving at least an inch on both ends, layer with veggies, wrap one end up, over, and roll. Slice in half and enjoy now or store for later. 

Notes:

Make 2 - 3 of these wraps at a time storing them in individual containers for the next day or two as a lunch or snack. They will hold up well and actually allow the bread to soften a bit in the refrigerator.

I have my cucumbers in long slabs but you can cut them in long 1/4 - 1/2 inch strips instead. 


Savory Chickpea Pancake/Flatbread (Gluten Free)

Savory Chickpea Pancake

The chickpea pancake is a great way to enjoy a savory and filling pancake any time of day. Filled with vegetables and spices of your choice, this pancake will leave you satisfied and able to concentrate on your day. Except you may be thinking about how wonderful it was and when you're going to make it next. It is that good and so easy to make. I know you will add this to your meal rotation somewhere!

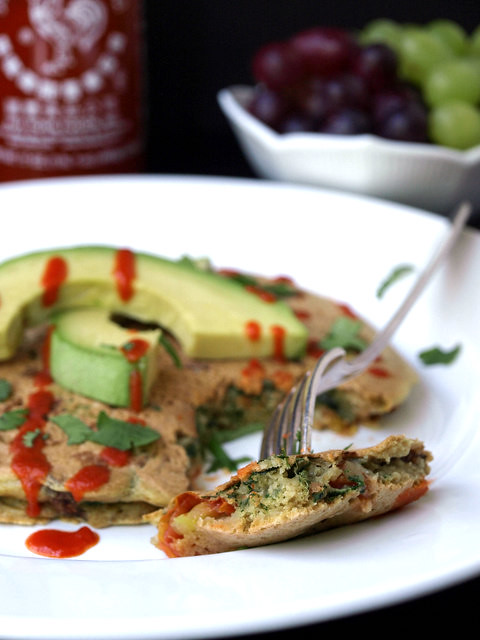
You can eat this like a pancake or pull it apart like flat bread. I especially love eating this with hummus, either spread on top or pulling it apart for dipping. For the photos I decided to serve it like a pancake topped with cilantro, avocado and sriracha. And you can bet this way was delicious too!

The Chickpea Pancake

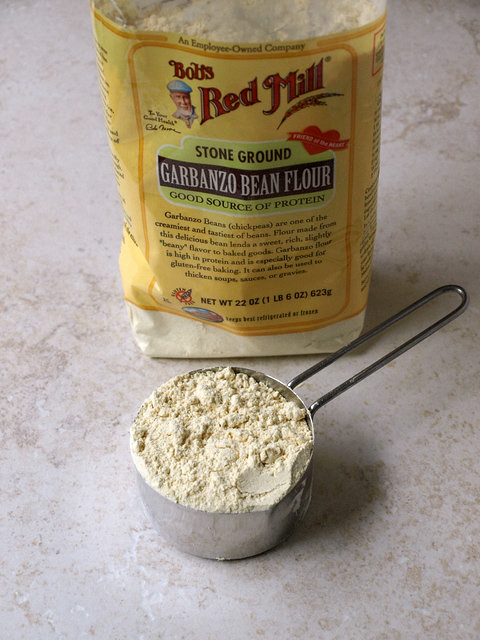
The base of the pancake, garbanzo bean flour (aka, besan, gram flour, chana flour, chickpea or cici flour ), is a great source of protein and fiber. It contains 110 calories per 1/4 cup of flour and boosts 6 grams of protein while offering 5 grams of fiber. One of these pancakes uses 1/3 cup flour so you're getting 9 grams of protein and about 7 grams of fiber per serving. Not bad at all! This is one of those vegan dishes that will stay with you for awhile making it great to start your day, or eat whenever you need to be fueled for a few extra hours. Fill your pancake with whatever you have handy or plan on picking up some special ingredients to make this extra special for yourself, friends and family. Some of the ingredients you may like to use are roasted garlic & bell peppers along with some dandelion greens. I used these ingredients the first time I made this and it was delicious. I'll break it down in a list...that'll be much easier...try mixing and matching any of the following.

Greens...kale, spinach, arugula, chard, dandelions, parsley or cilantro.

Other veggies...(slice, dice or grate any of the following)...scallions, onion, shallots, garlic, tomatoes or sun-dried tomatoes, mushrooms, zucchini, bell peppers, carrots, jalapenos, asparagus, broccoli, peas, green chilies, etc...

Spices...garam masala, cayenne, garlic powder, cumin, red pepper flakes, thyme, nutritional yeast, cracked pepper, curry, coriander, ground chipotle, summer savory, etc...

Toppings...hummus, salsa, avocado, harrisa, sweet chili sauce or hot sauce all come to mind.

I'm sure you will come up with some great versions of this pancake!

The Chickpea PancakeThe Chickpea Pancake

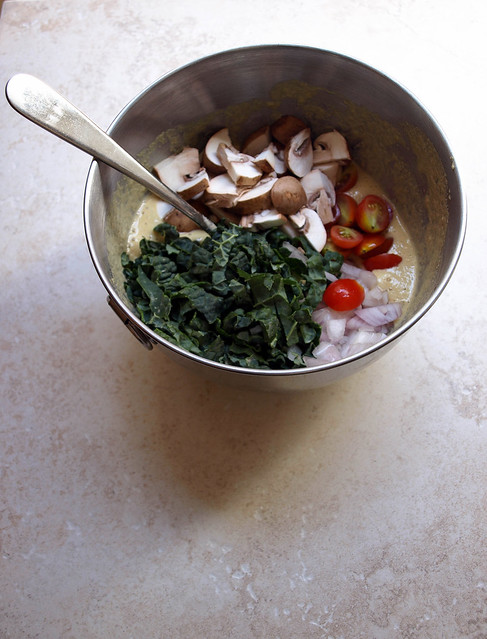
Add spices and vegetables of choice, mix to combine. I used kale, mushrooms, shallots and grape tomatoes.

The Chickpea Pancake

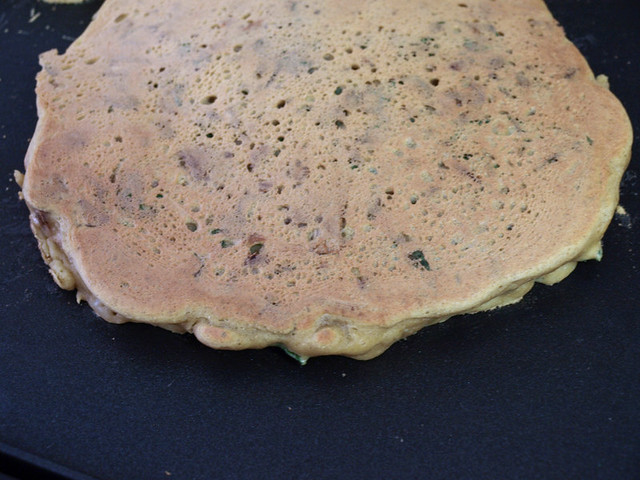
Pour 1/2 of the mixture onto preheated griddle or skillet. Use your spatula to spread the veggies around and flatten as needed. Also, you can help make your pancake round by gently pushing in the edges where needed. There may be times when it appears that you have more veggies than batter, don't panic....in a few minutes the batter will puff up from the baking soda and fill in making it look fluffy and full. Cook for 5 minutes.

The Chickpea Pancake

Flip and cook another 5 - 7 minutes making sure the center gets nice and cooked. I've had a few times of not letting it cook thoroughly enough and have had a center that was too mushy. Leave it on the heat a couple extra minutes if in doubt. Serve with your choice of condiments and topping. As shown  below, I used avocado, cilantro and sriracha to garnish. You can also add a nice dollop of your favorite hummus like the first photo in which I used an avocado hummus. Both ways are delicious!

The Chickpea Pancake

Savory Chickpea Pancake/Flatbread

Ingredients (makes two/serves two)
  • 2/3 cup garbanzo bean flour
  • 2/3 cup water
  • 1/2 heaping teaspoon baking soda
  • pinch of turmeric (will give it a yellow color), optional
  • 1/2 teaspoon cumin, or to taste
  • 1/4 teaspoon garlic powder
  • mineral salt, to taste
  • juice of 1/2 small lemon or 1 teaspoon apple cider vinegar
  • 2/3 cup lacinato kale (aka: Tuscan/dinosaur) or spinach, julienned and loosely packed
  • small handful sliced mushrooms
  • 1/2 shallot, diced
  • 7 grape tomatoes, halved or quartered depending on the size

Preheat griddle on medium.

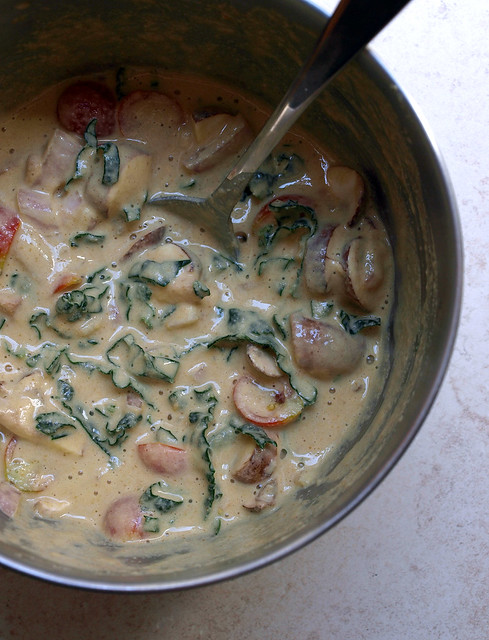
In a medium size bowl, combine flour, water, baking soda, optional turmeric, cumin, garlic powder and salt to taste. Mix well ensuring all the flour lumps are gone. Add in lemon, stir and you will notice the batter rise and foam a bit. Add in veggies and combine thoroughly. (Note: I don't really measure the vegetables, so this is an approximation)

Pour 1/2 of the mixture onto preheated griddle or skillet. You can use your spatula to move the veggies around and flatten as needed if they are piled up in areas. Also you can help make your pancake round by gently pushing in the edges where needed. There may be times when it appears that you have more veggies than batter, don't panic....in a few minutes the batter will puff up from the baking soda and fill in making it look fluffy and full. Let cook for 5 minutes. Flip and cook another 5 - 7 minutes, making sure the batter cooks throughout nicely. 

Serve with your choice of condiments. A thinned hummus would also be great! Pairs well with fresh fruit on the side.

Enjoy!

Inspired and adapted from Cake Maker To The Stars. She has various versions on her blog, check it out for more inspiration!