.

Showing posts with label sesame seeds. Show all posts

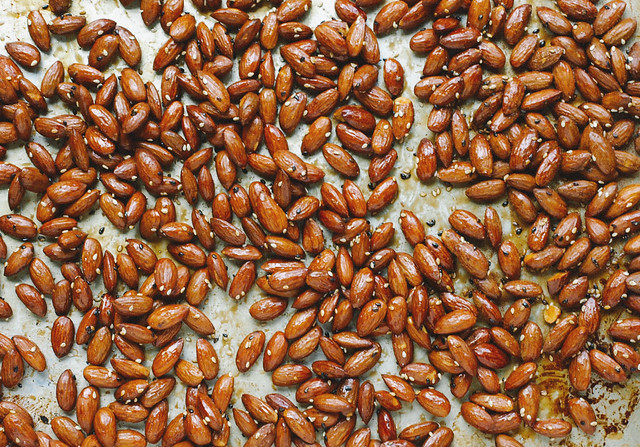
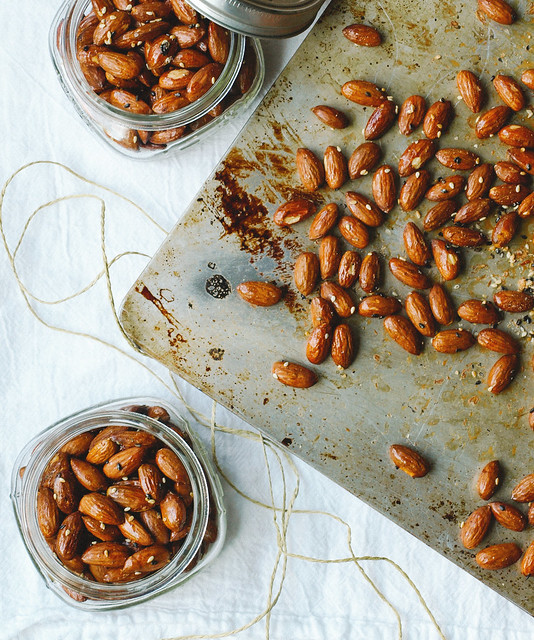
Mirin & Maple Roasted Almonds

Mirin & Maple Roasted Almonds

Sweet but not too sweet, these mirin & maple roasted almonds are a welcome addition to the recipe collection. This is my first recipe for roasted nuts and it's about time they appear here. The idea for the mirin & maple glaze came about from my Mirin & Maple Tempeh Stir Fry. I wasn't sure how this was going to turn out as this was something unusual for me but they came out great! It's simple flavors with sweetness from the mirin and maple, warmth from the cinnamon and chipotle, and a tad bit salty. And did you know, almonds are the most alkalizing nut. They're balancing, nourishing and contain high levels of potassium and vitamin E. In fact, nine almonds contain all the vitamin E you need for one day. They make for a great snack anytime of day. They're easy to stash and take along with you when you need a little something to get you through. These roasted almonds are really easy to put together and once ready will be done in 30 minutes. No reason to not have a batch of roasted almonds on hand when they're so easy to make!
Mirin & Maple Roasted Almonds

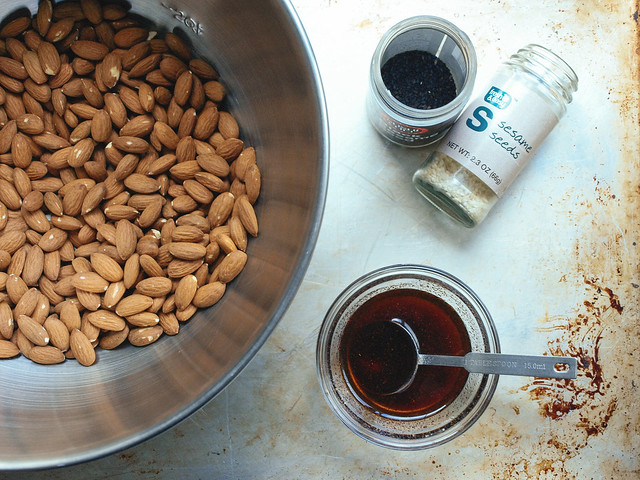
Start with fresh raw almonds. Mix your mirin, maple and spices.

Mirin & Maple Roasted Almonds

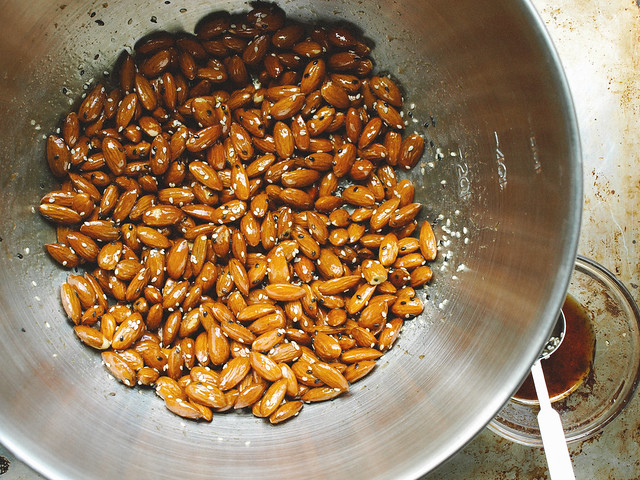
Add in your ingredients and toss to coat. Layer on baking sheet and roast.

Mirin & Maple Roasted Almonds

Remove from the oven, let cool and harden. And then you have beautifully glazed almonds that taste wonderful, will please your senses and satisfy your hunger. Be ready, these will be slightly addicting!

These roasted almonds are good things in little packages and make for great gift ideas too! 

Mirin & Maple Roasted Almonds

Mirin & Maple Roasted Almonds

Ingredients
  • 3 cups raw almonds (about 1 lb.)
  • 3 tablespoons mirin
  • 2 tablespoons pure maple syrup
  • 1/2 teaspoon cinnamon
  • 1/8 teaspoon chipotle powder
  • generous pinch or two mineral salt
  • 1 tablespoon white and/or black sesame seeds

Preheat oven to 350 degrees F.

In a small bowl, combine the mirin, maple syrup, cinnamon, chipotle powder and salt, mix well.

Put almonds in a large bowl, add the glaze and toss to coat. Add in sesame seeds and combine.

On a large baking sheet (a rimmed one would be ideal), spread mixture in an even layer...it's ok if some clump up. You may even like to sprinkle a little salt on top of the almonds for a little extra saltiness! Bake for 20 - 25 minutes, stirring once.

Remove from oven, let cool and harden.

Notes:

I recommend sourcing the best mirin you can get. Read the ingredient label and choose ones that are brewed traditionally and do not contain additives like corn syrup or use artificially produced koji enzymes. A good mirin will run you around $10 dollars and is worth the little extra compared to cheaper brands that use additives. You can also use it in the other recipes that call for mirin as mentioned in the first paragraph. It's great to use in marinades and stir fry's. You can use it to glaze your pie crusts and pastries too, giving them a beautiful shiny finish. It may also be used in making desserts such as poached fruit and puddings. 

I went a little easy on the spices so adjust to your preference. If you like a little more heat, add a tad bit more chipotle powder. I find these to be great without any spice as well, simply having the mirin, maple and salt as flavoring.

You may want to line your baking sheet with parchment paper for ease of clean up. I didn't personally use any and once cooled from the oven they did tend to stick to the bottom. I had to do a little scraping which didn't hurt my almonds one bit and just made for a little extra effort when cleaning the baking sheet. It's your call!

Enjoy!

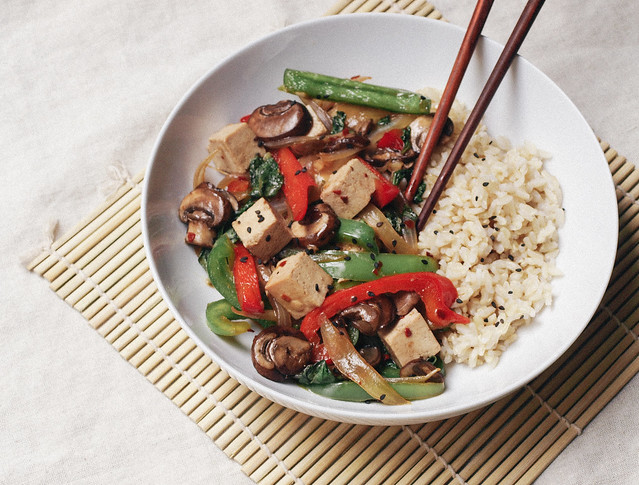
MUSHROOM, BELL PEPPER & BASIL STIR FRY

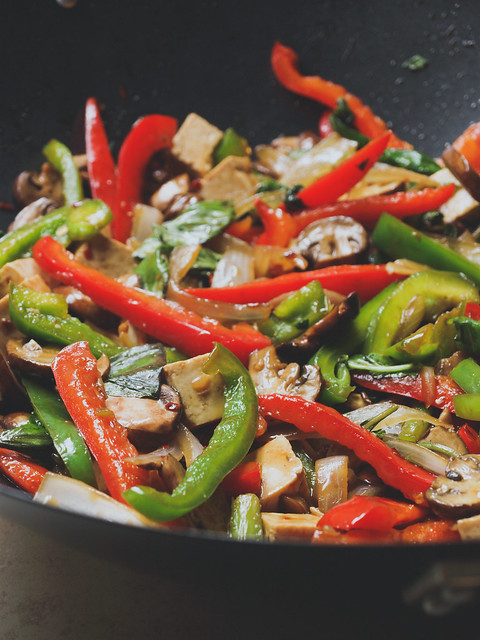
Mushroom, Pepper & Basil Stir Fry

This recipe is one of those on a whim recipes that just came about from cleaning out the fridge. I had all the ingredients in my kitchen, put them together and even shared my dish on Facebook and Instagram last week. It went well and I decided to put it into the recipe collection. I originally made this without any oil, using water to stir fry my vegetables. I simply forget that you can do that with great tasting results and will do it more often from now on. You could also use veggie broth for extra flavor if you like. In this recipe you'll have the option to either use oil or the water as you like. Since then I've been buying the ingredients to make this because it's just that good. I love basil and this stir fry is really all about the basil! I'm lucky enough to live in So Cal and have access to fresh basil year round. I use two cups in this recipe but feel free to add more if you like! I hope you're able to find it readily available too. As for the other vegetables, you can mix them up using whatever you like. That's what I love about stir-fry's is that they are so versatile. Try using different colored bell peppers, zucchini, bean sprouts, broccoli or carrots adding or replacing anything you don't care for...pretty much anything will work here. 

Mushroom, Pepper & Basil Stir FryMushroom, Pepper & Basil Stir Fry

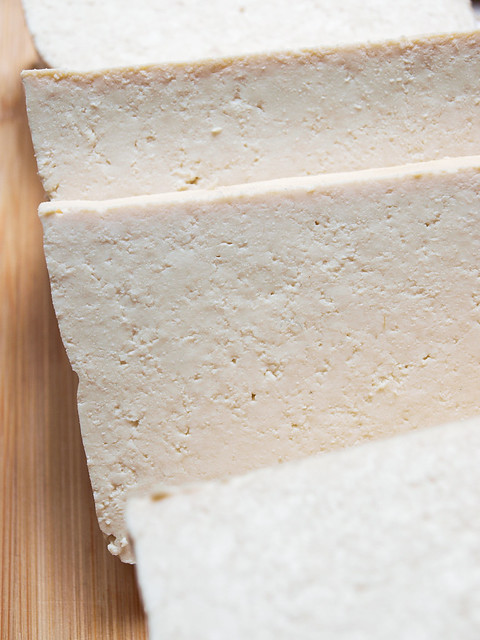
Lately, I've been buying tofu labeled either 'Sproutofu' from Wildwood or 'High Protein' from Trader Joe's. Both are high protein and extra firm. I find these do not need to be pressed making them a bit easier to work with in that you can skip the pressing process. They are so dense that there is no room for water to collect. Simply open your package, cut as desired and cook. It takes on the flavors surrounding it very well and has a nice tender texture. If you can find these in your local store, I highly recommend giving them a try. If you can't find these then you will still want to press your tofu for this recipe to release as much water as possible. 

Mushroom, Pepper & Basil Stir Fry

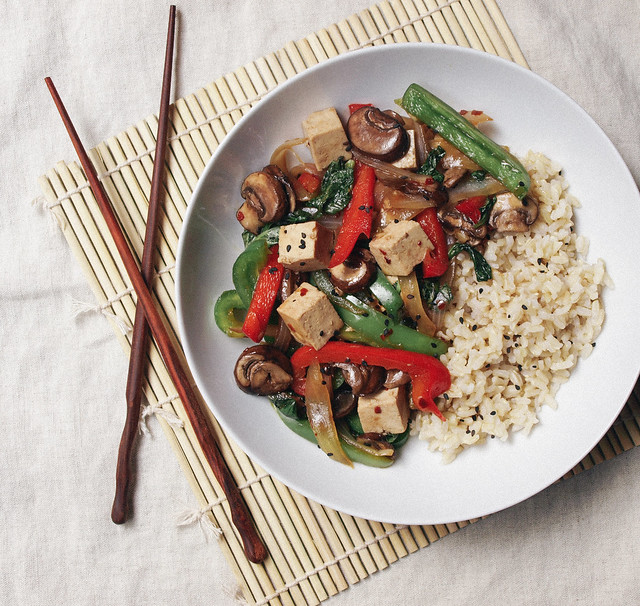
So simple to assemble and serve!

Mushroom, Pepper & Basil Stir Fry

MUSHROOM, BELL PEPPER & BASIL STIR FRY

Ingredients
  • 8 oz. mushrooms, sliced
  • 1 red & green bell pepper, julienned
  • 1 large onion, sliced
  • 3 cloves garlic, chopped
  • 2 cups basil, lightly packed
  • 1/4 cup tamari, coconut aminos or soy sauce
  • 1 tablespoon maple syrup
  • 1 tablespoon corn starch
  • red pepper flakes, to taste (I used 2 teaspoons)
  • 1 - 2 tablespoons sesame, coconut, olive or grapeseed oil OR water stir fry (see notes)
  • 10 oz. extra firm tofu, cubed (high protein pref), cut into 3/4 inch cubes
  • cooked grain of choice to serve (brown, basmati or jasmine rice...quinoa or soba noodles would be great too)
  • black or white sesame seeds, for garnish

If using non-high protein tofu, start by pressing your tofu (if using high protein tofu as mentioned above there is no need to press). Place your block of tofu either between a few sheets/or folded paper towel OR between a clean folded dish cloth. Place a heavy book, or pot, on top and let sit for about 20 minutes. Remove weight and cube your tofu. 

Prepare your vegetables. In a small bowl, combine the tamari, maple syrup, corn starch and red pepper flakes. Set aside.

In large skillet/wok, heat oil/water over medium high, add onions, garlic, bell peppers and mushrooms. Stir fry for 5 minutes. Add in the wet mixture and toss to coat. Add in basil and tofu, mix well and cook another 5 minutes, or until vegetables are just softened, tofu is warmed and sauce has thickened. Add more tamari and pepper flakes to taste.

Serve over grain of choice (I used a sprouted brown rice here) with a sprinkle of sesame seeds on top.

Notes:

Feel free to use a larger block of tofu if you like. No need to buy a larger block and not use it all. It will just make your meal more protein packed. Feel free to omit the tofu all together if you like!

Try doing a water or vegetable broth stir fry in place of using oil. Use 1/4 cup water/broth in place of the 1-2 tablespoon oil.

Bon Appetit!


Rosemary Almond Crackers

Rosemary Almond Crackers

These are great little crackers. Gluten free, grain free and full of goodness. Almonds are alkaline and are very low in cholesterol and sodium. They're also a good source of riboflavin, magnesium and manganese, and a very good source of Vitamin E. These crackers are simple to make with a minimal ingredient list. You can add whatever herbs or spices you might like. I just really love rosemary and it fits well in this cracker. Caraway seeds would be great too. Eat them alone, pair them with some hummus for a nice light healthy snack or along with some grapes or fresh fruit of choice. Almonds are an alkaline food and carry good nutrition for a healthy mind, body and soul. Have a go at these little crackers, I think you will enjoy them...

Rosemary Almond Crackers

Rosemary Almond Crackers

Ingredients
  • 2 tablespoons flaxseed meal 
  • 4 tablespoons water
  • 1 tablespoon extra virgin olive oil
  • 1 cup almond flour or almond meal, packed
  • 1 tablespoon fresh or dried rosemary or choice of herbs, finely chopped
  • 1 tablespoon sesame seeds, optional
  • 1/2 teaspoon salt

Preheat oven to 325 degrees.

Combine flaxseed meal with 4 tablespoons water and olive oil. Place in fridge for at least 10 min, or until the mixture is gooey, this is the binder for the mixture. 

You can buy almond flour or make it close enough at home like I did. In blender/food processor, grind 1 and 1/4 cup almonds into a fine powder or meal type consistency...doesn't have to be perfect but the finer the better.

Place all ingredients in medium size bowl and mix together well. Shape into a ball and place on a flat surface lined with parchment paper. Either roll to flatten or cover with another piece of parchment paper and press down with your hand, then roll with rolling pin flattening to about 1/8 inch or so. The thinner the better (even mine could have been thinner, take up the whole area spreading to the edges, the thinner they are the crispier they'll be). Remove top layer of paper, if using. Using a pizza cutter, or knife, cut squares or diagonals into whatever size you like. Top with a little sea salt.

Carefully slide and transfer prepared crackers along with the paper it lays on to a cookie sheet, bake for 20-25 minutes. After the first 10 minutes of baking, set timer every five minutes so you can keep an eye on them, removing the ones around the edges that are done. They will ever so slightly darken and turn golden, you don't want it too dark or it will have a burnt flavor. When done, let cool. Use your pizza cutter, or knife, and run through your lines once more to separate completely. Let set out for a few hours before storing, if they weren't rolled thin enough they may become more of a biscut style cracker if stored away to quickly...this will allow them to be completely air dried before storing. I keep mine in a large glass ball jar in the pantry or on the counter. 

Enjoy!

Here's a batch I just made using caraway seeds, no sesame seeds in this one. I rolled them a bit thinner this time giving them a bit more of a crunch. The caraway seeds are really great in this...right up there with the rosemary. These crackers pair so well with hummus. And some fresh fruit with this is an added bonus. These are super to make for parties or just to have around the house for a healthy snack for you and your family. Try it with this hummus.


Delicious!

KIMCHI BREAKFAST TACOS

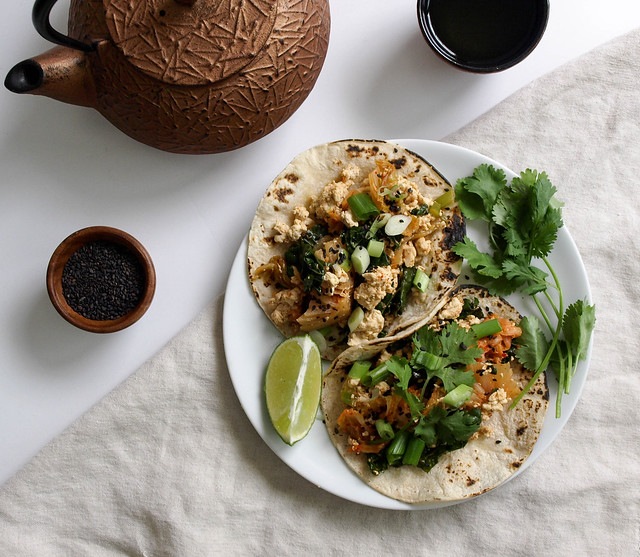
KIMCHI TOFU SCRAMBLE TACOS

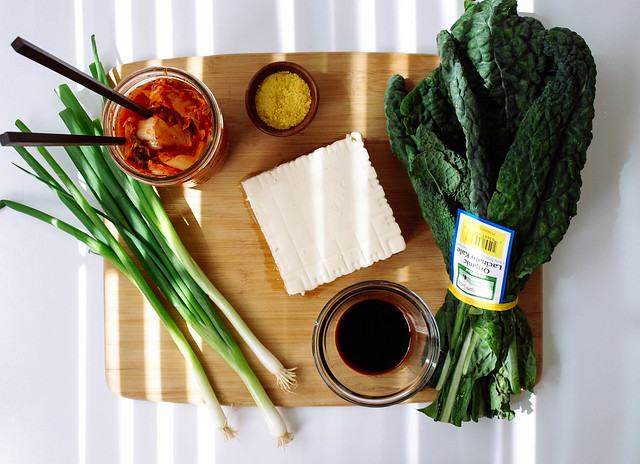
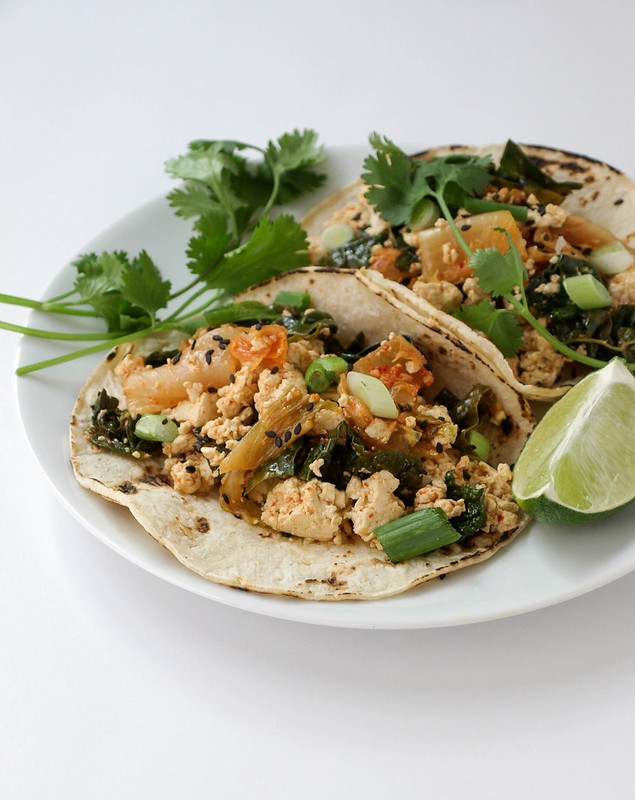
Now that kimchi has been added to the recipe collection, it's time to experiment with this spicy, tangy mixture. What better way than to add this spiciness to a tofu scramble. Tofu at times can use a little help, kimchi is a perfect addition and will whip that tofu into shape. This is my vegan version of a recipe I saw for a kimchi scramble using eggs. My tofu interpretation came out amazing and I'm very happy with the results. If you're a kimchi lover and tofu appreciator, than I think you'll agree! I first made this recipe using spinach (which tasted great, of course!) but ultimately decided to use kale here as we try to use the most nutrient dense foods possible whenever we can. I loved the kale, it cooks down beautifully adding a nice pop of green to the scramble. I've kept the seasoning super simple, it doesn't need much as the kimchi will shine through. Best to use your most fermented batch of kimchi, the ripened flavors will work best when cooking with kimchi. These tacos can be eaten any time of day. It pairs great with green tea. If having these for lunch or dinner and you're a beer drinker, I think an Asian or Mexican beer would be great too. Beers like Kirin Ichiban, Sapporo, Corona and Dos Esquis are vegan friendly. To see if your favorite beer or alcohol is vegen, check this great guide: Barnivore. Whatever your drink of choice is, you're going to love every bite of these kimchi tacos! 

KIMCHI TOFU SCRAMBLE TACOS
KIMCHI TOFU SCRAMBLE TACOSKIMCHI TOFU SCRAMBLE TACOS
KIMCHI TOFU SCRAMBLE TACOS

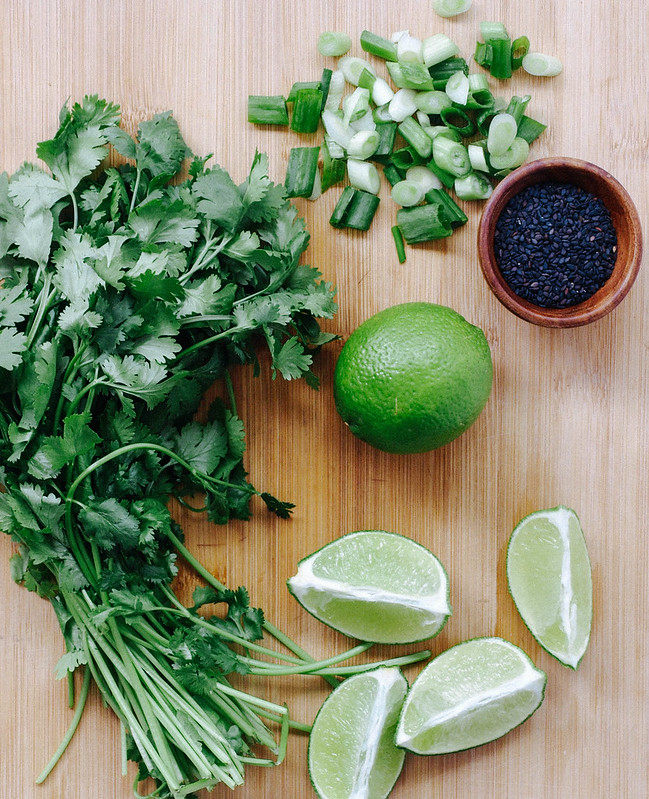
All cooked and ready to go. I could eat it just like you see it above...so good! But we're making tacos here, so fill your warmed tortillas (I used corn), you may like to use two if your mixture is very wet. Top with cilantro sprigs, scallions, sesame seeds and a squeeze of lime. Enjoy to the fullest!

KIMCHI TOFU SCRAMBLE TACOS

KIMCHI TOFU SCRAMBLE TACOS


Ingredients
  • 1 tablespoon sesame seed oil, optional
  • 1 block (14 - 16 oz) organic tofu, firm or extra-firm
  • 4-5 large leaves of kale, center stem removed and julienned
  • 3 scallions, sliced (divided)
  • 1-2 tablespoons tamari
  • 1/2 teaspoon garlic powder
  • 1-2 tablespoons nutritional yeast, optional
  • 1 cup kimchi
  • cilantro sprigs, for garnish
  • sesame seeds (toasted, black or white), for garnish
  • lime wedges, to serve
  • 6 corn or flour tortillas, to serve

Measure out 1 cup kimchi and let come to room temp.

Open and drain tofu. You may like to give it a quick press to remove moisture if not using a vacuum packed brand. 

In a large wok/skillet, heat oil over medium high heat. Add tofu, crumbling between your fingers, cook, stirring occasionally, for about 2 -3 minutes. Turn heat to medium, carefully add tamari and garlic powder, give a good stir. Add kale and 2/3 - 3/4 of the scallions, cook, stirring occasionally until kale becomes soft and wilts, cover partially to help with the process, about 5 - 7 minutes. Lastly, add the nutritional yeast and kimchi, mix and cook just until kimchi has warmed through, about 1 minute or so. We don't want to overcook the kimchi or it will destroy some of the health benefits of the probiotics. 

Heat your tortillas. I like to heat mine carefully over a gas burner until lightly charred in spots. Use your preferred method.

Layer your tortillas with the scramble mixture, add a few sprigs of cilantro, some of the reserved scallions, a sprinkle of sesame seeds and a squeeze of lime. 

Serves 3

Notes: 

Use spinach in place of kale.

Use ripened kimchi, the flavors will be more pronounced. You may prefer fresher kimchi, in which case use your favorite.

You may like to chop your kimchi a bit before adding it to the tofu. I kept it as it was but it's an optiona.

Try adding a drizzle of this Garlic Miso Cashew Sauce, or for extra heat try the Dynamite Sauce or Sriracha Cashew Cream. You can control the heat when adding the spice to each of these condiments. 


Homemade Tahini


If you love tahini, then you will love how simple it is to make at home. I was in the store the other day picking up a new jar for myself and I saw a bag of sesame seeds for $3 dollars and decided to make it myself since the jar I was about to buy cost $8. What the heck I thought...I make my own Almond Butter, why not my own tahini?! Of course, it was just as good if not better since I made it myself.

Homemade Tahini

Tahini (sesame seed paste) is full of wholesome nutrition. Sesame seeds contain important B Vitamins...B1, B2, B3, B5, as well as a great supply of calcium. They also have beneficial trace elements like copper, magnesium, iron, phosphorus and manganese. Sesame seeds contain both omega 3 & 6 that improve the health of the brain. I'm learning to use tahini in all different kinds of ways...like my Simple White Bean Hummus, or it can be used as a binder in place of hummus for my 'Chickpea of the Sea' Salad Sandwich or Stuffed Avocados. You can also use it in salad dressings, soups, cookies or just eat it plain spread on toast. It pairs well with different flavors like lemon, miso, cumin, parsley, cilantro, garlic, etc. So very good and so very good for you!


Homemade Tahini

Ingredients
  • 3 cups sesame seeds (1 lb.)


First you may want to toast your seeds to bring out the most flavor. You want your seeds to become fragrant and slightly darker during the process (I have to admit that I skip this step and it is completely optional.)

Toast your seeds one of two ways:

1. Preheat oven to 350. Place seeds on roasting pan or rimmed cookie sheet and roast for about 10-15 minutes making sure to move them around every few minutes so the seeds on the bottom don't burn. 

OR

2. Dry roast over medium low heat in a skillet using one cup at a time (add more or less depending on your skillet). Be sure to move the seeds around frequently to ensure that they don't burn. 

Once you have toasted your seeds and they have cooled a bit, place them in your food processor, or blender, and process on high until creamy, scrapping down the sides as needed. Will take apprx. 5-10 minutes to blend depending on your equipment. 

Store your tahini in an air-tight container in the fridge. Will last up to a couple months. Makes apprx. 2 cups.


Notes:

To add extra creaminess use 2 or 3 tablespoons of extra virgin olive oil or sesame oil when blending if desired. This will help create a smoother texture but it will also alter the flavor slightly. 


Have fun experimenting with different ways to use tahini...

So easy and delicious...Enjoy !

Sesame Quinoa with Tofu

Sesame Quinoa with Tofu

 This is one of those recipes that surprises you. At first I thought this wasn't going to be one of my most flavorful dishes but I was in fact pleasantly surprised. It's full of flavors! I didn't change much from the original recipe. I only added a dash of garlic powder, cayenne and upped the green onion amount. This is a minimalist ingredient list that really packs great flavor and nutrition. Tofu, quinoa and sesame seeds are all excellent foods for healthy happy living. Also makes for great left overs too..if there is any. This recipe comes from my Cooking Light Annual Recipes Book dating back to 2003. I have a collection of these and will be posting recipes from these here and there. 

Sesame Quinoa with Tofu

Sesame Quinoa with Tofu

Ingredients

  • 8 ounces firm or extra firm organic tofu, drained and pressed
  • 1 tablespoon sesame oil
  • 1 tablespoon sesame seeds...white, black or both
  • 1/2 teaspoon of garlic powder
  • 1 tablespoon tamari, bragg's amino's or soy sauce
  • 1 cup uncooked quinoa (I used tri-color)
  • 1 1/2 cups veggie broth or water
  • 1/4 teaspoon himalayan salt, or as needed
  • 1/2 to 3/4 cup green onions, chopped
  • 1/8 teaspoon black pepper or cayenne pepper


Place tofu on several layers of heavy-duty paper towels or dish cloth, let stand 20 minutes. Cut into 1/2-inch cubes.

Heat oil in a medium saucepan over medium heat. Add tofu, seeds and dash of garlic powder, saute 3 minutes. Remove tofu from pan and set aside. At this point, I sprinkled some tamaari on top of my tofu for extra flavor.

In same pan, add quinoa and cook 3 minutes, stirring frequently. Add broth and salt, bring to boil. Cover, reduce heat to low and simmer 15 minutes. Remove from heat, uncover and let set 15 min to soak up the rest of the water. Fluff with fork, add tofu, onions, soy sauce and pepper. Serve.

I lightly steamed some broccoli to serve with mine. I topped with cayenne pepper because extra spice is nice. A little sriracha or red pepper flakes would also be great. You could easily saute an extra vegetable with the tofu too. Or add spinach, fresh basil leaves or anything else that sounds good or is on hand.

Planning ahead, if your gone for the day but want to make this at night. Drain tofu and let it set in the fridge between heavy duty paper towels or dish cloth, it will be ready when you get home so you can have a meal within 30 min or so.

Enjoy !

Adapted from Cooking Light Annual Recipes, 2003 edition...page 53

SUGAR SNAP PEA & SOBA NOODLE BOWL + MISO SAUCE

SUGAR SNAP PEA & SOBA NOODLE BOWL + MISO SAUCESUGAR SNAP PEA & SOBA NOODLE BOWL + MISO SAUCESUGAR SNAP PEA & SOBA NOODLE BOWL + MISO SAUCE

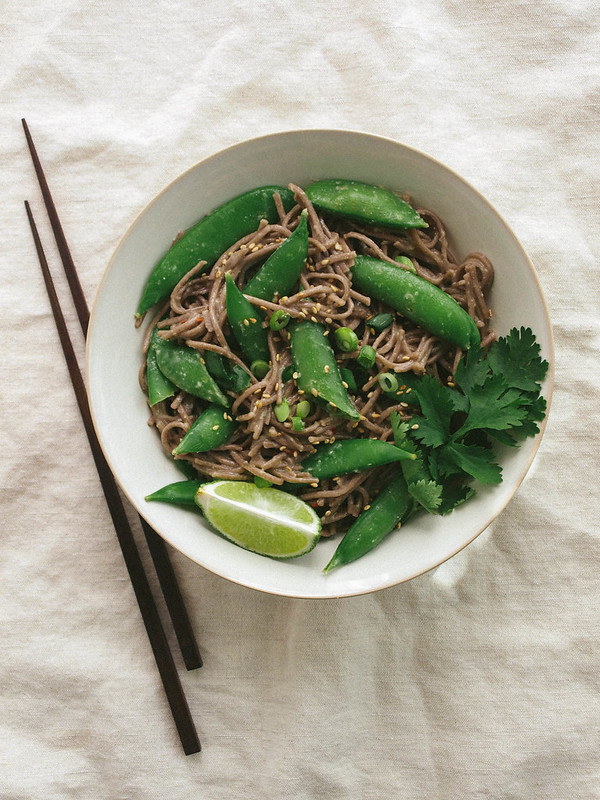
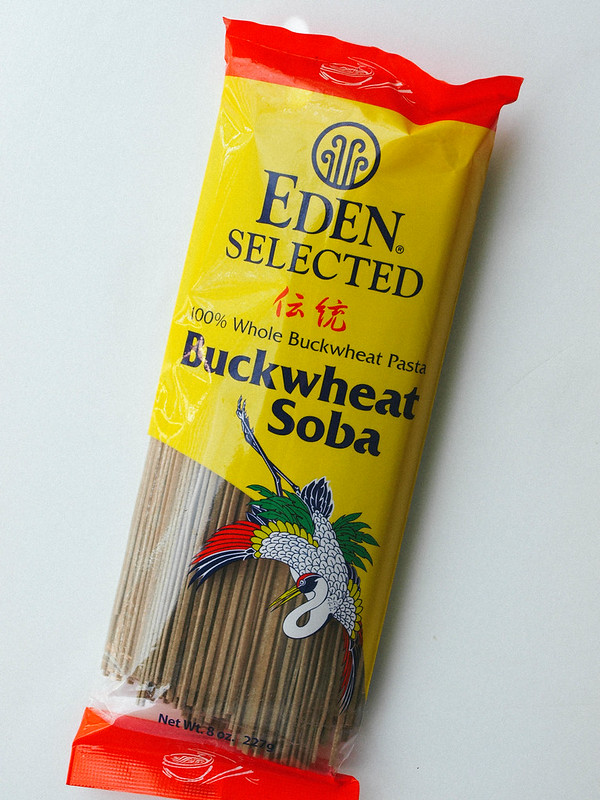
Soba noodles have become a favorite of mine. I love the 100% buckwheat noodles from Eden Foods. They have a nutty flavor with a somewhat chewy texture. Each serving contains 6 grams of protein and 3 grams of fiber. I love that they can be served warm or cold making them a versatile noodle choice. They are gluten free using only buckwheat flour, unlike other brands of soba noodles which use a combination of wheat and buckwheat flours. They tend to be a bit more expensive than the mixed flour soba noodles. I happen to see these noodles as a tradeoff for the more expensive items that I don't purchase anymore such as meat, poultry and dairy. Keeping that in mind, the extra expense doesn't bother me. I hope you may have the same perspective as I do when picking and choosing your plant based grocery items.

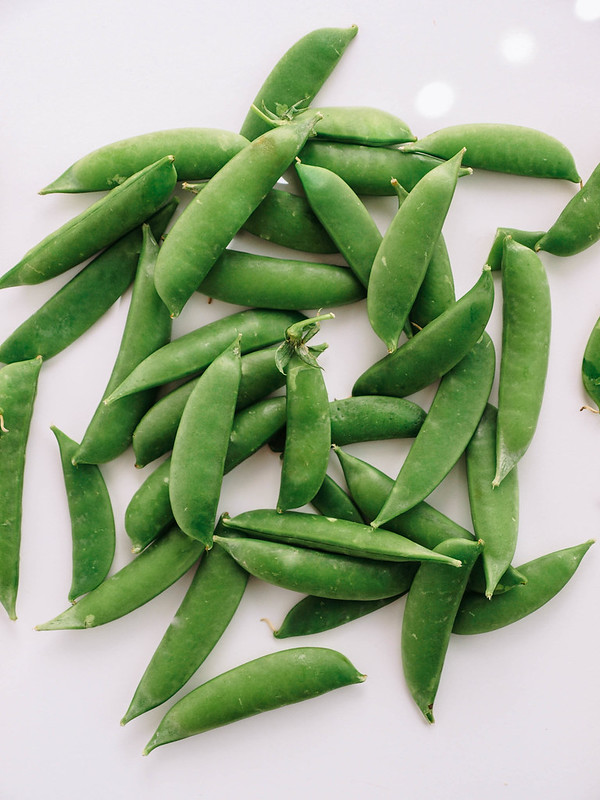
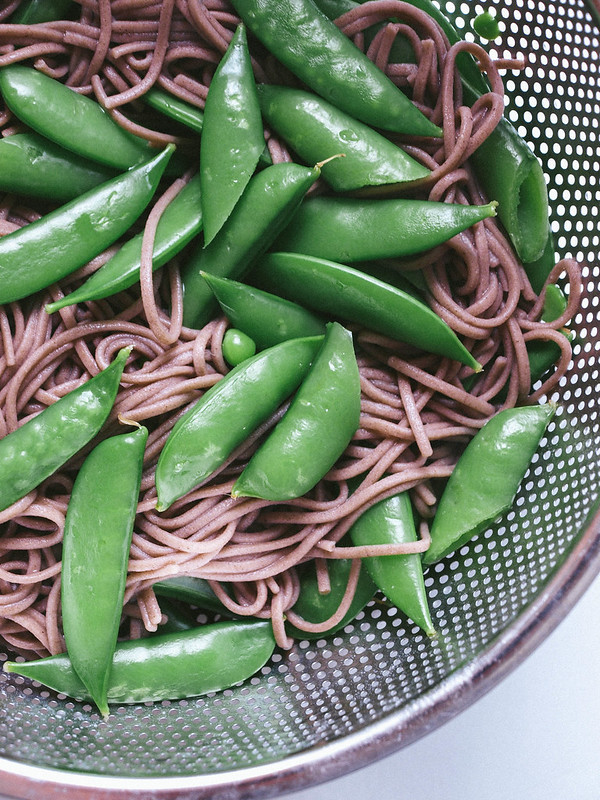
The addition of sugar snap peas add a perfect dose of sweetness and crunch to the soba noodles. I love sugar snap peas and have them often dipping them in hummus and eating as is. In this recipe we will be adding the pods to the soba noodles half way through as they cook to soften them a bit and bring out their greenest green. 

SUGAR SNAP PEA & SOBA NOODLE BOWL + MISO SAUCE
SUGAR SNAP PEA & SOBA NOODLE BOWL + MISO SAUCESUGAR SNAP PEA & SOBA NOODLE BOWL + MISO SAUCE

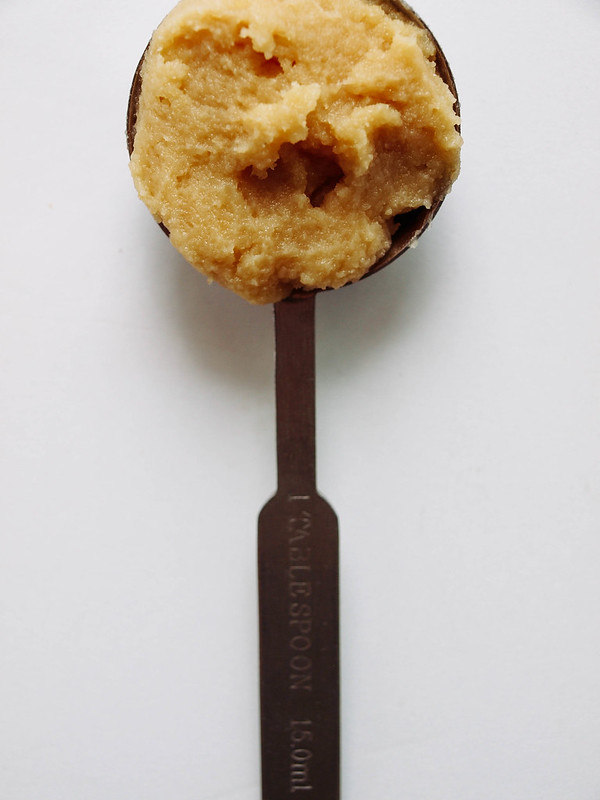
Miso is another great addition to your healthy eating habits. With a few additional ingredients it makes for an easy and flavorful dressing for the noodles and sweet peas. A tub of miso will last up to 9 months + in the refrigerator and can be used for soups, dressing/dips and adding richness to vegan cheeses and sauces. It will go a long way in your kitchen and is a great staple ingredient to have on hand.

This is a very easy meal to throw together and will be ready in about 25 minutes or less. I originally planned on having cubed tofu in this recipe but in the end forgot to add it in for this set of pictures. Feel free to add in a serving of tofu (as per the notes). With or without tofu, enjoy this simple, wholesome and delicious meal! 

SUGAR SNAP PEA & SOBA NOODLE BOWL + MISO SAUCE

SUGAR SNAP PEA & SOBA NOODLE BOWL+ MISO SAUCE

Ingredients
  • 1 package (9oz.) soba noodles
  • 8 oz. sugar snap peas
  • 2-3 scallions (green onions), sliced, to garnish
  • toasted sesame seeds, to garnish
  • handful cilantro sprigs, to serve
  • lime wedges, to serve

Miso Sauce
  • 2 - 3 tablespoons mellow miso paste (white miso)
  • 2 tablespoons rice wine vinegar 
  • 3 tablespoons water, + more as needed to thin
  • 1 inch knob of ginger, grated or minced
  • juice of 1 lime (about 1 tablespoon)
  • pinch of red pepper flakes

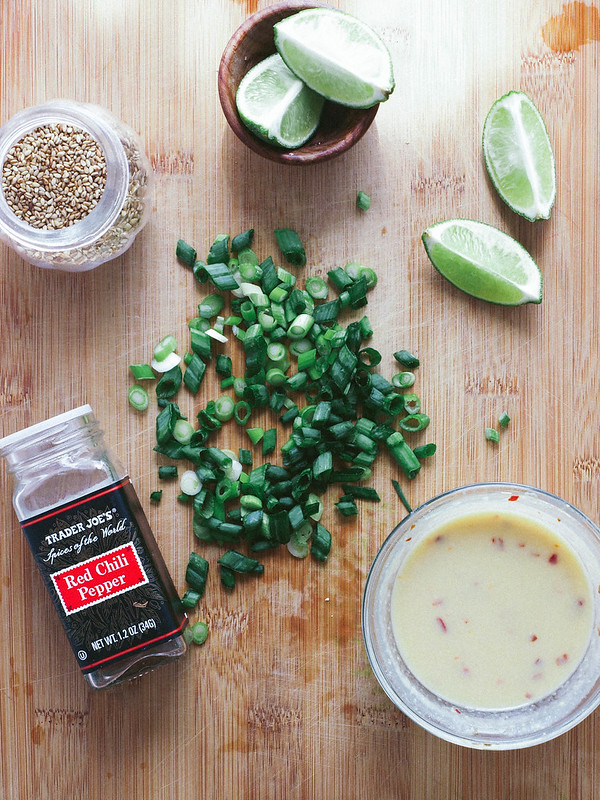
In a small bowl, mix the miso sauce ingredients together, set aside.

Fill a large pot just under 1/2 full of water, bring to a boil, add a pinch of salt and soba noodles, cook 4 minutes. If using 100% soba noodles, careful to watch the water after 2 minutes or so, it will start to become foamy and bubble over...turn the heat to medium and back up again as needed to keep the water at a boil but not boiling over.

2-3 minutes before noodles are done according to package directions, add sugar snap peas to the noodles and continue cooking until noodles are done. Drain and rinse noodles and peas under cool running water.

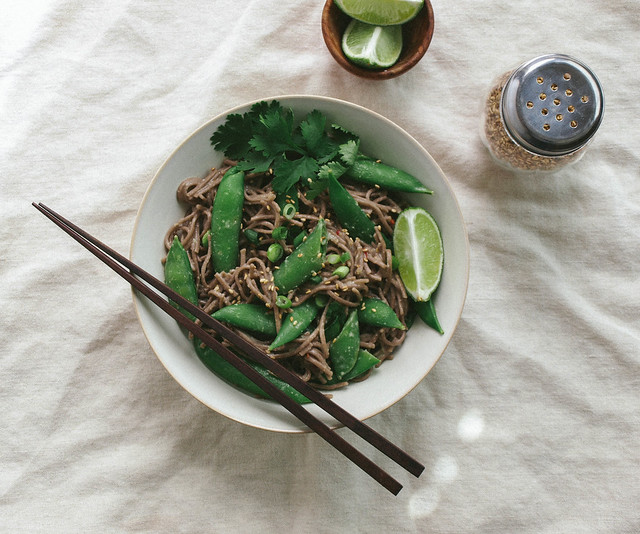
Add noodles/peas back to the pot they were cooked in, add sauce and gently toss to coat. Serve in individual bowls with sliced scallions, sesame seeds, cilantro and lime wedges to squeeze over top.

Serves 2

Notes:

If your sugar snap peas are on the larger side, slice them diagonally in the center to make them easier to eat.

Add in a serving or two of cubed tofu for extra protein if you like...either baked, pan cooked until golden or simply diced from the package. You may even like to add in a serving or so of edamame.

If you have soy allergies, try using other miso's which don't contain soy such as chickpea miso. 


    RAW GINGER SNAPS

    Raw Ginger Snaps

    If you love gingersnaps you'll love this raw version. They are full of flavor, all the ingredients come through in this cookie and they are quite addicting! I'm really loving these no bake raw cookie balls if you haven't noticed....this is my fourth recipe within two weeks....they are so good and easy to make. Plus I love the idea of it being a doughy cookie, it does harden more once refrigerated and turns to be a little less doughy and more of a chewy style cookie. Along with that, I love all the natural ingredients that go into them. All you need is a few to satisfy your craving....and if you have too many, you won't feel guilty!

    Raw Ginger Snaps

    Start by pulsing your oats and almonds until a somewhat fine consistency.

    Raw Ginger Snaps

    Add in your remaining ingredients and blend until it clumps together forming a dough ball.

    Raw Ginger Snaps

    The dough is amazing, try not to eat too much before you roll your balls like I did. I would have gotten 12 balls but I couldn't resist eating some of the dough only leaving me with 11 of these delicious spiracle treats.

    RAW GINGER SNAPS

    Roll the balls in sesame seeds or cinnamon for a finished look, or leave them as is.

    Raw Ginger Snaps

    RAW GINGER SNAPS

    Ingredients
    • 3/4 cup oats, regular or quick (I used GF)
    • 1/2 cup almonds
    • 3/4 cup dates, pitted and chopped
    • 2 tablespoons fresh ginger, minced or 1 1/2 teaspoons ginger powder
    • 3 tablespoons pure maple syrup or liquid sweetener of choice
    • 1 tablespoon unsulphured organic molasses, optional
    • 1/2 teaspoon vanilla extract
    • 1/4 teaspoon cinnamon
    • 1/8 teaspoon nutmeg or ground cloves
    • 1/8 teaspoon salt
    • sesame seeds & cinnamon, for rolling

    Combine oats and almonds in food processor, blend until you get a fairly fine consistency, doesn't have to be perfect. Add dates and rest of ingredients, blend until combined and dough like consistency, about 1 minute. If for any reason you added more oats or nuts/seeds and you feel it is too dry, try adding 1 tablespoon of water at a time to get desired consistency.

    Roll your dough into 1 inch balls. If you like you can roll them in cinnamon or white sesame seeds for a more finished look. Shredded coconut would be another great option.

    Keep refrigerated and enjoy within two weeks or so. Makes 12 balls.

    Notes: 

    For those with nut allergies, you may substitute the almonds for sunflower seeds or hemp hearts.

    I use oats in the recipe to cut the fat content. Feel free to use all almonds or more almonds and less oats. 

    Enjoy often!


    Detox Salad + Ginger Lime Cardamom Dressing

    Detox Salad 1
    Detox Salad Mix
    Detox Salad

    It's detox time! After a weekend of trials with the last recipe Pizza Pie + Balsamic Tomato Sauce + Roasted Vegetables, it was time for some fresh, detoxifying foods. This lovely salad is inspired by the energizing detox salad from Mildreds. I was able to put this together rather simply using most of the ingredients listed while adding my own flair with a few ingredients like cardamom. I've had cardamom on hand and have wanted to use it for a while now. It can be an optional ingredient in the dressing if you don't have it but it is a wonderful addition that I think you'll love if you have it on hand. This salad came out truly wonderful and I'm so pleased to share it with you. I can literally make a large batch of this salad and eat it all day long, for a few days on end to boot. It's what's for dinner, and lunch tomorrow! The flavors pair and mingle well for my taste, and I think those of you who love detox salads will definitely find this combination pleasing on many levels. It has a bit of sweetness from the raisins, carrots and apple, a little earthiness from the beets, a slight sour from the lime juice, and some zest from the ginger and cardamom. Add to that how colorful it is, healthy, nutritious, easy to make and so fresh...it's a detox keeper!

    Detox Salad BeetsDetox Salad Beet Leaves

    I love being able to incorporate beets into my diet. They are one of those foods that I don't eat often enough but this salad is a perfect place to use up this highly beneficial vegetable. Here we can use the beets and the greens...a win all around! If you can't find the beets with their greens, use chopped spinach, dandelion greens, even lacinato kale (aka: dinosaur or Tuscan kale) would be great. As for the beets, feel free to use golden beets instead. Red beets can be a bit messy. For this reason I decided to chop my beets instead of grating them, which tends to really leave a red wet mess. But of course, feel free to grate your beets if you rather. It will give extra moisture to your salad if you do. Even grating the apple will release a lot of moisture adding extra juices as well (at least for Fuji apples). Do what feels best to you!

    Detox Salad EatDetox Salad Tofu

    After I started eating, I remembered that the inspired recipe had an option for tofu and thought I'd give it a try. Let me say that it did not disappoint! Believe it or not the tofu was a great addition. I used an extra firm organic tofu and the texture blended right in and added a good dose of protein. Those who are familiar with tofu know that tofu it is a blank slate in terms of flavor and will take on whatever flavors it comes into contact with. Once mixed in it was great. Am I strange to love this? Oh well...I do! :) Tofu is optional but for those who are looking to make a complete meal I recommend adding a serving.

    Detox Salad 2

    Detox Salad + Ginger Lime Cardamom Dressing

    Ingredients
    • 1 large beet with greens, beet julienned or grated and greens julienned
    • 1 large apple, cored and diced
    • 2 medium carrots, grated
    • 1/2 cup cilantro, roughly chopped
    • 1/2 cup organic raisins or golden raisins
    • a few tablespoons hemp hearts or sesame seeds, to serve 
    • organic tofu, cubed (optional)

    Ginger Lime Dressing
    • 3 - 4 tablespoons lime juice (lemon is fine too)
    • 1 inch knob of ginger, finely grated (i used a microplane)
    • 1/8 teaspoon ground cardamom, or to taste
    • 1/2 - 1 teaspoon pure maple syrup or coconut nectar, optional

    In a small bowl, mix together the dressing ingredients. Set aside to let the flavors mellow and come together. Check dressing for flavor before serving. 

    Prepare your salad ingredients and use 3 to 4 large beet leaves (about 1 cup lightly packed) and place all ingredients in a large bowl. Pour dressing over the salad ingredients, toss to coat. (You can also make this ahead of time and keep refrigerated until ready to serve.)

    Serve topped with a good sprinkle of hemp hearts or sesame seeds, and some extra raisins if you like as they add a nice sweetness.  

    Serves 2 large portions or 4 -6 small portions. 

    Notes:

    If you don't find beets with the greens, use spinach, dandelion greens or lacinato kale instead. Use golden beets in place of red beets to keep the color mess to a minimum. 

    The cardamom can be optional. If you don't use it often, there is no need to buy this just for the salad dressing although it is delicious and you may find other uses for it either here soon, or elsewhere. If you don't have it, you will still have a great dressing.

    This salad tastes better the longer your able to let it set and let the flavors mingle. This is a great salad to make in advance and store in the fridge until ready to serve.

    Detox away! 

    Enjoy...


    Mirin & Maple Tempeh Stir Fry

    Mirin & Maple Tempeh Stir Fry

     This is a wonderfully sweet and nutty flavored dish. The tempeh and buckwheat noodles lend to nuttiness and the marinade that was inspired by Nigel Slater gives to the sweetness. I happen upon Nigel's website and found this recipe for a marinade that he uses and thought it would make for a nice tempeh stir fry. I added the tamari and red pepper flakes for my own taste and just pretty much used the ratio of mirin to maple syrup from his recipe as a guide. You could possibly even add some grated ginger or garlic too. I was really happy with the outcome and the way everything came together in taste, color and textures. It's a simple dish that delivers in flavor, protein and other healthy nutrients that we can all use more of!

    Mirin & Maple Tempeh Stir Fry

    Now let's talks about mirin for a moment. I've had my eye on recipes containing mirin but was so turned off by the product because I didn't research online first to find out more about it. Instead, while at the grocery store I made my assumption from the first bottle I picked up and happily put back because it contained corn syrup and other ingredients I prefer to stay away from. Months later I finally find there is a big difference in the way mirin is prepared. The real deal, like the one pictured above, is a traditionally brewed rice cooking wine that doesn't contain added sugar or synthetic enzymes. It’s also known as Hon-Mirin. Very commercial brands use corn syrup and preservatives and are known as Aji-Mirin. They may have their reasons for using corn syrup and preservatives but I will choose the ones that are free of these ingredients. Be sure to read the labels and find, Hon-Mirin, as it will give you the best flavor and add luster to your dishes. Here's a little article from the New York Times about mirin for further reading: Searching For The Real Mirin - Catching an ElusiveJapanese Flavor

    If you can't find this type of mirin in the store, you can order it onlineor you can substitute with dry sherry or sweet marsala if you must. Or you can dissolve a small amount of pure cane sugar in a little white wine or sherry, about 1/4 teaspoon of sugar to 1/4 cup wine. These are clean substitutes for hon-mirin.

    Mirin & Maple Tempeh Stir FryMirin & Maple Tempeh Stir Fry

    We're going to start with the tempeh first. Tempeh is one of those soy products that is good for you and can be eaten in moderation, a couple times a week. Tempeh is fermented and holds all kinds of healthy attributes along with 13 - 16 grams of protein per serving. I like to steam my tempeh before doing anything to it. Because I don't have a double broiler or bamboo steamer, I've made my own steamer by using a colander and medium size pot with lid. It works perfectly well. If you choose this route, you can reuse the pot and colander for cooking your buckwheat noodles. Steaming your tempeh will soften it nicely and the marinade will absorb a bit better. Steam for 10 minutes or so.

    If you can't find tempeh in your usual grocery store, ask the store manager to consider carrying it. This is how change begins on a small scale and it never hurts to ask as they are there for you!

    Mirin & Maple Tempeh Stir FryMirin & Maple Tempeh Stir Fry

    After steaming your tempeh, mix your marinade in a large bowl and add the tempeh, let set for 1 - 4 hours at room temp. Reserve the marinade.

    Mirin & Maple Tempeh Stir Fry

    Bake your tempeh...
    I know what your thinking this is a stir fry! Well, you'll just have to trust me. :) 

    Mirin & Maple Tempeh Stir FryMirin & Maple Tempeh Stir Fry

    Dice your veggies of choice, these just happen to be on hand from my last recipe. Feel free to use whatever vegetables you like, have handy or need to be used up. Other options are bell peppers, broccoli, sugar peas, zucchini...these are what come to mind in a pinch but use whatever your preference is or sounds good. They will be stir fried, or sauteed, until al dente or your choice of firmness and then mixed with the soba noodles if using those. (My favorite wok is the el cheapo carbon steel wok for around $20! It heats up quickly and cools down quickly so your food cooks just right and stops cooking when you remove it from the heat. Just be sure to season your wok well. Here's a great article on the subject: When Cheaper is Better)

    Mirin & Maple Tempeh Stir FP7096187ry

    Mirin & Maple Tempeh Stir Fry 

    Ingredients
    • 8 oz package tempeh (I used a five grain tempeh)
    • 1 tablespoon sesame oil, coconut oil or olive oil
    • 1/3 red cabbage, thinly sliced
    • 2 -3 large carrots, peeled and thinly sliced diagonally
    • 2 -3 scallions, thinly sliced
    • sesame seeds, garnish
    • cilantro, garnish, optional 
    • 8 oz. package soba noodles, or rice would fine too (I ♥ these 100% buckwheat noodles)

    Marinade
    • 1/3 cup mirin
    • 3 tablespoons pure maple syrup
    • 3 tablespoons warm water
    • 2 tablespoons tamari, bragg's aminos or soy sauce 
    • 1 teaspoon red pepper flakes, or to taste

    First start by steaming the tempeh. Use a double broiler, bamboo steamer or do like I did above by using a pot and colander. Bring water to a boil, cut tempeh into sticks about 1/4 inch or so, place in choice of steamer, steam for 10 minutes. This will soften and swell your tempeh a bit helping it to absorb more marinade.  

    In a large bowl, mix together the marinade, add the tempeh and let set for 1 to 4 hours at room temp, turning every so often. Reserve marinade for later.

    When ready, turn oven on to 400 degrees. Bake tempeh on a cookie sheet or in a baking dish for 25 minutes, turning once in between. 

    Cook your soba noodles according to package. 100% buckwheat noodles take 8 minutes to cook while the wheat and buckwheat soba noodles only take 4 minutes to cook. Drain and rinse well under cool water. Set aside. If using rice, cook about 1 dry cup and set aside.

    In a wok or large saute pan, heat oil and add your cabbage and carrots, cook for about 3 minutes, add scallions, a spoonful of marinade and cook another 2 minutes or until desired firmness (I like mine al dente). Add in the soba noodles and cook for another minute or so until soba noodles are gently warmed. 

    To serve, place noodles and veggies in serving bowl and top with a few strips of tempeh. Add a few large spoonful's of marinade over the noodle/veggie mixture and tempeh, top with sesame seeds and a few extra scallions. If using rice, serve rice in serving bowl and top with veggies and tempeh, drizzle with marinade, sesame seeds and scallions. 

    Serves three but more likely two!

    Enjoy!