.

Showing posts with label apples. Show all posts

APPLE, FENNEL + SAGE LENTIL LOAF

APPLE, FENNEL + SAGE LENTIL LOAF

It's been two years since my last lentil loaf recipe. I thought this time I'd create something with a whole new flavor profile. I love this flavor combination and think it's a perfect fall/winter loaf or one you can rotate for variation all year long. All the flavors come through making every bite just as good as the last! A little sweetness from the apple, it's not overpowering at all. The fennel and sage are a perfect pairing of herbs. The walnuts give a little extra texture. I've kept the glaze super simple with just organic ketchup, apple cider vinegar and pure maple syrup. The glaze is tangy which is a nice contrast to the other flavors. Simple worked great here (at least I think so). I'd love to know what you think! I've adapted this new lentil loaf from my other one, The Ultimate Vegetable Lentil Loaf, which was a big hit, it's a great all-around loaf and I hope you all find this new one just as delicious!

A note on the fennel seeds. In case you're wondering what to do with your fennel seeds, I've used them in a few recipes like this Cannellini Bean & Fennel Flatbread, Mushroom and Buckwheat Soup and the Rustic Cabbage, Potato & White Bean Soup. If they are new to your pantry, you can purchase them knowing you can use them in other recipes. I love the flavor they give in each of these recipes!
APPLE FENNEL SAGE LENTIL LOAFAPPLE, FENNEL + SAGE LENTIL LOAF

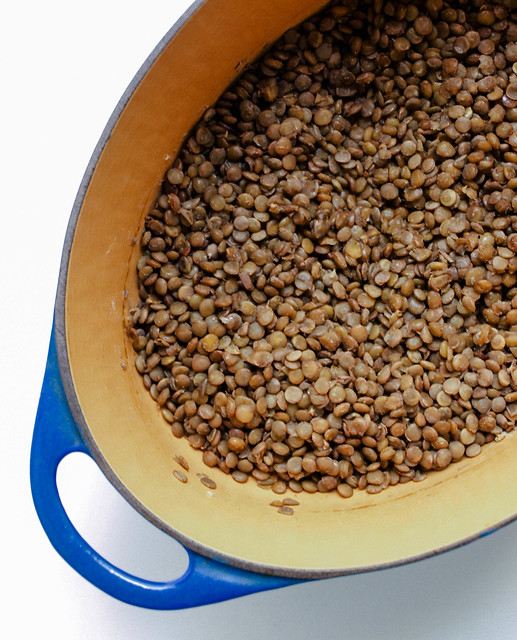
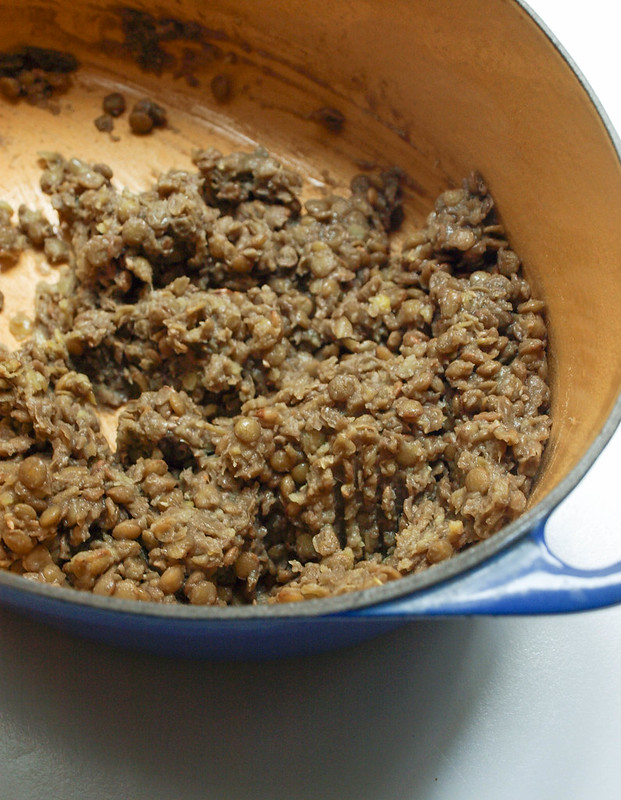
Cook your lentils, let set for about 15 minutes, most of the liquid should be absorbed. Mash or puree about 3/4 of the mixture. You should be able to easily mash the lentils with a back of a fork.
APPLE, FENNEL + SAGE LENTIL LOAFAPPLE, FENNEL + SAGE LENTIL LOAF

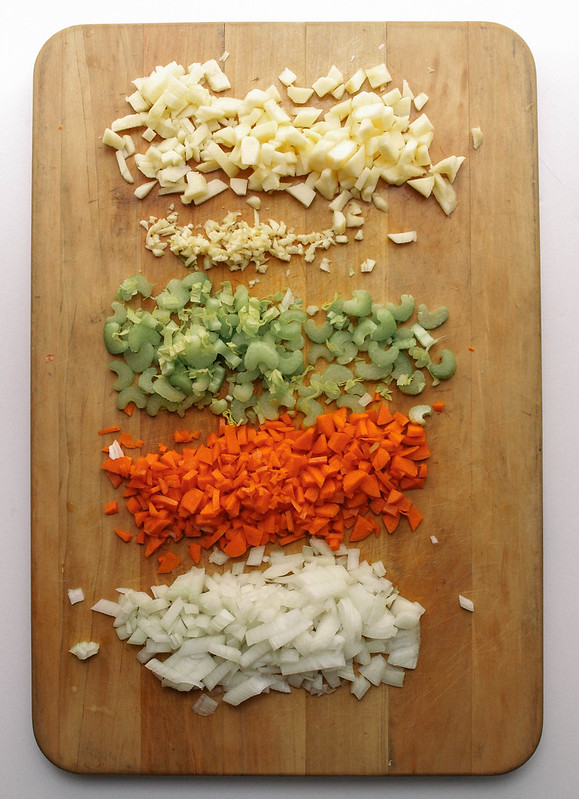
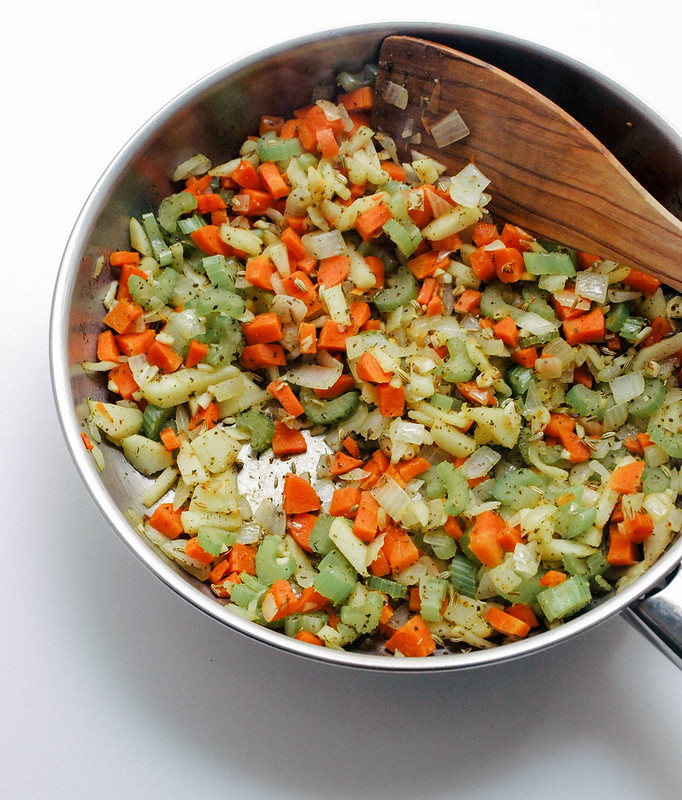
While you're working on the lentils, prepare your vegetables and apple and saute with herbs.

APPLE, FENNEL + SAGE LENTIL LOAFAPPLE FENNEL SAGE LENTIL LOAF

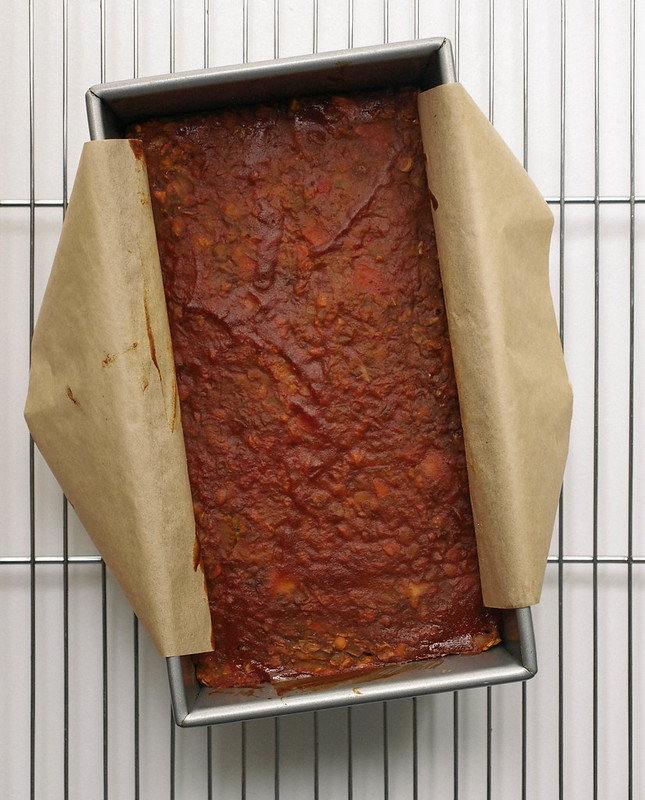
Once everything is mixed, pack mixture into a 9 x 5 loaf pan. Spread glaze over top and bake.
APPLE, FENNEL + SAGE LENTIL LOAF

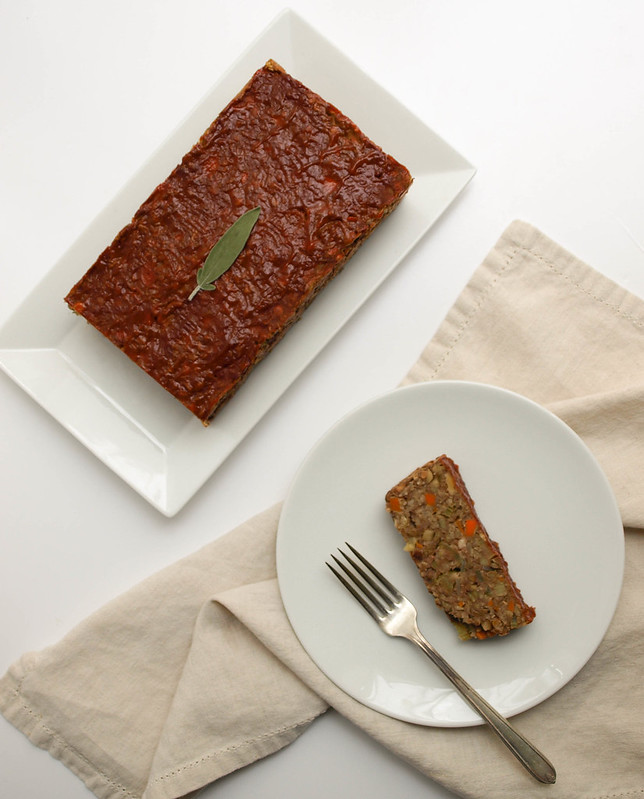
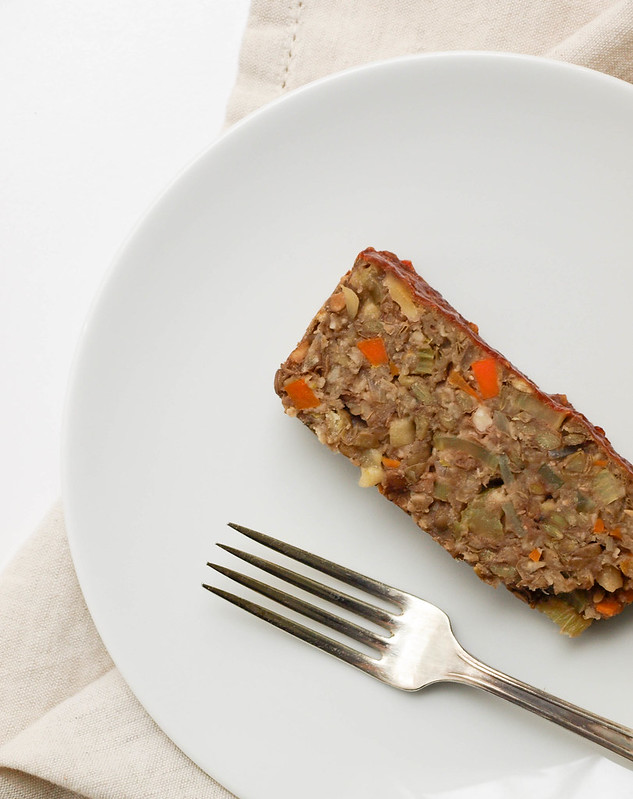
Remove from oven and let cool. You may like to add a fresh layer of glaze over top like I have in the first picture.
APPLE, FENNEL + SAGE LENTIL LOAF

APPLE, FENNEL + SAGE LENTIL LOAF

Ingredients
  • 1 cup green/brown lentils, rinsed
  • 2 1/4 cups vegetable broth or water
  • 3 garlic cloves, minced
  • 1 small onion, diced (about 1 1/4 cup)
  • 2 celery stalks, diced (about 1 cup)
  • 2 carrots, diced or grated (about 1 cup)
  • 1 small apple, cored, peeled and diced or grated (use firm crisp like fuji or gala) (about 1 cup)
  • 1 1/2 teaspoons fennel seeds, use whole or lightly crushed
  • 1 1/2 teaspoons sage or 2 tablespoons fresh minced
  • 3/4 cup oats, quick or rolled (I used quick) or bread crumbs
  • 1/4 cup flour (splet, almond, oat, GF all-purpose, etc.)
  • 1/2 - 3/4 cup unsweetened organic apple sauce
  • 3/4 cup finely chopped walnuts, optional
  • salt & pepper to taste (I used white pepper)
Glaze
  • 6 tablespoons organic ketchup
  • 3 tablespoons apple cider vinegar
  • 1 tablespoon pure maple syrup

Cook lentils: In a dutch oven or large pot, add vegetable broth and lentils, bring to a boil, cover, reduce heat to low and simmer for 40 - 45 minutes, most to all liquid should be absorbed. Lentils should be overcooked and tender. Set aside to cool, uncovered, for 15 minutes. Mash lentils with the back of a spoon or fork, or roughly puree using an immersion blender or food processor, about 2/3 - 3/4 of the lentil mixture.

Preheat oven to 350 degrees F.

Toast walnuts: Spread walnuts on a small rimmed baking pan, place in oven and toast until they are fragrant, about 10 -15 minutes. Set aside to cool..

Prepare vegetables and apple: Heat oil in a medium size pan over medium heat, add onion, celery and carrot, saute for about 5 minutes. Add apple, fennel, sage salt & pepper, heat for another 3 - 4 minutes.

Combine everything: Add the sauteed mixture with the lentils and mix. Add flour, oats, walnuts and 1/2 cup apple sauce, mix well to combine. If mixture seems to dry, add a little more apple sauce, mix again. Taste for seasoning adding extra herbs, salt and pepper as needed. 

Line a 9 x 5 loaf pan with parchment paper, (this will make for easy removal later), add mixture and press down gently but firmly filling in along the edges as well. 

Make glaze: In small bowl, mix together the glaze and spread over top lentil loaf as evenly as you can. Here you can even add a fresh sage leaf in the center of the loaf, it won't burn, it may roll a bit on the edges, and will add a nice decoration (the sage leaf I have shown was fresh). 

Bake: Place loaf in oven, on middle rack, and bake for 45 - 50 minutes. Remove from oven, let cool 10 minutes, remove from pan using the edges of the parchment paper. You may like to mix a bit more sauce and spread over top. Place loaf on serving dish, cut and serve individual slices.

Serving suggestions: Serve with roasted or mashed potatoes, or potato & cauliflower mash, a side of green beans or any combo of roasted brussels sprouts, carrots, butternut squash and beets. A simple fresh green salad with a light vinaigrette is also a great side! Left overs make for great sandwiches!

Makes 8 slices. 

Notes:

If you don't use a good vegetable broth while cooking the lentils, I recommend add in 1/2 teaspoon of onion and garlic powder, along with a big pinch of salt. The lentils are the base of the recipe and should have good flavor.

If mixture is too wet, add a tad more flour or oats/bread crumbs. If mixture is too dry, add a tad more apple sauce.

I've used both oats and bread crumbs. Both were great. I didn't notice that the oat flavor came through at all (or maybe I'm just adapted to them).

I don't recommend reheating the entire loaf at once. It will most likely become too dry, as the heat will take to long to reach the center. I recommend cutting slices and reheating, this way. If you need, you can make your lentil loaf the day before and store uncooked until ready to heat, bring to room temperature if possible, and heat according to instructions above.

If you love fennel and sage, by all means add an extra 1/2 teaspoon of each! Or an extra tablespoon of fresh minced sage.
RUSTIC APPLE & PEAR CRISP

Rustic Apple & Pear Crisp

This simple rustic apple & pear crisp comes from The Physicians Committee of Responsible Medicine. I subscribe to their emails and receive their recipe of the week and almost daily informative articles. I love what they stand for in the way of health and animals rights. They are against the use of animals in medical and scientific experimentation and have fought hard to eliminate the use of animals in schools, universities and labs across America. They embrace a plant based diet and promote it as the preferred diet to prevent and reverse many health issues. They've made great strides for both humans and animals. By promoting new ways of thinking and changing old outdated systems their work is a most positive breath of fresh air! I thank PCRM for everything they do as their work is extremely important. To find out more about their inspiring work please take a moment to watch this short video (be warned it may bring a few tears): Opening the Doors to Compassion

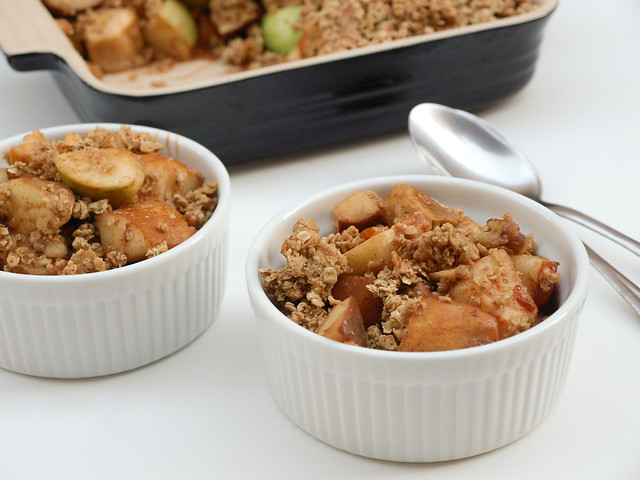
I'm happy to share one of their recipes here and have a few others in mind from their collection as well. This recipe was actually shared back in September, I bookmarked it and decided to finally give it a try. It was delicious! I've always loved apple crisps, or crumbles as they are referred to in the UK and Australia. They're just one of those simple pleasures that I've never tired of. Something about the soft apples, cinnamon and crispy oatmeal topping that I just love. And with the abundance of apples and pears this time of year it seems the perfect time to enjoy these fall fruits together. This was even a hit with my daughter who said she'd like to have this around the house more often. I changed the recipe slightly, you can find the original here. This would be good with a scoop of vanilla non-dairy ice cream and extra cinnamon on top. I didn't add any here but feel free to add a scoop to your bowl. Alone this crisp is healthy as can be. Not only does it make a great dessert but it can double as a nice breakfast idea as well. I can literally sit and eat this all day long!

Rustic Apple & Pear Crisp

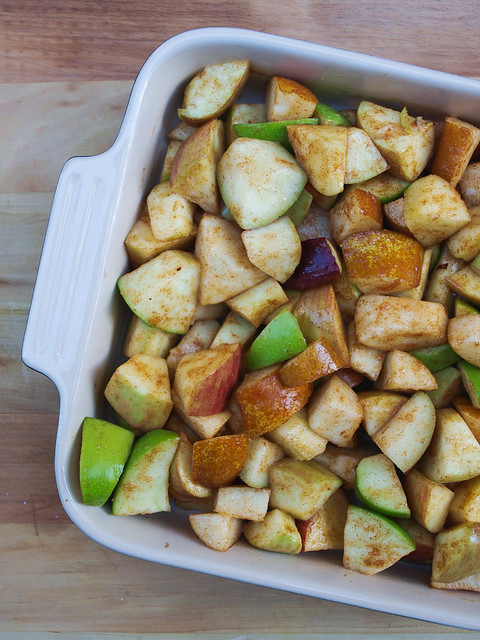
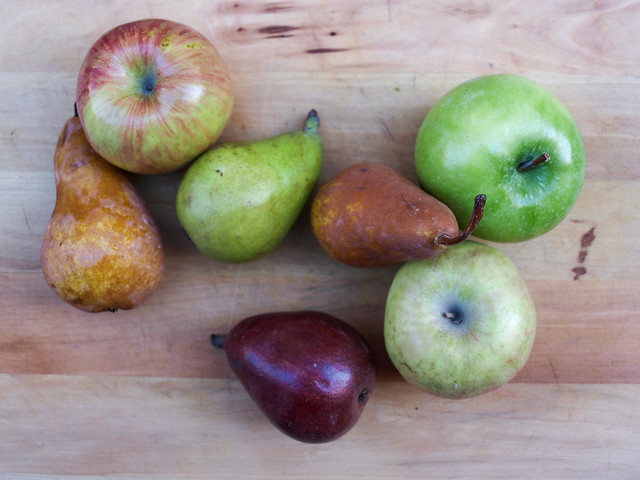
Pick your favorite apples and pears. I love Fuji apples for their sweetness and crispness, and I also added a granny smith for tartness and variation. Pears can be a variety or simply a few of the same. 

Rustic Apple & Pear Crisp

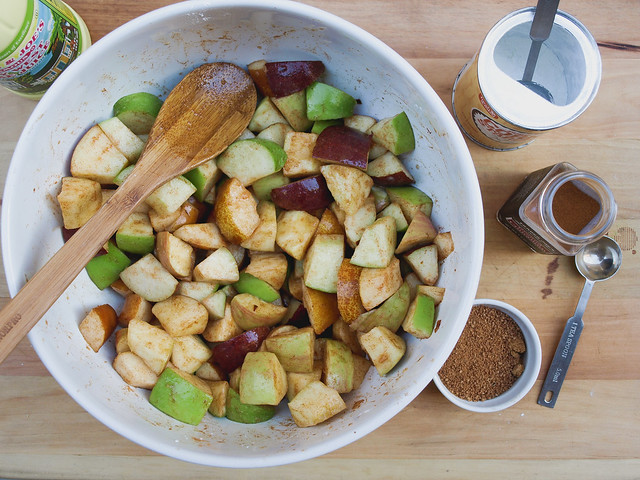
Wash, core and dice your apples. I prefer to leave the skin on but feel free to peel your apples. Mix your apples and pears with lemon or lime juice, cornstarch, sugar and cinnamon, mix well. I didn't have any fresh lemons on hand and used a bottled lime juice I had available. If you find yourself in this situation, the lime juice will do just fine. You can also mix this right in your baking dish making for one less dish to wash.

Rustic Apple & Pear CrispRustic Apple & Pear Crisp

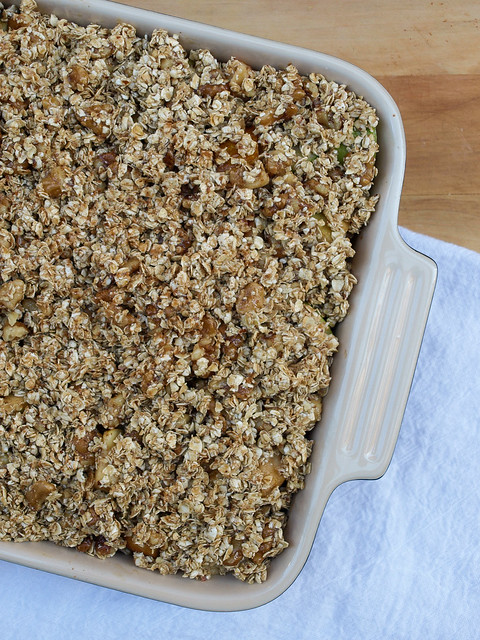
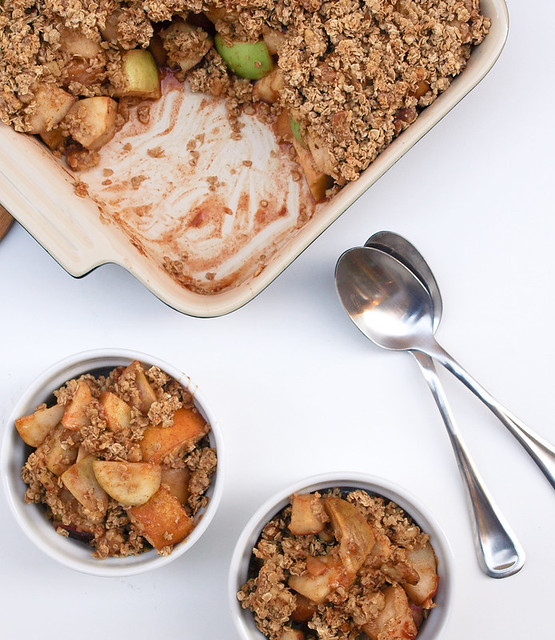
Layer your apples, top with granola mixture and bake...

Rustic Apple & Pear Crisp

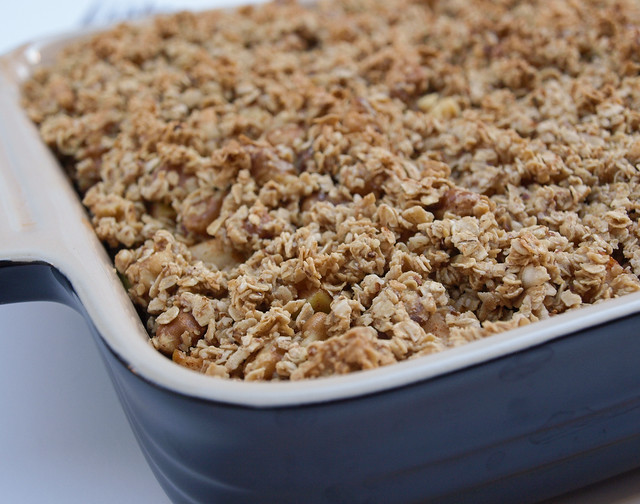
Once done, let cool and share the love! 

Rustic Apple & Pear Crisp

RUSTIC APPLE & PEAR CRISP

Ingredients 
  • 3 medium apples, cored and chopped (peel if you prefer)
  • 3 medium pears, cored and chopped (peel if you prefer)
  • 3 tablespoons fresh lemon juice
  • 1 tablespoon coconut or organic pure cane sugar
  • 1 heaping teaspoon cinnamon
Topping
  • 1 3/4 cup quick or regular oats (I used quick oats)
  • 1/4 cup almond meal, optional
  • 1 cup finely chopped walnuts, optional
  • 1/2 cup pure maple syrup
  • 3 - 4 tablespoons coconut oil (at room temp)
  • 1 teaspoon vanilla extract
  • 1/4 teaspoon mineral salt
  • cinnamon, to garnish 

Preheat oven to 350 degrees F.

Wash apples well. Slice, core and dice apples and pears. In a large bowl (or right in your baking dish), combine apples, pears, lemon juice, sugar and cinnamon. Mix well and layer into a 9 x 9 baking dish. 

In a medium size bowl, combine oats, almond meal, walnuts, maple syrup, coconut oil, vanilla and salt, mix well. Spread oat mixture evenly over the apples and sprinkle with a little cinnamon. 

Bake for 35 - 40 minutes, or until apples and pears are fork tender. Let cool 5 - 10 minutes before serving. 

Serves 6 generously. 

Notes: 

Make gluten free by using gluten free oats. 

Feel free to use almonds, pecans or other nuts and seeds of choice in place of the walnuts.  

Peel your apples if you prefer. I leave the skin on for the fiber and less work. Plus I love the rustic look and different colors the skin brings to the dish. If serving for everyday I won't bother to peel the apples but if serving for company I may consider peeling them. You may also like to dice your apples a little smaller than shown or cut them into thin to medium slices.

Make this oil free and omit the coconut oil. Your crisp top will be a little bit dryer but still good!

Add fresh cranberries for a splash of color. This is especially nice around the fall & winter holiday's.

Change the recipe to just be an apple crisp if you like, or vice versa. 

From my heart to yours...Enjoy!


KIMCHI

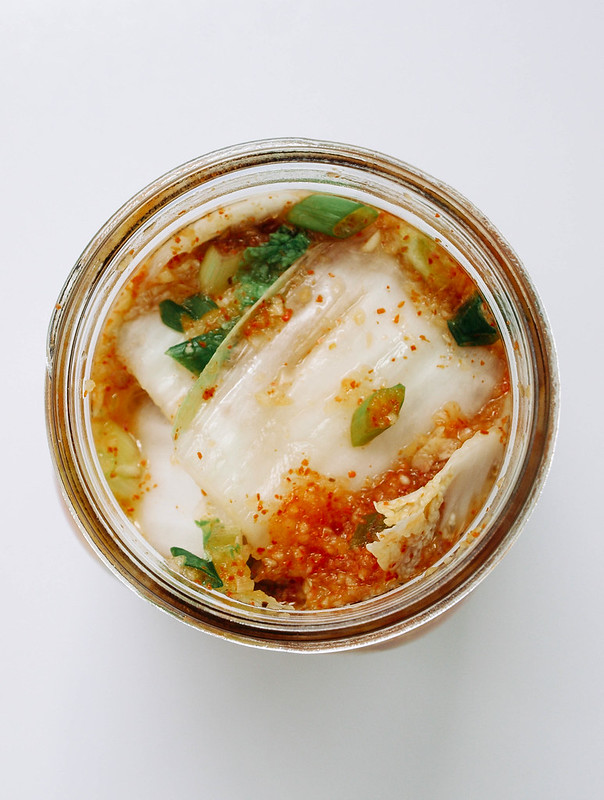
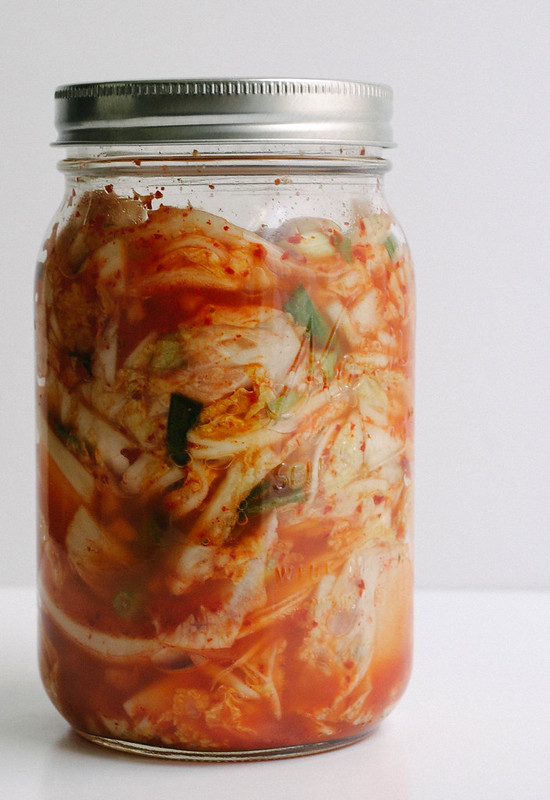
KIMCHI...Freshly packed

Welcome to the world of Kimchi! This tangy, spicy dish is a staple in the Korean culture and is typically eaten with every meal. In fact, kimchi is their national dish. Once you become accustomed to its unique characteristics, you may find yourself hooked! Kimchi is a mixture of vegetables and spices that go through a fermentation process, in our case we'll be using cabbage as our base. Fermenting foods have long been known for their health benefits. Foods like kimchi, kombucha, sauerkraut, pickles, miso and tempeh are probiotic powerhouses. The fermenting creates good bacteria which work directly in the gut to balance and regulate a variety of bodily functions. It can help with IBS, boost your immunity, aid in weight loss and even promote better skin. With kimchi being so simple to make, it's easy to add this beneficial mixture to your weekly meal plans. 

My first  experience with kimchi was with a jar I picked up at a local grocery store labeled Pickled Planet. I fell in love with the spicy flavor. I also have an affinity for all the ingredients listed on the jar and set out to make my own using the list as my guide. Basically it's cabbage, apple, green onion, red pepper, salt, garlic & ginger. After researching I found how kimchi recipes vary. I'll be playing around with different versions and sharing my experience here as I do. It's very easy to make and just takes patience to get through the first day or two. In the last couple weeks, I've tried 2 different spice blends, both delicious and noted below. I've also used different style cabbages, all great. I've even added shredded carrots but will save that for another recipe. Kimchi is a new addiction for me. Its spicy, pungent flavor and versatility keeps me coming back for more. If you've never tried kimchi, I hope this will inspire you to get in the kitchen and give it a try, or pick up a ready-made vegan version and enjoy asap! 

KIMCHIKIMCHIKIMCHI

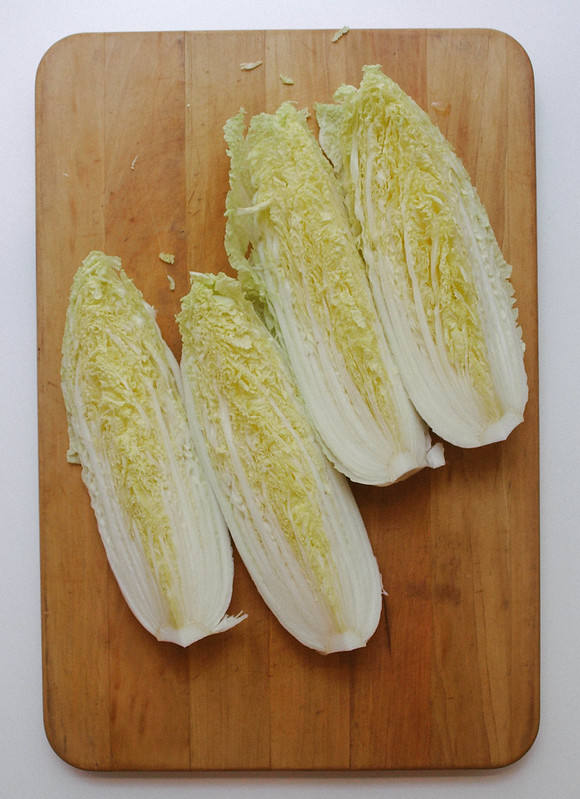
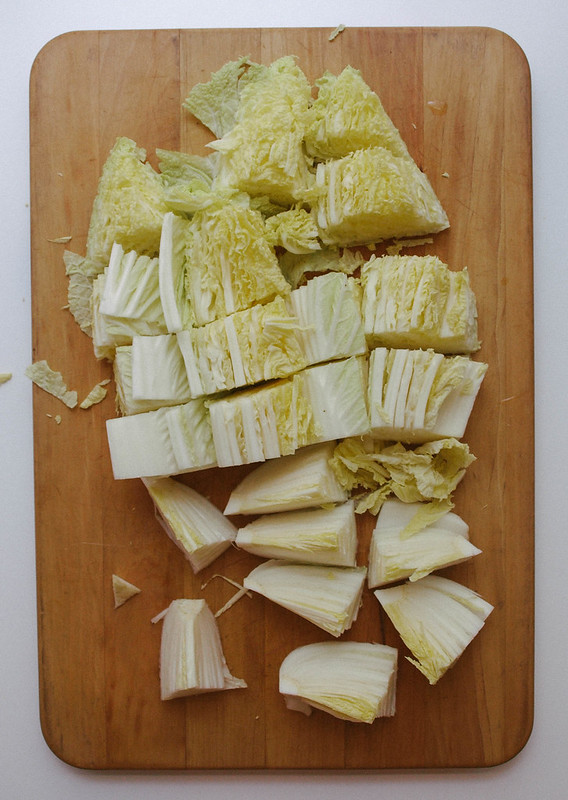
First, quarter your cabbage and slice laterally into 2" chunks. Cabbage will shrink a bit more during the fermentation process so no need to chop it too small. But you may consider slicing the pieces with thick stalks (mainly the pieces towards the bottom), slicing them in half will do fine. Here I used Napa cabbage as it is the most traditionally used cabbage but you can use green or savoy with excellent results, you may even find you like one of these better.

KIMCHIKIMCHIKIMCHIKIMCHI

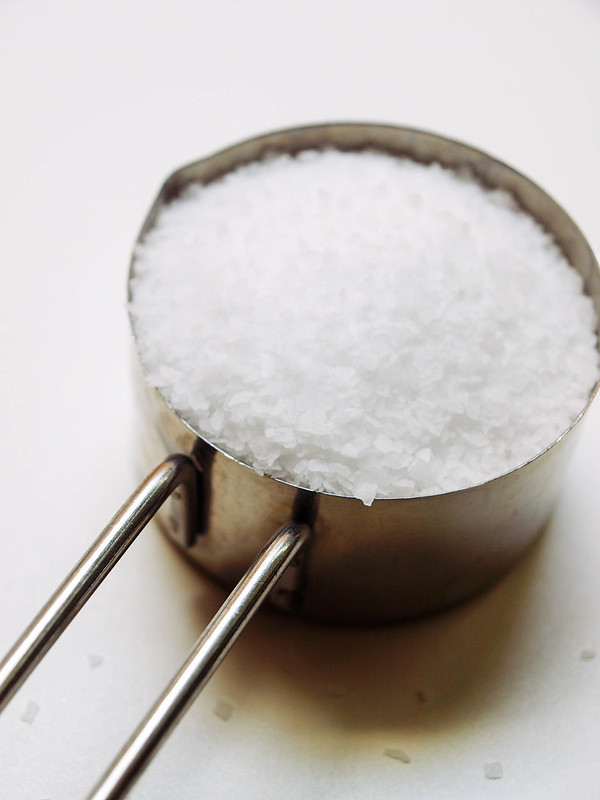
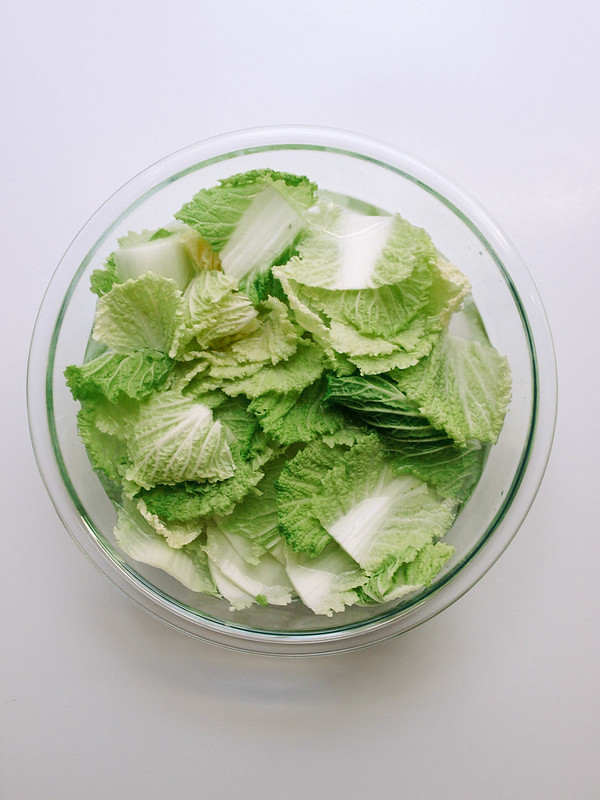
Next is the soaking of the cabbage in salt water, this will help draw moisture from the plant cells causing the leaves to wilt. Soaking the cabbage in salt water will move the preperation along a lot faster than than other methods used, it is my preferred method. For your salt, stick with using kosher, pickling or other course salts like sea or mineral salts that do not contain iodine. Iodine, with its antimicrobial properties, may interfere with proper fermentation. Place cabbage in a salted water bath, cover with dish and place weighted object on top to submerge the cabbage, let soak for at least 2 hours, up to 12 if you like but I find 2 hours is plenty.

KIMCHIKIMCHI

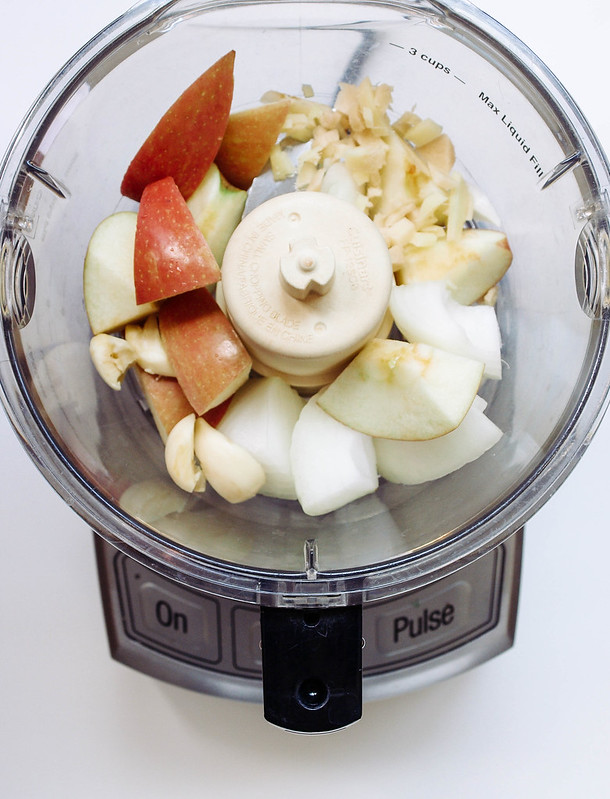
Puree the apple, onion, ginger and garlic making a sweet and zesty mixture. The sugar from the apple will help in the fermentation while adding a hint of sweetness. You can also use a pear. Some recipes call for a teaspoon or two of sugar in place of the apple (I will save that method for another kimchi recipe). I like the thought of using an apple but if you're in a pinch without an apple in sight, use 2 teaspoons of organic pure cane sugar, coconut sugar or sugar in the raw....just the puriest sugar you can find. You may like to add a bit of water to the mix as well, about 2 - 3 tablespoons. 

KIMCHI

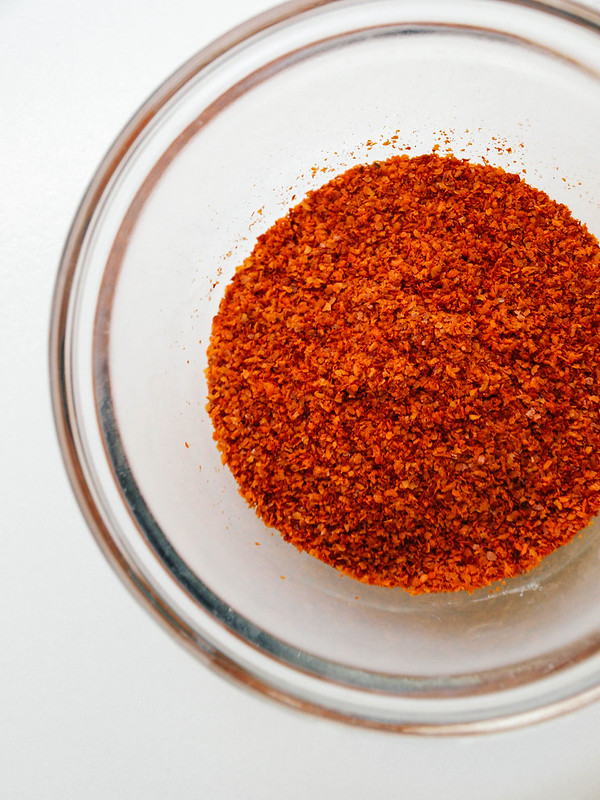
For the spice, you'll want to source out Korean red pepper powder or flakes known as gochugaru. You can find it at Asian grocery stores or online. I just tried this one from Mother In Laws Kimchi Korean red pepper flakes and thought it had an nice flavor. The peppers are not overly spicy, but I do find that the spiciness will intensify as the kimchi ages. I've also replaced the korean red pepper and used a mix of cayenne pepper and sweet Hungarian paprika, using 1 tablespoon each, and it was delicious as well.

KIMCHIKIMCHIKIMCHI

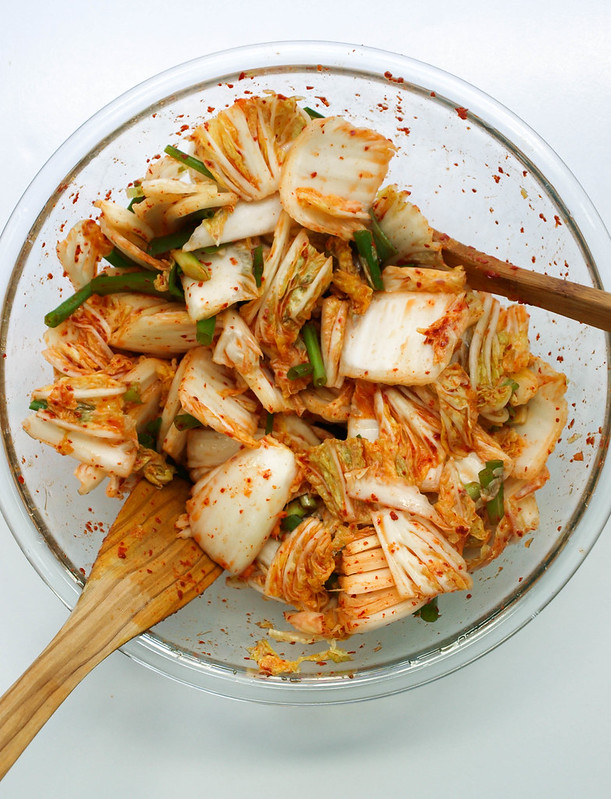
Make your spice mixtures and combine with cabbage and green onions, mix well to coat. Some use their hands (gloves recommended if you do), I used wooden spoons. Pack your mixture into glass jars or containers with a lid, leaving a little room at the top and cover. Check periodically for the next 24 - 36 hours. Move to refrigerator, kimchi will keep for at least a month, maybe 2. 

KIMCHIKimchi

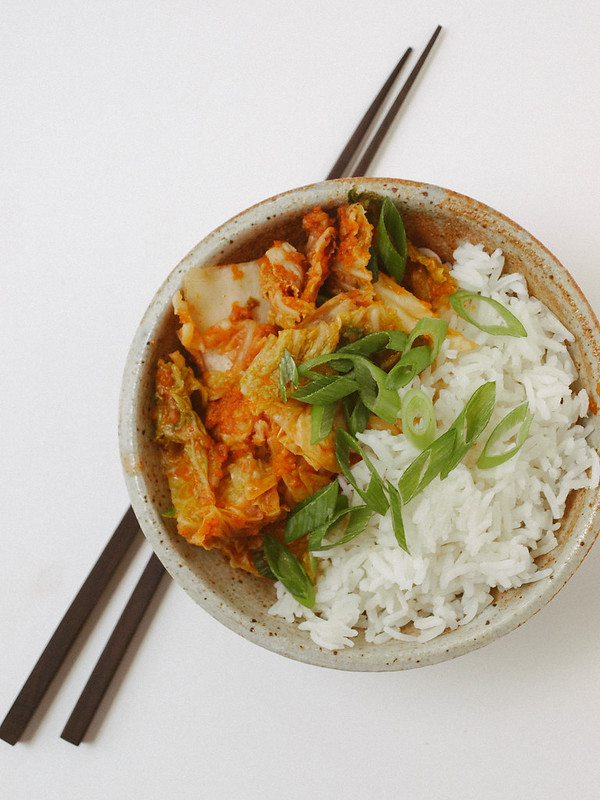
Kimchi can be served a number of ways. It's great as a simple dish with rice, a little cubed tofu would balance the meal out nicely. I have a Kimchi Tofu Scramble Taco recipe coming up next which tastes amazing! You can also be inspired by these tasty recipes: Kimchi Steamed Buns, Brussels Sprout Kimchi Tacos, Kimchi Fried Rice and Kimchi Tofu Summer Rolls. I have a few other ideas in mind as well so stay tuned...

KIMCHI

KIMCHI

Ingredients
  • 1 medium Napa cabbage, about 2 lbs (savoy, green or any combo works too)
  • 1/4 cup kosher, sea salt or other course salt 
  • 6  cups water
  • 3/4 sweet apple (I used fuji), chopped
  • 1/2 small white onion, chopped
  • 1 1/2 inch ginger, chopped
  • 1 - 2 cloves garlic
  • 3 tablespoons Korean chili powder (gochugaru) or 1 tablespoon each cayenne & Hungarian paprika
  • 3 - 4 scallions (green onions), sliced 1 inch

Preparing Cabbage: Quarter cabbage and chop laterally into about 2 inch pieces. Place cabbage in a an extra large bowl or pot. Combine salt with 2 cups of luke warm water, stir to dissolve salt. Pour salt water over the cabbage and add remaining 4 cups, stir to mix. If you can, place a plate or circular baking dish of sorts on top to submerge the cabbage (I used a pie dish), place something with a good amount of weight on top to hold down if necessary (it's not completely necessary but will help to evenly wilt the cabbage). Give cabbage a good mix every now and then. Let set for 2 hours, up to 12 if you like. I found that 2 - 4 hours was enough and didn't see much change between the two times.

Make your seasonings: While cabbage is soaking, combine apple, onion, ginger and garlic in food processor/blender and process until fairly smooth.

In a small bowl, mix the chili pepper with a small amount of water to make a wet paste. You can just as easily blend it with the apple/onion mixture adding a couple tablespoons of water as well.

Mix everything together: Once cabbage is ready, drain water, reserving 1/2 cup, and rinse well. Place cabbage back in large bowl, combine with the scallions, apple/onion mixture and chili paste. Mix well to coat all pieces. Either use your hands (with gloves on pref to protect from the chili pepper) or simply use wooden spoons to toss everything.

Packing: Place the kimchi in glass jars or containers with lid, pack down the best you can to close air pockets and leave about an inch at the top for air and gases. Top with remaining juices, add reserved brine if needed to cover vegetables.

Fermenting: Let kimchi set at room temp (or in a cool place like a pantry or closet if weather is extremely warm) for 24 - 36 hours. After 24 hours, open kimchi and pack the mixture down with a spoon (the cabbage will have likely shrunk and you'll have more liquids). You may notice it bubbling, this is perfectly normal as the kimchi is fermenting. As your kimchi ferments the flavors will develop, taste every 24 hours and place kimchi in the refrigerator once you're happy with the taste and to slow fermentation, usually after 48 - 36 hours. It should be tangy, spicy and slightly sweet. After moving to the fridge, it's best used within a month, maybe two.

Makes about 3 - 4 cups.

Notes:

Practice makes perfect with kimchi. You may find you like it more or less spicy. After a few tries you'll find the perfect mix to suit your taste. Also, how fermented you like your kimchi will take practice as well. The weather will also play a role in how fast/slow your mixture will ferment. Higher temperatures will progress fermentation while cooler will slow it down.

If you're in a pinch without an apple in sight, use 2 teaspoons of organic pure cane sugar, coconut sugar or sugar in the raw....just the puriest sugar you can find. You may like to add a bit of water to the mix as well, about 2 - 3 tablespoons. 

You can also enjoy kimchi fresh right after you mix it and store it straight in the fridge. You may like to experiment by putting half the recipe in the fridge and the other half in the pantry to ferment & sour to see which flavor is your favorite.

Optional ingredients for color and variation: carrots and/or daikon radish (grated or julienned), about a 1/2 cup of each. If using these, add to cabbage when mixing scallions and wet mixtures together.

If using savoy or green cabbage, quarter cabbage, remove core and roughly slice.

If you don't have glass jars, plastic containers with lids will work just as well. If you have too much room, more than and inch, place plastic wrap over top but sinking it close to the surface of the kimchi and cover with lid.


I'd love to see your noms...
#thesimpleveganista


APPLE HARVEST QUINOA SALAD + SWEET TAHINI DRESSING

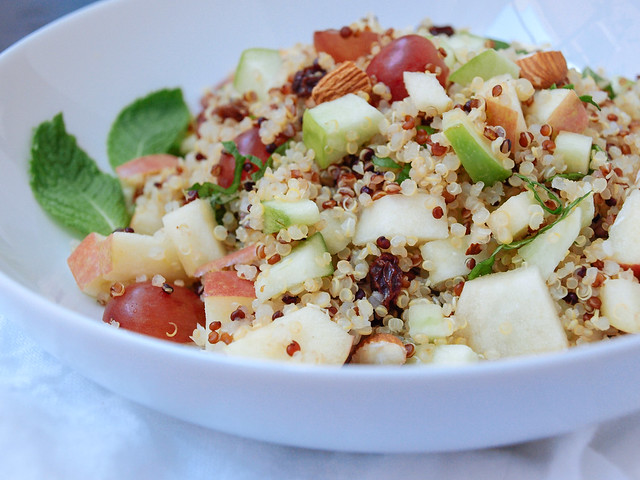
Apple Harvest Quinoa Salad + Sweet Tahini Dressing

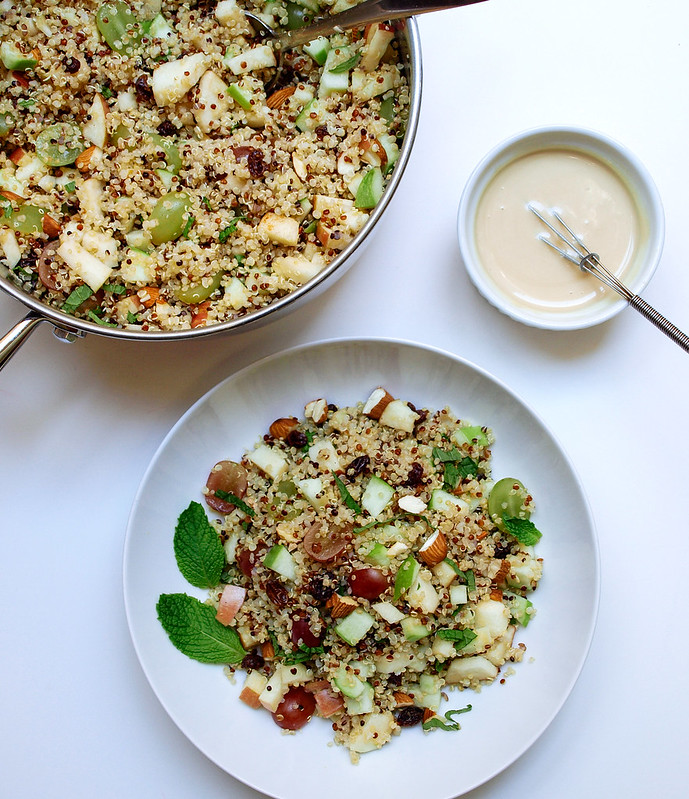
A little sweet, a little tart and a then a little more sweet...this quinoa salad is a wonderful mix of flavors and sensations. 

Apple Harvest

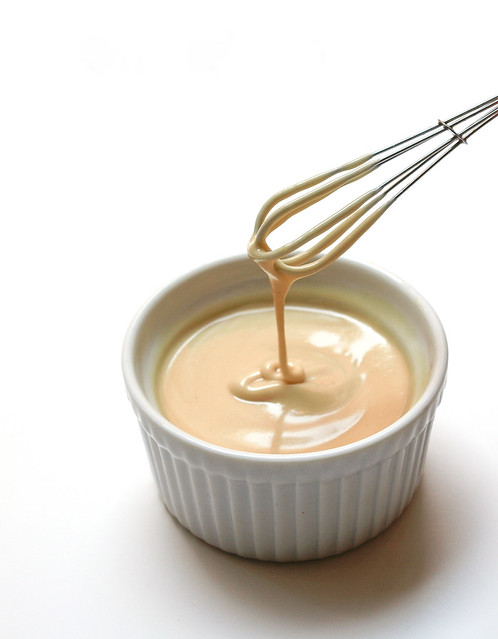
And then if it couldn't get any better, in comes the sweet tahini dressing...

Sweet Tahini Dressing

Without the dressing this salad can stand alone, especially with a nice hint of the cinnamon. But let me tell you, a good drizzle of this dressing adds whole new layer of yum factor. This is my first time having this sweet tahini dressing and I was amazed at how good it tasted. It's a wonderful creamy sweet dressing that so easy to make. The sesame paste isn't bitter here at all and mixes very well with sweetness. It would make for a nice twist on the Waldorf Salad. Yes, more ways to use tahini! I am now officially addicted to this new find. I also found myself using it as a dip for sliced apples. So good...better than caramel with apples I think! It has a unique flavor that I cannot explain, it is something you must experience for yourself if you haven't already. 

As for the salad, you can make it in one pot and uses common ingredients so you can whip this up anytime. You can also add/subtract ingredients to suit what you have on hand or to suit your taste. I love versatility and this salad allows for that. I know you will be fond of this combination and hope you put it on your must try list. It's a nice fruit fall salad...and a keeper! 

Lot's of flavor, texture and simple deliciousness in every bite. And, it's 100% percent good for you!

Apple Harvest Quinoa Salad + Sweet Tahini Dressing

APPLE HARVEST QUINOA SALAD + SWEET TAHINI DRESSING

Ingredients
  • 1 cup quinoa (I used tri-color)
  • 1 3/4 cup water
  • 1 lemon, juice of
  • 2 large apples, cored and diced (1 green + 1 red pref.)
  • 1 1/2 cup grapes, sliced in half (I used red & green)
  • 1 stalk celery, thinly sliced
  • 1/4 cup raisins
  • handful chopped almonds
  • a few large mint leaves, julienned
  • 1/2 teaspoon cinnamon, or to taste

Sweet Tahini Dressing
  • 1/3 cup tahini
  • 1/4 cup water
  • 2 tablespoons pure maple syrup
  • 1/2 teaspoon cider vinegar, or to taste (optional)

Rinse your quinoa in a fine mesh sieve. In a medium size pot, add water and quinoa, bring to a boil. Cover, reduce heat and simmer for 15 minutes. Remove cover and let set 15 minutes, fluff with a fork.

While quinoa is cooking, prepare your dressing by combining ingredients in a small bowl. Mix well and set aside to let the flavors relax into each other. Add more water, 1 teaspoon at a time, to thin as needed. To thicken add more tahini. It should be thin enough to drizzle. Dressing serves four.

Core and dice apples, top with lemon juice and toss gently (I did this right on the cutting board to not dirty up another bowl). Prepare the remaining ingredients. Add the apples, grapes, celery, raisins, almonds, mint leaves and cinnamon to the quinoa, mix well. Taste for flavor adding more cinnamon if you like.

Spoon into serving dishes and serve with a good drizzle of the sweet tahini dressing. Serves 4 - 6

Notes: 

I used 1 granny smith and 1 fuji apple. Feel free to use your favorite apples.

This recipe is just a template...feel free to sub in unsweetened cranberries for the raisins (I use raisins because they contain no added sugars and I can find organic ones easily). Opt to leave the celery or grapes out using just apples (or use any combo you like). Add in a grated carrot for more color. Add more cinnamon if you like. Try using pecans instead of almonds. Try serving with some leafy greens. Have fun playing around with this making it your own.

Store at room temperature if eating within a few hours or store in the refrigerator until ready.

Enjoy!


Did you make any changes or have suggestions that others might find helpful? 

Please share your experience with us. :)

Apple, Beet & Fennel Salad with Balsamic Maple Dijon Vinaigrette


 This is one of those unusual dishes that turned out to be fantastic. It's quite colorful and almost surreal looking. This came about as I had an extra fennel left over from my Butternut Squash and Fennel Lasagna and a beet that I was going to use in another recipe but decided against it. A google search of fennel and beet brought me to a few various recipes, some of which included my favorite apple, the Fuji. I came up with my own version using this wonderful dressing. To be honest, I don't really care for beets much but trying to work them into my lifestyle. This salad is perfect! The beets and all the flavors come together beautifully making it a go to salad that can give me the excellent beet nutrition that I'm looking to add to my meal rotation every now and then.

You could also use other colored beets too. I experimented with a yellow one and it was just as colorful and tasty as well. The maple pecans really add a nice touch. I can't imagine not making this salad without all of these ingredients as they each add their own special touch but you can adjust to suit your flavor palate. I'm looking forward to more of this in the future using some of the other colored beets again as well...really delicious!


Apple, Beet & Fennel Salad w/ Balsamic Maple Dijon Vinaigrette

Ingredients

Salad
  • 1/2 cup pecans or walnuts, roughly chopped
  • 1/4 cup pure maple syrup
  • 1 red beet (uncooked), peeled and coarsely grated
  • 1 fennel bulb, sliced or diced...a few fronds reserved for garnish
  • 1 Fuji apple, or hard crisp apple or pear of choice, cored and diced
  • handful of mint leaves, roughly chopped
  • arugula or spinach, optional

Balsamic Maple Dijon Vinaigrette
  • 1 tablespoon extra virgin olive oil
  • 1 tablespoon balsamic vinegar
  • 1 tablespoon pure maple syrup
  • 1 heaping teaspoon Dijon or stone ground mustard
  • salt & pepper to taste

Preheat oven to 350 degrees.

Mix nuts with 1/4 cup maple syrup and place in a single layer on a cookie sheet lined with parchment paper. Cook for about 10 minutes, set aside to cool. Maple will be caramelized on the nuts and your home will be smelling oh so good at this point !

Prepare your vegetables, fruit and herbs, combine them in a large bowl or dish of choice. Place all vinaigrette ingredients in a small bowl, combine until blended adding salt and pepper to taste. Add nuts (reserve a few for garnish) and dressing to prepared mix and combine.

Serve on a small bed of arugula or spinach, garnish with nuts and a few fennel fronds.

Notes:

You may like to grate your apple and fennel. I tried it myself but didn't care for it as I prefer to have some chunkiness to my salad.

If using a lighter color beet, you may consider using apple cider vinegar in place of the balsamic so the dark color of the balsamic doesn't discolor your lighter colored beets.

Enjoy the flavor sensation !

Bircher Muesli with Chia Seeds, Figs & Apples


Muesli is a wonderful raw cereal and can be served with a variety of ingredients. Oats have been traditionally used along with fruits, nuts & seeds. Here is my favorite version of muesli using not only oats but other 'superfoods' like chia seeds and buckwheat grouts making this a nutritional powerhouse meal. 

This recipe originally came about for two reasons. One, I had picked up some figs the other day not quite knowing what to do with them. And the other is due to a question I had posted on The Simple Veganista facebook page asking about vegan breakfasts, cereals in particular, so it all came together and I really love the mixture of grains, fruits, nuts, seeds and spices. So very good! It's almost like a chia pudding. 


If you're in need of a meal that will carry you the distance, muesli is it. The added chia seeds in this version alone are an energy extender as well as the all-important omega's 3 & 6 they contain. They are one of the few plants based sources of omega 3. Chia seeds also contain a good amount of protein, fiber, iron and calcium per serving. The buckwheat can be optional in this version but I highly suggest that you get to know buckwheat, aka Kasha. Despite its name buckwheat isn't in the wheat family at all, it is considered a seed and is a great source of protein and fiber, even more than the oats per serving. In fact, you may decide to do all buckwheat and no oats sometime. It's also gluten free. The oats are a classic muesli staple and help soak up the liquids to make for a nice creamy dish while the other ingredients give texture and flavor. 

Some history on muesli taken from wikipedia...

'Muesli was introduced around 1900 by the Swiss physician Maximilian Bircher-Benner for patients in his hospital, where a diet rich in fresh fruit and vegetables was an essential part of therapy. It was traditionally eaten with juice and not milks.

The original Bircher-Benner recipe is proportionately the opposite of most muesli available in today's supermarket varieties, calling for far more fruit than grains. One serving based on the original recipe consists approximately of:
  • 1 tablespoon rolled oats, soaked in 2–3 tablespoons water
  • 1 tablespoon lemon juice
  • 1 tablespoon cream
  • 200 grams apple (about one large, preferably a sour variety), finely grated and mixed with the above directly before serving
  • optionally top with 1 tablespoon ground hazelnuts or almonds
The original recipe used sweetened condensed milk instead of cream, a compromise due to hygiene concerns regarding fresh milk products in 1900 (bovine tuberculosis etc.), before pasteurisation and refrigeration became commonly available. The original recipe also advised to soak the oats in water overnight as raw oats need a lengthy soaking to soften them before eating. This long soaking time is unnecessary with modern rolled "quick oats", which the manufacturers already soften through a steam treatment. While phytic acid is an antinutrient and strong chelator of important minerals, it is removed during the steam process, making muesli desirable, given its positive antioxidant qualities.'


I highly believe if Bircher-Brenner was alive today, he would agree that non-dairy milk is a much better option to dairy creams...


Let's make some 'superfood' muesli...I think Bircher would approve of this version :)

Ingredients

2 tablespoon rolled oats* ( I use GF)
2 tablespoons buckwheat groats/Kasha
1 tablespoon chia seeds
1/2 teaspoon or so vanilla
3/4 cup unsweetened almond milk, or non-dairy milk of choice
cinnamon, to taste
3 figs
1/2 apple, I use fuji
1-2 tablespoon raisins
a few almonds
a few pepitas
a few walnuts

In small/medium bowl combine oats, buckwheat groats, chia seeds, vanilla, milk, cinnamon, and half of the raisins. Mix well, cover and refrigerate overnight, or eat in one to two hours after it has set. Serve cold, or at room temp, topped with diced figs, apples, raisins and nuts/seeds and a sprinkle of cinnamon...add a little more milk if desired. I like to mix most of the apples in first and then top with the remaining ingredients. Serves one. Stores up to a couple days in airtight container in the refrigerator. Try drinking a glass of lemon water with this, very refreshing!

You may also like to try 100% fruit juice in place of the milk or use any fruits you like. 

*For 100% raw look for raw oats that have not undergone the steam process. These you will want to soak for eight hours plus.


You can also make it to go in the morning. Combine all the ingredients in a mason jar, or other to go container, give it a good stir and take it with you. The non-dairy milk is perfectly fine without refrigeration until ready to eat. At least if it's eaten within the day it should be fine, unlike dairy products that need refrigeration (another reason non-dairy milk is so great).

If you want to use more whole grains try this recipe below. It will fill you up for those extra long periods in between meals or can be munched on for a few hours...

Ingredients
1/4 cup rolled oats (I used GF)
1/4 cup buckwheat groats
2 tablespoons chia seeds
1/2 - 1 teaspoon vanilla 
1 cup unsweetened almond milk or milk of choice
any fruit and nut/seeds of choice

Enjoy these superfoods and eat them often !

CURRY ROASTED CAULIFLOWER & QUINOA SALAD

CURRIED ROASTED CAULIFLOWER & QUINOA SALAD

Get ready for a different flavor sensation! It's a nice balance of sweet, a bit of tang and curry flavor that I just can't get enough of. If you love roasted cauliflower and the combination of ingredients in this salad, I have no doubt you will find this to be a great addition to your meal rotations.

This recipe came about from a recent trip to a small grocery store near me. I picked up a version they had and thought it was good enough to recreate for the recipe collection. The quinoa is my own addition, I wanted to add some protein and extra fullness to the salad. The remaining ingredients are almost the same. I did have to guess at the dressing but it came out perfect, even better than theirs I think...much less oily. This can easily be a side salad or a full meal. Great for to-go lunches as well, can be served at room temp or chilled. 

To all of those who have picked up a copy of THE ARCHIVES VOL 1, thank you so much! :)

CURRIED ROASTED CAULIFLOWER & QUINOA SALADCURRIED ROASTED CAULIFLOWER & QUINOA SALAD

Roast your cauliflower and prepare your quinoa...

CURRIED ROASTED CAULIFLOWER & QUINOA SALAD

Mix the dressing and gather the rest of the ingredients...

CURRIED ROASTED CAULIFLOWER & QUINOA SALAD

toss everything together and you're ready for a flavorful and filling salad!

CURRIED ROASTED CAULIFLOWER & QUINOA SALAD

CURRY ROASTED CAULIFLOWER & QUINOA SALAD

Ingredients
  • 1/2 cup dried quinoa
  • 1 cup water (or just under)
  • 1 large head of cauliflower
  • 1 medium apple (I used Fuji), cored and diced
  • 1/2 cup golden raisins
  • 1/3 cup shredded coconut

Dressing
  • 3 tablespoons grapeseed or olive oil
  • 2 - 3 tablespoons apple cider vinegar 
  • 1 tablespoon dijon mustard
  • 1 tablespoon pure maple syrup
  • 1 tablespoon lemon or orange juice
  • 1 tablespoon water
  • 2 teaspoons curry powder
  • mineral salt & fresh cracked pepper, to taste

Preheat oven to 425 degrees F. Cut cauliflower into florets. Lay in a single layer on a large rimmed baking sheet. Add a drizzle of oil and toss to coat. Roast in the oven for 40 minutes, mixing the cauliflower around half way through. Remove from oven, let cool. 

Rinse your quinoa using a fine mesh sieve (honestly, I usually skip this part but have it here for good measure. Don't feel you have to do it but you may find that you prefer it that way.) In a medium pot/pan, add quinoa and water, bring to a boil, cover, reduce heat to low and simmer for 15 minutes. Once done, turn heat off, uncover and let rest for 15 minutes. Fluff with a fork and set aside.

In a small bowl, mix together the ingredients for the dressing. Set aside to let the flavors develop. Taste for seasoning adding anything extra you might like. 

In a large mixing bowl, combine quinoa, cauliflower, apple, raisins, shredded coconut and dressing, toss well to coat. 

Serve at room temperature or chilled.

Serves 4

Notes:

If you know and love the Orange Muscat Champagne Vinegar from Trader Joe's, or elsewhere, this is a great place to use it! Use it in place of the apple cider vinegar.

Sub in a tablespoon or so of water for the oil. Try using 1 tablespoon oil and 2 - 3 tablespoons water.

Feel free to use regular raisins or currants. Cranberries may even be a nice change up.

For my quinoa, I buy one bag each of white and tri-color and mix them together creating a nice blend of color and texture.

Enjoy this flavor combination, it's delicious!


Detox Salad + Ginger Lime Cardamom Dressing

Detox Salad 1
Detox Salad Mix
Detox Salad

It's detox time! After a weekend of trials with the last recipe Pizza Pie + Balsamic Tomato Sauce + Roasted Vegetables, it was time for some fresh, detoxifying foods. This lovely salad is inspired by the energizing detox salad from Mildreds. I was able to put this together rather simply using most of the ingredients listed while adding my own flair with a few ingredients like cardamom. I've had cardamom on hand and have wanted to use it for a while now. It can be an optional ingredient in the dressing if you don't have it but it is a wonderful addition that I think you'll love if you have it on hand. This salad came out truly wonderful and I'm so pleased to share it with you. I can literally make a large batch of this salad and eat it all day long, for a few days on end to boot. It's what's for dinner, and lunch tomorrow! The flavors pair and mingle well for my taste, and I think those of you who love detox salads will definitely find this combination pleasing on many levels. It has a bit of sweetness from the raisins, carrots and apple, a little earthiness from the beets, a slight sour from the lime juice, and some zest from the ginger and cardamom. Add to that how colorful it is, healthy, nutritious, easy to make and so fresh...it's a detox keeper!

Detox Salad BeetsDetox Salad Beet Leaves

I love being able to incorporate beets into my diet. They are one of those foods that I don't eat often enough but this salad is a perfect place to use up this highly beneficial vegetable. Here we can use the beets and the greens...a win all around! If you can't find the beets with their greens, use chopped spinach, dandelion greens, even lacinato kale (aka: dinosaur or Tuscan kale) would be great. As for the beets, feel free to use golden beets instead. Red beets can be a bit messy. For this reason I decided to chop my beets instead of grating them, which tends to really leave a red wet mess. But of course, feel free to grate your beets if you rather. It will give extra moisture to your salad if you do. Even grating the apple will release a lot of moisture adding extra juices as well (at least for Fuji apples). Do what feels best to you!

Detox Salad EatDetox Salad Tofu

After I started eating, I remembered that the inspired recipe had an option for tofu and thought I'd give it a try. Let me say that it did not disappoint! Believe it or not the tofu was a great addition. I used an extra firm organic tofu and the texture blended right in and added a good dose of protein. Those who are familiar with tofu know that tofu it is a blank slate in terms of flavor and will take on whatever flavors it comes into contact with. Once mixed in it was great. Am I strange to love this? Oh well...I do! :) Tofu is optional but for those who are looking to make a complete meal I recommend adding a serving.

Detox Salad 2

Detox Salad + Ginger Lime Cardamom Dressing

Ingredients
  • 1 large beet with greens, beet julienned or grated and greens julienned
  • 1 large apple, cored and diced
  • 2 medium carrots, grated
  • 1/2 cup cilantro, roughly chopped
  • 1/2 cup organic raisins or golden raisins
  • a few tablespoons hemp hearts or sesame seeds, to serve 
  • organic tofu, cubed (optional)

Ginger Lime Dressing
  • 3 - 4 tablespoons lime juice (lemon is fine too)
  • 1 inch knob of ginger, finely grated (i used a microplane)
  • 1/8 teaspoon ground cardamom, or to taste
  • 1/2 - 1 teaspoon pure maple syrup or coconut nectar, optional

In a small bowl, mix together the dressing ingredients. Set aside to let the flavors mellow and come together. Check dressing for flavor before serving. 

Prepare your salad ingredients and use 3 to 4 large beet leaves (about 1 cup lightly packed) and place all ingredients in a large bowl. Pour dressing over the salad ingredients, toss to coat. (You can also make this ahead of time and keep refrigerated until ready to serve.)

Serve topped with a good sprinkle of hemp hearts or sesame seeds, and some extra raisins if you like as they add a nice sweetness.  

Serves 2 large portions or 4 -6 small portions. 

Notes:

If you don't find beets with the greens, use spinach, dandelion greens or lacinato kale instead. Use golden beets in place of red beets to keep the color mess to a minimum. 

The cardamom can be optional. If you don't use it often, there is no need to buy this just for the salad dressing although it is delicious and you may find other uses for it either here soon, or elsewhere. If you don't have it, you will still have a great dressing.

This salad tastes better the longer your able to let it set and let the flavors mingle. This is a great salad to make in advance and store in the fridge until ready to serve.

Detox away! 

Enjoy...