.

Showing posts with label arugula. Show all posts

Apple, Beet & Fennel Salad with Balsamic Maple Dijon Vinaigrette


 This is one of those unusual dishes that turned out to be fantastic. It's quite colorful and almost surreal looking. This came about as I had an extra fennel left over from my Butternut Squash and Fennel Lasagna and a beet that I was going to use in another recipe but decided against it. A google search of fennel and beet brought me to a few various recipes, some of which included my favorite apple, the Fuji. I came up with my own version using this wonderful dressing. To be honest, I don't really care for beets much but trying to work them into my lifestyle. This salad is perfect! The beets and all the flavors come together beautifully making it a go to salad that can give me the excellent beet nutrition that I'm looking to add to my meal rotation every now and then.

You could also use other colored beets too. I experimented with a yellow one and it was just as colorful and tasty as well. The maple pecans really add a nice touch. I can't imagine not making this salad without all of these ingredients as they each add their own special touch but you can adjust to suit your flavor palate. I'm looking forward to more of this in the future using some of the other colored beets again as well...really delicious!


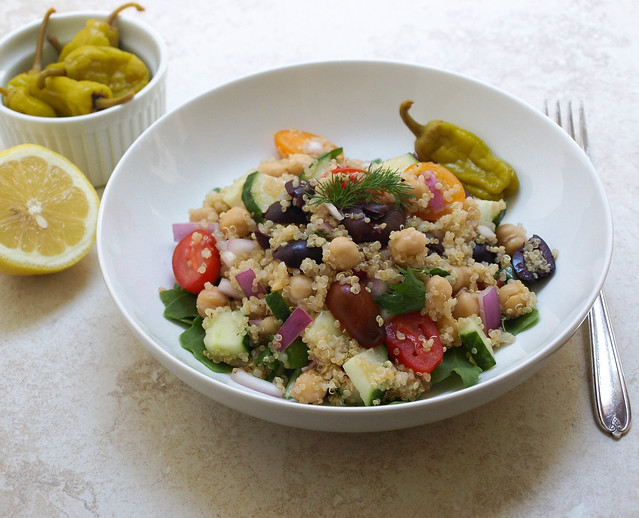
Apple, Beet & Fennel Salad w/ Balsamic Maple Dijon Vinaigrette

Ingredients

Salad
  • 1/2 cup pecans or walnuts, roughly chopped
  • 1/4 cup pure maple syrup
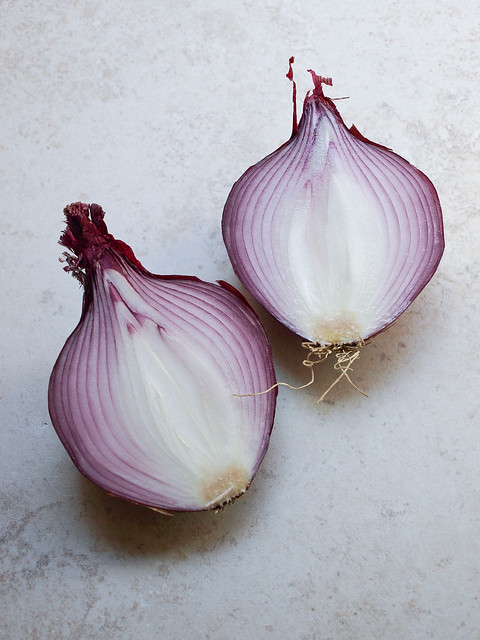
  • 1 red beet (uncooked), peeled and coarsely grated
  • 1 fennel bulb, sliced or diced...a few fronds reserved for garnish
  • 1 Fuji apple, or hard crisp apple or pear of choice, cored and diced
  • handful of mint leaves, roughly chopped
  • arugula or spinach, optional

Balsamic Maple Dijon Vinaigrette
  • 1 tablespoon extra virgin olive oil
  • 1 tablespoon balsamic vinegar
  • 1 tablespoon pure maple syrup
  • 1 heaping teaspoon Dijon or stone ground mustard
  • salt & pepper to taste

Preheat oven to 350 degrees.

Mix nuts with 1/4 cup maple syrup and place in a single layer on a cookie sheet lined with parchment paper. Cook for about 10 minutes, set aside to cool. Maple will be caramelized on the nuts and your home will be smelling oh so good at this point !

Prepare your vegetables, fruit and herbs, combine them in a large bowl or dish of choice. Place all vinaigrette ingredients in a small bowl, combine until blended adding salt and pepper to taste. Add nuts (reserve a few for garnish) and dressing to prepared mix and combine.

Serve on a small bed of arugula or spinach, garnish with nuts and a few fennel fronds.

Notes:

You may like to grate your apple and fennel. I tried it myself but didn't care for it as I prefer to have some chunkiness to my salad.

If using a lighter color beet, you may consider using apple cider vinegar in place of the balsamic so the dark color of the balsamic doesn't discolor your lighter colored beets.

Enjoy the flavor sensation !

Spicy Thai Curry Corn Soup


Corn is still in season and I wanted to feature it in a dish since I love it so much. I eat it fresh off the cob, it doesn't even need to be cooked. I also have a new found love for curries these days. This was an excellent dish. The sweet corn pairs well with the spice from the red pepper flakes and curry powder while the coconut wraps it all up making this a great dish to come back to again and again. I would consider this a lightly cooked meal, the veggies, except onion, garlic & spinach, are crispy and close to fresh. It's also an easy dish to put together from start to finish...ready in about 30 minutes. You don't have to use all these vegetables either...I added the celery and mushrooms I had on hand just to use up. Five hearts for this soup!

Spicy Thai Curry Corn Soup

Ingredients
  • 1 tablespoon sesame oil
  • 1 small onion, chopped
  • 2 cloves garlic, chopped
  • 4 ears of corn, cut off the cob
  • 3 celery stalks, diced
  • 1 red bell pepper, diced
  • handful mushrooms, sliced
  • 3-4 teaspoons curry powder
  • 1 teaspoon red pepper flakes
  • 1 can lite coconut milk (15 oz)
  • 2 cups unsweetened non-dairy milk
  • 1 cup water
  • juice of 1 lime
  • himalayan salt & cracked pepper to taste
  • large handful spinach (I used a spinach & arugula blend)

Heat oil in large pot over medium high heat and saute onions until translucent. Add garlic, corn, celery, bell pepper and mushrooms, cook a few minutes more. Add coconut milk, unsweetened non-dairy milk, water, curry powder, red pepper flakes, juice of lime, salt & pepper to taste and cook on medium heat for 10 min or until heated through. Add spinach and cook until softened to your liking. Test for flavors adding more spices if desired. Serve with lime wedges. You may even want to serve with some crispy bread to soak up the juices...


Enjoy !

SPICY LENTIL DAL

SPICY LENTIL DAL

Anyone who gardens and has tomato plants, especially here in California, will know that our plants are blooming with tomatoes at the moment. I set out to use some of my tomatoes and incorporate some lentils into my recipe collection. Lentils are a great source of protein and fiber for any lifestyle, and they are a low fat food. Nice to make up for all the higher fat foods I eat frequently like avocados and nut butters, albeit they are good fats but still nice to balance it out. One cup of lentils boosts 18 grams of protein and 16 grams of fiber. Adding cooked tomatoes to any dish is also healthy as cooking increases the level of phytochemicals, such as lycopene to do it's magic. Altogether, this was a great place to use a few garden tomatoes and add a good dose of lentils to my day. I've made lentil dishes in the past but easily tired of them. This recipe is perfect, not overly spicy with nice hints of cinnamon, cumin and ginger. I could easily eat this on a regular basis and will next time double the recipe so I have plenty of leftovers. I encourage you to gather your ingredients, get in the kitchen and make yourself some spicy lentil Dal. If you don't care for spice, you can omit the cayenne altogether...but do trust me when I say it's very low heat. Happy chopping, dicing, cooking and most of all eating!

SPICY LENTIL DAL

 A very easy ingredient list, you may have all of them on hand already. A simple, delicious dish to enjoy often!

SPICY LENTIL DAL

Dal is an Indian dish that's traditionally served over rice but I LOVED it on a bed of arugula. The nutty flavor paired beautifully while adding freshness. Even if you decide to serve this with a grain, I highly recommend adding in some sort of fresh leafy greens.

SPICY LENTIL DAL

SPICY LENTIL DAL

Ingredients
  • 1 cup red lentils (if using green/brown, see notes)
  • 4 cups water or vegetable broth
  • 1 tablespoon olive or grapeseed oil or 3 tablespoons water (for water saute)
  • 2 medium yellow onions, diced
  • 2 cloves garlic, minced
  • 1 tablespoon ginger, minced
  • 3-4 medium tomatoes, diced or 1 can (28oz) diced tomatoes, drained
  • 1 teaspoon cumin
  • 1 teaspoon coriander
  • 1 teaspoon turmeric
  • 1/4 teaspoon cinnamon
  • 1/4 teaspoon cayenne pepper
  • 1/2 teaspoon mineral salt, or to taste

Place lentils, liquid, and dry spices in a large pot, cover, and bring to boil over medium high heat. Reduce heat to low and simmer 20 minutes, stirring occasionally, until lentils are tender, not mushy. 

Meanwhile, saute onions, ginger & garlic in oil over moderate heat until onions are translucent, about 5 minutes. Add tomatoes and stir-fry 4-5 minutes. Set aside. 

When lentils are tender, stir in onions and tomato mixture, cover and simmer 5 minutes. Serve over arugula, brown rice, whole wheat pasta or as is with some of your favorite bread.

Notes:

I happen to love this with fresh greens, it adds so much freshness to the dish. Even if you serve this with a grain, fresh arugula or cilantro will do wonders.

If you happen to not have a spice or two you will still have a flavorful dish. Adjust ingredients to suit your taste.

If using green or brown lentils, cook about 45 minutes, or until tender. 

If two medium onions is too much onion for you, one will do fine.

Enjoy !

French Lentil & Bitter Greens Salad

French Lentil & Bitter Greens Salad

I know, I know...another salad! :)

French Lentil & Bitter Greens Salad

It is no secret that salads have been on my mind lately. The weather is warming up here in So. Cal and I instinctively start craving them. And so it is...another salad that I have been loving lately I have to share with you. And if you're like me, you can find a salad and stick with it for month's on end. This is one of those simple salads that falls into that category for me. Not that my other salads don't but this one has lots of qualities that suit me on a regular basis. For one, it's easy. It's only one tablespoon oil. The ingredients are simple and readily available. It's filling and has a nice share of protein from the lentils. The lentils can be served warmed or chilled, making it a nice versatile salad for the cooler season's. For me these are great qualities that I can stand behind day after day. 

French Lentil & Bitter Greens Salad

The first time I had french lentils was from Trader Joe's. They sell a steamed package that is fantastic! I've used them for tacos, eaten them plain, either cold or warmed, and now in salads. If you have access to these Trader Joe's lentils by all means feel free to use them in this recipe in place of making them from scratch. 

I finally got my hands on some dried french green lentils from Bob's Red Mill. I love them as well...they are so beautiful dry with their marbled and speckled surface. They have a nice flavor and pair wonderfully in this salad with the bitter sweet greens while adding a nice heartiness. I like to use about 1 cup cooked lentils for my salad but feel free to adjust up or down to suit your needs. Anything smaller than a cup for me and I'm hungry an hour after. I like my salads to be on the big side! You will have left over lentils for another salad or usage of choice. 

French Lentil & Bitter Greens Salad

The remaining key ingredients are simple and few. You may even have most of them on hand right now. I know the endive may be a bit harder for some to come by but you can use all arugula or choose from a variety of bitter greens such as radicchio, kale (julienned lacinato is best for this recipe), watercress, spinach, escarole, dandelion, etc. Use a much as you like of each ingredient. 

On a side note: I love music...when I'm in the kitchen playing around with recipes I usually have my playlist going and the volume up high...it's so therapeutic and relaxing to me. I thought I'd share a track that suited this recipe a bit, being that they both relate to french. You may already know this song, and if you don't have a listen and enjoy the mellow sounds...

French Lentil & Bitter Greens Salad

French Lentil & Bitter Greens Salad

Salad
  • 1 cup french lentils (beluga or puy), rinsed and picked over
  • 2 bay leafs
  • 3 cups water
  • 1/2 teaspoon garlic powder
  • bitter greens of choice (arugula, belgian endive, watercress, spinach, lacinato kale, escarole, dandelion to name a few)
  • grape tomatoes, halved
  • scallions or shallots, sliced
  • mineral salt, to taste
  • fresh cracked pepper, to taste

Lemon Dijon Balsamic Vinaigrette
  • 1 tablespoon extra virgin olive oil 
  • 1 tablespoon white or dark balsamic vinegar (I used white)
  • 2 teaspoons dijon mustard (whole grain is great too)
  • juice of one small lemon

In a medium size pot, bring water, lentils, bay leafs and garlic powder to a boil. Cover, reduce heat and simmer for 20 minutes. We want them tender but still holding their shape. Remove from heat, let cool a few minutes and drain.

While lentils are cooking start your vinaigrette. In a small bowl, whisk together the olive oil, balsamic vinegar, dijon mustard and lemon juice. Set aside. Note: Instead of adding salt and pepper to the dressing...I prefer to simply add it to my salad instead.

Next, prepare your greens and remaining salad ingredients using as much or little as you like.

Once lentils are done, prepare your salad by laying your greens first, then add in some lentils and toss gently. Top with tomatoes, scallions and a good sprinkling of mineral salt and fresh cracked pepper. Or simply lay your greens and top with lentils and remaining salad ingredients without tossing at all if you rather. No rules here, do what feels best for you! Store leftover lentils in the refrigerator for another salad or usage of choice.


Enjoy!


Greek Chickpea & Quinoa Salad

Greek Chickpea & Quinoa Salad

Another salad is born!

Greek Chickpea & Quinoa SaladGreek Chickpea & Quinoa Salad
Greek Chickpea & Quinoa Salad

 Over the last week or so we've moved from a Thai inspired Cucumber Salad + Peanut Citrus Dressing to an Italian inspired Heirloom Tomato and Endive Salad + Bagna Cauda to this Greek inspired salad of quinoa and chickpeas. I have been a happy girl eating and testing each one of them. This one is as delicious as the last and the one before that. Filled with protein packed quinoa and chickpeas tossed with tomatoes, cucumbers, olives and onions, and drizzled with simple lemon juice. It's a sensational salad that will leave you feeling satisfied and great, inside and out. And don't forget those pepperoncini, they are an exceptional accompaniment to the flavors of this dish! This is a great salad for to-go lunches, pot lucks, picnics or any social occasion, as well of course as eating it anytime of day in your own private sanctuary. Dig in and be happy. :)

Greek Chickpea & Quinoa Salad

Greek Chickpea & Quinoa Salad

Ingredients (serves 4 - 6)
  • 1 cup dried quinoa, rinsed
  • 1 1/2 - 1 3/4 cups water (anywhere in between)
  • 1 teaspoon garlic powder
  • 1 can (15oz) garbanzo beans (chickpeas), drained and rinsed
  • 1 cup grape tomatoes, sliced in half (diced red bell pepper would work here too)
  • 1 cup English cucumber, diced
  • 2/3 cup red onion or shallots, diced 
  • 1 jar (7oz) kalamata olives, pitted and sliced in half (drained)
  • 1/4 cup loosely packed parsley, chopped (dill, mint or oregano would be great too)
  • mineral salt & fresh cracked pepper to taste
  • juice of 1 large lemon
  • Greek pepperoncini, to serve
  • lemon slices, to serve (optional)
  • drizzle of extra virgin olive oil (optional)
  • arugula (optional)

In a medium size pot, add the water, quinoa and garlic powder and bring to a boil. Cover, reduce heat and simmer for 15 minutes. Remove cover and let stand for 15 minutes. Fluff with a fork.

While quinoa is cooking, prepare the remaining ingredients.

Once quinoa is ready, add in the chickpeas, tomatoes, cucumber, onion, olives and parsley. Mix well. Season with salt, fresh cracked pepper and the juice of your 1 large lemon.

Serve on a bed of arugula or as is. Tastes great with some pepperoncini and a little extra lemon juice on top. Add extra virgin olive oil if you wish. This dish can be served warm, at room temperature or chilled.

Optional dressing: You may like to use this Garlic Dressing from a previous recipe. I would suggest doubling it for use here. Add/subtract any ingredients to suit your taste.

I omitted the usual feta cheese in this recipe because I personally don't need it and haven't tried to replace it as of yet. But I know many of you will love your feta! Here is a recipe you can use to make your own from Happy Herbivore, Fat Free Vegan Feta Cheese. Or maybe you would like this Baked Almond Feta from Vegan Version. In either case,  be sure to read the comments before making this and enjoy! If you know of a great vegan feta recipe...please share...many would love to know.

Simple, healthy and flavorful...

Enjoy!


Zucchini Pasta + Creamy Avocado-Cucumber Sauce

Zucchini Pasta + Creamy Avocado-Cucumber Sauce

Happy Monday! Cheers to another refreshing raw recipe for our collection. These raw pasta dishes are always the ones that leave me feeling so refreshed and at my best. They are perfect for the warmer spring and summer months ahead. So far we have Creamy Zucchini Pesto with 'Noodles', Spicy Kale Pesto with Zucchini Noodles, 'Raw'sta Pasta with a marina'raw' sauce and now this simple zucchini pasta with a creamy avocado cucumber sauce. This is a nice addition, and one I think you will enjoy time and time again. 

I have adapted my recipe from this one from Feasting at Home. I have added a few extra goodies like tomatoes and jalapenos as well as changing up the puree a bit. I love the combination of avocado and cucumber. The cucumber adds a wonderful refreshing twist that I think you'll just love! This comes from my Avocado and Cucumber Soup recipe that can be used in many ways, ie..soup, guacamole, or sauce. I find the addition of the tomatoes and bits of jalapeno to be delicious and a nice accompaniment to the overall dish. Feel free to keep this simple like the original recipe or use what you have on hand making it your own. I've also seen lots of recipes that just use avocado without any cucumber for the puree and that is great too! Feel free to omit the cucumber in this recipe and add an extra avocado if you like for variations (you may like to add a couple tablespoons of extra virgin olive oil if you do). You can even add some arugula to the puree instead of using basil. Lots of ways to change it up and keep it fresh!

Zucchini Pasta + Creamy Avocado-Cucumber Sauce

Green and healthy...

Zucchini Pasta + Creamy Avocado-Cucumber Sauce (2)

Refreshing and light puree...

Zucchini Pasta + Creamy Avocado-Cucumber Sauce

You can either julienne the zucchini by using a julienne tool or you can spiralize using a spiralizer. Both ways are great. The julienne tool is much smaller and will fit nicely in your utensil drawer. The spiralizer on the other hand is a bit larger and cumbersome, but well worth the space as I do use mine fairly often. 

Zucchini Pasta + Creamy Avocado-Cucumber Sauce

You could also put this sauce on any pasta of choice. Here I have it with brown rice pasta. But my all time favorite way to eat this is with the zucchini noodles...hands down...so refreshing and perfect! 

Zucchini Pasta + Creamy Avocado-Cucumber Sauce

Zucchini Pasta + Creamy Avocado-Cucumber Sauce

Ingredients
  • 1 large zucchini (1 per person)
  • grape, cherry or mini heirloom tomatoes, halved
  • jalapeno, thinly sliced and seeds removed (optional)
  • arugula
  • pea shoots (optional)
  • zest of one meyer lemon or regular lemon

Avocado-Cucumber Puree
  • 1 medium avocado
  • 1 cucumber, peeled and sliced thick
  • a few large leaves of basil (optional)
  • 1 meyer lemon or regular lemon, juice of
  • 2 garlic cloves
  • 1/4 teaspoon white pepper or black pepper to taste
  • salt to taste

Prepare your zucchini noodles julienne style or spiralized. Or alternately, cook your pasta of choice, about 8 ounces.

For the puree, place all ingredients into a food processor/blender and process until creamy. Taste for flavor adding anything extra you might like.

Toss zucchini pasta with avocado-cucumber puree and a handful of arugula. Serve with tomatoes, peas shoots, jalapenos, lemon zest, lemon wedges and fresh cracked pepper.

Enjoy!


Grilled Hummus Sandwich + Sautéed Onion,Tomato & Arugula

Grilled Hummus Sandwich + Sautéed Onion,Tomato & Arugula

If you love sautéed onions...your going to love this!

Grilled Hummus Sandwich + Sautéed Onion,Tomato & Arugula

I've been loving sandwiches lately. It's a nice change from all the soups I've been eating. After seeing this wonderful recipe from Katy's Kitchen which features caramelized onions I was all in to give a grilled hummus sandwich a try. As you probably already guessed it did not disappoint! I wanted to create something a little faster and decided to simply sauté my onions until golden around the edges, saving the caramelized onions for another time. This sandwich is warm, juicy, full of simple flavors that come together and will melt in your mouth. I love everything about it...even the slight messiness of eating it and the onion breath afterward...so worth it! Since the protein amount is on the low side, I recommend pairing this with, or having after, a vanilla or Chocolate protein shake. Or maybe this Banana Split Protein Smoothie. You may even consider this Almond Chunky Monkey Ice Cream or Raw Chocolate Banana Ice Cream with an added scoop of protein powder and a splash of non-dairy milk. It will round out your meal perfectly making sure all your nutritional needs are met. Then give yourself a pat on the back for making such great choices!

Grilled Hummus Sandwich + Sautéed Onion,Tomato & Arugula

All it takes is a few simple ingredients and then grill to perfection. Seriously delicious!!! 

Grilled Hummus Sandwich + Sautéed Onion,Tomato & Arugula

Grilled Hummus Sandwich + Sautéed Onion, Tomato & Arugula

Ingredients (serves two)
  • 1 small onion, sliced and halved
  • olive or grapeseed oil
  • 2 - 3 medium to large tomatoes, sliced
  • handful arugula
  • hummus  (use your favorite)
  • mineral salt & fresh cracked pepper
  • 4 slices bread of choice

Heat 1 tablespoon oil in a medium pan over medium high heat, add sliced onion and cook, stirring occasionally until golden around the edges and tender, about 5 - 7 minutes keeping an eye on the last 2 minutes so they don't over char on the edges. Set aside. 

Heat your griddle over medium high. Depending on what type of griddle you are using, you may want to lightly grease it. I used a cast iron griddle and didn't grease mine.

Layer both inside slices of bread with a generous amount of hummus. Add a layer of sautéed onions, then sliced tomato, arugula and a sprinkle of salt & pepper. Add top slice of bread and gently press down. Drizzle or brush olive oil on the top. Place oiled side on griddle and cook for about 2 - 3 minutes, or until golden (times may vary, check periodically so the bread doesn't burn). Before flipping, drizzle or brush the top with olive oil. Using a good size spatula, flip and cook for another 2 -3 minutes until bread is golden once again and sandwich is warmed through.

Slice and devour!

Notes:

If your bread is on the larger side, you may consider slicing it in half either before layering and/or grilling.

If your humus is on the thicker side, thin it out with a little water making it less pasty and more like a mayo consistency.

Serving nothing but love here at The Simple Veganista...

Enjoy!