.

Showing posts with label red onion. Show all posts

Pan Bagnat (White Bean Niçoise Salad Sandwich)

Pan Bagnat (White Bean Niçoise Salad Sandwich)

This recipe was inspired by a recent post on BuzzFeed for 27 Awesome Easy Lunches To Bring To Work. I'm thrilled to have been included in the roundup with the Mashed Chickpea Salad Sandwich! There is also a few other great vegan options as well so be sure to take a look. In it I saw a Pan Bagnat from Food 52 and had to recreate it for us plant powered lovers. I love Food 52, and have always been inspired by the simplicity and beauty of their photography. And of course the recipes are great too! I have a few in my collection that were inspired from there like this Mushroom Bourguignon and these Gluten Free Banana Flap Jacks. It's a great community if you haven't heard of it yet! In fact, they have a vegan column called The New Veganism with Gena Hamshaw of Choosing Raw as the recipe creator. Be sure to take a look and be inspired by both the recipes and photography!
Pan Bagnat (White Bean Niçoise Salad Sandwich)

The pan bagnat (meaning 'bathed bread') is a classic specialty sandwich served in and around the region of Nice, France. It's a sandwich version of the salade niçoise which is a combination of tuna, anchovies and/or sliced hard boiled egg mixed with raw vegetables like red bell pepper, green beans, radishes, olives and onion. You will also find there to be olive oil and possibly vinegar, salt and pepper. Here we'll be using a few of these traditional ingredients but veganizing this classic using white beans as our protein. And I can guarantee you this is just as delicious if not better than the traditional version! Not only does the salad make for a great sandwich filler but it would be just as good on a bed of leafy greens as well. This recipe may give you leftovers, and that's a good thing because it only gets better in the next day. One day make a sandwich for work, home or a picnic and the next top it on some leafy greens or just eat as is. It's pretty amazing on its own!
Pan Bagnat (White Bean Niçoise Salad Sandwich)Pan Bagnat (White Bean Niçoise Salad Sandwich)
Pan Bagnat (White Bean Niçoise Salad Sandwich)

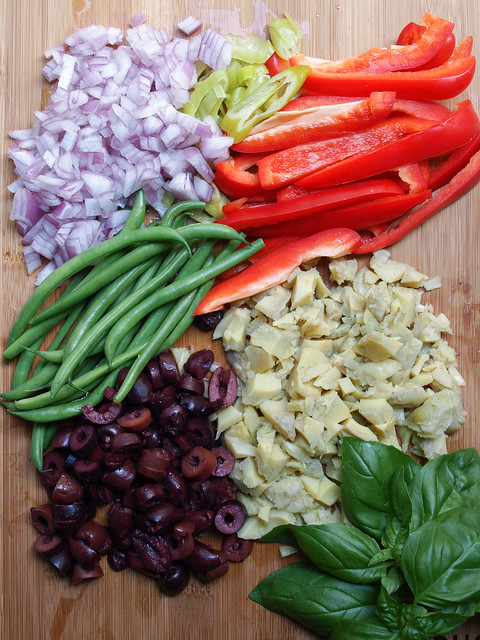
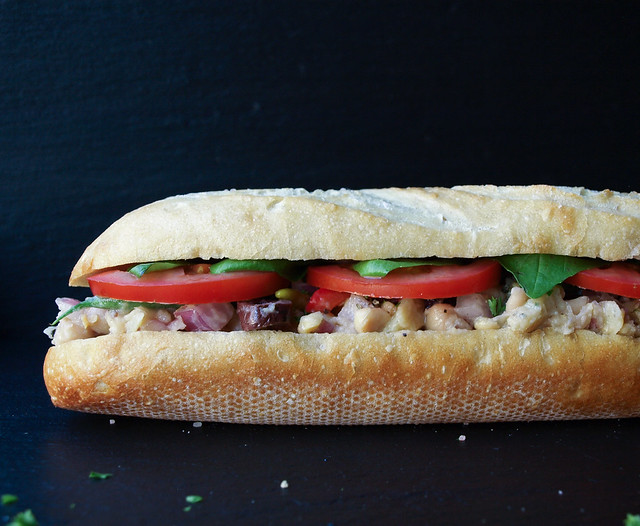
I love the saltiness from the olives here, you can add a tablespoon of capers if you like. The fresh bell pepper and blanched green beans add a nice crunch and sweetness while the onion and artichokes add another layer of flavor. Tie the vegetables together with the white beans, dressing made of olive oil, lemon and mustard, add a good sprinkling of mineral salt & plenty of cracked pepper and this salad will be another favorite to come back to time and time again!
Pan Bagnat (White Bean Niçoise Salad Sandwich)

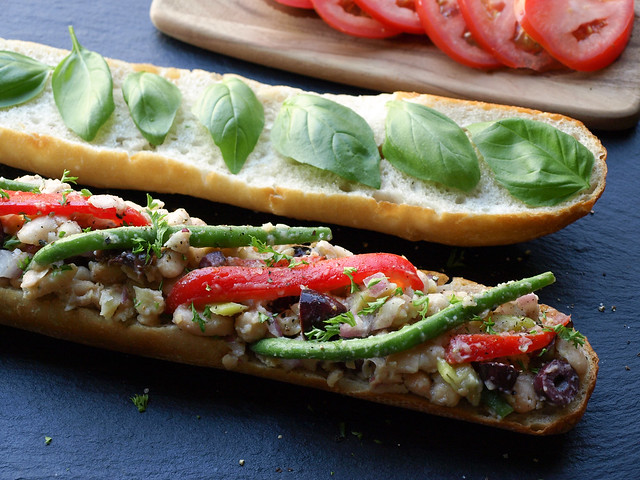
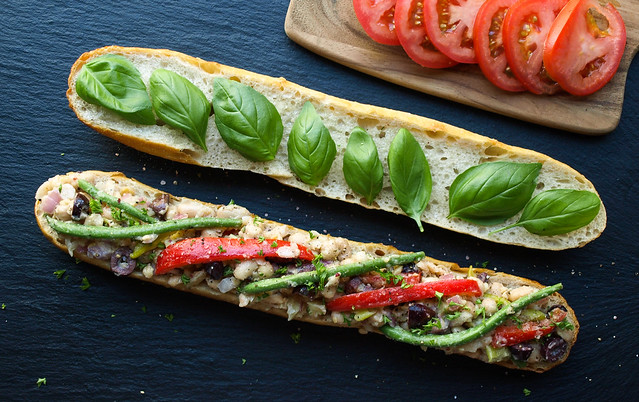
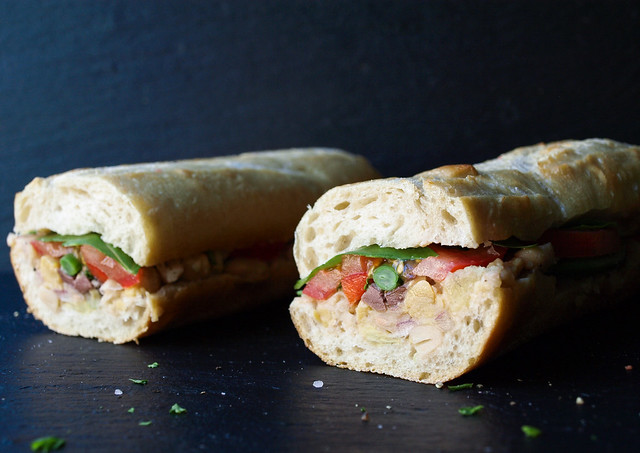
To create the traditional pan bagnet you'll first want to hollow out the insides of your bread. I left the top on this alone but from now on will hollow it out as well. It gives more room for your salad, helping to hold it together better while using less bread at the same time which is great too. Brush the insides of the bread with olive oil. Layer your bottom half with the salad. Since we're going to press the sandwich you can pile it on pretty good making a very hearty sandwich. Add your tomatoes across the top. Then layer basil, top with mineral salt & cracked pepper and remaining slice.
Pan Bagnat (White Bean Niçoise Salad Sandwich)

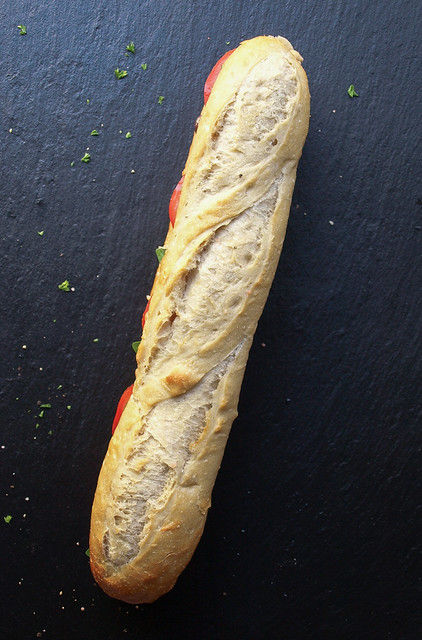
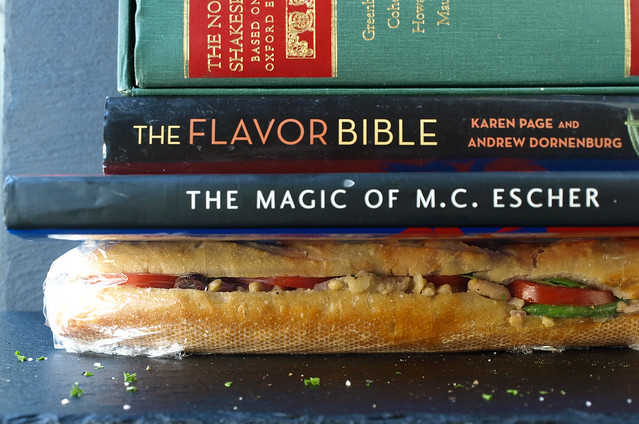
Wrap your sandwich tightly in saran wrap, fold ends under and press with a few heavy books or pots. This is an important part or your sandwich will be very messy and fall all over. Trust me, I know this from first hand experience. Plus, this helps the bread soak up the moisture of the salad dressing making for 'bathing the bread'. So be sure to press your sandwich, even if just for an hour, it will make all the difference...although overnight is even better. This makes a perfect grab and go sandwich for lunches and picnics, once pressed it's ready to go!
Pan Bagnat (White Bean Niçoise Salad Sandwich)

 Pan Bagnat (White Bean Niçoise Salad Sandwich) 

Ingredients 
  • 1 can (15 oz.) cannellini or chickpeas (garbanzo beans), drained and rinsed well or 1 1/2 cups cooked white beans
  • 1/2 red bell pepper, thinly sliced
  • 1/4 cup blanched French green beans, cut into half or thirds
  • 1 jar artichoke hearts in water, drained and chopped
  • 1/2 red onion, diced
  • 3/4 cup kalamata olives, pitted and sliced
  • 2 tablespoons parsley, finely chopped
  • 1 -2 greek pepperoncinis, diced (optional, not a traditional ingredient)
  • mineral salt & fresh cracked pepper, to taste
Dressing
  • 2 - 3 tablespoons extra virgin olive oil
  • juice of 1 large lemon (about 2 tablespoons)
  • 1 heaping teaspoon Dijon mustard
To assemble
  • 1 French baguette, ciabatta loaf, Pain de campagne, boule or artisan loaf of choice (even good sized rolls would be great)
  • extra virgin olive oil, to brush
  • 8 - 10 basil leaves
  • 1 medium tomato, thinly sliced
  • mineral salt & cracked pepper

Cut bread in half lengthwise. Remove some of the insides of each half making a trough for the filling (this will help keep the filling inside the sandwich when eating). Brush both halves with extra virgin olive oil.

In a small bowl, mix the dressing ingredients together until dijon has emulsified. Set aside to let the flavors develop.

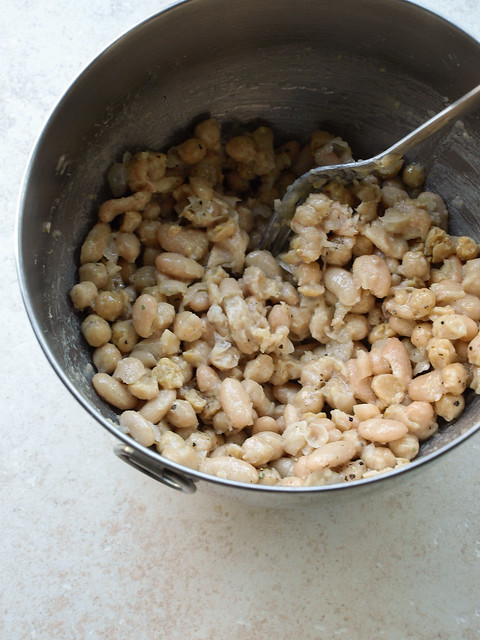
In a medium/large mixing bowl, add beans and roughly mash leaving about 2/3 whole beans. Add in dressing to the beans and mix well. Add in the bell pepper, green beans, artichokes, red onion, olives, parsley, optional pepperoncini and salt & pepper. Mix to combine.

Layer your bottom half of bread with a good serving of the mixed salad. Add tomatoes across the top, then top with basil leaves and salt & pepper. Top with other slice of bread. (You can also vice versa this layer order starting with the basil and tomato on the bottom and salad on top.)

Wrap sandwich tightly in saran wrap and press with a few heavy books/pots for at least an hour to overnight. If overnight, be sure to press in the refrigerator.

When ready to serve, slice in half or make as many slices as you like. Serve chilled or at room temperature.

Store any leftover salad mixture covered in the refrigerator for up to 5 days. 

Notes:

The cannellini beans have more protein and fiber than chickpeas so if that is a priority use them. Otherwise use your preferred white bean.

Try adding a splash of red or white wine vinegar to the dressing if you like.

As with all my recipes, add/subtract ingredients to your liking. Try adding a tablespoon or so of capers. I've had someone sub in asparagus for the green beans. Add sliced radishes along the top.

I edited this recipe on 11/10/13 at 12:15pm so it wouldn't make so much leftovers. The old recipe called for 2 cans white beans, 1 red bell pepper, 1/2 cup French green beans, 1 cup kalamata olives and 4 tablespoons olive oil. The old recipe was delicious, it just made a bit too much but of course feel free to use the old version instead so you'll have plenty of leftovers!

Enjoy!
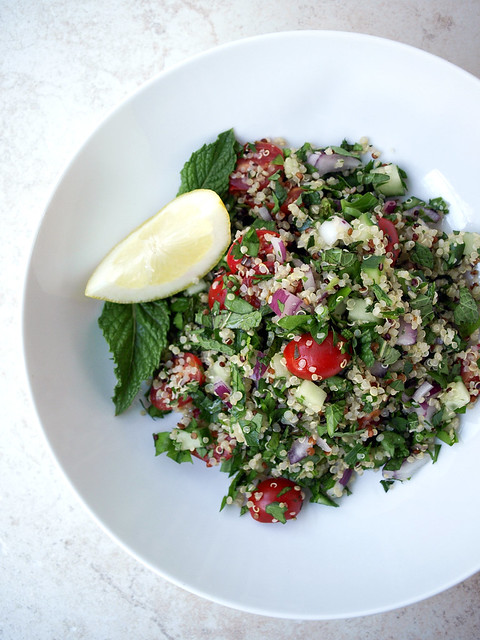

Quinoa + Hemp Heart Tabbouleh

Quinoa + Hemp Heart Tabbouleh

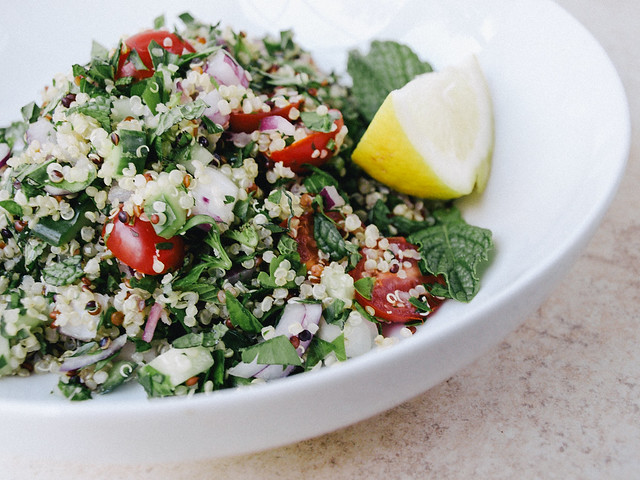
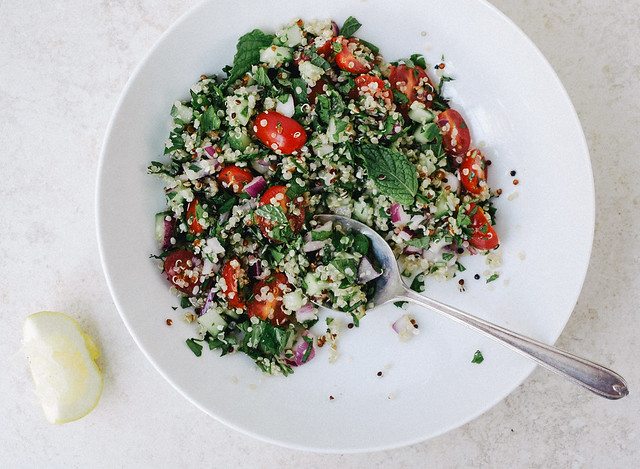
Tabbouleh is a popular traditional Middle Eastern dish. The ingredients remain the same but vary in ratio depending on the region. It traditionally uses bulgur wheat as the grain of choice but here we are using gluten free quinoa. I also added some hemp hearts as they are a perfect accompaniment and add extra nutrients, like all the very important omegas. What I really love about the quinoa and hemp hearts is that they are both complete proteins making this a well-balanced dish. If your new to hemp seeds and oil, following is a great article on just how wonderful and beneficial these seeds and oil is for your health: Hemp Seed - The Most Nutritionally Complete Food Source in the World

Quinoa + Hemp Heart Tabbouleh

I have been wanting to make this for some time now and am so glad I finally did. It was light, fresh and delicious! The ingredient list is simple and comes together creating pleasure for all your senses...visually, texturally and flavor wise. Not to mention the smell is delicious too. The mint and parsley together are a winning combination leaving a fresh, clean taste bite after bite. The cucumber is refreshing, the tomatoes add juiciness and the lemon adds a nice light zestiness. After making this I have to admit that I sat and ate the whole thing...of course I only made half of the recipe you see here which is why I doubled this recipe so you can have some for later, or share if you like. This is clean eating and nutrient dense. For those of you who count calories, when you learn to eat clean like this you don't need to count calories...eat as much as you like and count your blessing instead! 

Quinoa + Hemp Heart Tabbouleh

It's just pure and simple...

Quinoa + Hemp Heart TabboulehQuinoa + Hemp Heart Tabbouleh

Quinoa + Hemp Heart Tabbouleh 

Ingredients
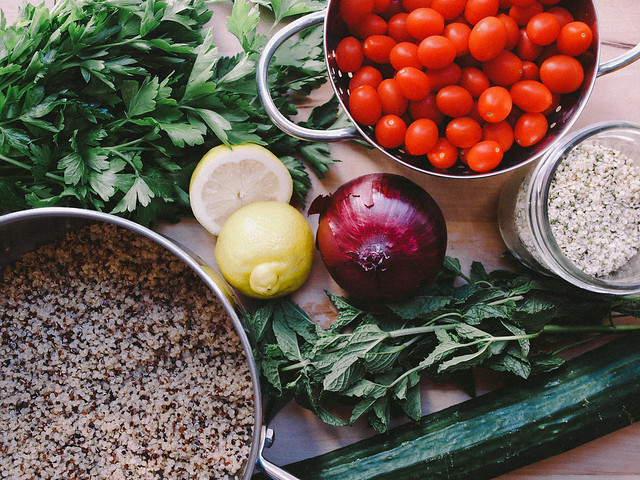
  • 1 cup quinoa (I used tri-color)
  • 1 3/4 cups water
  • 1 teaspoon garlic powder
  • 1 bunch parsley (about 2 cups lightly packed), stems removed
  • 1 small bunch mint (about 1 cup lightly packed), stems removed
  • 1 English cucumber (skin on), diced
  • 1 small red onion, diced or 3 green onions, thinly sliced
  • 1 1/2 cup cherry/grape tomatoes, halved or quartered depending on size
  • 1/4 cup hemp hearts (shelled hemp seeds)
  • drizzle of good extra virgin olive oil 
  • juice of 2 large lemons
  • mineral salt & cracked pepper to taste

Rinse your quinoa in a fine mesh stainer to remove any dust (sometimes I do this, sometimes I don't). In a medium size pot, bring water, quinoa and garlic powder to a boil, cover, reduce heat and simmer for 15 minutes. Remove from heat, remove cover and let set for 10 - 15 minutes, fluff with fork.

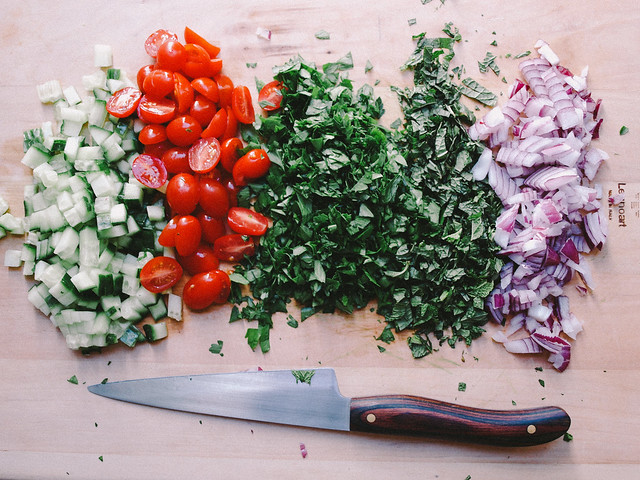
In the meantime, finely chop your parsley and mint. Dice your cucumber, tomato and onion.

Once quinoa is ready, add in the parsley, mint, cucumber, onion, tomatoes, hemp hearts, drizzle of olive oil and the juice of your lemons, salt & pepper to taste, gently mix together.

Serve with a few whole mint and/or parsley leaves and lemon wedges.

Serves three generously.

So clean & healthy...any day is a good day for tabbouleh!

Enjoy!


Quinoa & White Bean Veggie Burger

Quinoa & White Bean Veggie Burger

It's burger time...

Quinoa & White Bean Veggie Burger

Quinoa & White Bean Veggie BurgerQuinoa & White Bean Veggie Burger
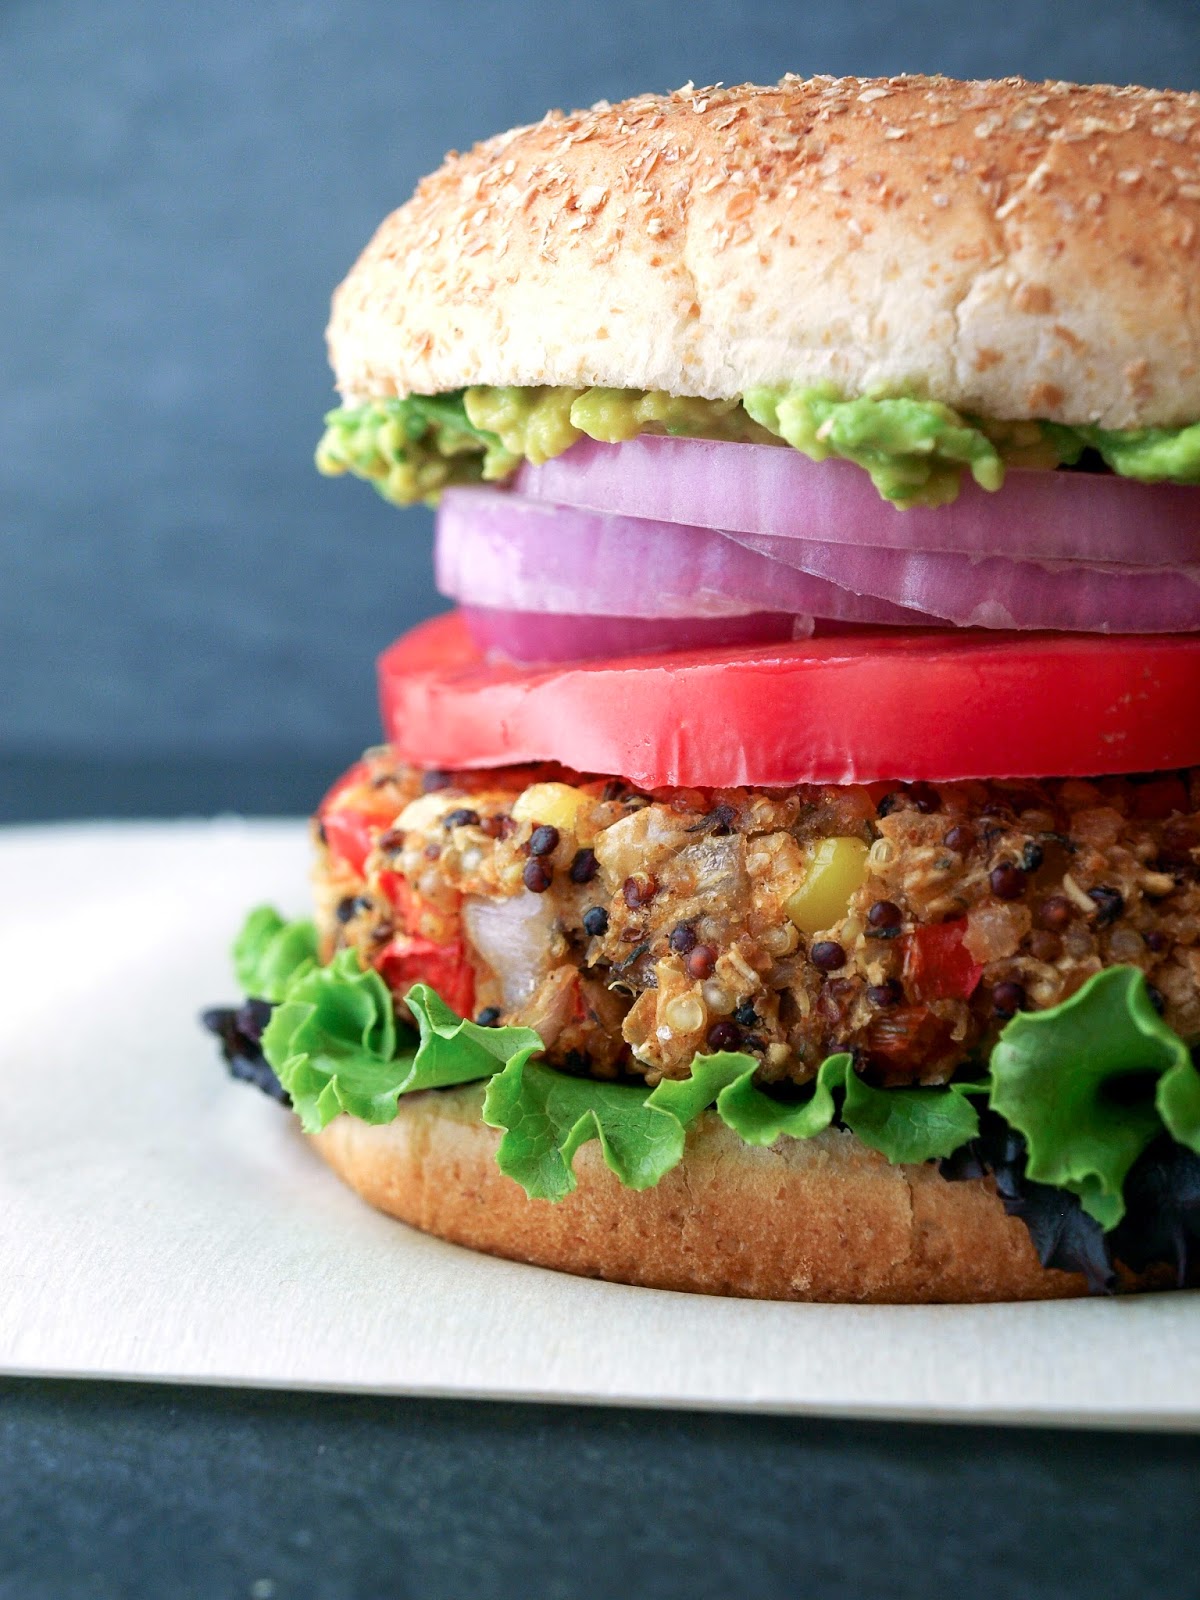
I haven't done a veggie burger in almost a year. It was time to add a new one to the list and this one is as delicious as it gets. These patties are loaded with protein and fiber as well as other beneficial nutrients, and they are very filling. As far as veggie burgers go this is fairly easy. I have to admit that I'm a pretty lazy cook and don't like a lot of steps. I prefer to spend as little time as possible preparing a meal as well as cleaning it up. Fyi, you can make this recipe even simpler by using a pre-made flour instead of processing oats like I did. The patties came out fantastic and held up great without falling apart, and they were not dry at all, nor were they mushy. The texture, taste and visual appeal all hit the mark. Once layered with all the extra goodies this burger was supreme and the best veggie burger I've ever had...am I biased...maybe, but these were divine! And, if you don't feel like having it on a bun, by all means top your veggie burger on a bed of fresh leafy greens with a squeeze of lemon, some avocado, salt and pepper...so good just like that! 

Quinoa & White Bean Veggie Burger

I loaded this beauty up with leafy greens, slice of heirloom tomato, sliced red onion, whole grain mustard, mashed avocado and a nice drizzle of sriracha. Lot's of flavors going on and I loved it. As the saying goes, "Eat like you mean it!" 

Quinoa & White Bean Veggie BurgerQuinoa & White Bean Veggie Burger

Quinoa & White Bean Veggie BurgerQuinoa & White Bean Veggie Burger

Quinoa & White Bean Veggie BurgerQuinoa & White Bean Veggie Burger

And now for the money shot! Having fun with my iphone and the VSCO Cam app (it's free), managed to create this final mouthwatering picture...veggie love at first sight!

Choose your cooking style...stove top

Quinoa & White Bean Veggie Burger

Ingredients (makes four patties)
  • 1/2 cup quinoa (I used tri-color)
  • 1 cup water
  • 1 teaspoon garlic powder
  • 3 teaspoons thyme, divided (oregano would be good too)
  • 1/2 - 1 teaspoon smoked paprika 
  • 1/2 teaspoon ground chipotle pepper, optional
  • 1 can (15 oz.) white beans (I used cannellini), drained and rinsed
  • 1/2 cup corn, fresh or frozen (about 1/2 fresh corn off the cob)
  • 1/2 cup red bell pepper, finely diced (about 1/2 bell pepper)
  • 1/2 cup shallot, finely diced (about 1 medium) or red onion
  • juice of one lemon
  • 1/3 cup oat flour, or flour of choice 
  • 1 Ener-G egg replacer or 1 flax egg (1 Tbs flaxseed meal + 3 Tbs water), optional*
  • mineral salt & cracked pepper, to taste
  • coconut or olive oil, to grease

To Serve:
  • tomato, sliced
  • leafy greens
  • avocado, sliced or mashed
  • red onion, sliced
  • whole grain or dijon mustard (hummus or vegan mayo is great too)
  • sriracha or Sriracha Cashew Cream (use the sriracha cream in place of mustard)
  • burger buns of choice

Start by making your flax egg or ener-g egg replacer and set aside. If baking in the oven, turn oven to 375 degrees F. (It's helpful to read instructions first before making the patties)  

In a medium pot, bring water, quinoa, garlic powder and 1 teaspoon thyme to a boil. Cover, reduce heat and simmer for 15 minutes. Once done, remove cover and let set for 10 minutes.

While quinoa is cooking, prepare your corn, shallot and red pepper. Be sure to dice your onion and red pepper fairly fine, they should be about the same size as the corn kernels.

Next, mash your beans. I mashed about 3/4 of the beans leaving a quarter of the batch whole or somewhat whole.

Once quinoa is ready, add the quinoa to the beans along with the shallots, red pepper, corn, remaining 2 teaspoons thyme, smoked paprika and optional chipotle powder and lemon juice. Mix well. Add in the flour and egg replacer, mix well again. Season to taste with salt, pepper and more of the other spices. We all vary on how strong we like our spices...you can't take out but you can always put in.

Now to divide and make your patties. I like to pat my mixture into the bowl a little and divide it with a knife into 4 sections, making a plus sign if you will. Take each section and pack it tightly into a ball in the palm of your hands. It should be about the size of your hand. Flatten with your palms and place on hard surface. Cup the edges with your palms and tighten them in a bit and flatten the top to the desired size. Mine were about 1/2 inch thick by 3 1/2 - 4 inches.

Cook one of two ways:

In the oven at 375 degrees on a greased or parchment lined cookie sheet for 30 minutes, turning once after 15 minutes. I also added a sprinkle of himalayan salt to the top before baking.

OR

In a large skillet, heat 1 tablespoon coconut oil or olive oil over medium to medium high heat. Cook patties about 4 - 5 minutes on each side.

I cooked both ways and had no preference. They both held up well and cooked great. (pic shows skillet cooked)

Serve on bun or bed of leafy greens with choice of toppings!

Notes:

The patties can be made ahead of time and stored covered in the refrigerator for a couple days prior to cooking.

*I have a sneaky feeling that this can be made without the use of any egg replacer if you don't have it available. I have it here for good measure until I try without (in the comments you will see that it has been done). If you decide not to use an egg replacer, when adding the flour, just try adding two - three tablespoons of water instead if needed...the amount may depend on the flour you're using.

For mashed avocado, cut open avocado, remove seed and using a fork, mash the flesh right in the skin...it's like a bowl. Spread on bun for a great creamy condiment!

I hope this makes you want to get in the kitchen and cook.
I encourage you to make these soon and often...

Enjoy!

Pizza Pie + Balsamic Tomato Sauce + Roasted Vegetables

Pizza Pie + Balsamic Tomato Sauce + Roasted Vegetables

It's been awhile since I've indulged in pizza. I was so inspired by this post from the Minimalist Baker and decided it was time to add another pizza recipe to the list. Not only does Minimalist Baker have nice simple recipes, a lot of them are vegan too, but the photography is superb! Take a look and find some inspiration for yourself through both the recipes and photography. Of course for this recipe we aren't using cheese, only almond parmesan which is fantastic served on top of your slice of pizza pie. We are dousing this pizza with a nice balsamic tomato sauce and lots of beautiful veggies making this a colorful pizza with lot's of wonderful flavor. I just thought it was so cool to cook your pizza in a skillet but feel free to use your normal method such as a pizza stone, which I also love, or other baking dish that your accustomed too (just adjust directions to your baking vessel).

Pizza Pie + Balsamic Tomato Sauce + Roasted Vegetables

We'll be broiling our veggies in the stove under the flame, or roasting as some countries call it. One side of the baking sheet is for the toppings. I used zucchini, bell peppers, tomatoes, asparagus and red onion for this pizza. Feel free to add/subtract other veggies to suit your taste. I imagine mushrooms would be divine too! The other side is for the whole grape tomatoes we will be using for our tomato sauce. Also, if you would like to add some broiled onion to your sauce be sure to add a few pieces along with your grape tomatoes.

Pizza Pie Sauce

Once veggies are ready after 5 to 6 minutes under the broiler...your ready to carefully transfer your tomatoes to the food processor to make the tomato sauce. 

Pizza Pie Sauce 1Pizza Pie + Balsamic Tomato Sauce + Roasted Vegetables

Your sauce should come out with a nice semi-thick consistency. If you find it's too runny, add a little more tomato paste. This tomato sauce is delicious and would be great on pasta too!

Assemble your pizza, cook and voila...pizza pie! 

Pizza Pie Slice

Pizza Pie + Balsamic Tomato Sauce + Roasted Vegetables 

Ingredients
  • 1 ready made pizza dough (pref. whole wheat)
  • fresh basil leaves, to serve
  • red pepper flakes, to serve
  • almond parmesan, to serve

Topping
  • 1/2 small zucchini, sliced thin and halved
  • 1/2 cup aspargus, cut into 1 inch pieces
  • 1/2 orange bell pepper
  • 1/4 red onion, diced
  • 3/4 cup cherry tomatoes (red & yellow), halved
  • a few large basil leaves, chopped
  • a guzzle of balsamic vinegar
  • pinch or two mineral salt

Balsamic Tomato Sauce
  • 1 dry pint (about 8 oz package or 1 1/2 cups) grape tomatoes
  • 3 rounded tablespoons tomato paste
  • 1 - 2 tablespoons balsamic vinegar
  • 1 garlic clove or 1/2 teaspoon garlic powder
  • 1 teaspoon Italian seasonings or a mix of oregano, basil, thyme, etc.
  • mineral salt & cracked pepper to taste

  1. Preheat oven to 450 degrees or heat oven to dough directions. (We'll start with this high temp to move the pizza cooking along as quickly as possible.)
  2. While oven is heating, prepare your vegetables, place them in a medium size bowl along with the tomatoes for the tomato sauce and add a guzzle of  your favorite balsamic vinegar. You can also add a tad of olive oil if you wish. Toss to coat. Place vegetables on a baking sheet keeping the cut topping and whole tomatoes separate for ease later on. 
  3. Coat your cast iron skillet with olive oil, place your dough in the center, flatten out along the bottom and bring a small bit up the edges. Let set to rest until ready to layer.
  4. Once oven has heated to 450, turn off oven and turn on the broiler (I had mine set on high but medium is good too), place vegetables under the flame and cook for about 6 minutes checking every so often. Remove and set aside. 
  5. Turn oven back on to 450 degrees. The heat sensor should go off right away letting you know the oven is ready. If you skip the first heating at 450, this step will take around 15-20 minutes.
  6. In a food processor or blender, being careful not to burn yourself, add the uncut grape tomatoes along with the other ingredients for the tomato sauce and process until blended and fairly smooth. Taste for flavor adding anything extra you might like. Your sauce should be a semi-thick consistency. If you find it's too runny, try adding an extra tablespoon or two of tomato paste. 
  7. Finally, add a nice layer of your tomato sauce and veggies to the pizza dough. Place in oven and bake for 20-25 minutes, until crust is golden. Remove from oven and let cool a few minutes before cutting to serve. Serve with red pepper flakes and a good dusting of almond parmesan. 
Notes:

I found that I needed to cook my pizza longer than the directions on the pizza dough package, about 20 -25 minutes worked for me but each oven is different.

If your crust doesn't become golden enough for you, place the skillet pizza under the broiler for a minute or so checking often so it doesn't burn.

If you have a hard time with your crust being soggy under the tomato sauce and veggies, try cooking your dough first for about 15 minutes, then add your sauce and veggies and cook another 5 minutes or so.

I would love to recommend a good pizza dough recipe but I haven't made one yet and find the ready made dough is quick and works great for me. If you have a good whole wheat pizza dough recipe I'd love know about it!

Hope this inspires you...Enjoy!


Cowboy Caviar Quinoa Salad

Cowboy Caviar Quinoa Salad

I love quinoa salads and this version is as simple as can be. It's full of protein, fiber and many other nutrients to keep you feeling at your best. I hope you all have come to love quinoa and can find it at a reasonable price. I happen to see it today in the store for $12 a pound and was stunned. I buy mine from a bulk bin for just under $4 a pound at my local health conscious store. If you can't find it for a decent price in your local stores, check online for the best possible prices and have it delivered to you. I have had great success with Vitacost.com, they have decent prices and ship fast! For a reasonably priced fair trade quinoa that ranges from $6 to $10 a pouch (depending on the color), check Alter Eco. They also have other fair trade items. Also, be sure to tell your grocery store manager to carry these items in the future. Quinoa is such a versatile grain, is full of protein and fiber and should be a staple in your healthy kitchen. 

Cowboy Caviar Quinoa Salad

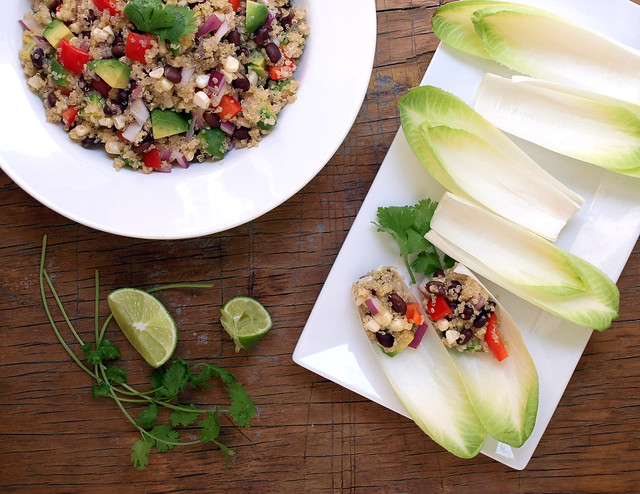
Ok, back to this cowboy caviar. Usually cowboy caviar is made without quinoa and is served as a dip of sorts along with tortilla chips to scoop. Here we are going to serve it along with some scooping leafy greens making this a super healthy meal or snack. This salad has just the right amount of flavor and I know you will enjoy it as much as I have. It's also a one pot meal making it an easy dish to put together. You can find the inspiration for this recipe here. 

Cowboy Caviar Quinoa Salad

I love not using spoons or forks with this but of course depending on the style of lettuce you choose you may need a little help from your utensils. The endive worked like a charm for scooping up this salad all the way to the end. You can also try romaine, radicchio, bibb lettuce. It's makes for extra freshness to this dish...a perfect match!

Cowboy Caviar Quinoa Salad

Cowboy Caviar Quinoa Salad
Ingredients
  • 1 cup dried quinoa
  • 1 3/4 cup water
  • 1 can (15oz.) black beans, drained and rinsed
  • 1 fresh corn off the cob (I used a white corn)
  • 1 red bell pepper, cored, seeded and diced
  • 1/2 red onion, diced
  • 1 avocado, diced
  • cilantro, chopped and added to taste
  • 1/2 teaspoon cumin, or to taste
  • himalayan salt, to taste
  • cracked pepper, to taste
  • 2-3 limes
  • scooping greens like endive, romaine or bibb lettuce

    In a medium size pot, add water and quinoa, bring to boil over medium high heat, reduce to a simmer and cover, cook for 15 minutes. Remove from heat, remove lid and let set for 10 minutes.

    While your quinoa is cooking, prepare your veggies. Once quinoa is done, add the black beans, corn, red bell pepper and onion. Season to taste with cumin, salt and pepper. Add the juice of one or two limes. Just before serving add in the diced avocado and chopped cilantro.

    Serve with lime wedges and scooping leafy greens. Serves four.

    As with all my recipes, add more or less of any ingredient to suit your tastes...

    Enjoy!
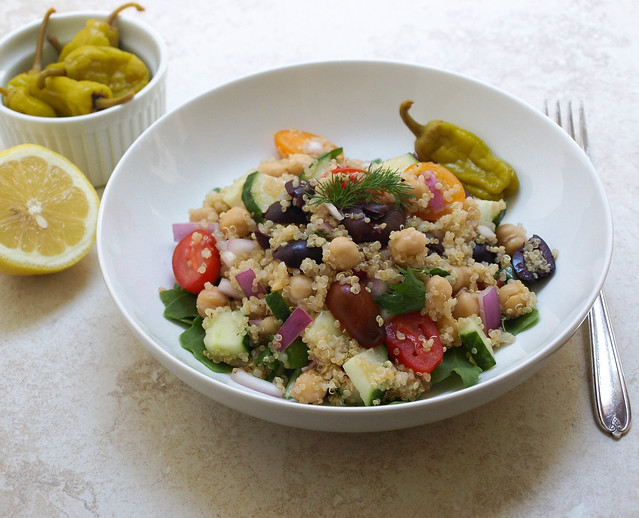

    Greek Chickpea & Quinoa Salad

    Greek Chickpea & Quinoa Salad

    Another salad is born!

    Greek Chickpea & Quinoa SaladGreek Chickpea & Quinoa Salad
    Greek Chickpea & Quinoa Salad
    Greek Chickpea & Quinoa Salad

     Over the last week or so we've moved from a Thai inspired Cucumber Salad + Peanut Citrus Dressing to an Italian inspired Heirloom Tomato and Endive Salad + Bagna Cauda to this Greek inspired salad of quinoa and chickpeas. I have been a happy girl eating and testing each one of them. This one is as delicious as the last and the one before that. Filled with protein packed quinoa and chickpeas tossed with tomatoes, cucumbers, olives and onions, and drizzled with simple lemon juice. It's a sensational salad that will leave you feeling satisfied and great, inside and out. And don't forget those pepperoncini, they are an exceptional accompaniment to the flavors of this dish! This is a great salad for to-go lunches, pot lucks, picnics or any social occasion, as well of course as eating it anytime of day in your own private sanctuary. Dig in and be happy. :)

    Greek Chickpea & Quinoa Salad

    Greek Chickpea & Quinoa Salad

    Ingredients (serves 4 - 6)
    • 1 cup dried quinoa, rinsed
    • 1 1/2 - 1 3/4 cups water (anywhere in between)
    • 1 teaspoon garlic powder
    • 1 can (15oz) garbanzo beans (chickpeas), drained and rinsed
    • 1 cup grape tomatoes, sliced in half (diced red bell pepper would work here too)
    • 1 cup English cucumber, diced
    • 2/3 cup red onion or shallots, diced 
    • 1 jar (7oz) kalamata olives, pitted and sliced in half (drained)
    • 1/4 cup loosely packed parsley, chopped (dill, mint or oregano would be great too)
    • mineral salt & fresh cracked pepper to taste
    • juice of 1 large lemon
    • Greek pepperoncini, to serve
    • lemon slices, to serve (optional)
    • drizzle of extra virgin olive oil (optional)
    • arugula (optional)

    In a medium size pot, add the water, quinoa and garlic powder and bring to a boil. Cover, reduce heat and simmer for 15 minutes. Remove cover and let stand for 15 minutes. Fluff with a fork.

    While quinoa is cooking, prepare the remaining ingredients.

    Once quinoa is ready, add in the chickpeas, tomatoes, cucumber, onion, olives and parsley. Mix well. Season with salt, fresh cracked pepper and the juice of your 1 large lemon.

    Serve on a bed of arugula or as is. Tastes great with some pepperoncini and a little extra lemon juice on top. Add extra virgin olive oil if you wish. This dish can be served warm, at room temperature or chilled.

    Optional dressing: You may like to use this Garlic Dressing from a previous recipe. I would suggest doubling it for use here. Add/subtract any ingredients to suit your taste.

    I omitted the usual feta cheese in this recipe because I personally don't need it and haven't tried to replace it as of yet. But I know many of you will love your feta! Here is a recipe you can use to make your own from Happy Herbivore, Fat Free Vegan Feta Cheese. Or maybe you would like this Baked Almond Feta from Vegan Version. In either case,  be sure to read the comments before making this and enjoy! If you know of a great vegan feta recipe...please share...many would love to know.
    Simple, healthy and flavorful...

    Enjoy!


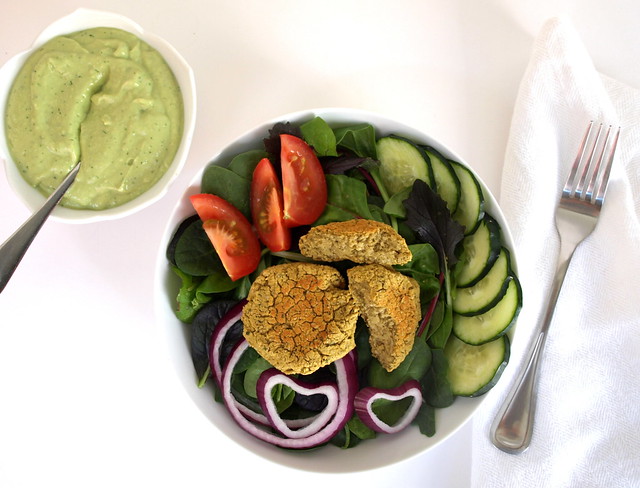
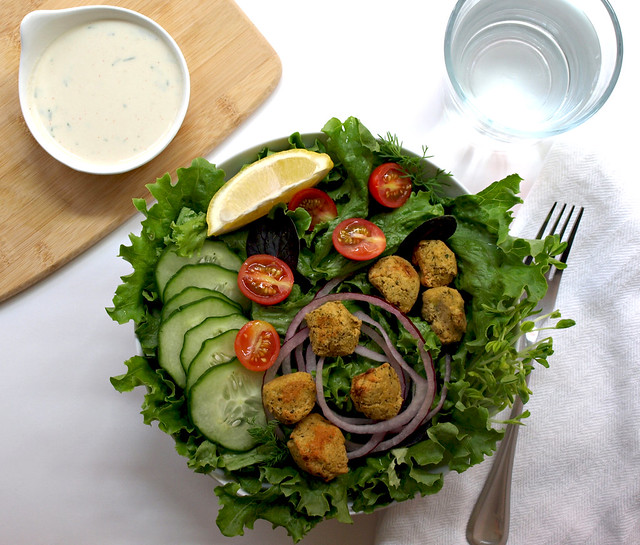
    Baked Falafel Salad + Two Creamy Dressings

    Baked Falafel + Two Creamy Dressings

    Chickpeas are an amazing bean and I'm finding out just how versatile they are. I've used chickpea's in a lentil stew, roasted them with spices for snacking on and used them on top of salads. They are the main ingredient in hummus, which is just as versatile as the chickpea itself. They are great freshly cooked and I have no problem snacking on them just like that. They also make good things like socca bread and chickpea omelets (recipes coming soon). Its flour can be used and combined with other gluten free flours to make gluten free baked items too. And now, I come across the falafel, another great way to use chickpeas. High in protein and full of fiber, anything made with chickpeas is a great addition to a healthy lifestyle.

    This last week I've been falafel making and am here to share with you my experiences. Falafels are a Mediterranean food and can be used in various ways like in salads, or made into sandwiches using pita bread and the ingredients of the salad base within this recipe along with a nice drizzle of dressing. You can also enjoy them by simply pairing your falafels with hummus, a flat bread and fruit (fresh grapes come to mind) for a great snack or simple meal. Along with the falafel recipe are two creamy style dressings. One is a more traditional dressing using tahini as the base while the other is not so traditional using avocado and cucumber. The avocado and cucumber dressing is inspired by my Avocado & Cucumber Soup and works great as a dressing too. I loved them both and decided to add them together for varying tastes. Hope you enjoy them!

    Baked Falafel Salad + Two Creamy Dressings

    Let me share with you a bit about my trials of falafel making. I have used canned beans and dried beans that have been soaked. It's important to soak them for at least 12 hours so they soften all the way through, but it's ideal to soak for 18 + hours and rinse well (this will help with gassiness and allow your body to absorb more of their nutrients). For me, both the canned and soaked beans worked out great without any issues. Use whatever style bean you prefer, or is convenient. You may like to try both for yourself to see which one you like best, I had no preference. I also made them with added flour and/or oil like some recipes call for. I personally found the flour and oil to not be necessary. I've baked my falafels in a skillet and on cookie sheets, both work great. I've also added a few extra ingredients like coriander which is nice but have omitted it here just to keep it simple as possible (although I do have the garlic & onion powder...I like them for good measure). But by all means, if you have coriander on hand go ahead and throw in a teaspoon if you like. As for the greens, feel free to use only parsley or cilantro if you like. That's a little about my experiences. I'm sure there is more to learn and each of us will have varying outcomes due to our kitchen appliances, tools and taste. All in all, these were great falafels and I see them being made fairly regularly around here!

    Baked Falafel + Two Creamy Dressings

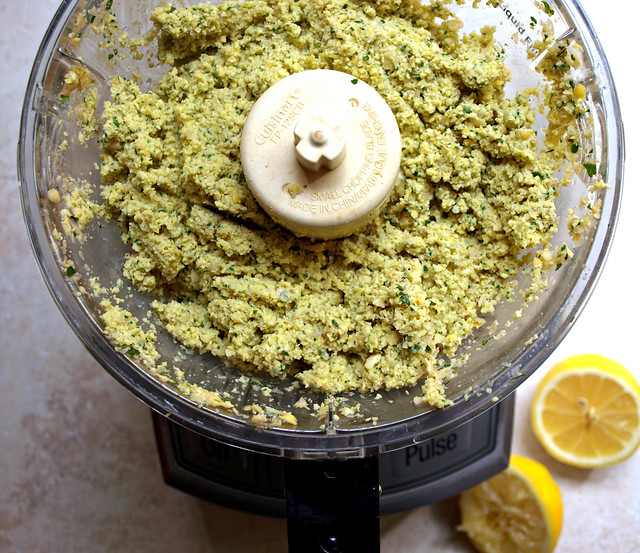
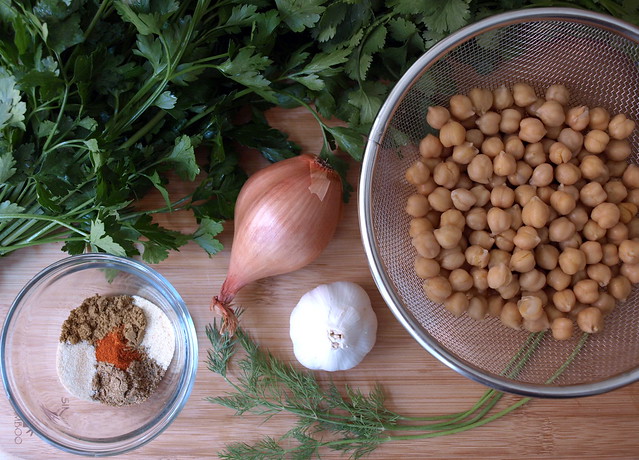
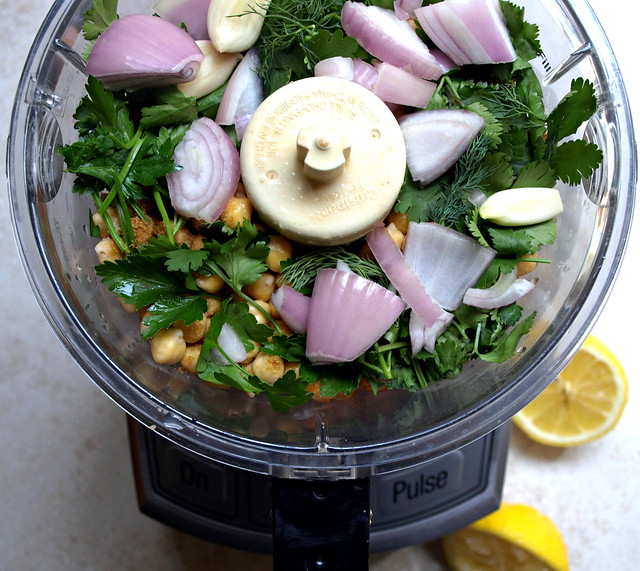
    Start by adding the ingredients to your food processor/blender...

    Baked Falafel + Two Creamy Dressings

    Blend until fairly smooth, stopping every now and then to scrap down the sides. And then your on to shaping your falafels into whatever size you like.

    Baked Falafel + Two Creamy Dressings

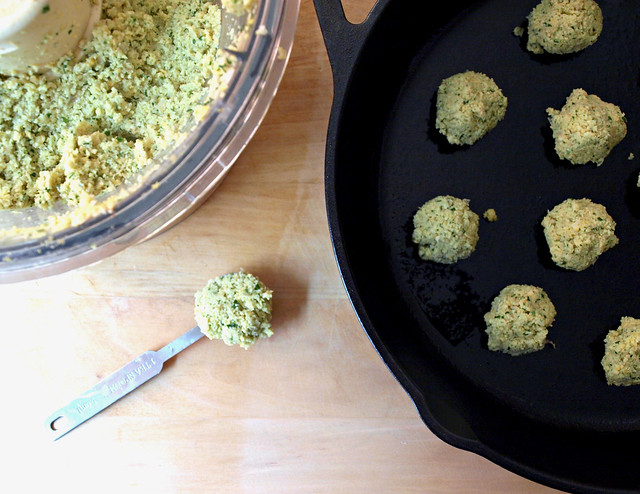
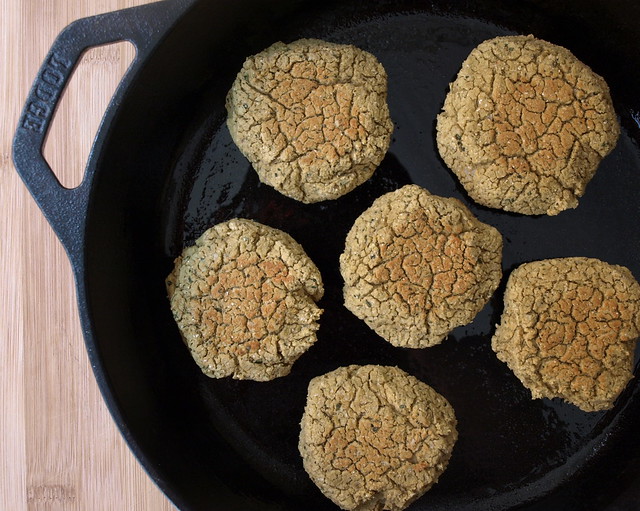
    These were some bite size falafels I made using a heaping teaspoon to scoop up the mixture, this yielded about 24 or so mini falafels. The ones below are the larger patties which I used approx 3 tablespoons per patty and yielded about 6. You can vary your size according to your needs and uses. All the ways I baked them they came out nicely firm on the outside and perfectly cooked on the inside, soft and tender. I know the ones below looked like a parched desert but trust me they weren't dry on the inside.

    Baked Falafel + Two Creamy Dressings

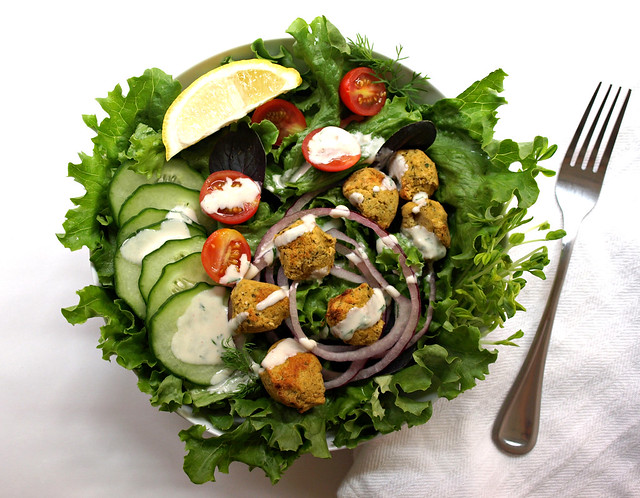
    Once your falafels are baked...make your salad or enjoy them however you like!

    Baked Falafel + Two Creamy Dressings

    Baked Falafal Salad + Two Creamy Dressings

    Salad Base
    • spring mix or choice of leafy greens
    • red onion, thinly sliced
    • tomatoes, sliced 
    • cucumber, thinly sliced

    Falafals
    • 1 can (15oz) garbanzo beans, drained and rinsed OR 3/4 heaping cup garbanzo beans soaked for at least 18 hours and drained (they will double in size)
    • 1/4 cup loosely packed cilantro, chopped
    • 1/4 cup loosely packed parsley, chopped
    • 3 tablespoons fresh dill, chopped (optional)
    • 1 small shallot or 1/2 small onion, roughly chopped
    • 3 garlic cloves
    • 1 teaspoon cumin
    • 1/2 teaspoon garlic powder
    • 1/2 teaspoon onion powder
    • pinch or two cayenne pepper, chili powder or smoked paprika (depending on your mood)
    • himalayan salt & freshly cracked pepper to taste

    Preheat oven to 400. Coat your cast iron skillet or cookie sheet with coconut oil, or oil of choice.

    In food processor/blender, combine all the ingredients for the falafels. Blend until fairly smooth. Form patties into whatever size you like....

    For larger patties: Scoop 3 tablespoons per patty...will yield approx. 6.

    For small patties: Scoop 1 heaping tablespoon per patty...will yield approx. 12.

    For mini patties: Scoop 1 heaping teaspoon...will yield approx. 24.

    Place patties on greased skillet/cookie sheet and bake for 10 minutes. Flip and bake for 15 minutes.  Total cooking time 25 minutes. If you find that your falafels are not as browned as you like, place them under the broiler for a minute or two, just be sure to keep an eye on them so they don't burn.

    Store leftover falafels in an air tight container. They will soften overnight. To warm them up and return crispness again to the outside, place under broiler or in a toaster oven at a high temp for a minute or two while keeping an eye on them so they don't burn. 


    Lemon-Tahini Dressing 
    • 4 tablespoons tahini
    • 1 garlic clove, pressed OR a dash or two garlic powder
    • juice of 1 large lemon
    • few dill fronds, cilantro or parsley, minced 
    • himalayan salt to taste
    • 1/3 cup water, + more to thin
    • pinch of cayenne

    In a small bowl, combine all ingredients and mix until well combined. Taste for seasoning and add more water as needed 1 tablespoon at a time or add more lemon juice. Store leftovers in an air tight container in the refrigerator for up to five days.


    OR, for something different and refreshing...


    Baked Falafel + Two Creamy Dressings

    Avocado-Cucumber Dressing 
    • 1 avocado
    • 1 cucumber, peeled
    • a few springs cilantro and dill fronds
    • 1 clove garlic
    • juice of 1/2 lemon
    • dash of onion powder
    • salt to taste
    • water as needed to thin

    In food processor/blender, combine all the ingredients except for the water. Blend until smooth. Taste for seasoning. Add water a tablespoon or two at a time until desired consistency. Best chilled in the refrigerator before serving. Leftovers will hold up a day or two in a sealed container in the refrigerator. It may last a little longer but it's gone by day two around my house.


    Once patties are ready, make your salad, top with falafels and dressing.

    Enjoy!
    How do you like your falafels? I like to experiment and would love to hear any suggestions and ideas!