.

Showing posts with label coconut. Show all posts

Spicy Thai Curry Corn Soup


Corn is still in season and I wanted to feature it in a dish since I love it so much. I eat it fresh off the cob, it doesn't even need to be cooked. I also have a new found love for curries these days. This was an excellent dish. The sweet corn pairs well with the spice from the red pepper flakes and curry powder while the coconut wraps it all up making this a great dish to come back to again and again. I would consider this a lightly cooked meal, the veggies, except onion, garlic & spinach, are crispy and close to fresh. It's also an easy dish to put together from start to finish...ready in about 30 minutes. You don't have to use all these vegetables either...I added the celery and mushrooms I had on hand just to use up. Five hearts for this soup!

Spicy Thai Curry Corn Soup

Ingredients
  • 1 tablespoon sesame oil
  • 1 small onion, chopped
  • 2 cloves garlic, chopped
  • 4 ears of corn, cut off the cob
  • 3 celery stalks, diced
  • 1 red bell pepper, diced
  • handful mushrooms, sliced
  • 3-4 teaspoons curry powder
  • 1 teaspoon red pepper flakes
  • 1 can lite coconut milk (15 oz)
  • 2 cups unsweetened non-dairy milk
  • 1 cup water
  • juice of 1 lime
  • himalayan salt & cracked pepper to taste
  • large handful spinach (I used a spinach & arugula blend)

Heat oil in large pot over medium high heat and saute onions until translucent. Add garlic, corn, celery, bell pepper and mushrooms, cook a few minutes more. Add coconut milk, unsweetened non-dairy milk, water, curry powder, red pepper flakes, juice of lime, salt & pepper to taste and cook on medium heat for 10 min or until heated through. Add spinach and cook until softened to your liking. Test for flavors adding more spices if desired. Serve with lime wedges. You may even want to serve with some crispy bread to soak up the juices...


Enjoy !

Coconut Lemon Bombs

Coconut Lemon Bombs

Coconut + Lemon = Flavor Explosion! 


I love lemony desserts, especially when they are raw and so healthy. The ingredient list is full of whole foods so you can be sure that you are feeding yourself a nourishing and healthy treat any time of day. This one is a nice combination of lemon and coconut with just the right amount of sweetness. Both flavors come through for a bright lemon flavor with a hint of coconut in this no bake cookie ball. I hope you enjoy them as much as I did.

Coconut Lemon Bombs

Ingredients
  • 1 cup cashews
  • 1/3 cup buckwheat groats/Kasha*
  • 1/3 cup rolled oats (I use GF)
  • 1/4 cup unsweetened shredded coconut flakes, optional
  • zest of 2 lemons, medium sized
  • juice of one lemon
  • 6 - 7 medjool dates, softened and pitted
  • 1/4-1/2 cup shredded coconut flakes for rolling

Place cashews, buckwheat groats and/or oats in food processor and blend until a medium to fine grind (doesn't have to be perfect). The buckwheat may stay a bit chunky so if your looking for a smooth center use all oats. Add rest of ingredients and blend until combined and you have a doughy consistency. If you find your dough is a bit too dry try adding fresh squeezed lemon juice, 1 tablespoon at a time. Chill dough for about 20-30 minutes. Roll into 1 inch balls then roll in coconut flakes. Makes apprx. 12 - 14. Store in air tight container in refrigerator for up to two weeks.

* If you don't have buckwheat grouts, replace with oats or nuts. I love to include buckwheat wherever I can since it is a 'superfood' and packs a lot of protein and fiber per serving, they also have a nice nutty flavor. Per 1/4 cup serving you are getting 6 grams of protein and 5 grams of fiber, more so than oats per serving, 1/2 cup yields 5 grams of protein and 4 grams of fiber.

Some of my favorite raw dessert blogs:


Raw Coconut Brownie Bites


I'm so excited about this recipe I found for these raw brownies. They are inspired by these two recipes from What's Cooking Good Looking and Food Doodles. They are simple and fabulous! This is the real deal...heaven here on earth for those seeking a great raw vegan brownie...this is it. I was amazed when I first tasted this, it is so much like a brownie to me. It's perfectly chocolaty, chewy and completely satisfying...one or two is all you need. I will never bother with any baked brownie again as they are so easy to make and full of wholesome goodness. These contain no refined sugars, no butters, no flours, and only six ingredients to boot. If your not a fan of coconut, try replacing the coconut with one of the nuts suggested. Let me warn you, these will go very fast!


Raw Coconut Brownie Bites
Ingredients
  • 3/4 cup raw almonds, walnuts or pecans
  • 1/3 cup unsweetened shredded coconut
  • 1/3 cup unsweetened cocoa powder
  • 1 1/3 cups packed medjool dates, pitted, softened* and chopped
  • 1 teaspoon vanilla
  • 1/8 teaspoon himalayan salt

Combine almonds, coconut and cocoa powder in food processor/blender and process until almonds are a fairly fine consistency. Remove mixture and set aside.

Add dates to the food processor/blender and process until dates become a paste. Add in the almond, coconut and cocoa powder mixture along with the remaining vanilla and salt. Pulse until just combined.

Line a loaf pan with plastic wrap, wax paper or parchment paper. Place mixture into loaf pan, press down firmly while smoothing out the surface. Here you can either put the brownies in the fridge for 20 minutes or so to harden a bit before cutting, or you can pull the brownies out right away and cut into 12 squares to make a 3-4 bite size brownie or cut into 24 squares for a 1-2 bite size brownie. Can be stored in an airtight container in the fridge, or on the counter, for up to two weeks.

Notes:

You can also roll these into 1 inch balls and eat as is, or roll them in shredded coconut or cocoa/cacao powder. If rolling into balls you should get apprx. 18-24 balls.

Additional toppings you may like: 

Shredded coconut
Dusting of cocoa powder
Chopped or whole raw almonds

*Depending on the type and freshness of your dates, you may need to soak them. To soften your dates, place dates in a medium size bowl and soak in hot water for a few minutes. I really prefer the medjool dates for their softness, they rarely need softening, but feel to use your favorite dates. Just be sure to soak before using them. 

Enjoy!

    Raw Chocolate Pistachio Oatmeal Bites

    Chocolate Pistachio Oatmeal Cookies

    I could eat cookies all day long. Well, maybe not really, I would miss all the other great foods I love. But when I need a cookie treat, these raw cookie balls are what I want...no flour, no butter, no refined sugars (except for chocolate chips if using non raw), and as delicious as the old cookie batter I used to love to eat, but healthier. To me that was always the best part of making cookies, eating the dough! I don't know about you but I used to make them just for that reason, I would even freeze the dough to eat for later. These are a much better option for many reasons and they completely satisfy my sweet tooth...these are fairly rich, one or two is about all you need with these. Ok, maybe three. :)

    Chocolate Pistachio Oatmeal Cookies

    I set out with the intention of this recipe focusing on a sweet & salty combination. My first batch was good, some thought it was too salty and some really liked it, so it is to taste and both options are available. My next batch I will use a small amount and sprinkle a little salt on  top instead of adding too much to the mixture. That you will get a taste of the salt as a surprise every now and then. If you like to make raw cocoa chips, the link to a good recipe, by Rawified, is in the ingredients list. These are meant to be a chunky style cookie ball.

    Chocolate Pistachio Oatmeal Cookies
    Chocolate Pistachio Oatmeal Cookies

    Chocolate Pistachio Oatmeal Bites

    Ingredients
    • 3/4 cup dates, pitted and chopped
    • 1/4 cup unsweetened shredded coconut
    • 1/2 cup oats (I used GF)
    • 1 cup pistachios, divided
    • 1 teaspoon vanilla
    • 3 tablespoon pure maple syrup
    • 1/8-1/4 teaspoon himalayan salt
    • 1/4 cup water, as needed
    • 1/4 cup raw dark chocolate chips , cacao nibs or vegan chocolate chips

    Place all ingredients in food processor except for 1/4 cup of the pistachio's, water and chocolate chips. Blend until combined adding the water a little at a time to help with the consistency of the dough, this will depend on your liking. Next, mix in the rest of the pistachio's and chocolate chips, using your hands for this is best. I also added a large pinch of oats for a more chunky feel to my cookies. Roll into 1 inch balls (mine were a bit bigger) and enjoy licking your fingers, and the bowl, when your all done. Makes approx. 13 - 16 balls.

    Next, the crushed pistachio pieces to roll the balls in which is optional but a nice touch. On a flat surface, I placed two pieces of wax paper with about 1/4-1/3 cup pistachio's in between and used a rolling pin to smash the pistachio's, as shown above, in a somewhat rough crushing, leaving some large and mostly small pieces. Roll your balls on the nuts and store in airtight container. They will keep in the fridge for a couple weeks and last even longer in the freezer. You can always make these ahead for special occasions.


    Enjoy!


    CURRY ROASTED CAULIFLOWER & QUINOA SALAD

    CURRIED ROASTED CAULIFLOWER & QUINOA SALAD

    Get ready for a different flavor sensation! It's a nice balance of sweet, a bit of tang and curry flavor that I just can't get enough of. If you love roasted cauliflower and the combination of ingredients in this salad, I have no doubt you will find this to be a great addition to your meal rotations.

    This recipe came about from a recent trip to a small grocery store near me. I picked up a version they had and thought it was good enough to recreate for the recipe collection. The quinoa is my own addition, I wanted to add some protein and extra fullness to the salad. The remaining ingredients are almost the same. I did have to guess at the dressing but it came out perfect, even better than theirs I think...much less oily. This can easily be a side salad or a full meal. Great for to-go lunches as well, can be served at room temp or chilled. 

    To all of those who have picked up a copy of THE ARCHIVES VOL 1, thank you so much! :)

    CURRIED ROASTED CAULIFLOWER & QUINOA SALADCURRIED ROASTED CAULIFLOWER & QUINOA SALAD

    Roast your cauliflower and prepare your quinoa...

    CURRIED ROASTED CAULIFLOWER & QUINOA SALAD

    Mix the dressing and gather the rest of the ingredients...

    CURRIED ROASTED CAULIFLOWER & QUINOA SALAD

    toss everything together and you're ready for a flavorful and filling salad!

    CURRIED ROASTED CAULIFLOWER & QUINOA SALAD

    CURRY ROASTED CAULIFLOWER & QUINOA SALAD

    Ingredients
    • 1/2 cup dried quinoa
    • 1 cup water (or just under)
    • 1 large head of cauliflower
    • 1 medium apple (I used Fuji), cored and diced
    • 1/2 cup golden raisins
    • 1/3 cup shredded coconut

    Dressing
    • 3 tablespoons grapeseed or olive oil
    • 2 - 3 tablespoons apple cider vinegar 
    • 1 tablespoon dijon mustard
    • 1 tablespoon pure maple syrup
    • 1 tablespoon lemon or orange juice
    • 1 tablespoon water
    • 2 teaspoons curry powder
    • mineral salt & fresh cracked pepper, to taste

    Preheat oven to 425 degrees F. Cut cauliflower into florets. Lay in a single layer on a large rimmed baking sheet. Add a drizzle of oil and toss to coat. Roast in the oven for 40 minutes, mixing the cauliflower around half way through. Remove from oven, let cool. 

    Rinse your quinoa using a fine mesh sieve (honestly, I usually skip this part but have it here for good measure. Don't feel you have to do it but you may find that you prefer it that way.) In a medium pot/pan, add quinoa and water, bring to a boil, cover, reduce heat to low and simmer for 15 minutes. Once done, turn heat off, uncover and let rest for 15 minutes. Fluff with a fork and set aside.

    In a small bowl, mix together the ingredients for the dressing. Set aside to let the flavors develop. Taste for seasoning adding anything extra you might like. 

    In a large mixing bowl, combine quinoa, cauliflower, apple, raisins, shredded coconut and dressing, toss well to coat. 

    Serve at room temperature or chilled.

    Serves 4

    Notes:

    If you know and love the Orange Muscat Champagne Vinegar from Trader Joe's, or elsewhere, this is a great place to use it! Use it in place of the apple cider vinegar.

    Sub in a tablespoon or so of water for the oil. Try using 1 tablespoon oil and 2 - 3 tablespoons water.

    Feel free to use regular raisins or currants. Cranberries may even be a nice change up.

    For my quinoa, I buy one bag each of white and tri-color and mix them together creating a nice blend of color and texture.

    Enjoy this flavor combination, it's delicious!


    Carrot Ginger Sunshine Soup


    Happy day when you add a bowl of sunshine to your life. This is just that...lot's of flavor and pretty colors to brighten any day. What else is so great about this recipe is that it's a one pot meal. It just keeps getting brighter and brighter. Simple to put together + simple to put away = Simply lovely! Even better still...this recipe is versatile to pretty much whatever you have in your kitchen. You can replace the potatoes with more carrots and zucchini if you like. I happen to have added coconut milk to this recipe but you can easily use your favorite nut milk instead without losing any flavor. Both ways are delicious and will you smiling!

    Let's shine on...

    Carrot Ginger Sunshine Soup

    Ingredients
    • 4 medium carrots, diced
    • 3 medium potatoes, diced
    • 1 medium zucchini, chopped
    • 1 small onion or 1 shallot, chopped
    • 1 inch fresh ginger, chopped
    • 2 garlic cloves, chopped
    • 1 teaspoon cumin
    • 1 teaspoon coriander 
    • 1/2 teaspoon turmeric
    • 1/8 teaspoon nutmeg
    • 1 tablespoon vegetable broth powder, optional
    • 1/2 teaspoon paprika
    • 2 Tbs olive oil
    • 1/2 lemon squeezed
    • 1/4  water
    • 1 can lite coconut milk, or nut milk*
    • 3 cups water, give or take
    • himalayan salt & pepper to taste

    Heat oil in a large pot on medium heat, add garlic, onion, ginger, pepper, cumin, coriander, paprika, turmeric, nutmeg. Saute mixture until garlic and onions are translucent, about 5 min. 

    Add carrots, potatoes, zucchini, mix well with spices and cook another 7 minutes or so. Add lemon juice and 1/4 cup water, cover, and cook until vegetables are soft and cooked, stirring occasionally, 10 minutes or so, depends on how small you chopped your pieces...the smaller the quicker they soften.

    Turn off heat , add coconut milk. Using an immersion blender, purée vegetables until creamy. Return to medium heat, add broth and cook until completely warmed through. Serve with bread or crackers if you wish. I had some olive oil & sea salt pita chips with mine. Very delicious!


    Here's a picture of how to get the carrot flowers, definitely an art that I need to practice. Luckily they sort of sink into the soup a little softening the edges making them look practically perfect. It'll be our secret. They are just too cute !

    Enjoy the sunshine !


    Adapted from The Lotus and The Artichoke... Carrot Ginger Zucchini Soup


    BANANA COCONUT GINGER ICE CREAM


    If you have followed my blog long enough, you know that I love my banana ice creams! The reason being is that I don't have an ice cream maker, or the space for one, so I make due by blending up banana's with all kinds of fun ingredients. They can be served as a soft-serve, or frozen for a few hours and scooped out like ice cream. The best of both worlds. Just blend your ingredients and enjoy now or later. Easy and done!

    This recipe came about on a whim. I threw these ingredients together and it worked beautifully (of course, this combo is a no brainer!). My taste buds were extremely pleased and if you love these ingredients, yours will be too! 

    Banana Coconut Ginger Ice Cream (soft serve)Banana Coconut Ginger Ice Cream (soft serve)Banana Coconut Ginger Ice Cream (soft serve)

     Get ready for summer with some of the easiest ice cream you'll ever make!

    Banana Coconut Ginger Ice Cream (soft serve)

    Soft-serve or frozen....you choose!

    Banana Coconut Ginger Ice Cream

    BANANA COCONUT GINGER ICE CREAM

    Ingredients
    • 3 frozen bananas
    • 2 - 3 tablespoons coconut butter, coconut milk* or 3 tablespoons shredded coconut
    • 2 tablespoons pure maple syrup
    • 1 tablespoon ginger, minced
    • splash or two of unsweetened vanilla almond milk

    Place ingredients into your food processor/blender, except milk, process, adding milk as needed through the feeder to help move the mixture around, blend until fairly smooth and creamy. 

    For soft-serve: eat right away.

    For ice cream: place mixture into a freezer safe container, cover and place in the freezer for at least 4 hours before serving. Scoop out like ice cream and serve.

    Serve with mini chocolate chips, shredded coconut or whatever you like.

    Serves 2 to 3...or one as a meal.

    Notes: 

    *Canned coconut milk should be chilled before using, store the remaining in the refrigerator for up to a week.

    If using shredded coconut, place in food processor/blender and blend until finely shredded or creamy.

    Try not to over blend, it will become almost frothy. I personally didn't care for over blending.

    Adjust ingredients to suit your taste.


    'Sweet Tang' Smoothie


    Sweet pineapple, tangy plum and chia seeds make for a smoothie that will give you plenty of extended energy that tastes great any time of day. It's a 'Sweet Tang' Smoothie.


     Chia seeds are not just for the 'chia pet' that I remember growing up with, in fact, they are a 'superfood'. They contain omega-3 oil (a great source for vegans), its protein is complete to raise your energy levels and they expand with liquids to keep you feeling fuller longer. It contains a lot of nutrition in a little package. A serving (two Tbsp) of chia seeds has 60 calories, 5 grams of fiber, 3 grams of protein and 4 grams of healthy fat. They have no flavor and are so little you really can't tell they're there. They are a staple in my kitchen these days. Great To sprinkle on salads, fruit dishes, add to smoothies, cereal...all kinds of places to sneak these in!

    'Sweet Tang' Smoothie

    Ingredients
    • 6 plums
    • 1/2 cup fresh pineapple chunks
    • 1 cup coconut water
    • 2 tablespoon chia seeds

    Directions
    1. Wash and remove seeds from plums. 
    2. Place all ingredients in blender and blend to desired smoothness. 

    * Makes approximately 24 oz., a glass and a half, which was a serving for me.

    * To make this a 'Fiber Blast Smoothie' add an extra serving of chia seeds. You can also replace the coconut water with other water if like.

    Enjoy !

    APPLE NACHOS

    Apple Nachos

    Gather some of your favorite apples and get ready to enjoy a simple, fun and delicious treat! I'm not sure why I haven't made this yet, I guess it's true that everything has its time. I've seen apple nachos here and there on the web over the last couple years, a quick google search will pull up all kinds of similar versions, but I never put it on my immediate to do list. With all the busyness going on in life right now, I was thinking of something easy to share here and this popped into mind. I'm so glad that the time has come because these are absolutely delicious! A well loved classic, and I can see why. It's fresh, sweet (if using a sweet apple), with bits of chocolate and coconut flakes all topped with warm nut butter and cinnamon. What's not to love?! I easily ate two apples and could've eaten more if in the end I felt like slicing up more. But really two was enough, and maybe one will be enough for you, but I highly recommend going ahead and slicing up 2 per person, just in case. If you don't end up eating all the apple slices, the lemon juice will keep them from turning brown so you can make it with the leftovers the next day. This is also a great way to get in some protein that everyone seems to fuse over about a vegan diet. Where do you get your protein? How many times have I heard that. ;) Have no fear, this treat will give you about 8 grams of protein for every 2 tablespoons of nut butter you use (different butters may vary). Not too bad at all! This is a great snack for kids, as well as adults. I can see myself indulging in this quite often!

    APPLE NACHOS

    If you can circle your apples similar to this, you'll be sure to have a little of everything on every apple slice without causing too much mess when eating. But I sure didn't mind liking my fingers clean and I'm sure you won't mind either!

    Apple Nachos
    APPLE NACHOSAPPLE NACHOS

    I was asked if I'd like to try out this gourmet raw almond butter from Dastony, and being that it's from a small family business I said of course. I'm all about promoting small family run businesses, and they deliver a wonderful product that's smooth & creamy! They have a quite a few butters to choose from, even a couple sprouted ones that look delicious, all of which may work well in this recipe. Their butters are 100% organic, stone ground, raw, vegan, and free from additives and preservatives. If you're looking for that special nut butter as a gift or one for yourself to use every day, this is it!

    APPLE NACHOSAPPLE NACHOSAPPLE NACHOS

    APPLE NACHOS

    Ingredients
    • 2 apples of choice 
    • 1/4 cup natural nut butter of choice
    • small handful chocolate chips (I used Enjoy Life Mini Chips)
    • small handful shredded coconut
    • small handful slivered almonds
    • sprinkle of cinnamon
    • 1 tablespoon lemon juice

    Optional toppings:
    • hemp hearts
    • cacao nibs
    • raisins or currants
    • ground cardamom
    • pure maple syrup

    Wash, core and cut your apples into 1/4 inch slices. I like to cut mine into quarters, take a small paring knife and carefully remove the core and upper and lower end where dirt may still be collected (even after washing). Lay apple quarters on a flat surface with the inside of the apple facing up, carefully slice your apple into 1/4 inch slices, you may even be able to get them into 1/8 inch slices if your extremely patient, even 1/2 inch slices is good too. Whatever thickness you prefer, no rules here! Place apple slices in a small bowl with the lemon juice, toss to coat.

    Heat your nut butter just until warmed and somewhat runny. I like to heat mine by using a small silicon bowl placed in a small pot with just enough water to reach half way up the side of the silicon bowl, heat water on low and gently heat the nut butter until warm and drizzable.

    On a serving plate, lay your apple slices in a single layer around the outside edge, then layer another small layer over those but towards the inside center of the plate (like shown in the picture above). Drizzle the nut butter in a circular motion, from the middle of the plate to the outside edge. You can also just zig zag the almond butter from one side to the other if you like. Again, no rules...just do what you feel is best! Top with choco chips, coconut flakes, almonds and sprinkle of cinnamon (or whatever you've chosen to use as your toppings). Enjoy this simple yet delicious treat!

    Serves one generously, or two as a small plate.

    Notes: 

    Use red or green apples, you may even consider using one of each for a combination of sweet & tart.

    Make this 100% raw by using raw nut butters, raw cacao chips and unsweetened shredded coconut.

    Live well & thrive!

    I'd love to see your masterpieces...
    #thesimpleveganista


    Coconut Bacon


    Let's talk about this coconut bacon for a second. It's pretty amazing that you can replicate a baconish flavor and crispness with coconut flakes. I've had my eye on this for quite a while and finally decided to give it a try. I first heard of coconut bacon from Fettle Vegan last year, which has got tons of fanfare since, even making it onto the PPK Top 100 of 2012. Awesome! And just recently I saw this post from Cupcakes and Kale and decided it was time to try this wonder of a creation. I gave these and a few other various recipes a try. All were tasty in their own way but my mission was still not complete. After more searching I finally read about adding smoked paprika from Then Squash and gave it a try. That was my favorite of all. The smoked paprika added a wonderful layer of warmth that I fell in love with. I can eat this stuff by the handfuls. Just to be sure I was not alone in loving this, I shared it with my non-vegan friends and it was a hit. "It's guilt free with all the flavor", one of my friends said. They were asking me to make a batch for them and suggesting I start to sell this stuff. That most likely won't be happening but lucky there is a company already ahead of the curve, you can find out more here: Phoney Baloney's Coconut Bacon. Now you have an option to make it yourself or purchase for convenience. And now I can say my coconut bacon mission is now complete!

    This is a great recipe to have on hand. It's easy and fairly quick, you can be enjoying your coconut bacon in about 40 minutes from start to finish. Then you're ready to make the classic B.L.T. sandwich or wrap. Try adding it on top of soups, salads, tofu scrambles, home fries, pizza. Top it on stuffed or mashed potatoes, roasted veggies like brussels sprouts or other cooked vegetables, beans and/or legumes. And don't forget the sweets, this would be great on these Butterscotch Cupcakes from Post Punk Kitchen or these Maple Bacon Donuts from Phoney Baloney's. There are so many possibilities for its uses and I have no doubt that you will find all kinds of ways to add this quick and tasty tidbit to your meals.

    Coconut Bacon (7)

    Coconut Bacon

    Ingredients
    • 2 tablespoons tamari, bragg's amino's or soy sauce
    • 1 tablespoon liquid smoke 
    • 1 tablespoon pure maple syrup 
    • 1/2 teaspoon smoked paprika 
    • 3 1/2 cups large flaked coconut (about a 7 oz.)
    • mineral salt for sprinkling, optional
    • coconut oil, for greasing 

    Preheat oven to 325 degrees.

    Mix the first four ingredients in a small bowl making sure to break up any clumps of paprika. In a large bowl add coconut flakes, drizzle the wet mixture over top and gently toss making sure to coat each flake well, about 45 seconds or so.

    Using a slotted spoon, scoop seasoned coconut flakes and place onto a lightly greased, or parchment paper lined, cookie sheet/s. I used two sheets so they could be laid out in a single layer as much as possible but you can also use a single cookie sheet or a large 9 x 13 baking dish and have good results (the key is to stir during baking). Sprinkle coconut flakes lightly with a bit of mineral salt if desired.

    Place in oven and bake for 20-25 minutes. Set the timer for intervals of 5 minutes and stir each time making sure to rearrange all pieces by bringing the center to the outside and the outside to the center for even cooking. You may even like to change the position of the sheets in the oven after the second interval, moving the top sheet to the bottom rack and vice versa. After the first 15 minutes, keep close and keep watch as the coconut bacon can burn very quickly at this point. I really babied my coconut bacon towards the end, it'll be worth your while if you do too!

    Remove when coconut has a nice browned and caramelized color. Let cool, it will get crispy as it cools.

    Once completely cooled you can store leftovers in an air tight container and keep in the pantry for up to a week or two. If it softens a bit, re-crisp in the toaster oven on medium for a few minutes, or under the broiler for a few seconds, keeping an eye that it doesn't burn.

    Notes:

    Use more or less maple syrup to suit your taste. I like the maple flavor and usually add a heaping tablespoon. Omit it if you don't want any maple flavor at all.

    Keep in mind there are different flavors of liquid smoke...ie, hickory, mesquite, etc., use your favorite. For a more intense smoke flavor, add up to 1 tablespoon more of the liquid smoke of choice.

    Some recipes call for an addition of 1 tablespoon water or oil in the seasoning mixture. I found that I didn't need it and do not call for it in my recipe. Use your discretion as to whether you want/need to add this ingredient. Oil is used to help coat and bind the seasoning to the coconut flakes. Water is used to ensure there is enough liquids to coat flakes evenly.

    • • •

    And what's the first thing I made using my coconut bacon and sharing on Instagram?

    Bacon, lettuce, tomato & avocado wrap...B.L.T.A wrap!

    It was a B.L.T. + Avocado Wrap. And it was delicious!

    Salad with diced apple, coconut bacon and peanut dresisng!

    The next day I made a great little salad of red & green oak leaf lettuce, diced fuji apple, peanut dressing and topped with coconut bacon. This was super!

    Tofu scramble & coconut bacon wrap!

    And lastly if I may, a tofu scramble wrap with coconut bacon and garlic chili sauce...seriously good!

    Now go make yourself some of this coconut bacon and enjoy!


    Follow my kitchen on Instagram if you like...


    If you don't care for coconut bacon, give this Shitake Bacon from Olives For Dinner a try!


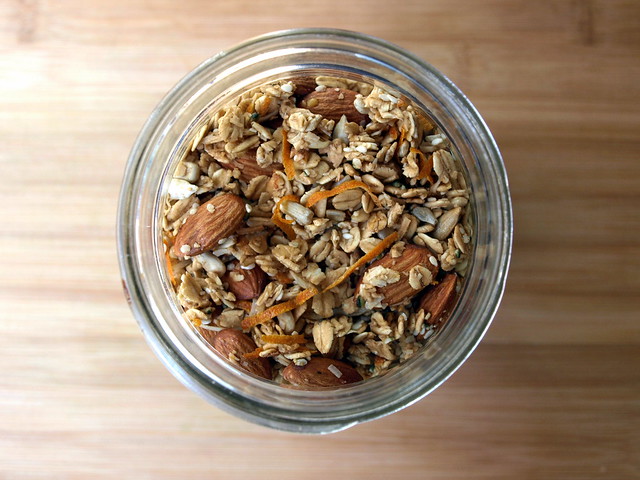
    Ginger-Orange Granola

    Ginger-Orange Granola

    Next time you make granola...this is a must try! Especially if you love ginger and orange zest. I thought my last granola, Seeds & Goji Berry Granola, was delicious but this may just surpass that by a margin. I've been trying a few granola's lately and these two have come out on top. My house smelled like orange cinnamon rolls...mouthwatering! This granola has such nice flavoring, especially with the orange zest. I love zest of any kind, so the addition of the orange zest is welcome. It toasts up just perfectly along with the other ingredients. And when you get a bite of the toasted sesame seeds, they add another layer of deliciousness. We have another great granola to add to the recipe list. I just love a good granola and I think you'll love this one too!

    Ginger-Orange Granola

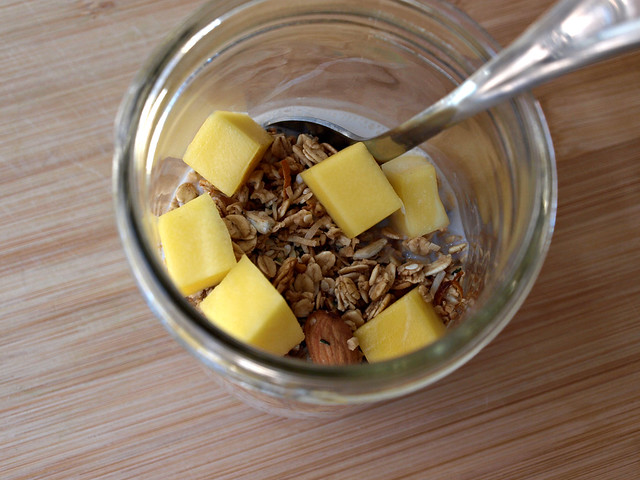
    This was terrific as a cereal with diced mango and unsweetened almond milk. I can see this being a great muesli mix too for overnight oats. Might even be good with some fresh squeezed orange juice as your liquid. So simple and delicious...


    Ginger-Orange Granola

    Ingredients
    • 2 1/2 cups rolled oats (I used GF)
    • 1/2 cup sunflower seeds
    • 2/3 cup almonds
    • 1/3 cup shredded unsweetened coconut
    • couple tablespoons sesame seeds
    • couple tablespoons hemp hearts, ground flax seeds or chia seeds
    • 1 heaping teaspoon ground ginger
    • 1/2 teaspoon cinnamon
    • pinch of salt
    • zest of 1 - 2 oranges, chopped fine or left as is 
    • 2/3 - 3/4 cups pure maple syrup
    • coconut oil, to grease

    Preheat oven to 250 degrees.

    Mix all of your dry ingredients together in a large mixing bowl. Add in your maple syrup and mix well to coat. On a greased rimmed cookie sheet, lay granola in a single layer. You may need to use 2 rimmed sheets. Place sheets in oven and cook for 30 - 40 minutes, stirring every 10 minutes or so to ensure even toasting.

    Once done, remove from oven, let cool completely, store in an air tight container for up to a month.

    Let this be a template, add/subtract anything you like. If you're missing an ingredient you may add extra of something else you do have on hand. I like lots of zest and added the zest of 2 oranges.

    Enjoy the aroma and the taste!


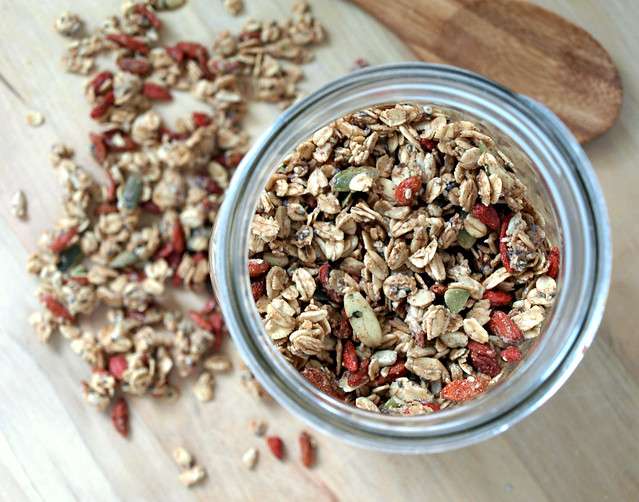
    Seeds & Goji Berry Granola

    Seeds & Goji Berry Granola

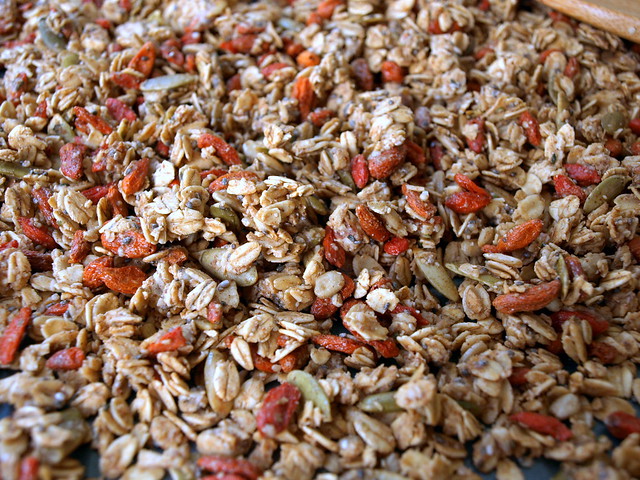
    Let's talk granola, seeds and goji berries for a second, shall we? I know there are many recipes out there and it's no wonder why... it's pretty great and handy to have around. Have it as cold cereal, top it on hot oatmeal, non-dairy yogurts or non-dairy ice creams, or simply take some to-go in a small container...it's a great snack or meal that is filling, healthy and just plain good. It's so versatile too. You can pretty much add anything to your base and come out with something wonderful. That happens to be the case here. I have a ton of goji berries in my fridge along with pumpkin (pepitas) and sunflower seeds that needed to be put to good use. A few days ago I ran across this article from Wake Up World entitled, Five Healthy Seeds, which I had posted to the Facebook page. That planted the seed so to speak for this recipe. Seeds are great; especially for those who have nut allergies...they can be a nice alternative. Some of the best seeds in whole form are hemp, sunflower, chia, sesame and pumpkin seeds. Flax seeds are great too but unless they are ground you're not going to get their full benefits as they will pass straight through the body without much notice. As for the goji berries, well I love them because they don't have any added sweeteners like most dried fruits do (I also like raisins for this reason). They are full of anti-oxidants just as other berries like blueberries, acai berries, cranberries, strawberries and cherries. Find out more about their nutritional profile from this article from Live Strong, Goji Berries Nutrition.

    Seeds & Goji Berry Granola

    Seeds & Goji Berry Granola

    Ingredients
    • 2 1/2 cups old fashioned rolled oats (I used GF)
    • 1/3 cup sunflower seeds
    • 1/3 cup pumpkin seeds (pepitas)
    • 1/3 cup goji berries
    • 2 tablespoons chia seeds
    • 2 tablespoons hemp hearts or the entire seed
    • 1 teaspoon cinnamon
    • pinch of salt
    • 1/2 - 3/4 cup pure maple syrup*
    • 1/4 cup sunflower seed butter (sunbutter), optional
    • 1 teaspoon vanilla

    Preheat oven to 250 degrees.

    Combine all your dry ingredients in a medium size bowl. Add your maple syrup, sunbutter and vanilla. Mix until well coated.

    On a greased (I used coconut oil), or ungreased, baking sheet (use two sheets if you like), add your granola, laying it flat and bake for about 30- 35 minutes, stirring the mixture every 10 minutes to ensure even cooking. If using two baking sheets, you may even like to switch their positions in the oven once after stirring. If using a smaller baking dish such as a 9x9 or 11x13, bake for up to 1 hour or so, or until golden throughout. Be sure to stir the mixture every 15 minutes or so.

    Once done, remove from oven and let cool completely before storing in an air tight container of choice. Will keep up to one month.

    * The more syrup you use the more likely you are to create larger granola chunks throughout. I only used 1/2 cup in mine and felt it was a nice texture with many clumps. It also was a perfect sweetness for my liking, not too sweet. Add additional syrup to your preferences.

    Feel free to add 1/4 cup or so unsweetened shredded coconut to the dry mixture as well.

    Enjoy!

    Overnight Buckwheat & Steel Cut Oats Breakfast Jars

    Buckwheat & Steel Oats Breakfast Jars

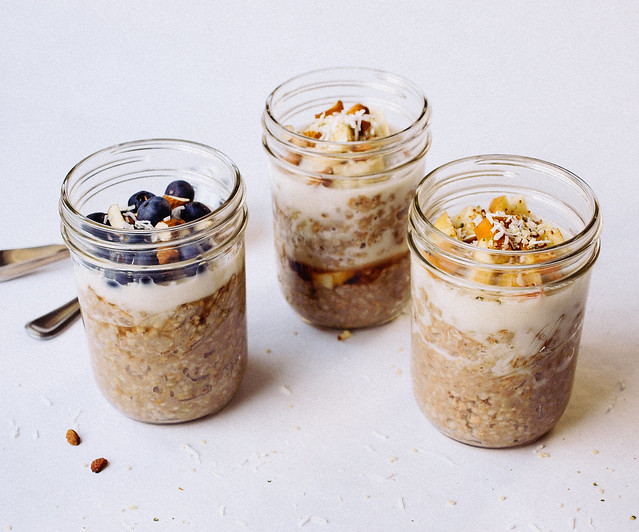
    Lately, I've been eating a lot of oatmeal. Especially when I'm on the go, I'll stop by Starbuck's and grab their blueberry oatmeal which is delicious and always hits the spot. I figured it was time to look into coming up with something that I can take on the go. In comes overnight oats, and not just one serving but five for the week. I love the idea of having a couple jars in the refrigerator to grab on the go or simply take out and eat whenever I'm home and in the mood. After a little searching, I can across this recipe from The Kitchn for overnight steel cut oats in jars. Since I had both steel cut oats and buckwheat groats in the pantry, I decided to use the combination. Feel free to use one or the other if you prefer or only have one available (see notes). I've done a Raw Bircher Muesli using buckwheat groats and oats which I love, but cooking the groats and oats and letting them sit overnight leaves them a bit softer, chewier and creamier than my raw version. I really enjoyed this version and would like to try some other variations with grains in the future.

    Buckwheat & Steel Oats Breakfast Jars
    Buckwheat & Steel Oats Breakfast Jars

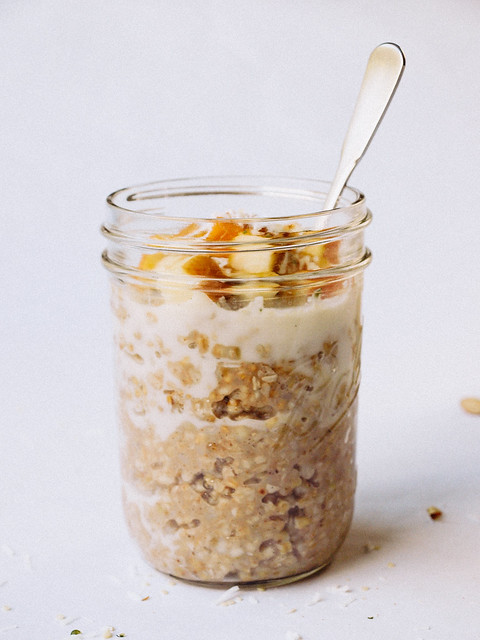
    Buckwheat groats and steel cut oats are both top notch grains and make for a perfect porridge. Full of protein and fiber, this will leave you feeling satisfied and ready to go for a few hours or more. Add in some of the optional toppings making sure that at least one of them is fresh and you have yourself one heart healthy breakfast, lunch or dinner for that matter! 

    Buckwheat & Steel Oats Breakfast JarsBuckwheat & Steel Oats Breakfast Jars

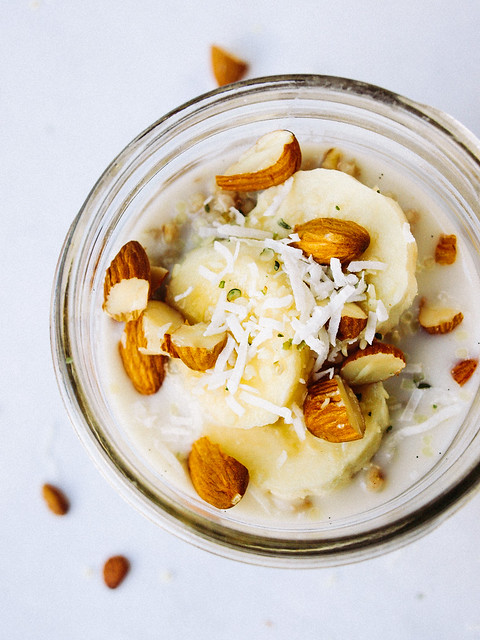
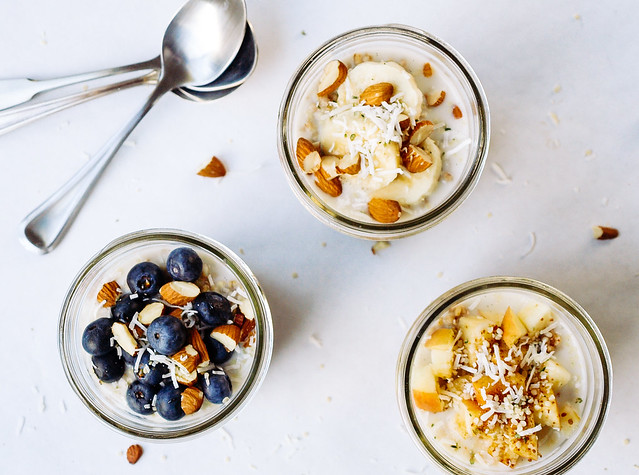
    You may like to try sliced bananas, chopped almonds, hemp hearts, coconut flakes along with a splash of almond milk and pure maple syrup. Here I added sliced bananas half way through and topped with cinnamon before adding more porridge and topping it off. Nice to have some goodies in the center after you've run out...it's like an overnight oatmeal parfait!

    Buckwheat & Steel Oats Breakfast JarsBuckwheat & Steel Oats Breakfast Jars
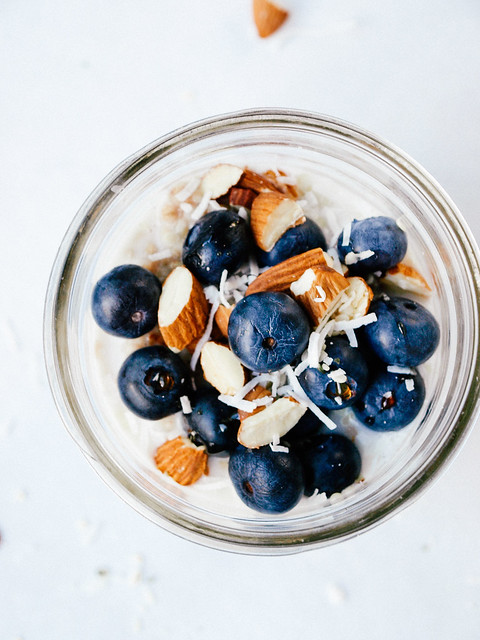
    Or maybe some blueberries, chopped almonds, coconut flakes, almond milk and pure maple syrup.

    Buckwheat & Steel Oats Breakfast JarsBuckwheat & Steel Oats Breakfast Jars

    Lastly, how about diced apples, coconut flakes, hemp hearts, coconut sugar with almond milk poured over top with an extra sprinkle of cinnamon.

    You get the idea...use whatever you have on hand or suits your taste.

    Simple, versatile and ready to go!

    Buckwheat & Steel Oats Breakfast Jars

    Overnight Buckwheat & Steel Cut Oats Breakfast Jars

    Ingredients
    • 1 cup raw buckwheat groats (not toasted aka kasha)
    • 1 cup steel cut oats
    • 5 cups water
    • 1 teaspoon cinnamon
    • 1/2 teaspoon cardamom
    • 1 teaspoon ground vanilla or vanilla extract
    • pinch of himilayan salt

    Optional ideas for topping:
    • chopped dates, raisins, apricots or other dried fruit
    • unsweetened coconut flakes
    • fresh berries of all kind
    • coconut, almond, hazelnut or any non-dairy milk
    • pure maple syrup, coconut sugar or other sweetener of choice
    • nuts and seeds of all kinds
    • cocoa nibs
    • 100% fruit jam
    • nut butter

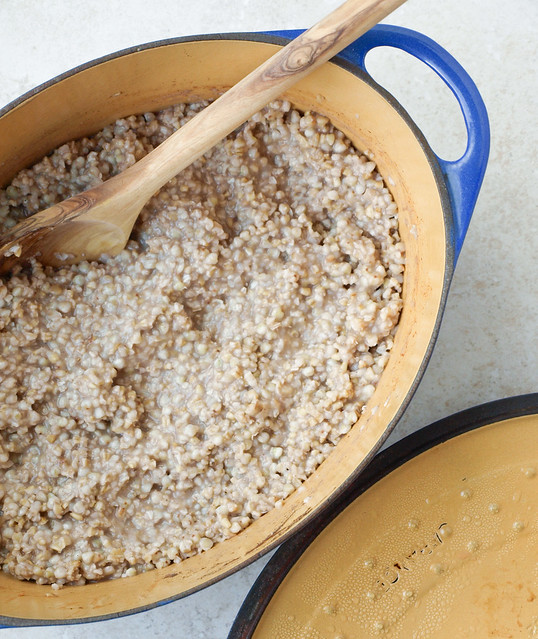
    In dutch oven or large pot, bring water and remaining ingredients to a boil, cover, reduce heat to low and simmer for 5 minutes. Remove from heat, give a good stir, add more water as needed, replace lid and let sit overnight. Or you can carefully fill your mason jars (or other containers), cover and let sit overnight. Porridge will be fine on the counter, but if you wish you can place it in the refrigerator and it will still be fine.The next day fill your jars with a mix of toppings for grab & go time or simply top each jar when ready to eat.

    I prefer to eat my porridge at room temp but you can heat yours either in the microwave for a minute or two, or use a heated pot of water setting the mason jar in the center until warmed.

    This will fill 5, maybe 6, pint sized mason jars. Wide mouth jars are preferred, much easier to spoon out of for eating.

    Serves 5 - 6. Will last up to 5 days in the refrigerator.

    Notes:

    Feel free to use 2 cups buckwheat or steel cut oats instead of combining the two. If using only buckwheat reduce the water amount to 4 cups.

    I like my porridge on the thicker side, adjust water adding more for a thinner consistency. I prefer to add the non-dairy milk at serving to thin it out a bit.

    Adjust the amount of cinnamon and cardamom to suit your taste. I'm in love with cardamom at the moment and find myself using a bit more than suggested here.

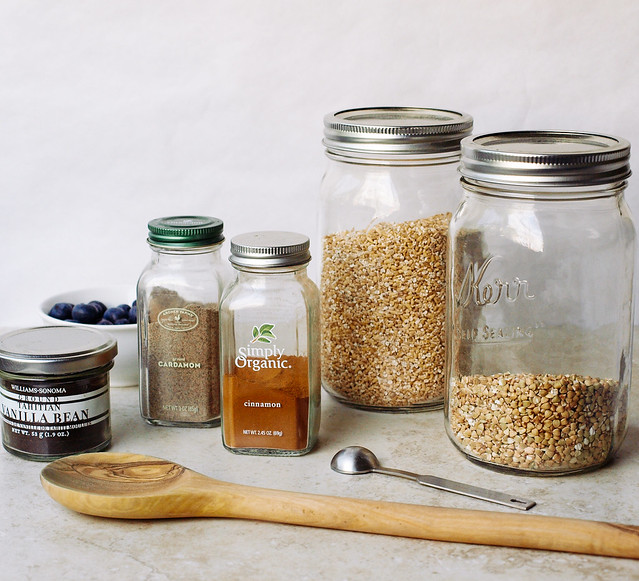
    Bob's Red Mill carries both raw buckwheat groats and steel cut oats. I ordered buckwheat groats from Arrowhead Mills thinking they were raw but they were toasted, it wasn't stated on the front of the package so just be wary. Let these at least be an example of what to look for as they both have different variations.

    Enjoy!