.

Showing posts with label maple syrup. Show all posts

SMOKY CHIPOTLE MAPLE T.L.T.

SMOKY CHIPOTLE T.L.T SANDWICH

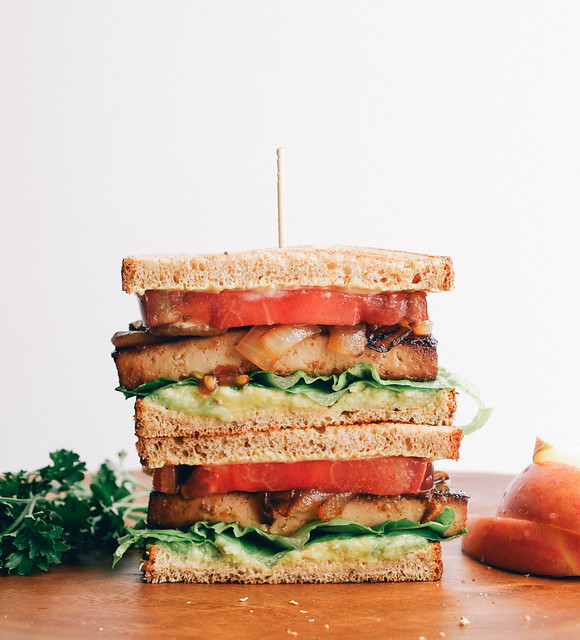
This is reminiscent of a B.L.T in some ways, minus the crunchiness of the bacon, but I rather prefer this one! So my version will be called a T.L.T., or better yet, Smoky Chipotle T.L.T. If you've followed my blog long enough, you will know I love adding a little spice to my foods whenever I can! 
SMOKY CHIPOTLE T.L.T SANDWICH

I've had my eye on this recipe from I Love Vegan for a while and finally got around to putting it together. Let me tell you, it did not disappoint! My only additions were adding a little bit of ground chipotle pepper and using a bit more of each ingredient than what is called for in the original recipe. I love the caramelized onions and the avocado mash as the condiment...so good! I tend to use avocado or a light flavored thin hummus as a sandwich spread all the time now. They both are wonderful!  A hummus spread would be great here too. If you use the avocado, I ensure you that you will not miss the old standard spreads. The tomato will also lend some nice juices into the mix. This was a great find and a keeper! Plus, it will leave your home smelling delicious. :)
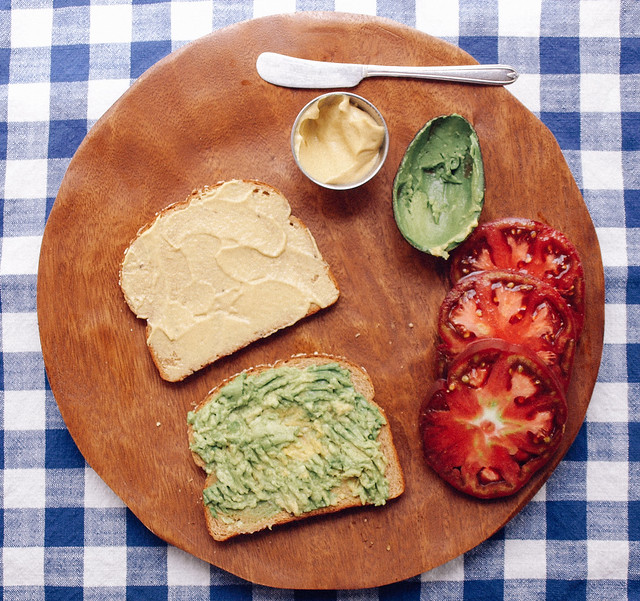
SMOKY CHIPOTLE T.L.T SANDWICH

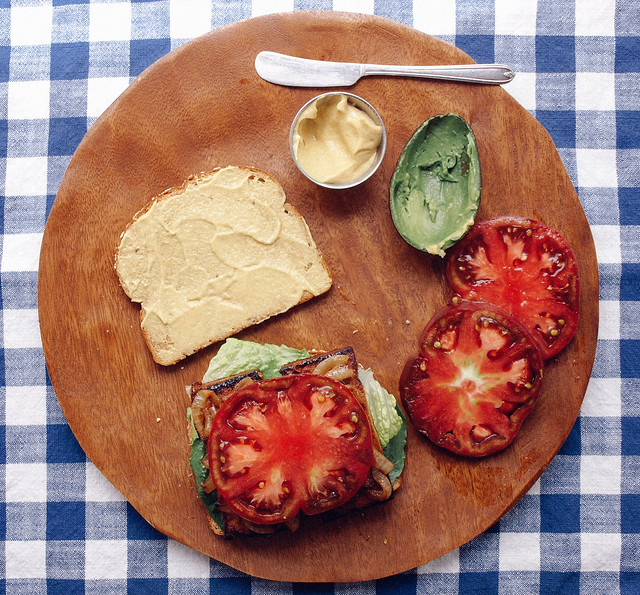
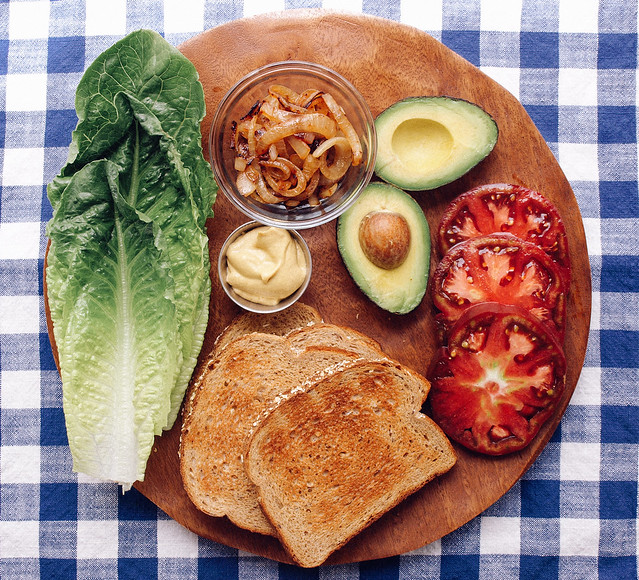
Start by spreading your mustard and mashed avocado...
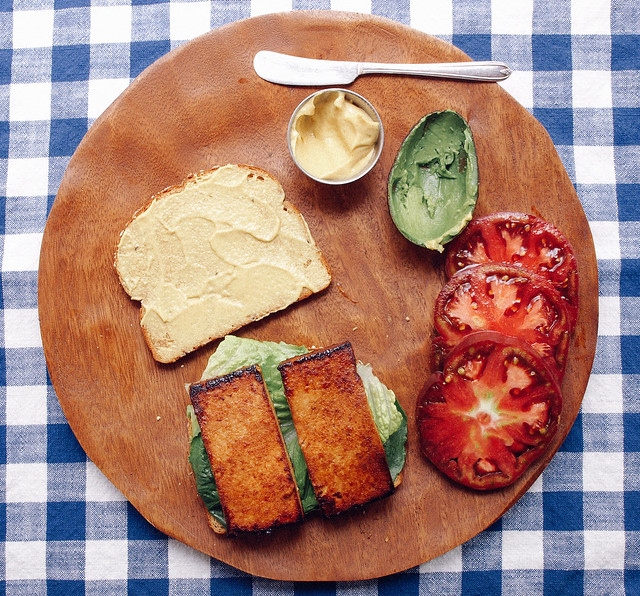
SMOKY CHIPOTLE T.L.T SANDWICH

Add your leafy greens and tofu slices...
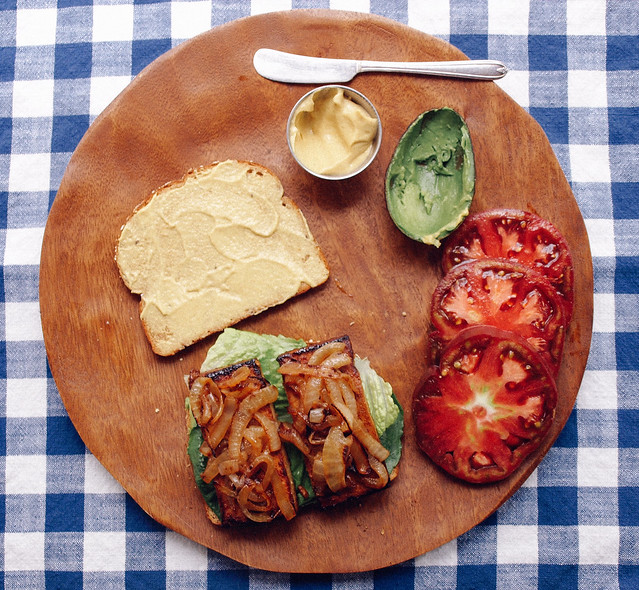
SMOKY CHIPOTLE T.L.T SANDWICH

Top with grilled onions...

SMOKY CHIPOTLE T.L.T SANDWICH

Lastly, add tomato, I used a large deep red heirloom tomato I had on hand. Place remaining slice of bread on top and slice in half. 

Pairs great with fresh sliced apples!
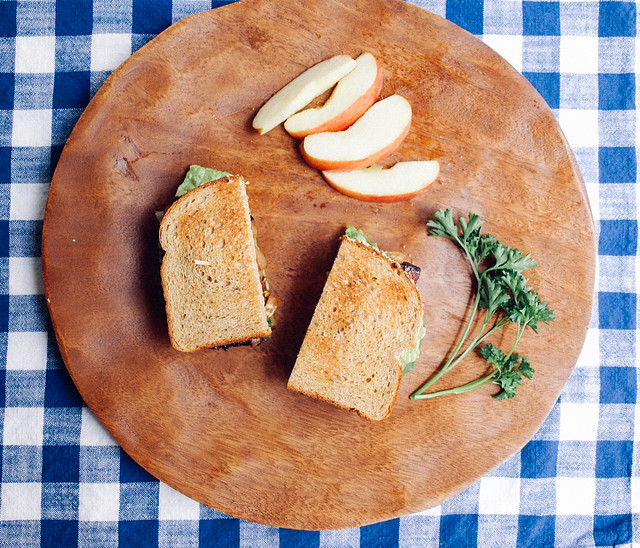
SMOKY CHIPOTLE T.L.T SANDWICH

SMOKY CHIPOTLE MAPLE T.L.T.

Ingredients
  • 1 block (15oz) organic firm or extra firm tofu
  • 1 onion, thinly sliced
  • 2 tablespoons sesame or olive oil, divided
  • 1 medium to large tomato, sliced thin
  • Dijon or stoneground mustard, to spread
  • 1 1/2 avocados, mashed, to spread
  • a few leaves of your favorite sandwich greens, red or green leaf, romaine, iceberg, etc...
  • salt to taste
  • 6 slices bread of choice
Marinade
  • 2 tablespoons pure maple syrup
  • 1 tablespoon tamari, bragg's liquid amino's, coconut amino's or soy sauce
  • 1 tablespoon water 
  • 1/4 teaspoon liquid smoke
  • generous dash of garlic powder or 1 clove garlic, minced
  • dash chipotle powder, to taste

Remove tofu from the package. Turn tofu on its side and slice in thirds, creating 3 large slabs. Gently press each slab between a clean dish towel or paper towels to remove some of the excess water. Cut the slabs in half. You should have six pieces that look like large domino (rectangular) shapes. 

In a medium sized shallow dish, mix together the marinade. Place tofu in the dish and let soak for about 1 hour turning carefully once or twice in between. 

Once the hour is almost up, caramelize your onions using 1 tablespoon oil. Heat oil over medium heat, add onions, turn down heat to medium low, stir often and cook until they start to brown and caramelize. May take 10 to 15 minutes or so. Once done, set aside.

In same skillet, heat remaining oil and cook tofu over medium high heat. Once tofu has browned, about 5 minutes, gently flip and brown the other side. It's ok if it gets a little crispy too! If you feel it is drying out too much, add some of the juices from the bowl it marinated in for extra moisture. When done, remove from heat.

Toast your bread. Spread one side of toast with mustard and the other with a layer of mashed avocado, about 1/2 avocado. Over the avocado, layer your lettuce, tofu, onions and tomato. Top with your other slice of bread. 

Serves three.

Enjoy! 

I'd love to see your masterpieces!
#thesimpleveganista

Cranberry Pistachio Energy Bars


A homemade granola bar with a bit of a chew and a crunch at the same time. Lot's of flavor and full of goodness you can taste in every bite. So colorful too! Be warned, these are delicious and won't last long. But no worries, they're easy to make so you can whip some up in cinch. :)


I originally started these as a no bake granola bar like the recipe at Gimme Some Oven, but felt they were a bit to sticky to handle, even after chilling in the fridge a while. I decided to bake them in order to harden the maple syrup and stiffen them a bit. They came out really good and still have a bit of chewiness but without the stickiness. If you want them a bit crunchy bake for a little longer. They really are a vibrant and delicious treat! This recipe will give you the option to decide if you want to bake or not...a lot may depend on the date paste and how much moisture there is...but you may find that you prefer it unbaked. 


Cranberry Pistachio Energy Bars

Ingredients
  • 1 cup packed medjool dates, pitted and chopped (about 15 dates)
  • 1/4 cup pure maple syrup
  • 1 tablespoon chia seeds, optional
  • 1 tablespoon hemp hearts, optional
  • 1 tablespoon ground flax seeds 
  • 1/2 teaspoon cinnamon, optional
  • pinch of sea salt
  • 1 1/2 cups rolled oat (I used GF)
  • 1 cup unsalted pistachios
  • 1 cup dried cranberries or fresh chopped
  • 1/4 cup semi-sweet chocolate or a dark chocolate bar chopped into small pieces, optional

Place dates, maple syrup, chia seeds, hemp hearts, flax seed meal, optional cinnamon and salt in food processor/high speed blender and process until it becomes a paste like consistency. Move date paste to a medium size bowl and add the remainder of the ingredients, mix well.

In a loaf pan or 8x8 pan, lined with parchment paper or greased with coconut oil, spread the mixture evenly to all edges and corners, press down gently but firmly to ensure a compact mixture. Place in fridge for 30 minutes before removing from pan and cutting into bars.

Once chilled, gently remove loaf and place on hard surface. Cut into any size bar you like. If you feel that they are just right for you without baking than your done and can enjoy one right now, if not continue....also, you may decide to try a few bars just to see how it works for you.

Preheat oven to 350 degrees. Place bars on a prepared cookie sheet with either the same parchment paper used to chill or greased, bake for 15 minutes. Remove from oven and let cool completely. I put mine in the fridge to cool as I was being a bit impatient with this extra step but well worth it! It may take an hour or two to completely cool, especially if you used chocolate.

Store in an air tight container or keep in the fridge if you like. Eat within two weeks. If using fresh cranberries it's best to eat within a week. (I highly recommend trying some fresh cranberries, they add a nice tartness with the sweetness of the other ingredients)

Enjoy!

A little picture tutorial and more...


Date paste...depending on the freshness of your dates will determine how thin or thick your paste is. The paste shown here was with very fresh dates, they were moist and soft creating this very moist paste...this was almost too moist but I also used 1/3 cup syrup instead of 1/4 cup, probably didn't need to use that much with such soft dates. I've also used older dates with less moisture and added a tablespoon or so extra maple syrup to the paste for added moisture. Use your judgement...if you need any extra moisture at all it should only be a tablespoon or two at most. If you feel your paste is too wet, add extra oats in the next step.


I used fresh chopped cranberries in this batch...the fresh cranberries added a little tartness and paired well with the sweetness of some of the other ingredients without adding refined sugars that are usually in dried cranberries. You can find organic dried cranberries that use pure cane sugar or apple sauce to sweeten the berries. Fresh is always best so give it a try sometime, you may be surprised how good they are in this recipe.


Gently pack the mixture into a lined loaf pan, chill, cut and bake if desired. I spy my little Piper girl, always underfoot waiting for something to drop, or a hand to reach down and give her some love. We've had her since Halloween of 2010, she was a rescue dog and needed a home, and we needed her little spirit...it worked out perfectly. :)

Hope this inspires something wonderful in your future. Happy Holidays. :)


Salted Chocolate Pecan Sandies (Gluten Free)


I love anything pecans, and when you add some chocolate to the mix you've really got a winner! These are a welcome addition to the recipe list and my go to baked cookie. The recipe consists of an almond flour/meal and has a nice lightly sweet flavor, especially from the coconut sugar which gives it a nice caramel flavor. And the salt adds to the delightfulness of these cookies bringing an added touch that will leave you wanting another bite, and another. Pair with a nice glass of your favorite non-dairy milk, or tall glass of water, and enjoy this chocolate chip style cookie...not too crisp, not too soft...just right. They are kid tested and most definitely mother approved! When the craving for a baked cookie comes around this will be the one!


I made this batch with half chocolate chips and half without. The above picture will be what the dough should roughly look like after blending well and before adding in the chocolate chips. I used almond meal in this recipe as I like to make my own. If using almond flour, your dough will be much lighter in color since the skin will have been removed by the manufacturer before processing. I scooped out rounded tablespoons, rolled into about a one inch ball, placed on the cookie sheet and flattened slightly. They will puff up a little when cooking so leave at least a half an inch or so between cookies. 

Also, I'm looking into a silicon mat to use instead of parchment paper. Coconut oil works great too but having a silicon mat handy will be welcome. It may interest you also...you can find out more about them by looking at the reviews in the following link: Silpat Non-Stick Baking Mat


Salted Chocolate Pecan Sandies

Ingredients
  • 2 cups packed almond flour or almond meal*
  • 1/4 cup coconut palm sugar, turbinado sugar or pure cane brown or white sugar
  • 1/2 teaspoon cinnamon
  • 1/4 teaspoon baking soda
  • 1/4 teaspoon sea salt
  • 1/4 cup coconut oil, melted
  • 1/4 cup pure maple syrup, warmed
  • 2 teaspoons vanilla
  • 1/2 cup pecan pieces (raw or roasted)
  • 1/4 or so cup semi-sweet chocolate or dark chocolate chunk pieces, you can place some strategically on top as well
  • sea salt to garnish

Preheat oven to 325 degrees.

Combine the first five dry ingredients in medium sized bowl. In a small bowl, add the coconut oil and maple syrup together, heat until warmed and coconut oil is melted. Add in all three wet ingredients to the dry mixture and blend well. Mix in the pecans and chocolate chips. 

Prepare a baking sheet with coconut oil, parchment paper or use a non-stick mat. Scoop out rounded tablespoons full and roll dough into balls about an 1 inch or so in size, place on cookie sheet and flatten slightly with your fingers. Leave about a half inch to an inch between cookies as they will expand when cooking. Sprinkle entire batch with sea salt. Bake for 20 minutes. They may look like they need to cook more but don't worry once they cool they will darken slightly, harden a little and be a perfect cookie. Let cool and enjoy!

Makes about 16 to 18 cookies.

* I make my own almond meal in a food processor. 1 1/2 cups of almonds will easily get you 2 cups of flour/meal. It's super easy...just process for about 4 minutes, depending on your processor. Store any leftover flour in a mason jar or sealed container of choice for later use.

Happy Baking!


Inspired by this recipe from Comfy Belly

Oat Jam Thumbprint Cookies


Finally, a baked cookie to add to my recipes. This one is really a tasty little treat. It doesn't contain any butters or wheat flours...just oats, a few nice spices, raw or coconut sugar, coconut oil and lot's of love. This recipe even uses the food processor for easy mixing. These really remind me of a breakfast bar of sorts. They would be great in the morning, as well as after lunch, dinner or any time you just want a cookie that hits the spot with lots of wholesome goodness.


Oat Jam Thumbprint Cookies

Ingredients
  • 1 tablespoon chia seeds or flax seed meal
  • 3 tablespoons almond milk
  • 1 cup rolled oats (I used GF)
  • 1/4 cup coconut sugar, turbinado or pure cane sugar
  • 1 teaspoon cinnamon
  • 1/2 teaspoon baking soda
  • 1/2 teaspoon baking powder
  • 1/8 teaspoon himalayan salt
  • 3 tablespoons coconut oil (in it's melted state)
  • 1 tablespoon pure maple syrup
  • 2 tablespoons almond butter, optional
  • 1 teaspoon vanilla extract
  • 100% fruit jam for filling (I used strawberry & blueberry)


Preheat oven to 350 degrees.

Combine chia seeds or flax seed meal with the almond milk in a small bowl, set aside for at least 10 min.

In food processor, add oats and blend until you have a rough oat flour. Add the sugar, cinnamon, baking soda, baking powder and salt. Pulse a few times until combined. Add melted coconut oil, maple syrup, optional nut butter, chia/flax mixture and vanilla, blend until it comes together and forms a ball.

Scoop 1 tablespoon of the dough onto an ungreased cookie sheet, you should get 12 cookies. Bake for 15 minutes. 

Once removed from the oven, using a small spoon....I used the back of a teaspoon....press down gently creating a small thumb sized dent in the center of the cookie.  

Once cookies have cooled, using the same teaspoon, scoop a dollop of jam into the center.

Store in an air-tight container. In the container they will soften a bit so I suggest eating within a few days or store in the refrigerator for up to a week. 

Enjoy !

Adapted from this recipe

Mirin & Maple Roasted Almonds

Mirin & Maple Roasted Almonds

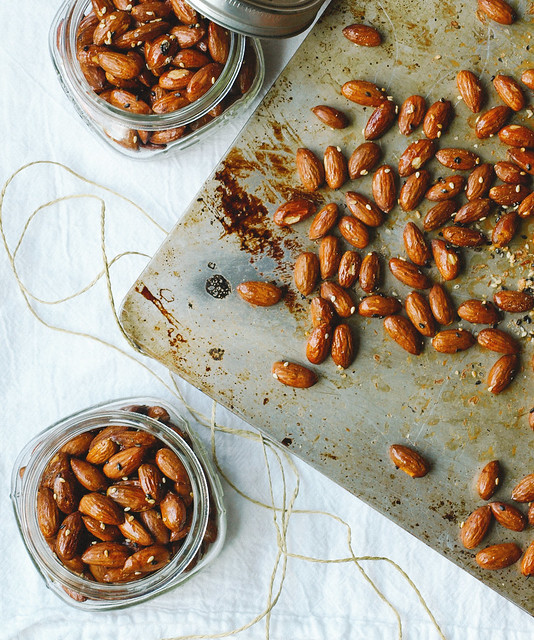
Sweet but not too sweet, these mirin & maple roasted almonds are a welcome addition to the recipe collection. This is my first recipe for roasted nuts and it's about time they appear here. The idea for the mirin & maple glaze came about from my Mirin & Maple Tempeh Stir Fry. I wasn't sure how this was going to turn out as this was something unusual for me but they came out great! It's simple flavors with sweetness from the mirin and maple, warmth from the cinnamon and chipotle, and a tad bit salty. And did you know, almonds are the most alkalizing nut. They're balancing, nourishing and contain high levels of potassium and vitamin E. In fact, nine almonds contain all the vitamin E you need for one day. They make for a great snack anytime of day. They're easy to stash and take along with you when you need a little something to get you through. These roasted almonds are really easy to put together and once ready will be done in 30 minutes. No reason to not have a batch of roasted almonds on hand when they're so easy to make!

Mirin & Maple Roasted Almonds

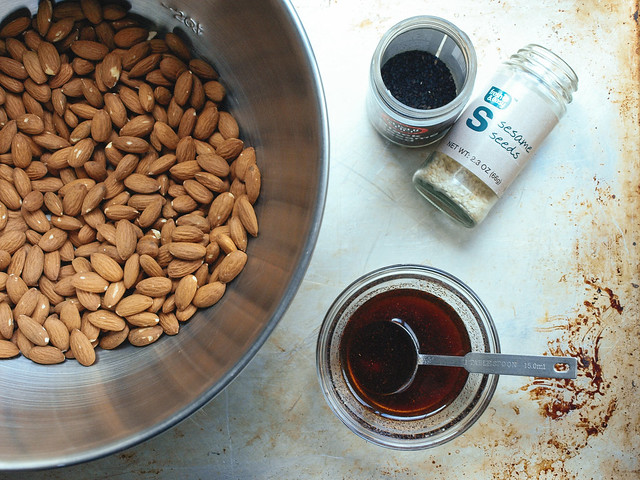
Start with fresh raw almonds. Mix your mirin, maple and spices.

Mirin & Maple Roasted Almonds

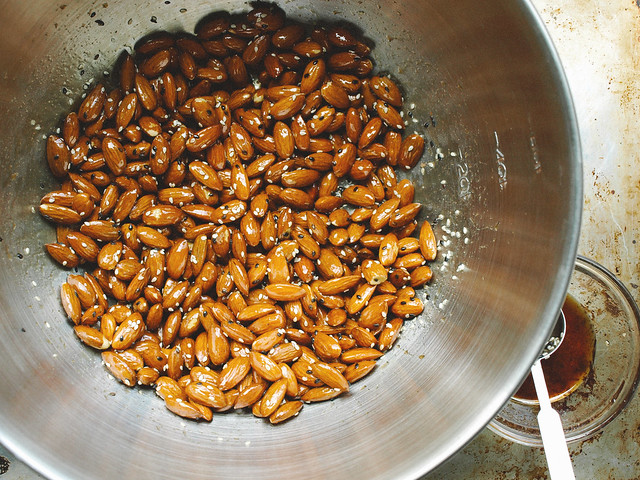
Add in your ingredients and toss to coat. Layer on baking sheet and roast.

Mirin & Maple Roasted Almonds

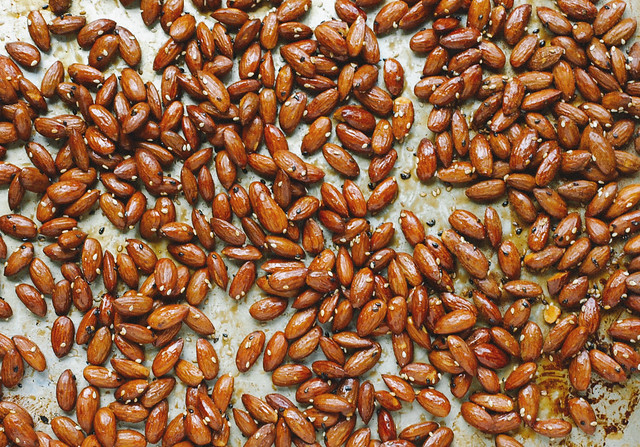
Remove from the oven, let cool and harden. And then you have beautifully glazed almonds that taste wonderful, will please your senses and satisfy your hunger. Be ready, these will be slightly addicting!

These roasted almonds are good things in little packages and make for great gift ideas too! 

Mirin & Maple Roasted Almonds

Mirin & Maple Roasted Almonds

Ingredients
  • 3 cups raw almonds (about 1 lb.)
  • 3 tablespoons mirin
  • 2 tablespoons pure maple syrup
  • 1/2 teaspoon cinnamon
  • 1/8 teaspoon chipotle powder
  • generous pinch or two mineral salt
  • 1 tablespoon white and/or black sesame seeds

Preheat oven to 350 degrees F.

In a small bowl, combine the mirin, maple syrup, cinnamon, chipotle powder and salt, mix well.

Put almonds in a large bowl, add the glaze and toss to coat. Add in sesame seeds and combine.

On a large baking sheet (a rimmed one would be ideal), spread mixture in an even layer...it's ok if some clump up. You may even like to sprinkle a little salt on top of the almonds for a little extra saltiness! Bake for 20 - 25 minutes, stirring once.

Remove from oven, let cool and harden.

Notes:

I recommend sourcing the best mirin you can get. Read the ingredient label and choose ones that are brewed traditionally and do not contain additives like corn syrup or use artificially produced koji enzymes. A good mirin will run you around $10 dollars and is worth the little extra compared to cheaper brands that use additives. You can also use it in the other recipes that call for mirin as mentioned in the first paragraph. It's great to use in marinades and stir fry's. You can use it to glaze your pie crusts and pastries too, giving them a beautiful shiny finish. It may also be used in making desserts such as poached fruit and puddings. 

I went a little easy on the spices so adjust to your preference. If you like a little more heat, add a tad bit more chipotle powder. I find these to be great without any spice as well, simply having the mirin, maple and salt as flavoring.

You may want to line your baking sheet with parchment paper for ease of clean up. I didn't personally use any and once cooled from the oven they did tend to stick to the bottom. I had to do a little scraping which didn't hurt my almonds one bit and just made for a little extra effort when cleaning the baking sheet. It's your call!

Enjoy!


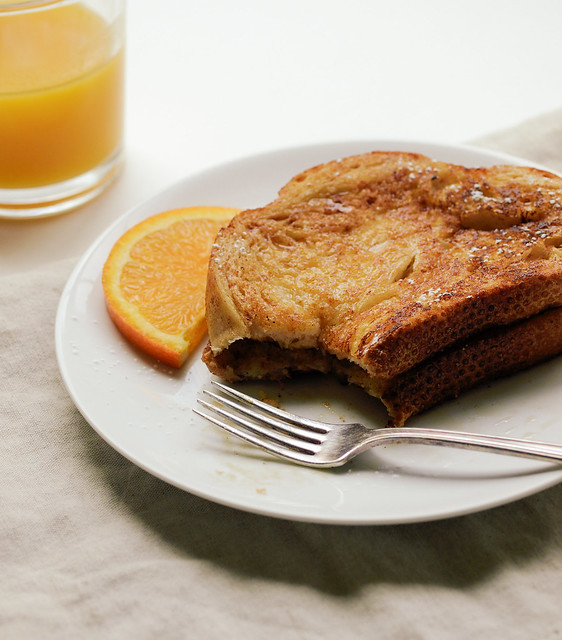
ORANGE-FRENCH TOAST

Orange French Toast
Orange French Toast
Orange French Toast

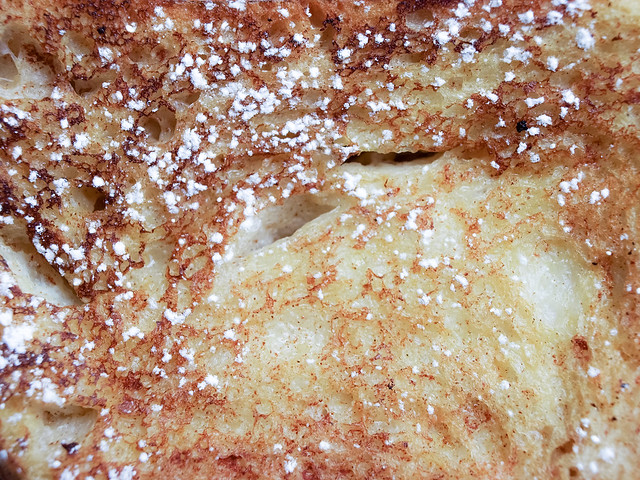
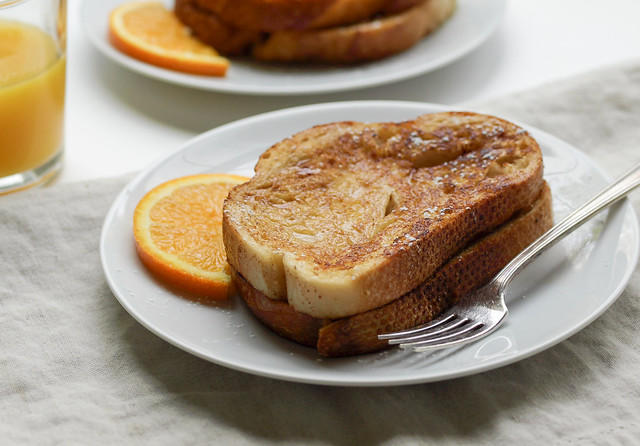
I LOVE french toast! This version is so simple and delightful. It came out perfectly soft and moist in the center with subtle flavors of orange and cinnamon all around. Adding a nice glass of pure organic orange juice along side completed this any time of day meal. This would be great to serve when you have over night company. You can impress them with this easy breakfast/brunch they will surely want the recipe. This recipe is adapted from a very fun recipe blog called Vegan Stoner, you can find the original recipe here.

Orange-French Toast

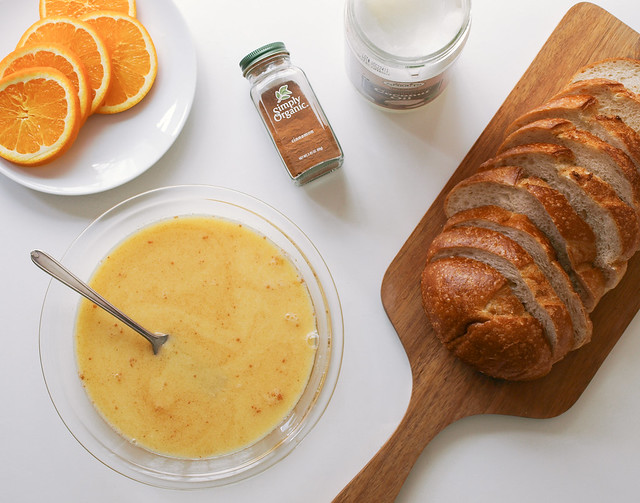
So easy to put together, simply mix your ingredients, dip the bread and cook on the griddle or skillet. Simple, straight forward and fast!

Orange French Toast

Orange-French Toast

Ingredients
  • 1 loaf french or sourdough bread, sliced 
  • 1/2 cup almond milk, or non-dairy milk of choice
  • 1/2 cup fresh squeezed or pure organic orange juice
  • 2 tablespoon pure cane sugar, maple syrup or coconut palm sugar
  • a few dashes of cinnamon
  • 1 teaspoon vanilla extract, optional
  • 1 to 2 tablespoons coconut oil, for griddle/skillet
  • pure maple syrup to serve
  • pure cane powdered sugar to garnish

In medium size, flat bottom, shallow bowl, mix milk and orange juice. Add choice of sweetener, cinnamon and optional vanilla extract, mix well.

Melt coconut oil on griddle/skillet at about a medium high heat, lightly dip both sides of toast in mixture and cook until golden brown on each side, approx 2-3 minutes per side. After dipping 3 or 4 toasts you may want to add a few more dashes of cinnamon to the mixture, it floats on top and will most likely be gone after the first few dips.

Serve with pure maple syrup and garnish of choice. Serves about 3 - 4, depending on how thick you slice your bread.

Enjoy!


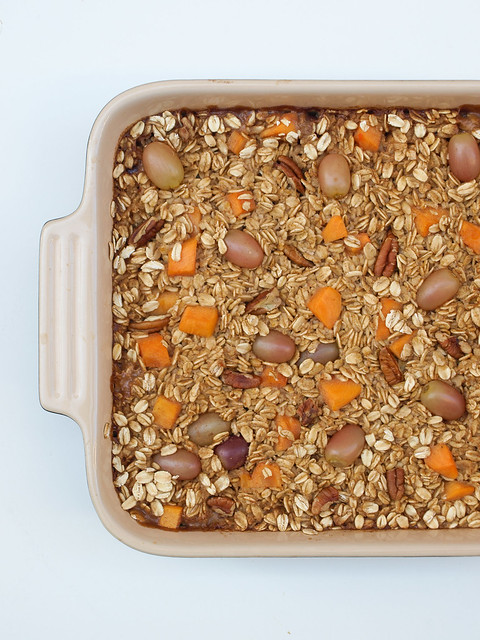
Persimmon & Grape Baked Oatmeal

Persimmon & Grape Baked Oatmeal

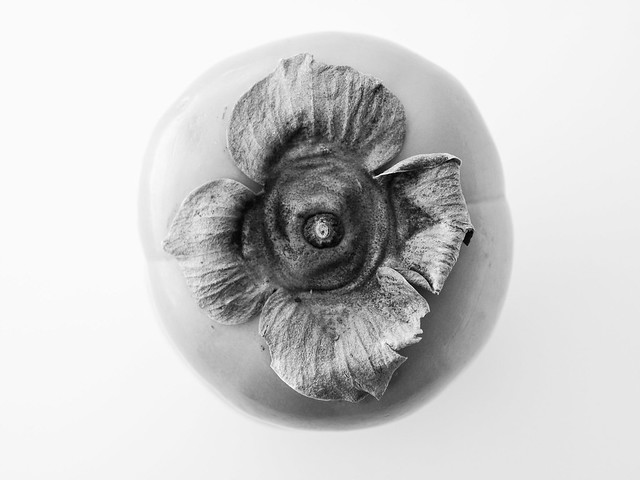
I had my first persimmon about a year ago. I've always admired their bright color and shape. Finally having picked one up, I fell in love at first taste. They have their own unique flavor...a sweet cinnamony flavor that I look forward to when they're in season. This recipe came about as I had a couple lying around. After a quick google search for persimmon recipes I decided to put them in a baked oatmeal, which by the way is a first for me. I found a baked oatmeal recipe for persimmons and cranberries which looked great and also one for persimmon and apple. I happen to have red grapes on hand, and after looking in my trusted Flavor Bible saw that persimmons and grapes compliment each other. I've so been wanting to try grapes from the oven so it was born this persimmon & grape baked oatmeal. The baked grapes are warm and juicy, while the persimmons are soft and flavorful. I also used a vanilla bean as I ran out of vanilla extract which was a nice touch and treat. If you have one on hand give it a try! I was super pleased with this combination of ingredients, although it sounds strange, but it's full of flavor, texture and not to mention your home will smell wonderful as it bakes. This is so easy to put together and well the worth the wait! 

Persimmon & Grape Baked Oatmeal

Persimmon & Grape Baked Oatmeal

Ingredients
  • 1 fuyu persimmon, peeled and diced
  • 1 cup red grapes (use your favorite color grapes)
  • 2 cups rolled oats
  • 1 1/2 teaspoons cinnamon
  • 1/2 teaspoon cardamom
  • 1/2 cup chopped pecans or walnuts
  • pinch mineral salt
  • 2 cups unsweetened almond milk
  • 1/3 cup pure maple syrup
  • 1 vanilla bean, split lengthwise and seeds scraped or 2 teaspoons vanilla extract

Preheat oven to 375 degrees F.

In medium bowl combine the oatmeal, cinnamon, cardamom, pecans and salt. In another bowl combine the milk, syrup and vanilla. Add wet mixture to the dry mixture, mix well. Add in persimmon and grapes, mix again.

Place mixture into a lightly greased 9 x 9 baking dish and bake for 40 minutes. Serve warm with a splash or two of non-dairy milk over top. 


Serves 4 or 2 generously.

Notes:

Sub in fresh cranberries for the grapes. Try using diced apples of choice in place of the persimmon. Use more of either of the fruits if you like. 


Enjoy!


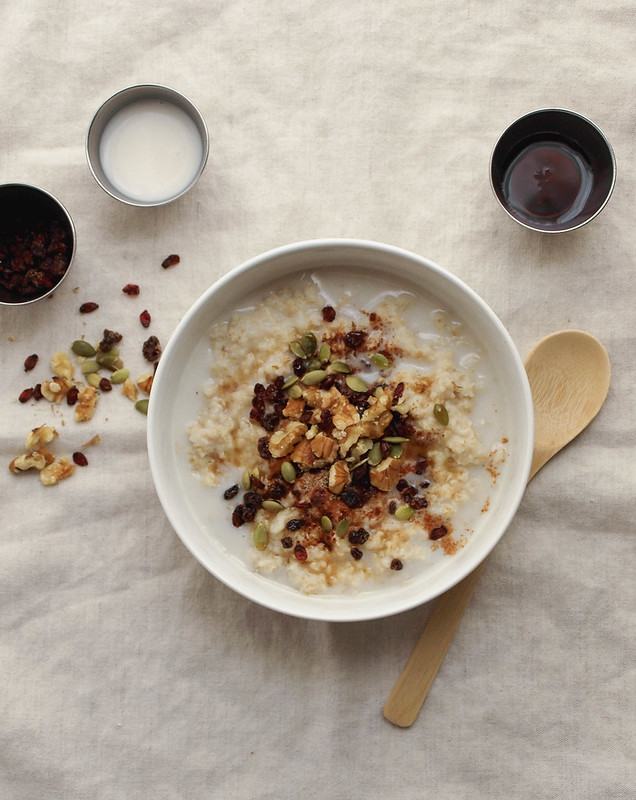
EVERYDAY OATMEAL

Everyday Oatmeal

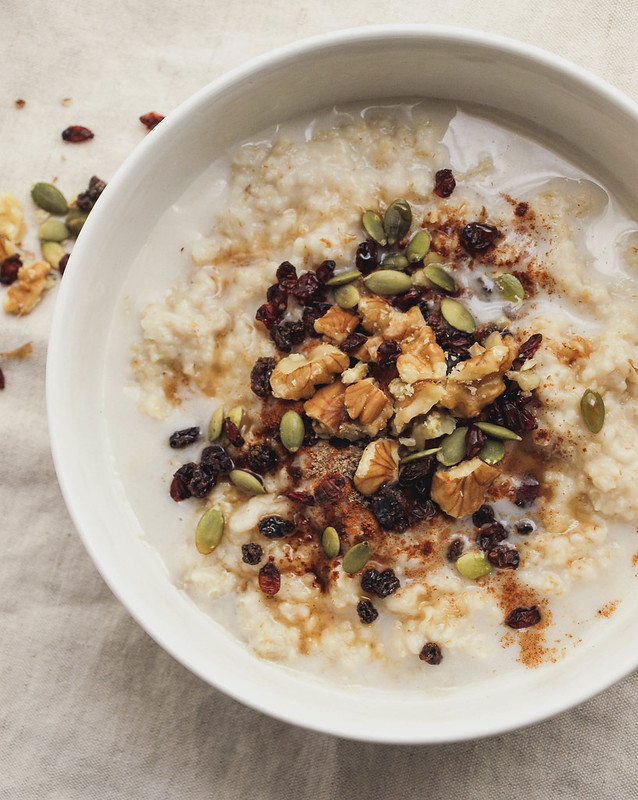
Today I share with you my go-to oatmeal. It's quick and flavorful! On its own, oatmeal is nothing to get excited about. It needs help with warm spices, sweet and/or tart fruits and some crunchy nuts & seeds. Add a drizzle of pure maple syrup and splash of almond milk for the perfect finishing touch. I love oatmeal all year long, but during the fall\winter I especially eat this on a regular basis. It warms me up, fills that morning hunger, supplies me with good carbohydrates and keeps me going for a good part of the day. 

Everyday Oatmeal: The Essentials

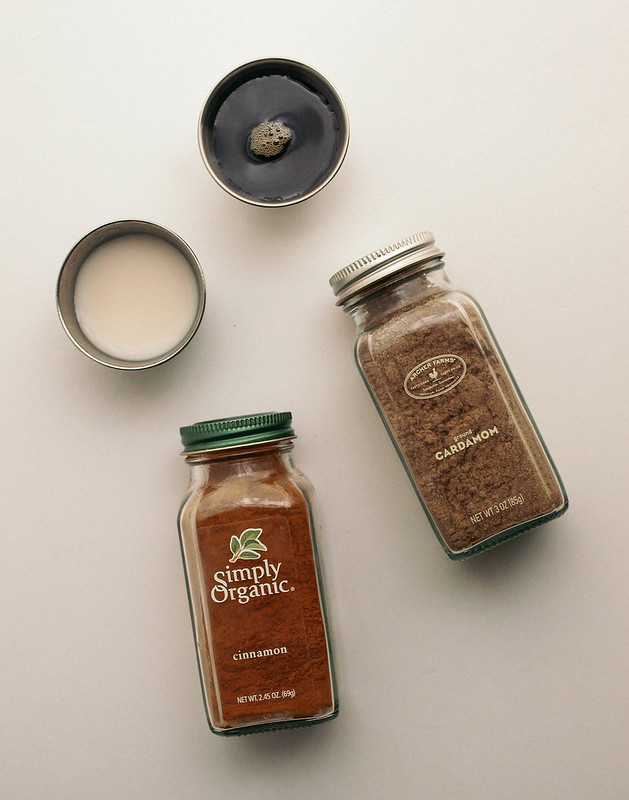
My everyday oatmeal always consists of cinnamon, cardamom, maple syrup and almond milk...these are the essential flavor boosters. The rest of the ingredients will be mixed and matched depending on what I have on hand.

Cinnamon and cardamom are warming spices and both hold health benefits. They are delicious together and will add a ton of flavor to plain oatmeal!

Pure maple syrup is my sweetener of choice and contains a good dose of manganese and zinc.

For the milk, I use unsweetened almond milk but you can use your favorite non-dairy milk. Most non-dairy milks are low in calories, fat and are fortified with important vitamins and minerals (even more so than dairy milk) like calcium, vitamin D, B-12 and E, manganese, potassium, copper and selenium.

The oats can be whatever you prefer. Lately I've been using quick oats, it's what I've been baking with and have tons on hand. You can use rolled or steel cut oats too, just cook according to the package directions.

I usually always add in some sort of fruit, whether dry or not. Usually its dried fruit since I always have some on hand in the pantry or refrigerator. I prefer unsweetened dried fruit like raisins, currants, barberries, blueberries and cranberries. Chopped dates, apricots and cherries are also great. I'm loving the addition of the barberries I picked up awhile back, they add a tartness contrasting the sweetness of the other dried fruits. I've come to learn that barberries are higher in anti-oxidants than dried blueberries, cranberries, goji berries and even pomegranates! These little tart fruits can be found in Middle Eastern grocery stores (you can also order them online) and hold up well in the pantry or refrigerator. When using fresh fruits, I may use blueberries, sliced bananas or apples.

The addition of nuts & seeds will add protein and a nice crunch. Many nuts & seeds contain essential omegas that are heart healthy making them another good reason to add a small handful. You can use any combo of walnuts, pepitas (pumpkin seeds), almonds, hemp hearts, chia seeds and pecans.

It's the perfect everyday oatmeal to get me going, or end my day! Sometimes I have oatmeal for dinner. ♥

Everyday Oatmeal

EVERYDAY OATMEAL

Ingredients
  • 3/4 cup quick oats 
  • 1 1/4 cup water
  • 1/2 cup unsweetened almond milk, divided
  • 1 - 2 tablespoons pure maple syrup
  • 1/4 heaping teaspoon cinnamon
  • 1/8 teaspoon cardamom
  • small handful mixed nuts (I used walnuts and pepitas)
  • small handful dried or fresh fruit ( I used currants and barberries)

Bring water to a boil in a small saucepan. Stir in 3/4 cup oats, reduce heat to medium and cook for 1 1/2 minutes. Add 1/4 cup milk and cook another 30 seconds. Remove from heat, cover and let stand for 2 to 3 minutes. 

Place oatmeal in your serving bowl, top with cinnamon, cardamom, nuts, seeds and berries. Drizzle maple syrup over top and some of the remaining milk. Give a good stir and enjoy!

It tastes great with a morning cup of coffee, green tea or lemon water.

Notes: 

Give or take on both the oatmeal and water when cooking, using more or less as needed.

Use rolled or steel cut oats if you prefer, cook according to package instructions. 

If you don't like the flavor of maple, use coconut nectar or pure cane brown sugar. 

Dried fruits you might like to use...cranberries, blueberries, goji berries, raisins, currants, barberries, chopped dates, apricots and cherries. Fresh fruits can be blueberries, apples and bananas.

Nuts and seeds you might like to use are almonds, walnuts, pecans, pepitas, hemp hearts and chia seeds. 

The Ultimate Vegetable Lentil Loaf

The Ultimate Vegetable Lentil Loaf

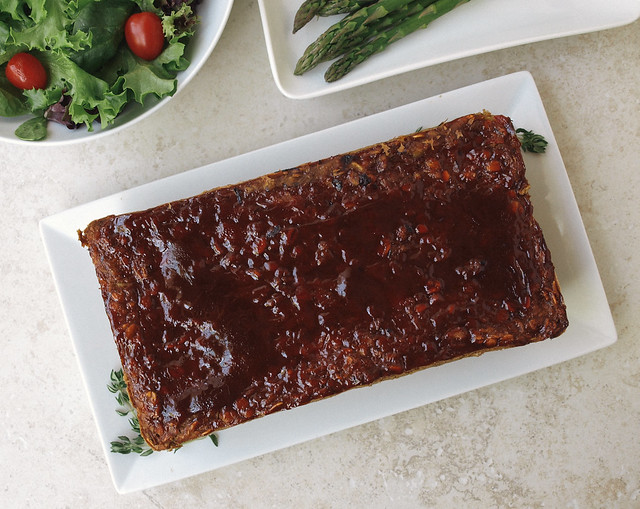
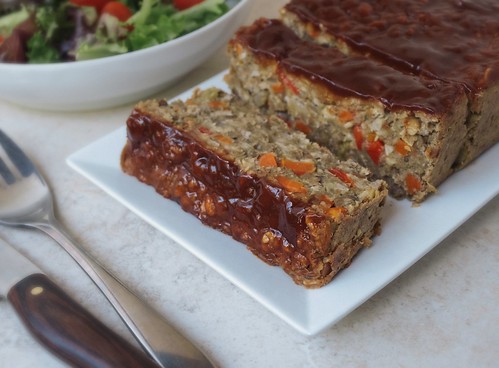
After a few attempts (five to be exact) at making this lentil loaf, I have finally come up with a veggie version that tastes pretty darn good and is extremely filling. I wanted to keep this easy with ingredients you may already have in your pantry. After doing a little digging I was able to piece this together from a few resources like the one from Made to Create which is wonderfully simple and also had good reviews from when I shared it on my Facebook page! And also this one from Oh She Glows which is a walnut version using apples and raisins but I wanted one with all veggies (Hers looks delicious and I will be trying it too). Last but not least, I referenced this recipe at My Vegan Cookbook. 

I especially love the glaze for the top of this loaf. You could serve some extra on the side, or double the amount if you like and put a little extra on. And if you like spicy, you'll love the ground chipotle pepper in this recipe with the glaze, such a nice combo of sweet and spice! I found the higher amount of chipotle listed below to be just perfect for myself, adjust to your liking starting with the smaller amount if you're not a fan of spice. Be prepared, one slice will most likely fill you up, it does for me! I'm not kidding when I tell you this is one hearty and filling lentil loaf. Leftovers make for great sandwiches. Store the loaf in the refrigerator for up to a 5 - 6 days. Sub in other veggies if you like. Some have left comments of adding in zucchini for the bell pepper. You get the idea, you can adjust to what you have on hand or prefer. Now on with the recipe...make a loaf and share the love!

The Ultimate Vegetable Lentil Loaf

The Ultimate Vegetable Lentil Loaf

Ingredients

Loaf
1 cup dry lentils (use green/brown)
2 1/2 cups water or vegetable broth
3 tablespoons flaxseed meal (ground flaxseeds)
1/3 cup water (6 tablespoons)
2 tablespoons olive oil for sauteing or steam saute using 1/4 cup water
3 garlic cloves, minced
1 small onion, finely diced
1 small red bell pepper, finely diced
1 carrot, finely diced or grated
1 celery stalk, finely diced
3/4 cup oats (I used GF oats)
1/2 cup oat flour or finely ground oats (any flour of choice will work here too)
1 heaping teaspoon dried thyme
1/2 heaping teaspoon cumin
1/2 teaspoon each garlic powder & onion powder...for good measure!
1/4 - 1/2 teaspoon ground chipotle pepper, optional
cracked pepper & sea salt to taste

Glaze
3 tablespoons organic ketchup
1 tablespoon balsamic vinegar
1 tablespoon pure maple syrup


Rinse lentils. In large pot add 2 1/2 cups water with lentils. Bring to a boil, reduce heat, cover and simmer for about 40 minutes, stirring occasionally. It's ok if they get mushy, we are going to roughly puree 3/4 of the mixture when cooled. Once done, remove lid and set aside to cool (do not drain), they will thicken a bit upon standing, about 15 minutes is good.

Preheat oven to 350 degrees.

In small bowl combine flaxseed meal and 1/3 cup water, set aside for at least 10 minutes, preferably in the refrigerator. This will act as a binder and will thicken nicely upon sitting.

Prepare vegetables. In saute pan heat oil or water over medium heat. Saute garlic, onion, bell pepper, carrots and celery for about 5 minutes. Add spices mixing well to incorporate. Set aside to cool.

Using an immersion blender or food processor, blend 3/4 of the lentil mixture. For me this was an important part, I tried it other ways and this worked to help as a binder. If using an immersion blender, tilt your pot slightly to the side for easier blending. Alternately, you can mash the lentils with a potato masher or fork.

Combine sauteed vegetables with the lentils, oats, oat flour and flax egg, mix well. Taste, adding salt and pepper as needed, or any other herb or spice you might like. Place mixture into a loaf pan lined with parchment paper, leaving it overlapping for easy removal later. Press down firmly filling in along the edges too.

Prepare your glaze by combining all ingredients in a small bowl, mix until incorporated. I recommend making each tablespoon heaping so you have plenty of this great sauce on top. Spread over top of loaf and bake in oven for about 45 - 50 minutes. Let cool a bit before slicing.

Serves 8.

 Your work is done...except for the dishes...maybe you can delegate that to someone else. :)

The Ultimate Vegetable Lentil Loaf

Enjoy!

RUSTIC APPLE & PEAR CRISP

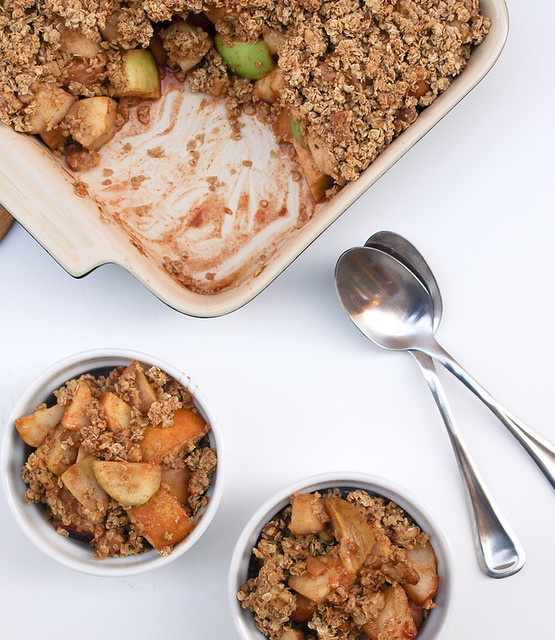
Rustic Apple & Pear Crisp

This simple rustic apple & pear crisp comes from The Physicians Committee of Responsible Medicine. I subscribe to their emails and receive their recipe of the week and almost daily informative articles. I love what they stand for in the way of health and animals rights. They are against the use of animals in medical and scientific experimentation and have fought hard to eliminate the use of animals in schools, universities and labs across America. They embrace a plant based diet and promote it as the preferred diet to prevent and reverse many health issues. They've made great strides for both humans and animals. By promoting new ways of thinking and changing old outdated systems their work is a most positive breath of fresh air! I thank PCRM for everything they do as their work is extremely important. To find out more about their inspiring work please take a moment to watch this short video (be warned it may bring a few tears): Opening the Doors to Compassion

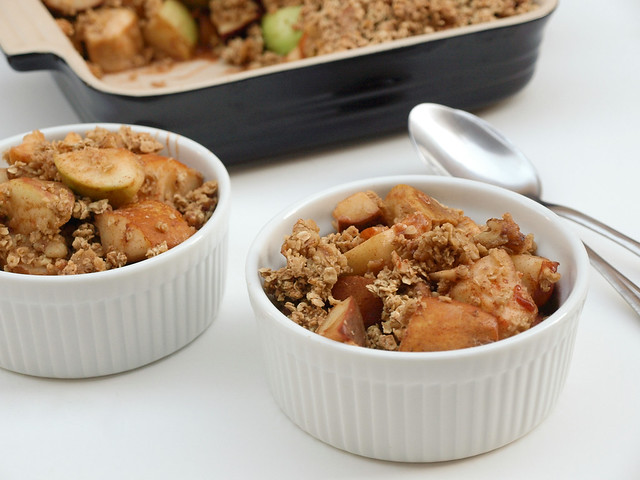
I'm happy to share one of their recipes here and have a few others in mind from their collection as well. This recipe was actually shared back in September, I bookmarked it and decided to finally give it a try. It was delicious! I've always loved apple crisps, or crumbles as they are referred to in the UK and Australia. They're just one of those simple pleasures that I've never tired of. Something about the soft apples, cinnamon and crispy oatmeal topping that I just love. And with the abundance of apples and pears this time of year it seems the perfect time to enjoy these fall fruits together. This was even a hit with my daughter who said she'd like to have this around the house more often. I changed the recipe slightly, you can find the original here. This would be good with a scoop of vanilla non-dairy ice cream and extra cinnamon on top. I didn't add any here but feel free to add a scoop to your bowl. Alone this crisp is healthy as can be. Not only does it make a great dessert but it can double as a nice breakfast idea as well. I can literally sit and eat this all day long!

Rustic Apple & Pear Crisp

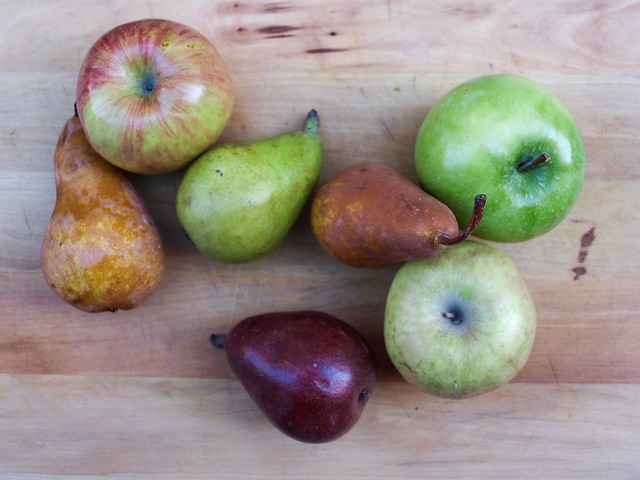
Pick your favorite apples and pears. I love Fuji apples for their sweetness and crispness, and I also added a granny smith for tartness and variation. Pears can be a variety or simply a few of the same. 

Rustic Apple & Pear Crisp

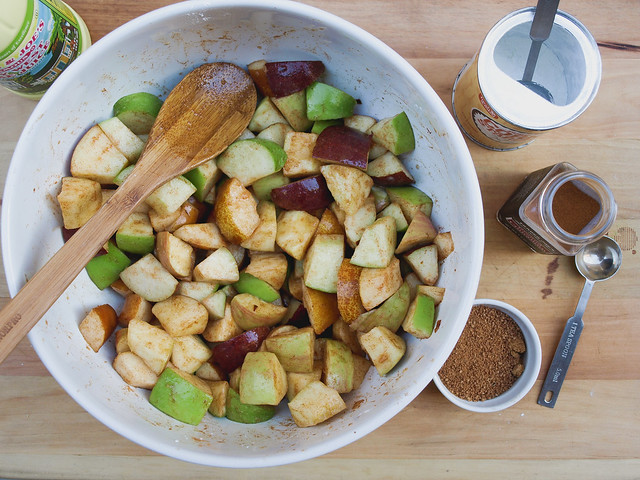
Wash, core and dice your apples. I prefer to leave the skin on but feel free to peel your apples. Mix your apples and pears with lemon or lime juice, cornstarch, sugar and cinnamon, mix well. I didn't have any fresh lemons on hand and used a bottled lime juice I had available. If you find yourself in this situation, the lime juice will do just fine. You can also mix this right in your baking dish making for one less dish to wash.

Rustic Apple & Pear CrispRustic Apple & Pear Crisp

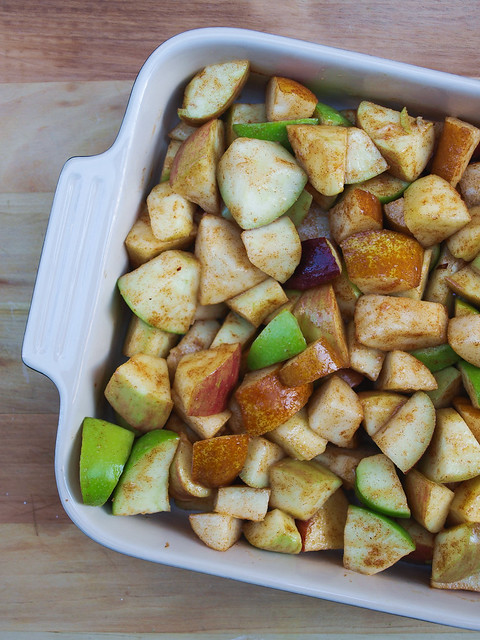
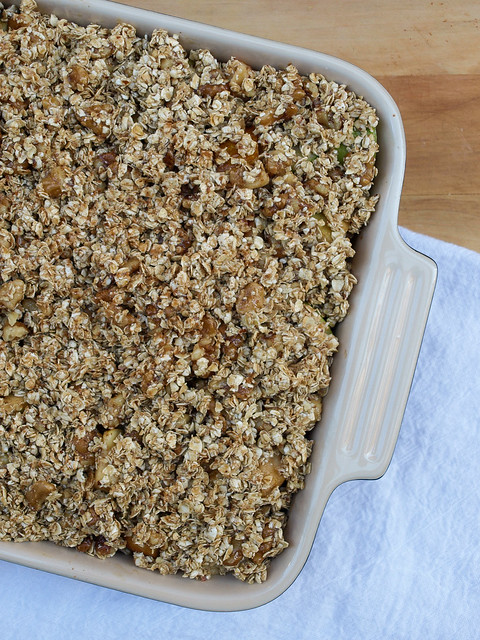
Layer your apples, top with granola mixture and bake...

Rustic Apple & Pear Crisp

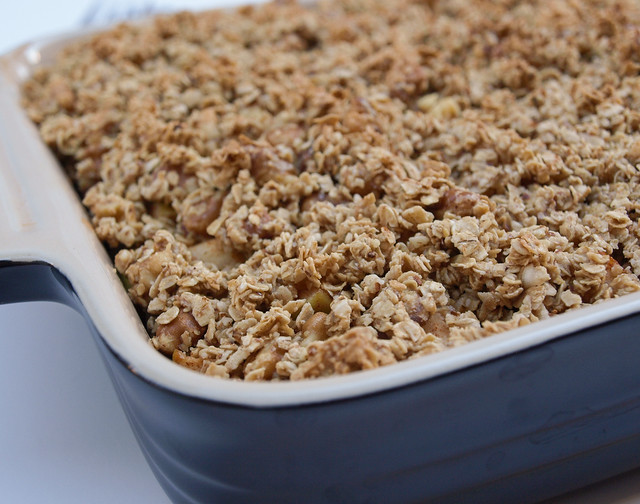
Once done, let cool and share the love! 

Rustic Apple & Pear Crisp

RUSTIC APPLE & PEAR CRISP

Ingredients 
  • 3 medium apples, cored and chopped (peel if you prefer)
  • 3 medium pears, cored and chopped (peel if you prefer)
  • 3 tablespoons fresh lemon juice
  • 1 tablespoon coconut or organic pure cane sugar
  • 1 heaping teaspoon cinnamon
Topping
  • 1 3/4 cup quick or regular oats (I used quick oats)
  • 1/4 cup almond meal, optional
  • 1 cup finely chopped walnuts, optional
  • 1/2 cup pure maple syrup
  • 3 - 4 tablespoons coconut oil (at room temp)
  • 1 teaspoon vanilla extract
  • 1/4 teaspoon mineral salt
  • cinnamon, to garnish 

Preheat oven to 350 degrees F.

Wash apples well. Slice, core and dice apples and pears. In a large bowl (or right in your baking dish), combine apples, pears, lemon juice, sugar and cinnamon. Mix well and layer into a 9 x 9 baking dish. 

In a medium size bowl, combine oats, almond meal, walnuts, maple syrup, coconut oil, vanilla and salt, mix well. Spread oat mixture evenly over the apples and sprinkle with a little cinnamon. 

Bake for 35 - 40 minutes, or until apples and pears are fork tender. Let cool 5 - 10 minutes before serving. 

Serves 6 generously. 

Notes: 

Make gluten free by using gluten free oats. 

Feel free to use almonds, pecans or other nuts and seeds of choice in place of the walnuts.  

Peel your apples if you prefer. I leave the skin on for the fiber and less work. Plus I love the rustic look and different colors the skin brings to the dish. If serving for everyday I won't bother to peel the apples but if serving for company I may consider peeling them. You may also like to dice your apples a little smaller than shown or cut them into thin to medium slices.

Make this oil free and omit the coconut oil. Your crisp top will be a little bit dryer but still good!

Add fresh cranberries for a splash of color. This is especially nice around the fall & winter holiday's.

Change the recipe to just be an apple crisp if you like, or vice versa. 

From my heart to yours...Enjoy!


Cranberry Walnut Chickpea Salad Sandwich

Cranberry Walnut Chickpea Salad Sandwich

Chickpeas are just about the most versatile bean I've ever come across. They pair well with so many flavors making them the ultimate bean in my book. No wonder they are loved by so many! They may not have as much protein or fiber as black beans and cannellini beans, but chickpeas come in close enough with 15 grams of protein and 12 grams of fiber per 1 cup. They are a nutrient dense food with good carbohydrates the body needs and are low in fat with only 4 grams of fat per 1 cup. And the other beans are not nearly as versatile as the chickpea. You can make savory chickpea pancakes with the flour, add them to ratatouille, stews, salads, make hummus, falafels, roast them as a snack and the list goes on and on. They are the greatest bean ever and I can't wait to put them into new recipes here in the future. I have lots of ideas for these little guys!

Cranberry Walnut Chickpea Salad Sandwich

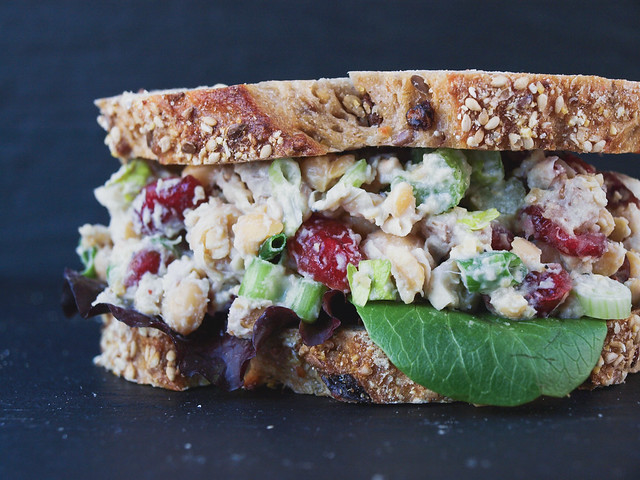
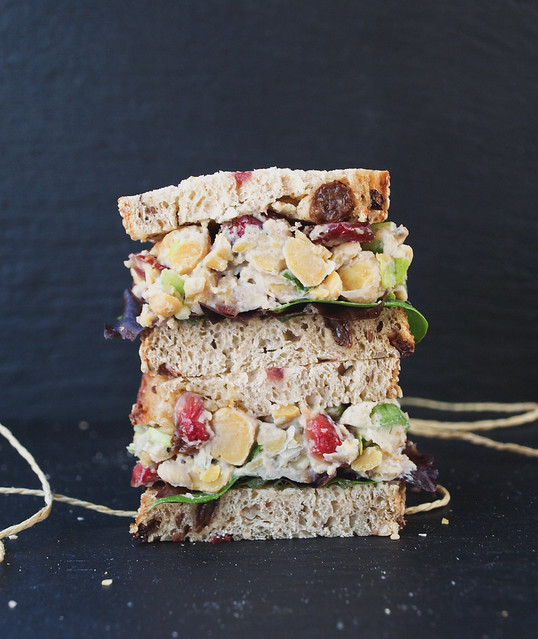
And we'll start by adding this super awesome Cranberry Walnut Chickpea Salad Sandwich to the collection. If you didn't already know, chickpeas make for great sandwich fillers too!

Cranberry Walnut Chickpea Salad Sandwich

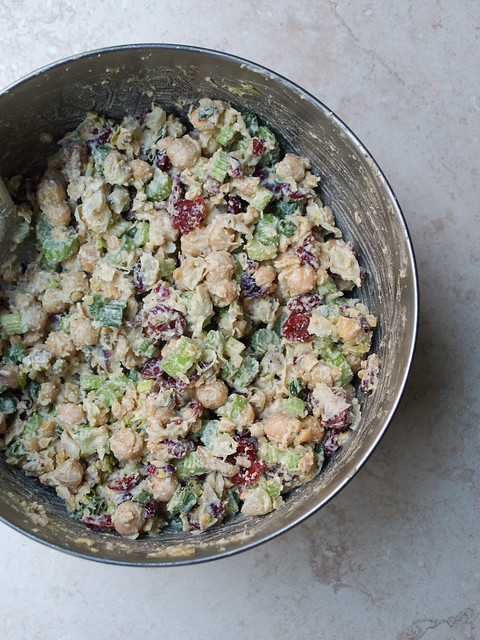
You may already be familiar with my 'Chickpea of the Sea' Salad and my other classic Mashed Chickpea Salad. This one is just as delicious but with a sweet flair that I just know you'll fall in love with! I assure you that this will hit the spot and satisfy your craving for a chunky, sweet, peppery, crunchy style sandwich. Full of texture and flavor this has become my new favorite. It's a hearty salad that will comfort you and leave you feeling completely satisfied. This can be served as a traditional or open faced sandwich. Or simply serve on a bed of lettuce and skip the bread. You may even find that you love the salad all by itself without any accompaniment! I can easily eat this straight from the bowl all day long. :)

Cranberry Walnut Chickpea Salad Sandwich

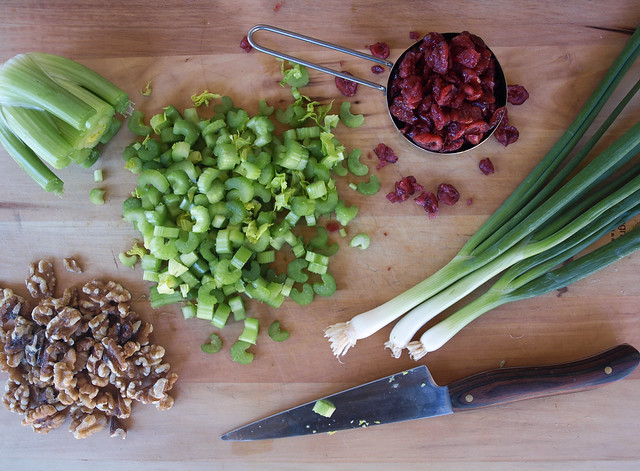
Slice your celery, feel free to add in some celery leaves if you can. For the scallions, when slicing use both the green and white parts. Roughly chop your walnuts. When buying cranberries, use organic whenever possible (I like the ones from Trader Joe's, they're so brightly colored too!). You can also use fresh chopped cranberries!

Cranberry Walnut Chickpea Salad SandwichCranberry Walnut Chickpea Salad Sandwich

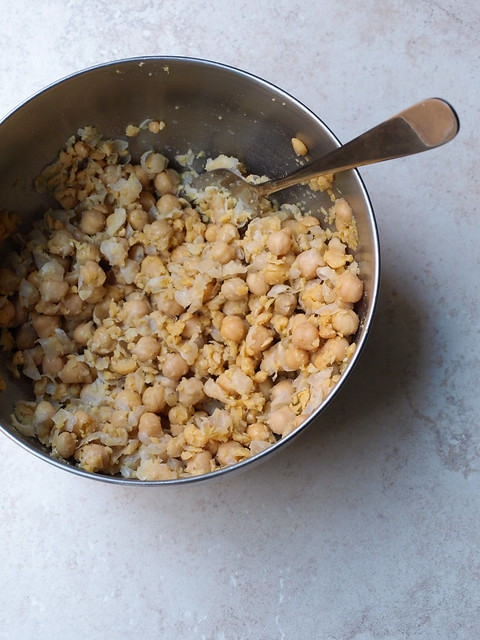
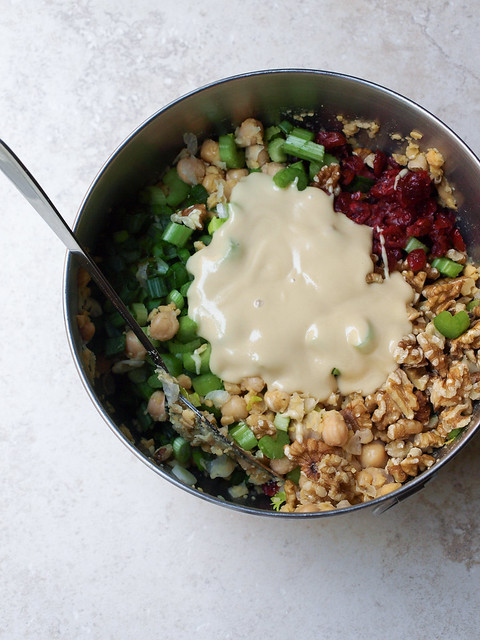
Roughly mash your chickpeas. I decided to double this batch using 3 cups of chickpeas instead of 1 1/2 so you'll have plenty of leftovers. And you'll be glad you have them! Add in the remaining ingredients and mix. About as simple as it gets, which is why I love chickpea salads!

Cranberry Walnut Chickpea Salad Sandwich

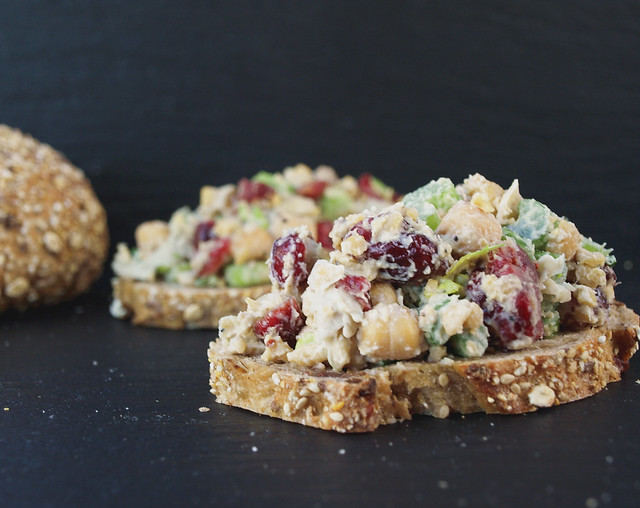
There you have it...serve on your favorite bread. I have it paired here with a fruit, nut and seed loaf.

Cranberry Walnut Chickpea Salad Sandwich

Cranberry Walnut Chickpea Salad Sandwich

Ingredients
  • 3 cups cooked or 2 cans (15oz) garbanzo beans (chickpeas), drained and rinsed
  • 1 cup celery, diced 
  • 1/2 cup organic dried cranberries (chopped fresh would be great too)
  • 1/2 cup walnuts or pecans, roughly chopped
  • 1/2 cup scallions (green onions), thinly sliced, white & green parts
  • mineral salt & freshly ground pepper, to taste (I used about 1/2 teaspoon each)
Dressing
  • 6 tablespoons (1/3 cup) tahini or vegan mayo
  • 4 tablespoons (1/4 cup) champagne, white wine or cider vinegar (I used Orange Muscat Champagne Vinegar)
  • 2 tablespoons water (only needed if using tahini)
  • 2 teaspoons pure maple syrup
To serve
  • leafy lettuce of choice
  • bread of choice

Start by mixing your dressing. In a small bowl combine tahini/mayo, vinegar, water and maple syrup. Set aside so the flavors come together. This can be made a day or two ahead and stored in the refrigerator until ready to use. Add a tad more water, or vinegar if you're a vinegar lover, to thin out dressing as desired. If using vegan mayo, you may like to add 2 more tablespoons.

In a medium to large bowl, add your garbanzo beans and roughly mash with a strong fork or potato masher. Add in celery, cranberries, nuts, scallions, salt, pepper and dressing, mix well. Serve at room temp or let chill in the refrigerator for an hour before serving.

Serve on your favorite bread as a closed or open faced sandwich, or on a bed of leafy greens. You may even opt to simply enjoy the salad as is.

Serves 6 - 8.

Notes:

Add extra of anything you like, and vice versa, if you're not keen on an ingredient use less or omit! One particular ingredient may be the vinegar. I'm not much of a vinegar fan but I loved the orange muscat champagne vinegar and found I used quite a bit and loved it!

Change up the walnuts, using pecans, almonds, sunflower seeds, etc. If using sunflower seeds, use half the amount called for.

For the dressing, I have only made this using tahini since I do not use any kind of store bought vegan mayos. If using vegan mayo, adjust accordingly adding more mayo as needed, maybe 1/2 cup instead of 1/3. I do recommend trying this recipe with tahini...it is seriously so good that you would never know and it is much better/cleaner for you than the store bought mayos!

Enjoy!