.

Showing posts with label walnuts. Show all posts

Spaghetti Squash & Italian Bean Balls

Spaghetti Squash & Italian Bean Balls

If you've never had spaghetti squash, you are in for a surprise. It really is a great replacement for pasta for those looking for a change, or just wanting to stay away from the wheat and rice pasta alternatives. It does have a little crunch but it's very pleasant, the texture reminds me a little of kelp noodles if you're familiar with those. Spaghetti squash contains lots of nutrients, including folic acid, potassium, vitamin A & C, and it's low in calories containing about 42 calories per serving. It's just so colorful too. I can definitely get used to this and incorporate it into my meal rotations every now and then.

Spaghetti Squash & Italian Bean Balls

This is my second time having spaghetti squash. The first time was with just sauce and that was delicious by itself. But I decided if I was going to do a recipe it would be best to add in some bean balls as well just to make it a more rounded meal. And it was, this was very filling and the bean balls came out great. They definitely added more protein per serving to this meal and left me completely content for quite a few hours.

Spaghetti Squash & Italian Bean BallsSpaghetti Squash & Italian Bean Balls

I really wanted the bean ball recipe to be easy, using things you may already keep on hand so you can whip these up without too much planning and/or work involved. I also wanted to make this with an option for being low fat, as well as for people with nut allergies, you can add the nuts/seeds if you wish. I did this batch without any nuts/seeds. Adding them into the mixture will give an extra dose of protein, texture and hardiness to the bean balls. You may think they look a little dry coming from the oven (dipping them in sauce right before serving will greatly help that), but once you put some sauce on top they come to life. Honestly, I actually found myself munching on the leftover bean balls the rest of the day without any sauce. They held together extremely well too!

Spaghetti Squash & Italian Bean Balls

Spaghetti Squash & Italian Bean Balls

Ingredients
  • 1 large or 2 small spaghetti squash, seeds removed
  • 1 jar (25oz.) organic pasta sauce of choice
Bean Balls
  • 1 heaping cup of mushrooms (about 4 oz), sliced (I used cremini)
  • 1 small yellow onion, diced
  • 2 cloves garlic, minced
  • 1 tablespoon olive or grapeseed oil, to saute
  • 1/2 cup walnuts or sunflower seeds, optional
  • 1 can (15oz) cannellini, kidney or black beans, drained and rinsed (I used cannellini)
  • 1 cup of quick oats
  • 1 tablespoon dried oregano, basil, thyme or Italian seasonings (or a mixture of these)
  • 1/2 teaspoon garlic powder
  • dash or two of cayenne pepper or red pepper flakes, to taste
  • sea salt and cracked pepper, to taste

Preheat oven to 375 degrees.

Cut spaghetti squash in half lengthwise, remove seeds and place in roasting pan or baking dish, cut side up. If you like you can coat with a thin layer of olive oil and a sprinkle of salt & pepper. Add about 1/4 inch of water to the dish and bake on bottom rack for 45 - 50 minutes. (You will be adding the bean balls to the middle rack about half way through.) EDIT: Alternately, you can place squash cut side down (without oil and seasonings), add 1/4 inch of water to the dish and bake the same as above (this has been my preferred method lately). 

Start assembling the bean balls. Saute onions, mushrooms and garlic over medium heat for 5 minutes and let cool. If using the nuts/seeds, place in food processor first and pulse until coarsely ground, and continue. Also, if using old fashioned oats place them in the with the nuts to chop then up a bit. In food processor place beans, sauteed veggies, oats and herbs and spices. Pulse until just combined. Taste for seasoning adding anything extra you may like. I added in some fresh chopped basil I had on hand.

Roll into balls, about 1 1/2 - 2 inches, and place on a baking sheet. I was able to get 9 jumbo sized bean balls. Put in the oven on the middle rack for the remaining 25-30 minutes of the squash cooking time, they should get at least 20 minutes. Remove both when time is up and let cool. OR...you can also cook the balls in a saute pan using a little olive oil over medium to medium high heat, turning often enough so that all sides brown (I used the oven method here).
spaghetti squash

In the meantime, heat your sauce. When ready to assemble, using a fork scrape the insides of the squash horizontally all the way around. It will pull easily from the sides resembling 'noodles'. You will have more squash noodles than you might expect, enough to serve two with one good sized squash.

Serve squash 'noodles' topped with bean balls, sauce, fresh cracked pepper, salt and some chopped fresh parsley or basil. A nice dusting of Almond Parmesan will also enhance this dish!

Serves 3 - 4. Store leftovers in an air tight container for up to five days. Leftovers were great!

Notes:

If you don't have quick oats, use regular oats but process gently into a very rough flour. Also, replace the oats with breadcrumbs if you prefer.

Try dipping your bean balls in the sauce just before serving, this will greatly enhance the visual appeal as well giving it a nice flavorful coating.

Sub in zucchini noodles, gently heated, or any pasta of choice if spaghetti squash is not available. 

Spaghetti Squash & Italian Bean Balls

Enjoy!

Adapted from these recipes: Whole Foods and The Vegan Stoner

Raw Veggie Chili with Taco Nut Meat

Raw Veggie Chili with Taco Nut Meat

This is a welcome meal after all the Thanksgiving festivities. Nothing like adding a raw meal into the mix and this was superb! I have to hand it to Ani Phyo for not being afraid to use spices, this packs great flavor with fresh produce to create a raw chili that I absolutely adore and am craving already. Adapted from this recipe 'Fresh Tomato Chili with Taco Nut Meat'. I will definitely be adding this to my to go lunches as well as my at home meals. Feel free to add/subtract any vegetable you wish. Get in as many as you can to really make this a well rounded garden chili recipe. Use as much or as little as you like of each ingredient. This could've really used a dollop of raw Sour Cream or this flavorful Lime Cilantro Cashew 'Sour Cream', it would've added that final touch.

Raw Veggie Chili with Taco Nut Meat

Mine didn't seem to come out with as much soupyness as Ani's photo shows. But never the less, this is so very fresh, hearty and delicious...simply great! Be sure to take a peek at her photo to see what I mean. You can find it here, just scroll down a bit. She also has other recipes you may be interested in. Her focus in on raw food only.

Raw Veggie Chili with Taco Nut Meat

Dice up your vegetables and fresh oregano (if using fresh)...

Raw Veggie Chili with Taco Nut Meat

Combine with seasoning, I also added in some cilantro as an after thought...

Raw Veggie Chili with Taco Nut Meat

Using a food processor, puree half of the mixture... 

Raw Veggie Chili with Taco Nut Meat

Bring back pureed vegetables to diced vegetables and combine. Then, onto your nut meat...

Raw Veggie Chili with Taco Nut Meat

Add nut meat ingredients to food processor and pulse just until crumbly...

Fairly simple...just slicing, dicing, pureeing and pulsing. So fresh and good. I always feel the best after eating meals like this! Don't forget to add some raw Sour Cream or Lime Cilantro Cashew 'Sour Cream' on top for even more added deliciousness, or simply add some avocado slices to round it out even more.

Raw Veggie Chili with Taco Nut Meat

Vegetable Chili
  • 3 cups tomatoes (I used roma and grape)
  • 1 small red bell pepper (orange would be great too), diced
  • 1 large celery stalk, diced
  • 1/2 yellow or red onion, diced
  • 1 small zucchini, diced
  • 1 corn off the cob
  • 1 - 2 garlic cloves, minced
  • cilantro (as much as you like), chopped
  • 1 - 2 teaspoon chili powder, to taste
  • 1 teaspoon cumin
  • 3/4 teaspoon oregano, fresh or dried
  • 1/4 teaspoon sea salt, to taste

Prepare vegetables and combine all ingredients in large size bowl. Place 1/2 or so of the mix into a food processor and blend until pureed. Return puree to diced vegetables and toss well.


Nut Meat
  • 1 cup walnuts
  • 1 cup mushrooms
  • 1 tablespoon cumin
  • 2 teaspoons coriander
  • 1 teaspoon tamari, bragg's or nama shoyu, or 1/4 teaspoon sea salt, to taste

Place all ingredients into food processor and pulse until crumbly. You don't want to over blend or it will be a paste.

To serve, place vegetable chili in bowls and top with nut meat adding any additional garnishes you like. Serves four, or two generously. Store left overs, if there is any, in an air tight container in the refrigerator. Chili will last for five to six days. Nut meat will last up to two to three days, depending on the freshness of the mushrooms. Before eating let sit at room temp as it tastes best this way.


Enjoy the freshness!


EVERYDAY OATMEAL

Everyday Oatmeal

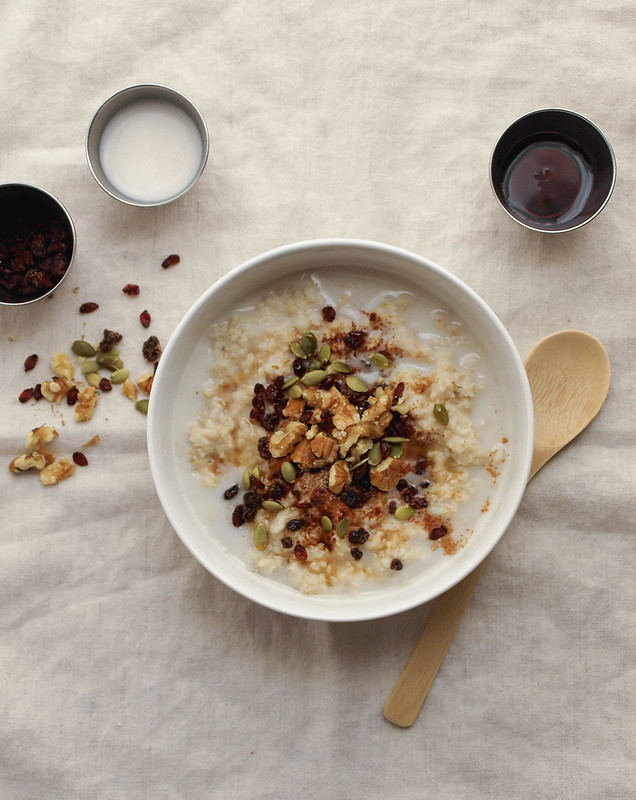
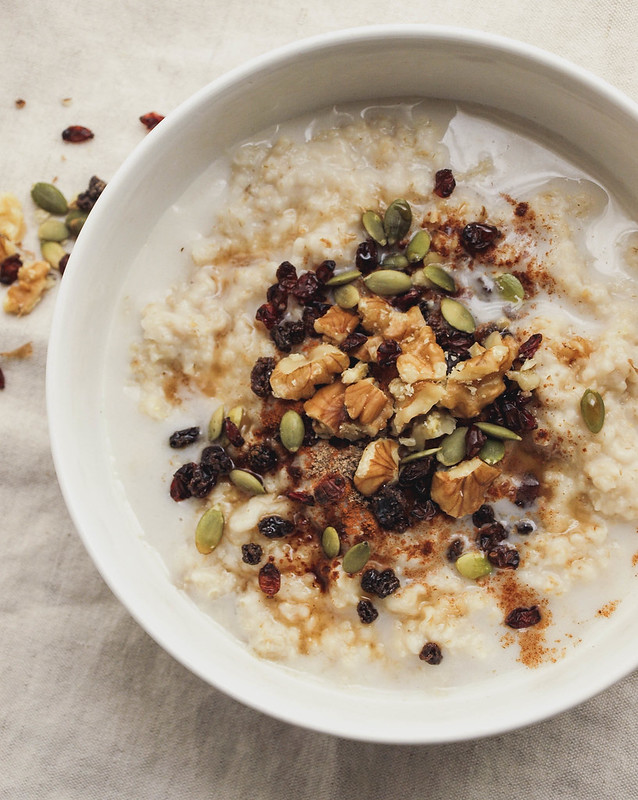
Today I share with you my go-to oatmeal. It's quick and flavorful! On its own, oatmeal is nothing to get excited about. It needs help with warm spices, sweet and/or tart fruits and some crunchy nuts & seeds. Add a drizzle of pure maple syrup and splash of almond milk for the perfect finishing touch. I love oatmeal all year long, but during the fall\winter I especially eat this on a regular basis. It warms me up, fills that morning hunger, supplies me with good carbohydrates and keeps me going for a good part of the day. 

Everyday Oatmeal: The Essentials

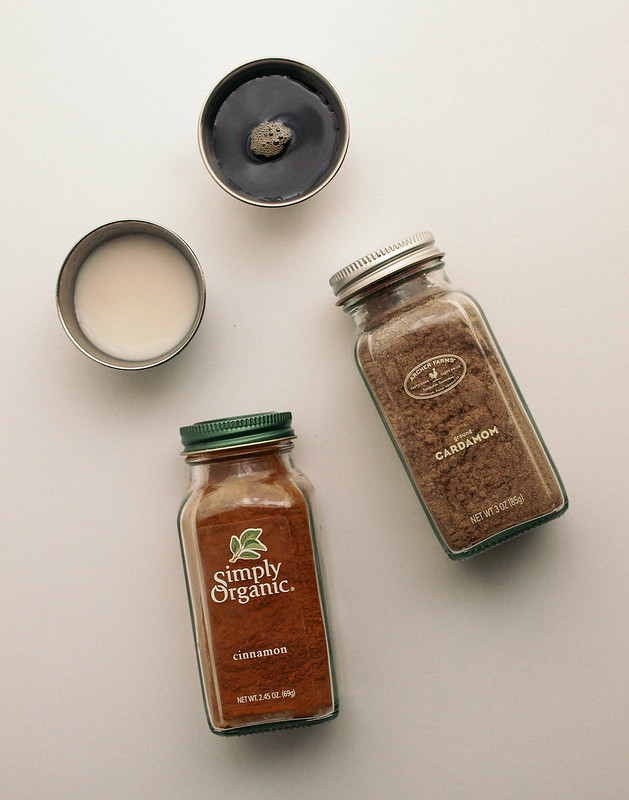
My everyday oatmeal always consists of cinnamon, cardamom, maple syrup and almond milk...these are the essential flavor boosters. The rest of the ingredients will be mixed and matched depending on what I have on hand.

Cinnamon and cardamom are warming spices and both hold health benefits. They are delicious together and will add a ton of flavor to plain oatmeal!

Pure maple syrup is my sweetener of choice and contains a good dose of manganese and zinc.

For the milk, I use unsweetened almond milk but you can use your favorite non-dairy milk. Most non-dairy milks are low in calories, fat and are fortified with important vitamins and minerals (even more so than dairy milk) like calcium, vitamin D, B-12 and E, manganese, potassium, copper and selenium.

The oats can be whatever you prefer. Lately I've been using quick oats, it's what I've been baking with and have tons on hand. You can use rolled or steel cut oats too, just cook according to the package directions.

I usually always add in some sort of fruit, whether dry or not. Usually its dried fruit since I always have some on hand in the pantry or refrigerator. I prefer unsweetened dried fruit like raisins, currants, barberries, blueberries and cranberries. Chopped dates, apricots and cherries are also great. I'm loving the addition of the barberries I picked up awhile back, they add a tartness contrasting the sweetness of the other dried fruits. I've come to learn that barberries are higher in anti-oxidants than dried blueberries, cranberries, goji berries and even pomegranates! These little tart fruits can be found in Middle Eastern grocery stores (you can also order them online) and hold up well in the pantry or refrigerator. When using fresh fruits, I may use blueberries, sliced bananas or apples.

The addition of nuts & seeds will add protein and a nice crunch. Many nuts & seeds contain essential omegas that are heart healthy making them another good reason to add a small handful. You can use any combo of walnuts, pepitas (pumpkin seeds), almonds, hemp hearts, chia seeds and pecans.

It's the perfect everyday oatmeal to get me going, or end my day! Sometimes I have oatmeal for dinner. ♥

Everyday Oatmeal

EVERYDAY OATMEAL

Ingredients
  • 3/4 cup quick oats 
  • 1 1/4 cup water
  • 1/2 cup unsweetened almond milk, divided
  • 1 - 2 tablespoons pure maple syrup
  • 1/4 heaping teaspoon cinnamon
  • 1/8 teaspoon cardamom
  • small handful mixed nuts (I used walnuts and pepitas)
  • small handful dried or fresh fruit ( I used currants and barberries)

Bring water to a boil in a small saucepan. Stir in 3/4 cup oats, reduce heat to medium and cook for 1 1/2 minutes. Add 1/4 cup milk and cook another 30 seconds. Remove from heat, cover and let stand for 2 to 3 minutes. 

Place oatmeal in your serving bowl, top with cinnamon, cardamom, nuts, seeds and berries. Drizzle maple syrup over top and some of the remaining milk. Give a good stir and enjoy!

It tastes great with a morning cup of coffee, green tea or lemon water.

Notes: 

Give or take on both the oatmeal and water when cooking, using more or less as needed.

Use rolled or steel cut oats if you prefer, cook according to package instructions. 

If you don't like the flavor of maple, use coconut nectar or pure cane brown sugar. 

Dried fruits you might like to use...cranberries, blueberries, goji berries, raisins, currants, barberries, chopped dates, apricots and cherries. Fresh fruits can be blueberries, apples and bananas.

Nuts and seeds you might like to use are almonds, walnuts, pecans, pepitas, hemp hearts and chia seeds. 

APPLE, FENNEL + SAGE LENTIL LOAF

APPLE, FENNEL + SAGE LENTIL LOAF

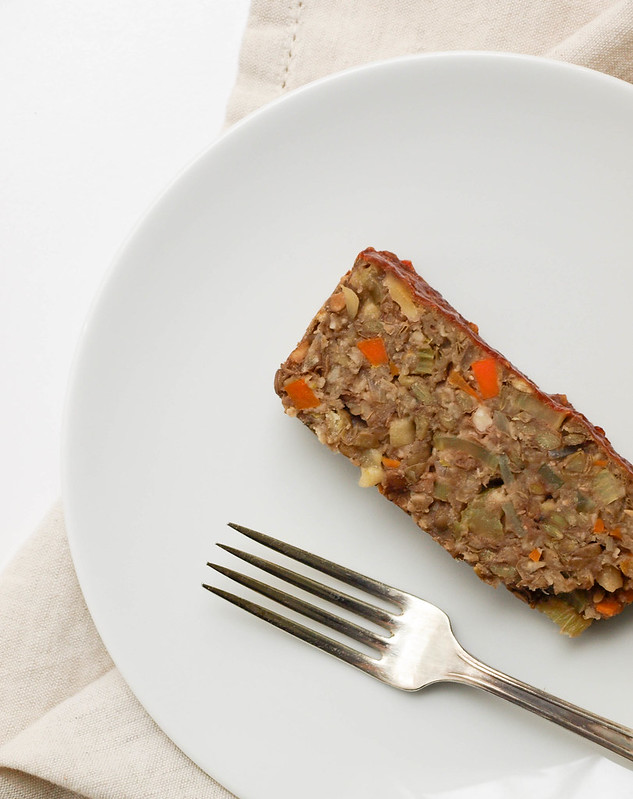
It's been two years since my last lentil loaf recipe. I thought this time I'd create something with a whole new flavor profile. I love this flavor combination and think it's a perfect fall/winter loaf or one you can rotate for variation all year long. All the flavors come through making every bite just as good as the last! A little sweetness from the apple, it's not overpowering at all. The fennel and sage are a perfect pairing of herbs. The walnuts give a little extra texture. I've kept the glaze super simple with just organic ketchup, apple cider vinegar and pure maple syrup. The glaze is tangy which is a nice contrast to the other flavors. Simple worked great here (at least I think so). I'd love to know what you think! I've adapted this new lentil loaf from my other one, The Ultimate Vegetable Lentil Loaf, which was a big hit, it's a great all-around loaf and I hope you all find this new one just as delicious!

A note on the fennel seeds. In case you're wondering what to do with your fennel seeds, I've used them in a few recipes like this Cannellini Bean & Fennel Flatbread, Mushroom and Buckwheat Soup and the Rustic Cabbage, Potato & White Bean Soup. If they are new to your pantry, you can purchase them knowing you can use them in other recipes. I love the flavor they give in each of these recipes!

APPLE FENNEL SAGE LENTIL LOAFAPPLE, FENNEL + SAGE LENTIL LOAF

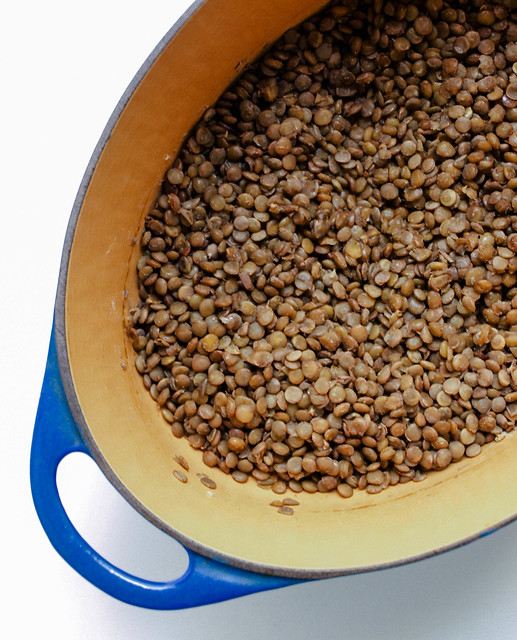
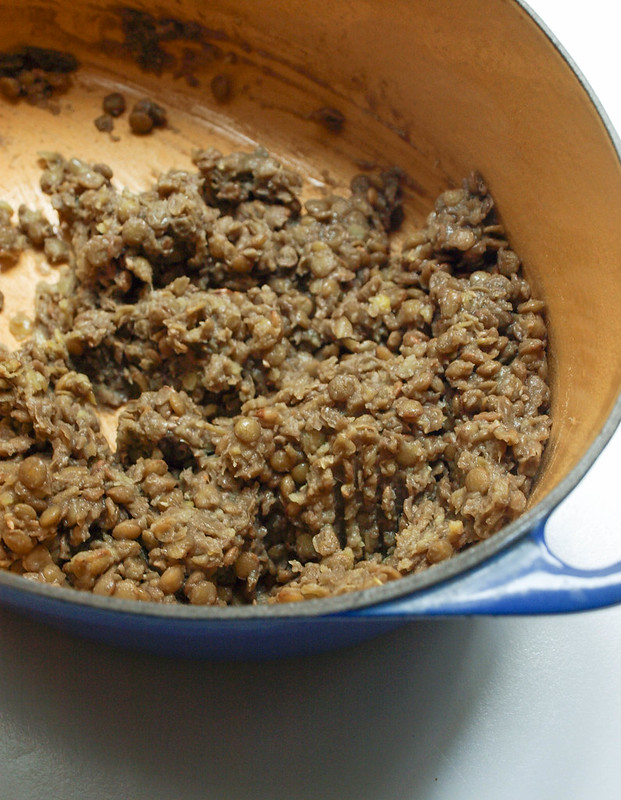
Cook your lentils, let set for about 15 minutes, most of the liquid should be absorbed. Mash or puree about 3/4 of the mixture. You should be able to easily mash the lentils with a back of a fork.

APPLE, FENNEL + SAGE LENTIL LOAFAPPLE, FENNEL + SAGE LENTIL LOAF

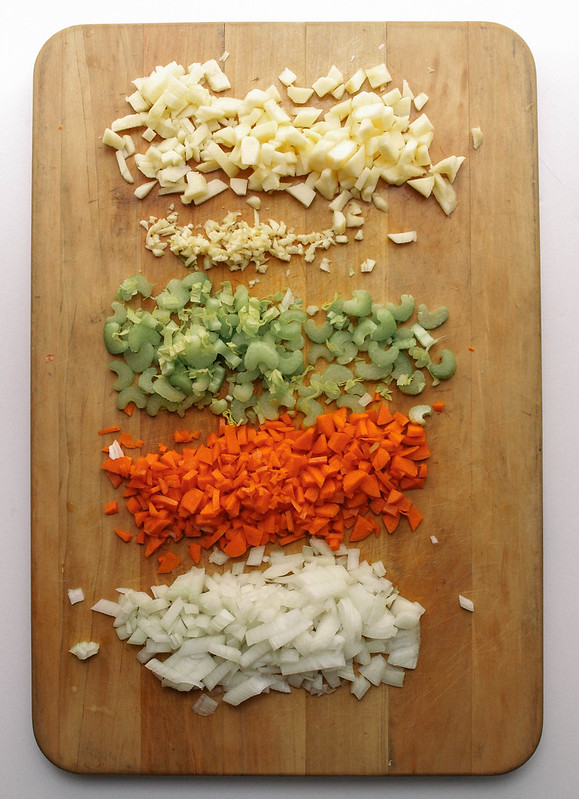
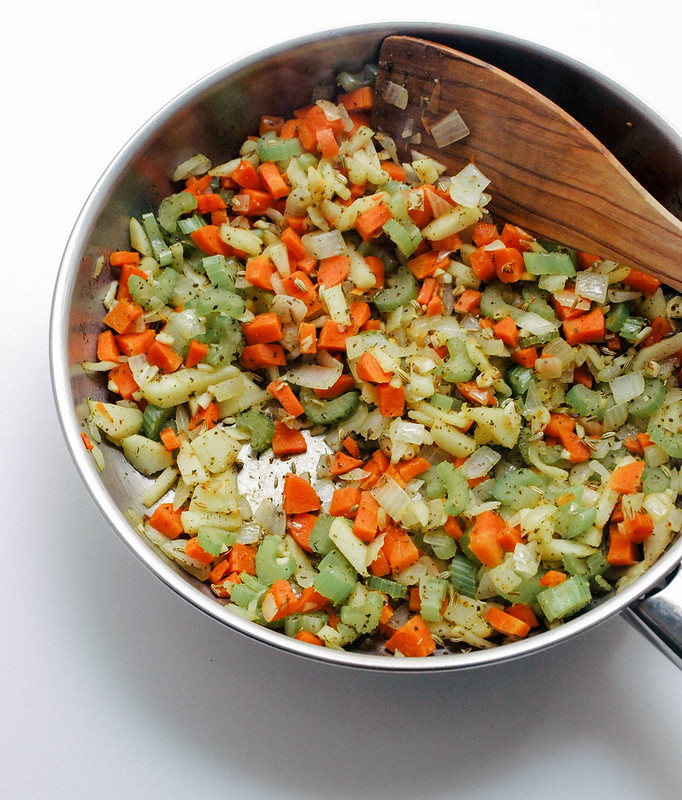
While you're working on the lentils, prepare your vegetables and apple and saute with herbs.

APPLE, FENNEL + SAGE LENTIL LOAFAPPLE FENNEL SAGE LENTIL LOAF

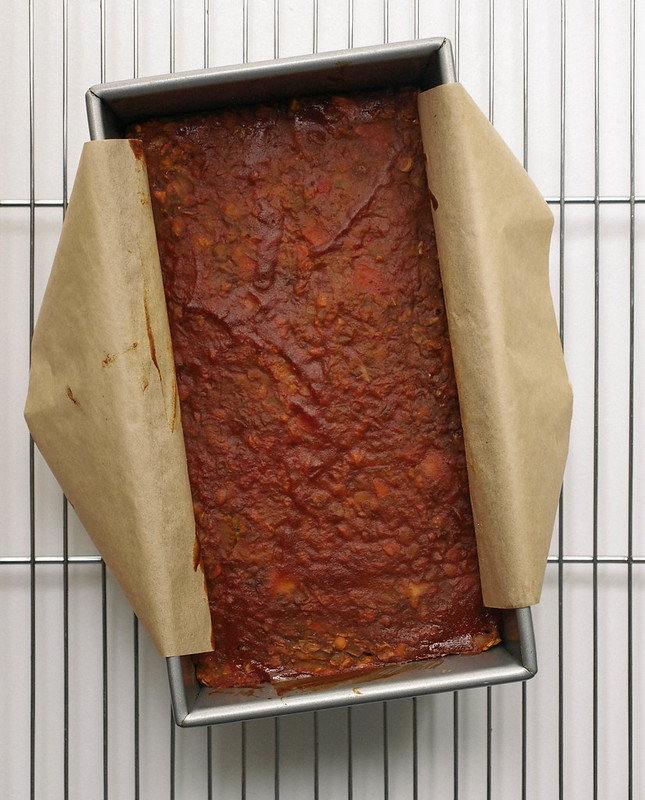
Once everything is mixed, pack mixture into a 9 x 5 loaf pan. Spread glaze over top and bake.

APPLE, FENNEL + SAGE LENTIL LOAF

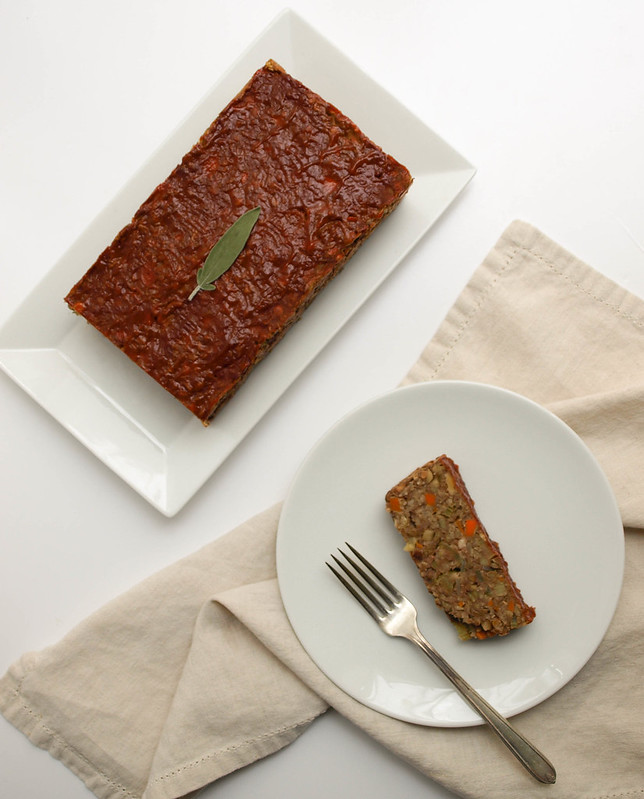
Remove from oven and let cool. You may like to add a fresh layer of glaze over top like I have in the first picture.

APPLE, FENNEL + SAGE LENTIL LOAF

APPLE, FENNEL + SAGE LENTIL LOAF

Ingredients
  • 1 cup green/brown lentils, rinsed
  • 2 1/4 cups vegetable broth or water
  • 3 garlic cloves, minced
  • 1 small onion, diced (about 1 1/4 cup)
  • 2 celery stalks, diced (about 1 cup)
  • 2 carrots, diced or grated (about 1 cup)
  • 1 small apple, cored, peeled and diced or grated (use firm crisp like fuji or gala) (about 1 cup)
  • 1 1/2 teaspoons fennel seeds, use whole or lightly crushed
  • 1 1/2 teaspoons sage or 2 tablespoons fresh minced
  • 3/4 cup oats, quick or rolled (I used quick) or bread crumbs
  • 1/4 cup flour (splet, almond, oat, GF all-purpose, etc.)
  • 1/2 - 3/4 cup unsweetened organic apple sauce
  • 3/4 cup finely chopped walnuts, optional
  • salt & pepper to taste (I used white pepper)
Glaze
  • 6 tablespoons organic ketchup
  • 3 tablespoons apple cider vinegar
  • 1 tablespoon pure maple syrup

Cook lentils: In a dutch oven or large pot, add vegetable broth and lentils, bring to a boil, cover, reduce heat to low and simmer for 40 - 45 minutes, most to all liquid should be absorbed. Lentils should be overcooked and tender. Set aside to cool, uncovered, for 15 minutes. Mash lentils with the back of a spoon or fork, or roughly puree using an immersion blender or food processor, about 2/3 - 3/4 of the lentil mixture.

Preheat oven to 350 degrees F.

Toast walnuts: Spread walnuts on a small rimmed baking pan, place in oven and toast until they are fragrant, about 10 -15 minutes. Set aside to cool..

Prepare vegetables and apple: Heat oil in a medium size pan over medium heat, add onion, celery and carrot, saute for about 5 minutes. Add apple, fennel, sage salt & pepper, heat for another 3 - 4 minutes.

Combine everything: Add the sauteed mixture with the lentils and mix. Add flour, oats, walnuts and 1/2 cup apple sauce, mix well to combine. If mixture seems to dry, add a little more apple sauce, mix again. Taste for seasoning adding extra herbs, salt and pepper as needed. 

Line a 9 x 5 loaf pan with parchment paper, (this will make for easy removal later), add mixture and press down gently but firmly filling in along the edges as well. 

Make glaze: In small bowl, mix together the glaze and spread over top lentil loaf as evenly as you can. Here you can even add a fresh sage leaf in the center of the loaf, it won't burn, it may roll a bit on the edges, and will add a nice decoration (the sage leaf I have shown was fresh). 

Bake: Place loaf in oven, on middle rack, and bake for 45 - 50 minutes. Remove from oven, let cool 10 minutes, remove from pan using the edges of the parchment paper. You may like to mix a bit more sauce and spread over top. Place loaf on serving dish, cut and serve individual slices.

Serving suggestions: Serve with roasted or mashed potatoes, or potato & cauliflower mash, a side of green beans or any combo of roasted brussels sprouts, carrots, butternut squash and beets. A simple fresh green salad with a light vinaigrette is also a great side! Left overs make for great sandwiches!

Makes 8 slices. 

Notes:

If you don't use a good vegetable broth while cooking the lentils, I recommend add in 1/2 teaspoon of onion and garlic powder, along with a big pinch of salt. The lentils are the base of the recipe and should have good flavor.

If mixture is too wet, add a tad more flour or oats/bread crumbs. If mixture is too dry, add a tad more apple sauce.

I've used both oats and bread crumbs. Both were great. I didn't notice that the oat flavor came through at all (or maybe I'm just adapted to them).

I don't recommend reheating the entire loaf at once. It will most likely become too dry, as the heat will take to long to reach the center. I recommend cutting slices and reheating, this way. If you need, you can make your lentil loaf the day before and store uncooked until ready to heat, bring to room temperature if possible, and heat according to instructions above.

If you love fennel and sage, by all means add an extra 1/2 teaspoon of each! Or an extra tablespoon of fresh minced sage.


RUSTIC APPLE & PEAR CRISP

Rustic Apple & Pear Crisp

This simple rustic apple & pear crisp comes from The Physicians Committee of Responsible Medicine. I subscribe to their emails and receive their recipe of the week and almost daily informative articles. I love what they stand for in the way of health and animals rights. They are against the use of animals in medical and scientific experimentation and have fought hard to eliminate the use of animals in schools, universities and labs across America. They embrace a plant based diet and promote it as the preferred diet to prevent and reverse many health issues. They've made great strides for both humans and animals. By promoting new ways of thinking and changing old outdated systems their work is a most positive breath of fresh air! I thank PCRM for everything they do as their work is extremely important. To find out more about their inspiring work please take a moment to watch this short video (be warned it may bring a few tears): Opening the Doors to Compassion

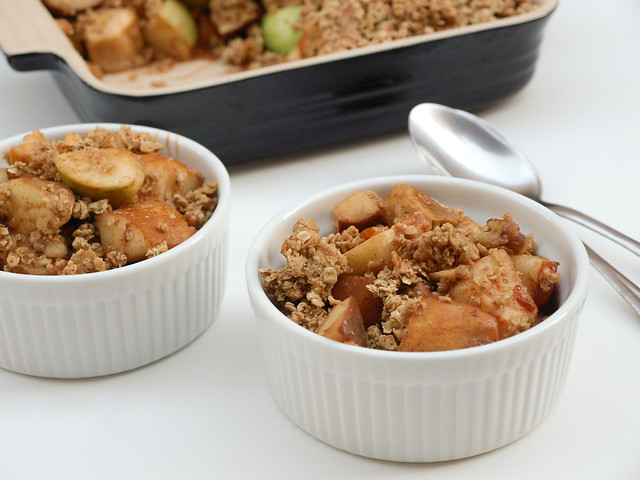
I'm happy to share one of their recipes here and have a few others in mind from their collection as well. This recipe was actually shared back in September, I bookmarked it and decided to finally give it a try. It was delicious! I've always loved apple crisps, or crumbles as they are referred to in the UK and Australia. They're just one of those simple pleasures that I've never tired of. Something about the soft apples, cinnamon and crispy oatmeal topping that I just love. And with the abundance of apples and pears this time of year it seems the perfect time to enjoy these fall fruits together. This was even a hit with my daughter who said she'd like to have this around the house more often. I changed the recipe slightly, you can find the original here. This would be good with a scoop of vanilla non-dairy ice cream and extra cinnamon on top. I didn't add any here but feel free to add a scoop to your bowl. Alone this crisp is healthy as can be. Not only does it make a great dessert but it can double as a nice breakfast idea as well. I can literally sit and eat this all day long!

Rustic Apple & Pear Crisp

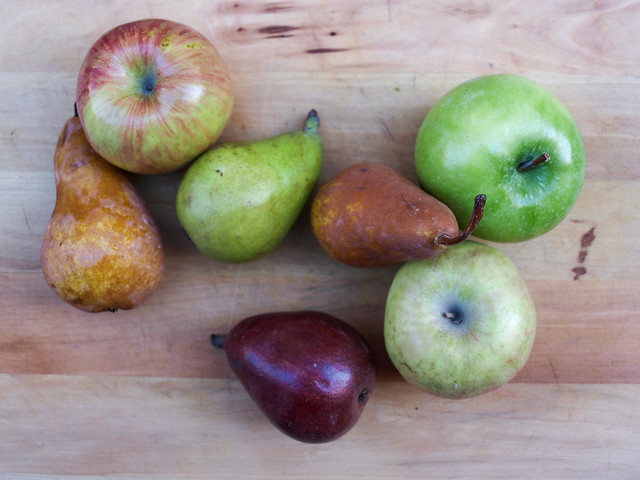
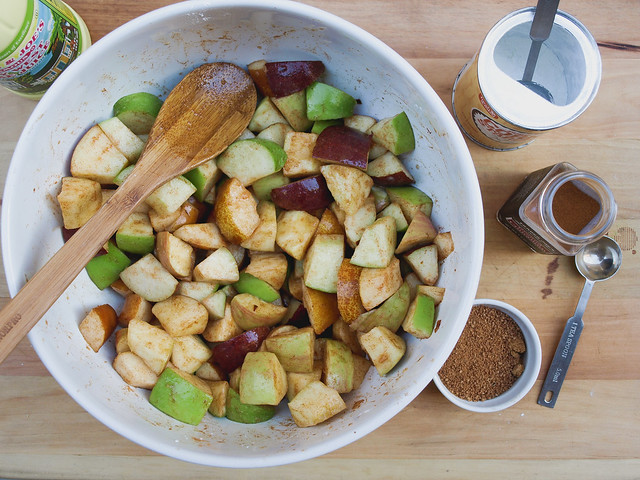
Pick your favorite apples and pears. I love Fuji apples for their sweetness and crispness, and I also added a granny smith for tartness and variation. Pears can be a variety or simply a few of the same. 

Rustic Apple & Pear Crisp

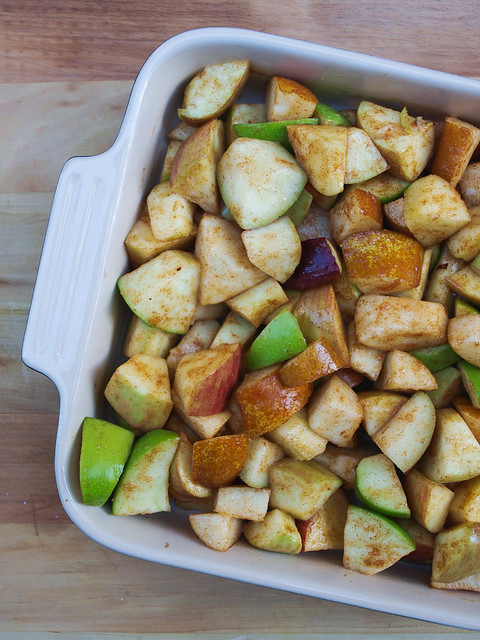
Wash, core and dice your apples. I prefer to leave the skin on but feel free to peel your apples. Mix your apples and pears with lemon or lime juice, cornstarch, sugar and cinnamon, mix well. I didn't have any fresh lemons on hand and used a bottled lime juice I had available. If you find yourself in this situation, the lime juice will do just fine. You can also mix this right in your baking dish making for one less dish to wash.

Rustic Apple & Pear CrispRustic Apple & Pear Crisp

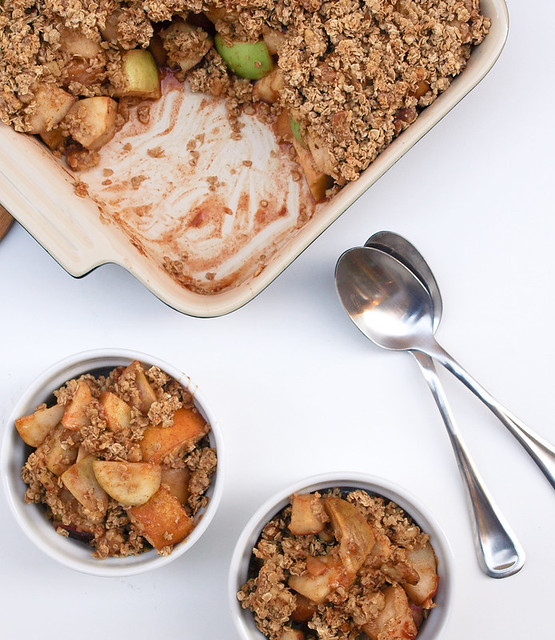
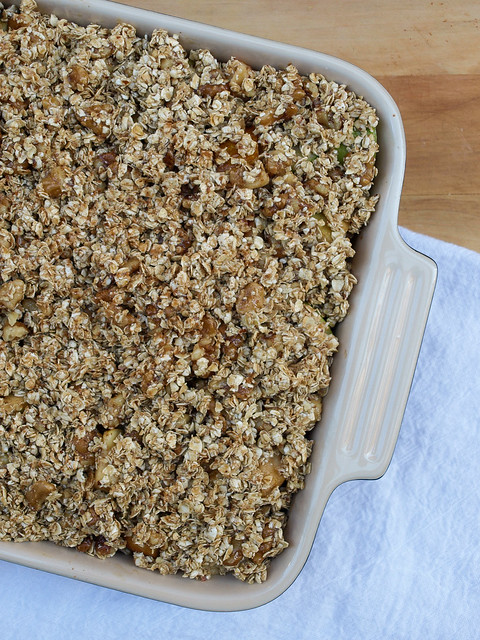
Layer your apples, top with granola mixture and bake...

Rustic Apple & Pear Crisp

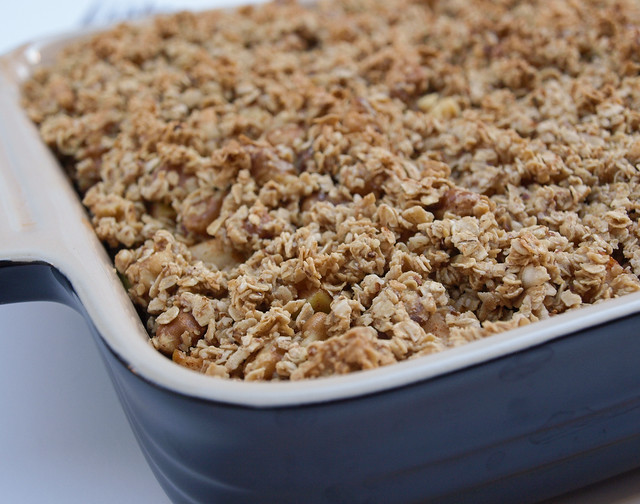
Once done, let cool and share the love! 

Rustic Apple & Pear Crisp

RUSTIC APPLE & PEAR CRISP

Ingredients 
  • 3 medium apples, cored and chopped (peel if you prefer)
  • 3 medium pears, cored and chopped (peel if you prefer)
  • 3 tablespoons fresh lemon juice
  • 1 tablespoon coconut or organic pure cane sugar
  • 1 heaping teaspoon cinnamon
Topping
  • 1 3/4 cup quick or regular oats (I used quick oats)
  • 1/4 cup almond meal, optional
  • 1 cup finely chopped walnuts, optional
  • 1/2 cup pure maple syrup
  • 3 - 4 tablespoons coconut oil (at room temp)
  • 1 teaspoon vanilla extract
  • 1/4 teaspoon mineral salt
  • cinnamon, to garnish 

Preheat oven to 350 degrees F.

Wash apples well. Slice, core and dice apples and pears. In a large bowl (or right in your baking dish), combine apples, pears, lemon juice, sugar and cinnamon. Mix well and layer into a 9 x 9 baking dish. 

In a medium size bowl, combine oats, almond meal, walnuts, maple syrup, coconut oil, vanilla and salt, mix well. Spread oat mixture evenly over the apples and sprinkle with a little cinnamon. 

Bake for 35 - 40 minutes, or until apples and pears are fork tender. Let cool 5 - 10 minutes before serving. 

Serves 6 generously. 

Notes: 

Make gluten free by using gluten free oats. 

Feel free to use almonds, pecans or other nuts and seeds of choice in place of the walnuts.  

Peel your apples if you prefer. I leave the skin on for the fiber and less work. Plus I love the rustic look and different colors the skin brings to the dish. If serving for everyday I won't bother to peel the apples but if serving for company I may consider peeling them. You may also like to dice your apples a little smaller than shown or cut them into thin to medium slices.

Make this oil free and omit the coconut oil. Your crisp top will be a little bit dryer but still good!

Add fresh cranberries for a splash of color. This is especially nice around the fall & winter holiday's.

Change the recipe to just be an apple crisp if you like, or vice versa. 

From my heart to yours...Enjoy!


Cranberry Walnut Chickpea Salad Sandwich

Cranberry Walnut Chickpea Salad Sandwich

Chickpeas are just about the most versatile bean I've ever come across. They pair well with so many flavors making them the ultimate bean in my book. No wonder they are loved by so many! They may not have as much protein or fiber as black beans and cannellini beans, but chickpeas come in close enough with 15 grams of protein and 12 grams of fiber per 1 cup. They are a nutrient dense food with good carbohydrates the body needs and are low in fat with only 4 grams of fat per 1 cup. And the other beans are not nearly as versatile as the chickpea. You can make savory chickpea pancakes with the flour, add them to ratatouille, stews, salads, make hummus, falafels, roast them as a snack and the list goes on and on. They are the greatest bean ever and I can't wait to put them into new recipes here in the future. I have lots of ideas for these little guys!

Cranberry Walnut Chickpea Salad Sandwich

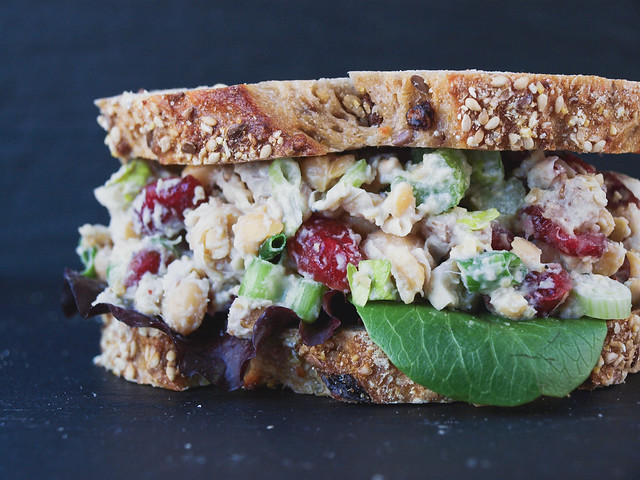
And we'll start by adding this super awesome Cranberry Walnut Chickpea Salad Sandwich to the collection. If you didn't already know, chickpeas make for great sandwich fillers too!

Cranberry Walnut Chickpea Salad Sandwich

You may already be familiar with my 'Chickpea of the Sea' Salad and my other classic Mashed Chickpea Salad. This one is just as delicious but with a sweet flair that I just know you'll fall in love with! I assure you that this will hit the spot and satisfy your craving for a chunky, sweet, peppery, crunchy style sandwich. Full of texture and flavor this has become my new favorite. It's a hearty salad that will comfort you and leave you feeling completely satisfied. This can be served as a traditional or open faced sandwich. Or simply serve on a bed of lettuce and skip the bread. You may even find that you love the salad all by itself without any accompaniment! I can easily eat this straight from the bowl all day long. :)

Cranberry Walnut Chickpea Salad Sandwich

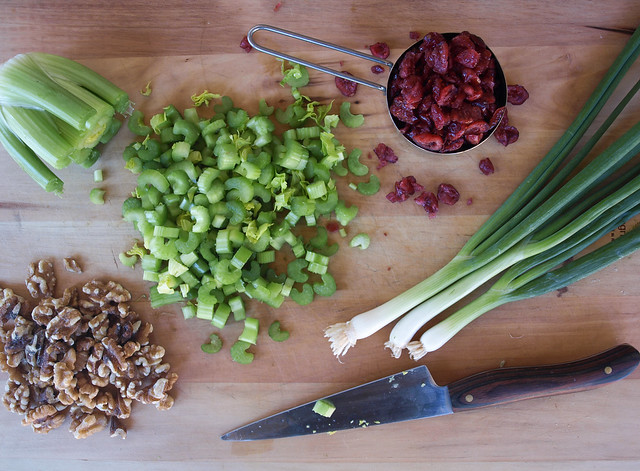
Slice your celery, feel free to add in some celery leaves if you can. For the scallions, when slicing use both the green and white parts. Roughly chop your walnuts. When buying cranberries, use organic whenever possible (I like the ones from Trader Joe's, they're so brightly colored too!). You can also use fresh chopped cranberries!

Cranberry Walnut Chickpea Salad SandwichCranberry Walnut Chickpea Salad Sandwich

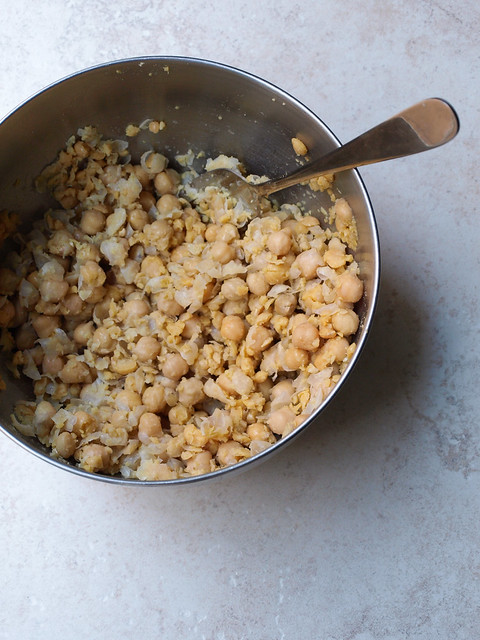
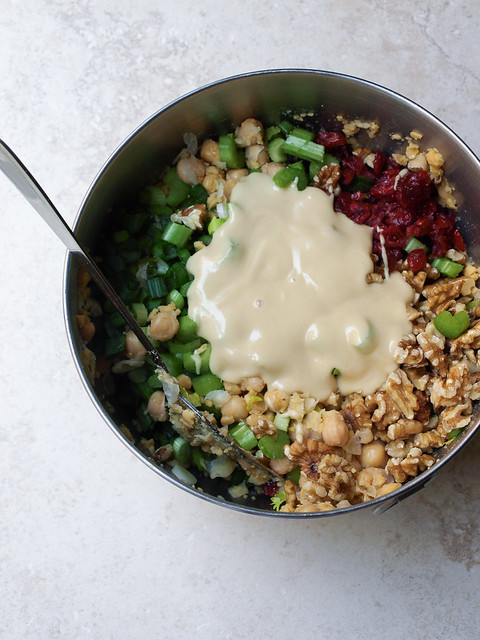
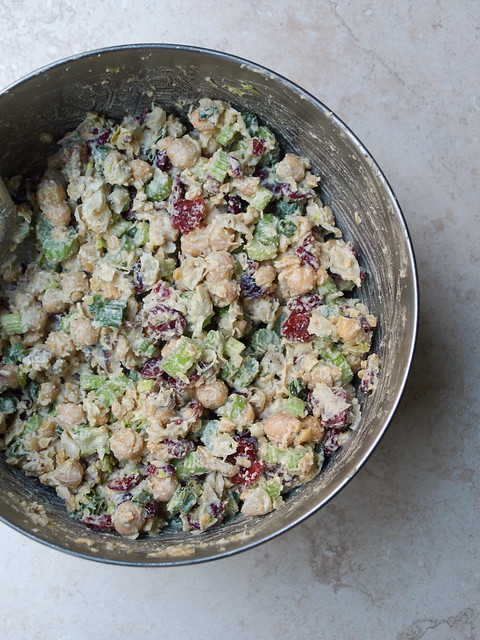
Roughly mash your chickpeas. I decided to double this batch using 3 cups of chickpeas instead of 1 1/2 so you'll have plenty of leftovers. And you'll be glad you have them! Add in the remaining ingredients and mix. About as simple as it gets, which is why I love chickpea salads!

Cranberry Walnut Chickpea Salad Sandwich

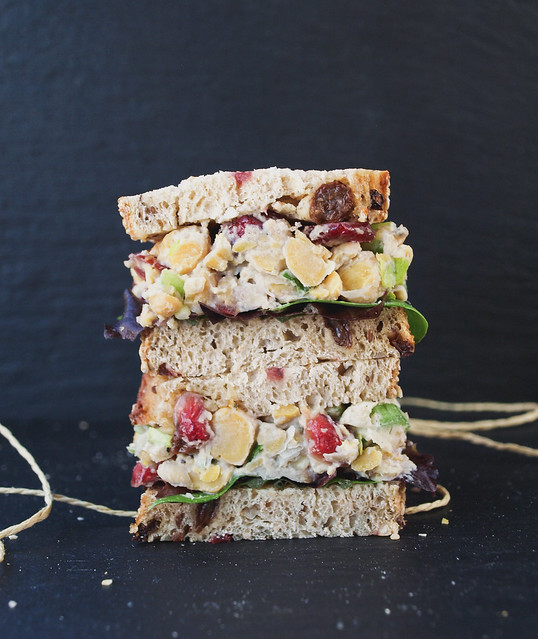
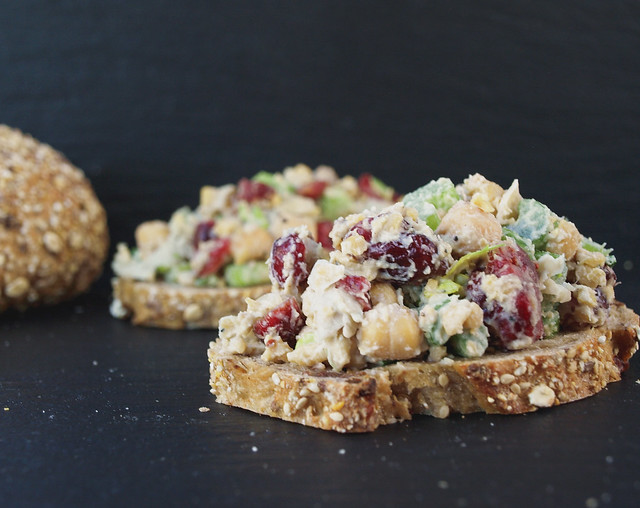
There you have it...serve on your favorite bread. I have it paired here with a fruit, nut and seed loaf.

Cranberry Walnut Chickpea Salad Sandwich

Cranberry Walnut Chickpea Salad Sandwich

Ingredients
  • 3 cups cooked or 2 cans (15oz) garbanzo beans (chickpeas), drained and rinsed
  • 1 cup celery, diced 
  • 1/2 cup organic dried cranberries (chopped fresh would be great too)
  • 1/2 cup walnuts or pecans, roughly chopped
  • 1/2 cup scallions (green onions), thinly sliced, white & green parts
  • mineral salt & freshly ground pepper, to taste (I used about 1/2 teaspoon each)
Dressing
  • 6 tablespoons (1/3 cup) tahini or vegan mayo
  • 4 tablespoons (1/4 cup) champagne, white wine or cider vinegar (I used Orange Muscat Champagne Vinegar)
  • 2 tablespoons water (only needed if using tahini)
  • 2 teaspoons pure maple syrup
To serve
  • leafy lettuce of choice
  • bread of choice

Start by mixing your dressing. In a small bowl combine tahini/mayo, vinegar, water and maple syrup. Set aside so the flavors come together. This can be made a day or two ahead and stored in the refrigerator until ready to use. Add a tad more water, or vinegar if you're a vinegar lover, to thin out dressing as desired. If using vegan mayo, you may like to add 2 more tablespoons.

In a medium to large bowl, add your garbanzo beans and roughly mash with a strong fork or potato masher. Add in celery, cranberries, nuts, scallions, salt, pepper and dressing, mix well. Serve at room temp or let chill in the refrigerator for an hour before serving.

Serve on your favorite bread as a closed or open faced sandwich, or on a bed of leafy greens. You may even opt to simply enjoy the salad as is.

Serves 6 - 8.

Notes:

Add extra of anything you like, and vice versa, if you're not keen on an ingredient use less or omit! One particular ingredient may be the vinegar. I'm not much of a vinegar fan but I loved the orange muscat champagne vinegar and found I used quite a bit and loved it!

Change up the walnuts, using pecans, almonds, sunflower seeds, etc. If using sunflower seeds, use half the amount called for.

For the dressing, I have only made this using tahini since I do not use any kind of store bought vegan mayos. If using vegan mayo, adjust accordingly adding more mayo as needed, maybe 1/2 cup instead of 1/3. I do recommend trying this recipe with tahini...it is seriously so good that you would never know and it is much better/cleaner for you than the store bought mayos!

Enjoy!


Basil-Walnut Pesto with Mushroom, Jalapeno & Sun-Dried Tomato

Basil Walnut Pesto with Mushrooms, Jalapeno's & Sun-Dried Tomatoes

I had a really nice lunch over the weekend in Old Town Pasadena. I met up with a friend of mine and we ate at Mi Piace, a great little Italian restaurant on Colorado Blvd. I was so inspired by the basil pesto dish that my friend had and had to recreate it at home. This home cooked dish came out pretty close. The the dish at the restaurant had a lot more olive oil in the pesto but I have cut it down to a bare minimum here, feel free to add a tad more if you like. I love the combination of these vegetables, each adding their own characteristics. The sun-dried tomatoes add sweetness, while the jalapenos add spiciness and the mushrooms add a nice meatiness. Nice to know I can make it anytime I want without having to go anywhere. But I still love getting out to restaurants to see what's on the menu and have some good social time with friends and family...always a pleasure!

Basil Walnut Pesto with Mushrooms, Jalapeno's & Sun-Dried Tomatoes

Basil Walnut Pesto with Mushrooms, Jalapeno's & Sun-Dried TomatoesBasil Walnut Pesto with Mushrooms, Jalapeno's & Sun-Dried Tomatoes

Simple and flavorful! 

Basil Walnut Pesto with Mushrooms, Jalapeno's & Sun-Dried Tomatoes

Use rice or quinoa pasta to make gluten free.

Basil Walnut Pesto with Mushrooms, Jalapeno's & Sun-Dried Tomatoes

Basil Walnut Pesto with Mushrooms, Jalapeno's & Sun-Dried Tomatoes
    Ingredients
    • 2/3 cup sun-dried tomatoes, softened
    • 8 oz. package mushrooms, sliced
    • 2 jalapenos, sliced and seeds discarded
    • 1 tablespoon extra virgin olive oil
    • 8 oz. pasta of choice 
    • almond parmesan, for topping

    Walnut Basil Pesto
    • 2 cups basil, packed
    • 1/2 cup walnuts 
    • 1/4 cup extra virgin olive oil
    • 2 tablespoon lemon
    • 3 or 4 garlic cloves
    • himalayan salt & pepper to taste (I used white pepper)
    • 1 tablespoon nutritional yeast, optional*

    Start with your pesto: Combine ingredients in food processor, process until blended and creamy, stopping to scrape down the sides as needed. Set aside.

    Cook pasta according to package, drain and return to pot you cooked it in. Add a small amount of oil and toss to coat.

    In saute pan heat oil over medium, saute mushrooms, sun dried tomatoes and jalapeno for 4 - 5 minutes or until mushrooms are tender. It should be smelling pretty delicious about now! Remove from heat.

    Toss pasta with pesto. Place pasta on individual serving dishes and top with sauteed vegetables, add salt and pepper to taste. Top with almond parmesan for even more flavor. Serves 2 - 3.

    Notes:

    I didn't use the nutritional yeast in my recipe, it's a good healthy option for those seeking to replace the cheese flavor in other pesto recipes. Add slowly until you find the amount you like.

    Use as much of the sun-dried tomatoes, mushrooms and jalapeno pepper as you like.

    Use rice or quinoa pasta to make this gluten free.

    Enjoy !

    Bircher Muesli with Chia Seeds, Figs & Apples


    Muesli is a wonderful raw cereal and can be served with a variety of ingredients. Oats have been traditionally used along with fruits, nuts & seeds. Here is my favorite version of muesli using not only oats but other 'superfoods' like chia seeds and buckwheat grouts making this a nutritional powerhouse meal. 

    This recipe originally came about for two reasons. One, I had picked up some figs the other day not quite knowing what to do with them. And the other is due to a question I had posted on The Simple Veganista facebook page asking about vegan breakfasts, cereals in particular, so it all came together and I really love the mixture of grains, fruits, nuts, seeds and spices. So very good! It's almost like a chia pudding. 


    If you're in need of a meal that will carry you the distance, muesli is it. The added chia seeds in this version alone are an energy extender as well as the all-important omega's 3 & 6 they contain. They are one of the few plants based sources of omega 3. Chia seeds also contain a good amount of protein, fiber, iron and calcium per serving. The buckwheat can be optional in this version but I highly suggest that you get to know buckwheat, aka Kasha. Despite its name buckwheat isn't in the wheat family at all, it is considered a seed and is a great source of protein and fiber, even more than the oats per serving. In fact, you may decide to do all buckwheat and no oats sometime. It's also gluten free. The oats are a classic muesli staple and help soak up the liquids to make for a nice creamy dish while the other ingredients give texture and flavor. 

    Some history on muesli taken from wikipedia...

    'Muesli was introduced around 1900 by the Swiss physician Maximilian Bircher-Benner for patients in his hospital, where a diet rich in fresh fruit and vegetables was an essential part of therapy. It was traditionally eaten with juice and not milks.

    The original Bircher-Benner recipe is proportionately the opposite of most muesli available in today's supermarket varieties, calling for far more fruit than grains. One serving based on the original recipe consists approximately of:
    • 1 tablespoon rolled oats, soaked in 2–3 tablespoons water
    • 1 tablespoon lemon juice
    • 1 tablespoon cream
    • 200 grams apple (about one large, preferably a sour variety), finely grated and mixed with the above directly before serving
    • optionally top with 1 tablespoon ground hazelnuts or almonds
    The original recipe used sweetened condensed milk instead of cream, a compromise due to hygiene concerns regarding fresh milk products in 1900 (bovine tuberculosis etc.), before pasteurisation and refrigeration became commonly available. The original recipe also advised to soak the oats in water overnight as raw oats need a lengthy soaking to soften them before eating. This long soaking time is unnecessary with modern rolled "quick oats", which the manufacturers already soften through a steam treatment. While phytic acid is an antinutrient and strong chelator of important minerals, it is removed during the steam process, making muesli desirable, given its positive antioxidant qualities.'


    I highly believe if Bircher-Brenner was alive today, he would agree that non-dairy milk is a much better option to dairy creams...


    Let's make some 'superfood' muesli...I think Bircher would approve of this version :)

    Ingredients

    2 tablespoon rolled oats* ( I use GF)
    2 tablespoons buckwheat groats/Kasha
    1 tablespoon chia seeds
    1/2 teaspoon or so vanilla
    3/4 cup unsweetened almond milk, or non-dairy milk of choice
    cinnamon, to taste
    3 figs
    1/2 apple, I use fuji
    1-2 tablespoon raisins
    a few almonds
    a few pepitas
    a few walnuts

    In small/medium bowl combine oats, buckwheat groats, chia seeds, vanilla, milk, cinnamon, and half of the raisins. Mix well, cover and refrigerate overnight, or eat in one to two hours after it has set. Serve cold, or at room temp, topped with diced figs, apples, raisins and nuts/seeds and a sprinkle of cinnamon...add a little more milk if desired. I like to mix most of the apples in first and then top with the remaining ingredients. Serves one. Stores up to a couple days in airtight container in the refrigerator. Try drinking a glass of lemon water with this, very refreshing!

    You may also like to try 100% fruit juice in place of the milk or use any fruits you like. 

    *For 100% raw look for raw oats that have not undergone the steam process. These you will want to soak for eight hours plus.


    You can also make it to go in the morning. Combine all the ingredients in a mason jar, or other to go container, give it a good stir and take it with you. The non-dairy milk is perfectly fine without refrigeration until ready to eat. At least if it's eaten within the day it should be fine, unlike dairy products that need refrigeration (another reason non-dairy milk is so great).

    If you want to use more whole grains try this recipe below. It will fill you up for those extra long periods in between meals or can be munched on for a few hours...

    Ingredients
    1/4 cup rolled oats (I used GF)
    1/4 cup buckwheat groats
    2 tablespoons chia seeds
    1/2 - 1 teaspoon vanilla 
    1 cup unsweetened almond milk or milk of choice
    any fruit and nut/seeds of choice

    Enjoy these superfoods and eat them often !