.

Showing posts with label cabbage. Show all posts

KIMCHI

KIMCHI...Freshly packed

Welcome to the world of Kimchi! This tangy, spicy dish is a staple in the Korean culture and is typically eaten with every meal. In fact, kimchi is their national dish. Once you become accustomed to its unique characteristics, you may find yourself hooked! Kimchi is a mixture of vegetables and spices that go through a fermentation process, in our case we'll be using cabbage as our base. Fermenting foods have long been known for their health benefits. Foods like kimchi, kombucha, sauerkraut, pickles, miso and tempeh are probiotic powerhouses. The fermenting creates good bacteria which work directly in the gut to balance and regulate a variety of bodily functions. It can help with IBS, boost your immunity, aid in weight loss and even promote better skin. With kimchi being so simple to make, it's easy to add this beneficial mixture to your weekly meal plans. 

My first  experience with kimchi was with a jar I picked up at a local grocery store labeled Pickled Planet. I fell in love with the spicy flavor. I also have an affinity for all the ingredients listed on the jar and set out to make my own using the list as my guide. Basically it's cabbage, apple, green onion, red pepper, salt, garlic & ginger. After researching I found how kimchi recipes vary. I'll be playing around with different versions and sharing my experience here as I do. It's very easy to make and just takes patience to get through the first day or two. In the last couple weeks, I've tried 2 different spice blends, both delicious and noted below. I've also used different style cabbages, all great. I've even added shredded carrots but will save that for another recipe. Kimchi is a new addiction for me. Its spicy, pungent flavor and versatility keeps me coming back for more. If you've never tried kimchi, I hope this will inspire you to get in the kitchen and give it a try, or pick up a ready-made vegan version and enjoy asap! 

KIMCHIKIMCHIKIMCHI

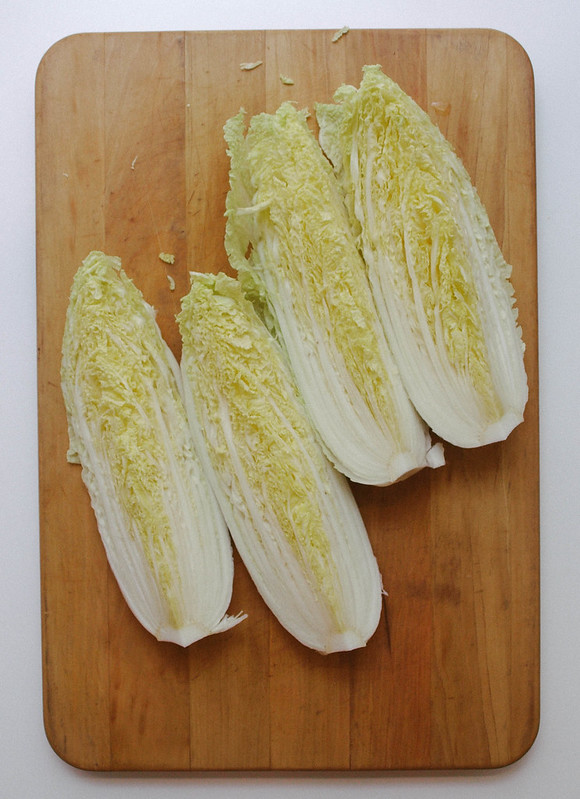
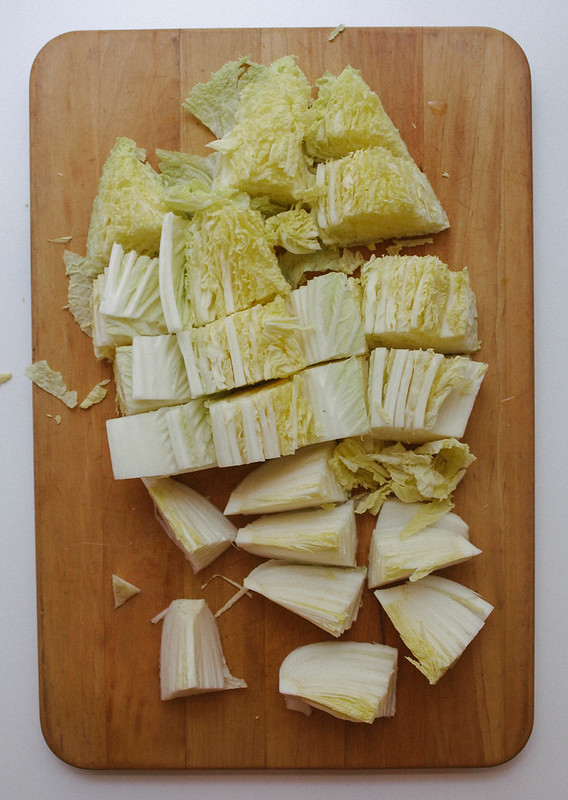
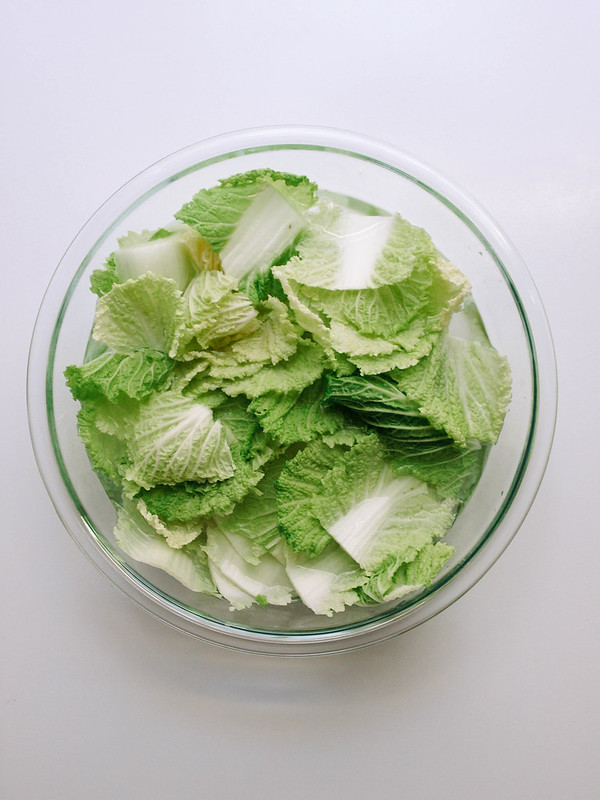
First, quarter your cabbage and slice laterally into 2" chunks. Cabbage will shrink a bit more during the fermentation process so no need to chop it too small. But you may consider slicing the pieces with thick stalks (mainly the pieces towards the bottom), slicing them in half will do fine. Here I used Napa cabbage as it is the most traditionally used cabbage but you can use green or savoy with excellent results, you may even find you like one of these better.
KIMCHIKIMCHIKIMCHIKIMCHI

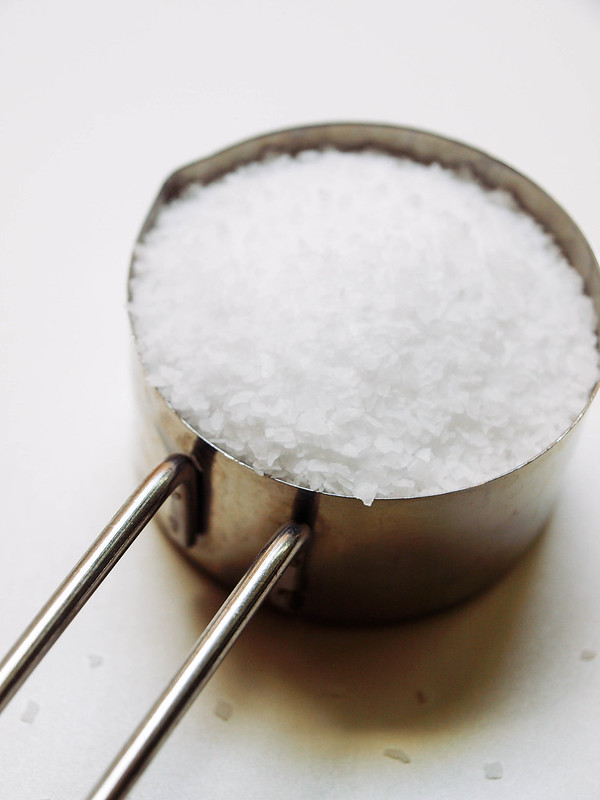
Next is the soaking of the cabbage in salt water, this will help draw moisture from the plant cells causing the leaves to wilt. Soaking the cabbage in salt water will move the preperation along a lot faster than than other methods used, it is my preferred method. For your salt, stick with using kosher, pickling or other course salts like sea or mineral salts that do not contain iodine. Iodine, with its antimicrobial properties, may interfere with proper fermentation. Place cabbage in a salted water bath, cover with dish and place weighted object on top to submerge the cabbage, let soak for at least 2 hours, up to 12 if you like but I find 2 hours is plenty.
KIMCHIKIMCHI

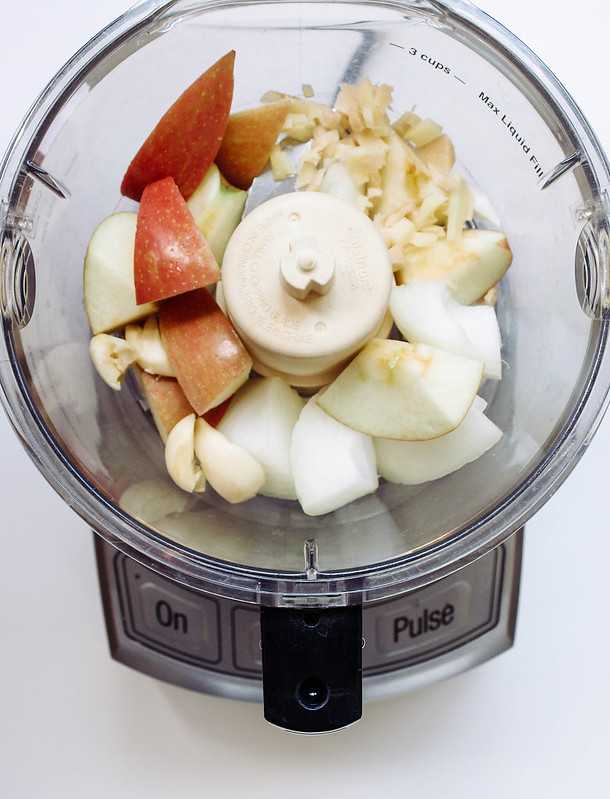
Puree the apple, onion, ginger and garlic making a sweet and zesty mixture. The sugar from the apple will help in the fermentation while adding a hint of sweetness. You can also use a pear. Some recipes call for a teaspoon or two of sugar in place of the apple (I will save that method for another kimchi recipe). I like the thought of using an apple but if you're in a pinch without an apple in sight, use 2 teaspoons of organic pure cane sugar, coconut sugar or sugar in the raw....just the puriest sugar you can find. You may like to add a bit of water to the mix as well, about 2 - 3 tablespoons. 
KIMCHI

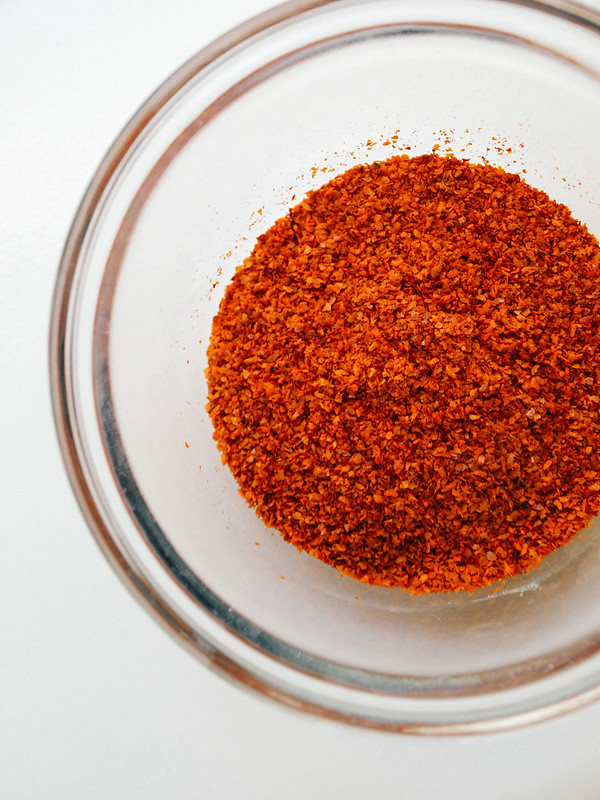
For the spice, you'll want to source out Korean red pepper powder or flakes known as gochugaru. You can find it at Asian grocery stores or online. I just tried this one from Mother In Laws Kimchi Korean red pepper flakes and thought it had an nice flavor. The peppers are not overly spicy, but I do find that the spiciness will intensify as the kimchi ages. I've also replaced the korean red pepper and used a mix of cayenne pepper and sweet Hungarian paprika, using 1 tablespoon each, and it was delicious as well.

KIMCHIKIMCHIKIMCHI

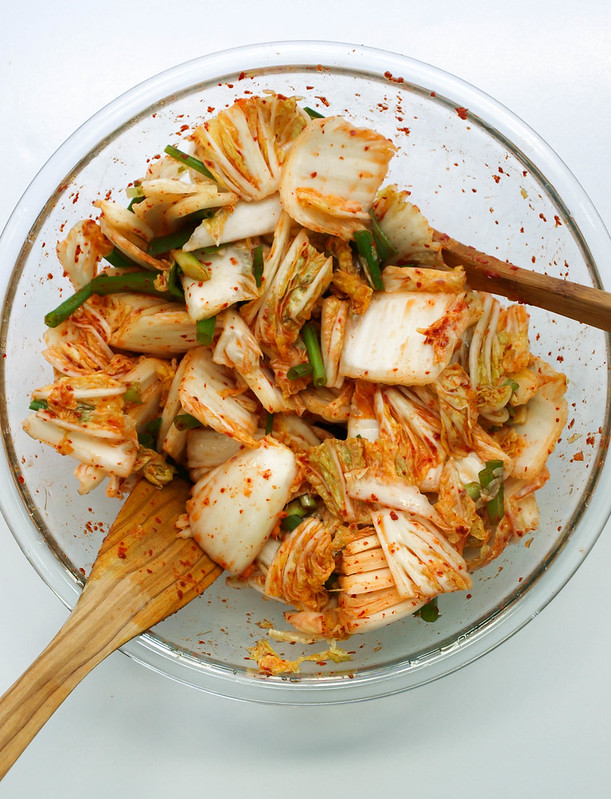
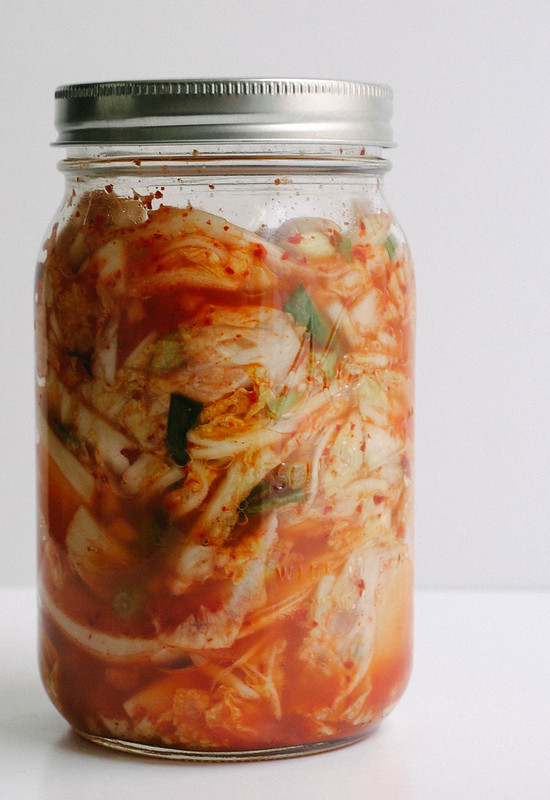
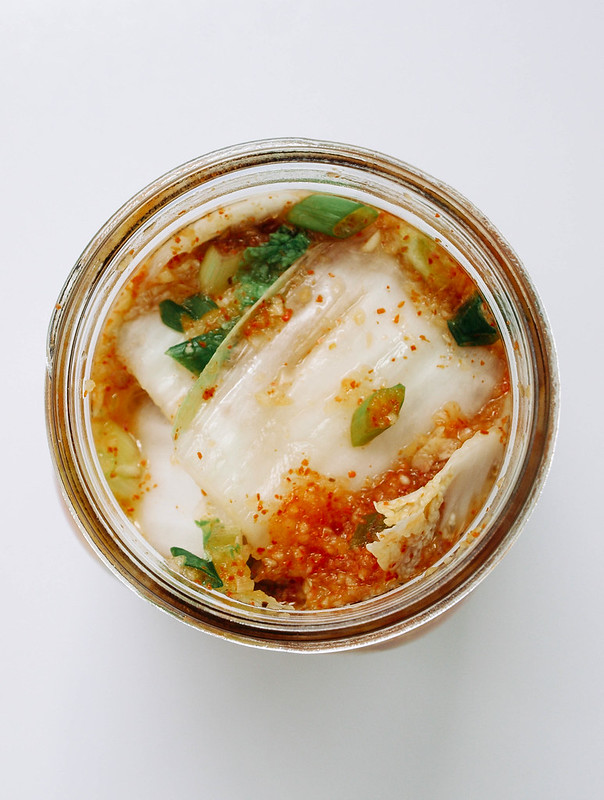
Make your spice mixtures and combine with cabbage and green onions, mix well to coat. Some use their hands (gloves recommended if you do), I used wooden spoons. Pack your mixture into glass jars or containers with a lid, leaving a little room at the top and cover. Check periodically for the next 24 - 36 hours. Move to refrigerator, kimchi will keep for at least a month, maybe 2. 
KIMCHIKimchi

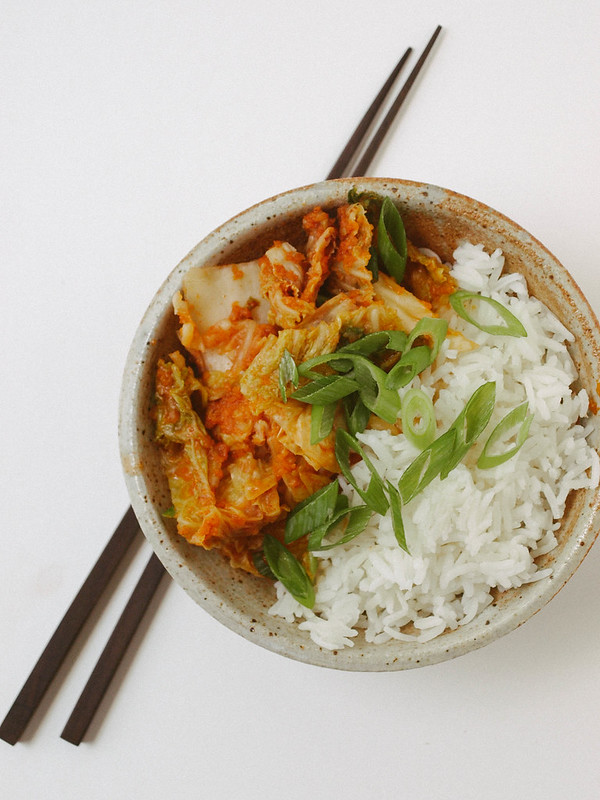
Kimchi can be served a number of ways. It's great as a simple dish with rice, a little cubed tofu would balance the meal out nicely. I have a Kimchi Tofu Scramble Taco recipe coming up next which tastes amazing! You can also be inspired by these tasty recipes: Kimchi Steamed Buns, Brussels Sprout Kimchi Tacos, Kimchi Fried Rice and Kimchi Tofu Summer Rolls. I have a few other ideas in mind as well so stay tuned...
KIMCHI

KIMCHI

Ingredients
  • 1 medium Napa cabbage, about 2 lbs (savoy, green or any combo works too)
  • 1/4 cup kosher, sea salt or other course salt 
  • 6  cups water
  • 3/4 sweet apple (I used fuji), chopped
  • 1/2 small white onion, chopped
  • 1 1/2 inch ginger, chopped
  • 1 - 2 cloves garlic
  • 3 tablespoons Korean chili powder (gochugaru) or 1 tablespoon each cayenne & Hungarian paprika
  • 3 - 4 scallions (green onions), sliced 1 inch

Preparing Cabbage: Quarter cabbage and chop laterally into about 2 inch pieces. Place cabbage in a an extra large bowl or pot. Combine salt with 2 cups of luke warm water, stir to dissolve salt. Pour salt water over the cabbage and add remaining 4 cups, stir to mix. If you can, place a plate or circular baking dish of sorts on top to submerge the cabbage (I used a pie dish), place something with a good amount of weight on top to hold down if necessary (it's not completely necessary but will help to evenly wilt the cabbage). Give cabbage a good mix every now and then. Let set for 2 hours, up to 12 if you like. I found that 2 - 4 hours was enough and didn't see much change between the two times.

Make your seasonings: While cabbage is soaking, combine apple, onion, ginger and garlic in food processor/blender and process until fairly smooth.

In a small bowl, mix the chili pepper with a small amount of water to make a wet paste. You can just as easily blend it with the apple/onion mixture adding a couple tablespoons of water as well.

Mix everything together: Once cabbage is ready, drain water, reserving 1/2 cup, and rinse well. Place cabbage back in large bowl, combine with the scallions, apple/onion mixture and chili paste. Mix well to coat all pieces. Either use your hands (with gloves on pref to protect from the chili pepper) or simply use wooden spoons to toss everything.

Packing: Place the kimchi in glass jars or containers with lid, pack down the best you can to close air pockets and leave about an inch at the top for air and gases. Top with remaining juices, add reserved brine if needed to cover vegetables.

Fermenting: Let kimchi set at room temp (or in a cool place like a pantry or closet if weather is extremely warm) for 24 - 36 hours. After 24 hours, open kimchi and pack the mixture down with a spoon (the cabbage will have likely shrunk and you'll have more liquids). You may notice it bubbling, this is perfectly normal as the kimchi is fermenting. As your kimchi ferments the flavors will develop, taste every 24 hours and place kimchi in the refrigerator once you're happy with the taste and to slow fermentation, usually after 48 - 36 hours. It should be tangy, spicy and slightly sweet. After moving to the fridge, it's best used within a month, maybe two.

Makes about 3 - 4 cups.

Notes:

Practice makes perfect with kimchi. You may find you like it more or less spicy. After a few tries you'll find the perfect mix to suit your taste. Also, how fermented you like your kimchi will take practice as well. The weather will also play a role in how fast/slow your mixture will ferment. Higher temperatures will progress fermentation while cooler will slow it down.

If you're in a pinch without an apple in sight, use 2 teaspoons of organic pure cane sugar, coconut sugar or sugar in the raw....just the puriest sugar you can find. You may like to add a bit of water to the mix as well, about 2 - 3 tablespoons. 

You can also enjoy kimchi fresh right after you mix it and store it straight in the fridge. You may like to experiment by putting half the recipe in the fridge and the other half in the pantry to ferment & sour to see which flavor is your favorite.

Optional ingredients for color and variation: carrots and/or daikon radish (grated or julienned), about a 1/2 cup of each. If using these, add to cabbage when mixing scallions and wet mixtures together.

If using savoy or green cabbage, quarter cabbage, remove core and roughly slice.

If you don't have glass jars, plastic containers with lids will work just as well. If you have too much room, more than and inch, place plastic wrap over top but sinking it close to the surface of the kimchi and cover with lid.


I'd love to see your noms...
#thesimpleveganista

RUSTIC CABBAGE, POTATO & WHITE BEAN SOUP

RUSTIC CABBAGE, POTATO & WHITE BEAN SOUP

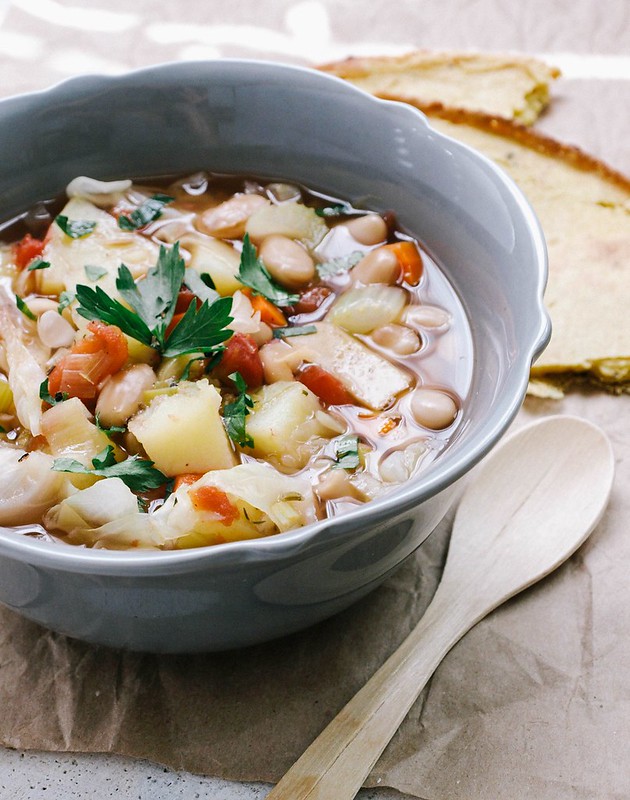
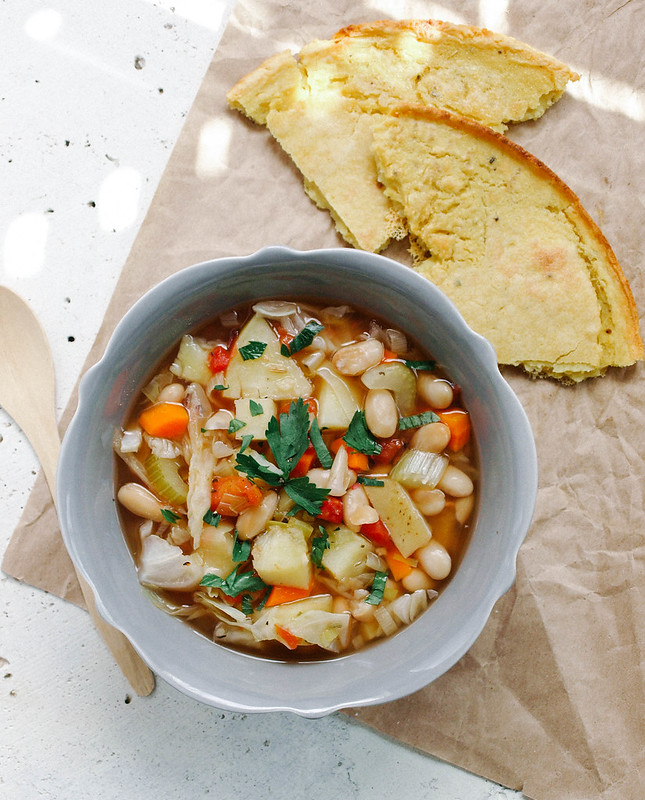
Wondering what to do with a half head of cabbage and potatoes I had sitting around brought about this hearty soup. It's brimming with vegetables, white beans and spices and is enough to feed a small crowd. Add some socca or crusty bread to the meal and you're all set. The socca I made here was seasoned simply with salt & pepper and can be whipped up while the soup is cooking. It's a nice accompaniment, not so much of a soaking bread like crusty bread, but delicious and filling. The soup in itself makes for a complete, nutritious meal with the beans adding a good amount of protein. I used leeks in this recipe, they lend a nice mellow onion flavor, but you can sub in an onion if you like. This turned out to be a great place to use up the leftover produce. I love cabbage in soups, this will be made many times to come. I'm happy to share another hearty soup for the recipe collection to inspire your senses, keeping you plant strong and loving it! 

RUSTIC CABBAGE, POTATO & WHITE BEAN SOUP

Feel free to change up the vegetables. If you're missing one or two, you can still pull this together and have a wonderful soup. If you can't find leeks, use 1 medium onion, diced, in its place. For the cabbage, use your favorite here. I happen to have regular green cabbage on hand but savoy cabbage would be great too. 

RUSTIC CABBAGE, POTATO & WHITE BEAN SOUP

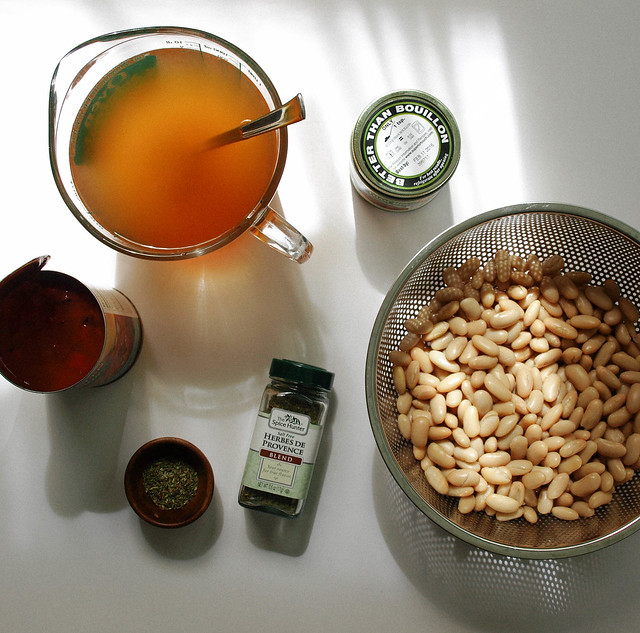
For this time around I chose to use herbes de provence. I love the combination of spices, especially the fennel that I find in this blend from The Spice Hunter. I also added in a teaspoon of fennel here because I love it. Feel free to use any spices you like as most of them will work well here. You can use 2 - 3 teaspoons of an Italian blend or combine a few herbs using 1 teaspoon each: thyme, oregano, rosemary. You can also use sage, marjoram or parsley, savory, etc...in any combination as long it equals about 1 tablespoon. 

When using Better Than Bouillon vegetable broth base, I never use the recommended serving size. I use just enough to flavor the water. For this recipe I used just under 2 teaspoons. This makes my jar last a lot longer and reduces the 'would be' sodium content per recipe. I've just recently (the last six months or so) been using their vegetable broth base and love it!

RUSTIC CABBAGE, POTATO & WHITE BEAN SOUPRUSTIC CABBAGE, POTATO & WHITE BEAN SOUP

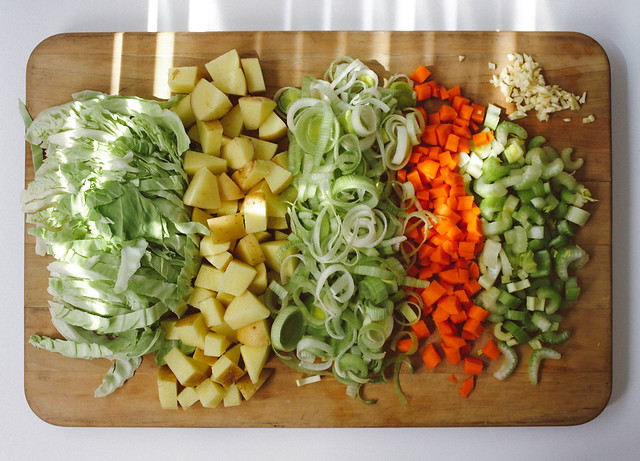
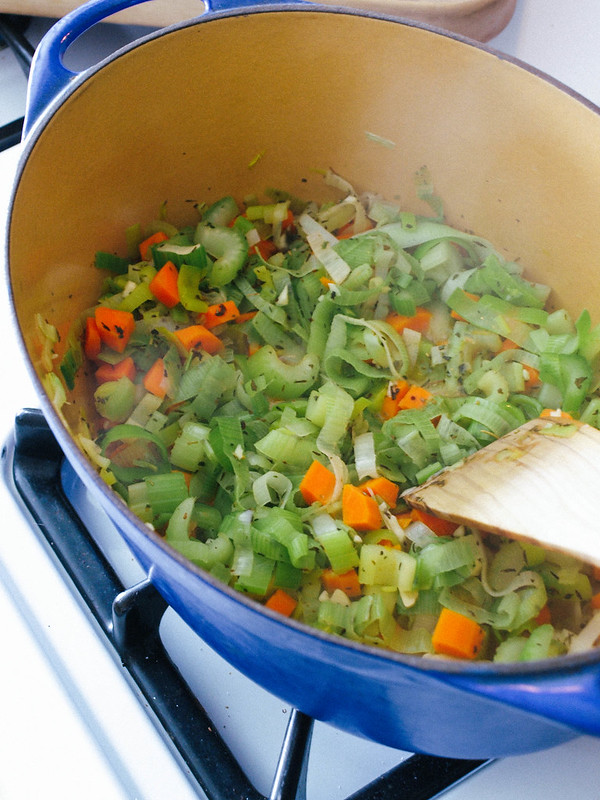
This is a one pot soup that's so easy to pull together. Saute the leeks, celery and carrots, add spices and garlic, cook a bit more. Add remaining ingredients ending with cabbage and white beans last as pictured above. Cover and simmer until cabbage and potatoes are tender, about 30 minutes. Serve with bread of choice. Enjoy often!

RUSTIC CABBAGE, POTATO & WHITE BEAN SOUP

RUSTIC CABBAGE, POTATO & WHITE BEAN SOUP


Ingredients
  • 1/4 cup water or 2 tablespoons olive or grapeseed oil (for sauteing)
  • 2 leeks (use white & pale green parts), sliced and rinsed 
  • 2 carrots, diced
  • 2 stalks celery, diced
  • 2 - 3 cloves garlic, minced
  • 1 tablespoon herbs de Provence OR 1 teaspoon each thyme, rosemary, oregano
  • 1 can (15oz) diced tomatoes 
  • 6 - 7 cups vegetable broth or water
  • 2 medium gold potatoes, diced
  • 1/2 head large cabbage, sliced (savoy or green)
  • 3 cups cooked white beans or 2 cans (15oz), drained and rinsed (use cannellini, great northern or navy) 
  • mineral salt & fresh cracked pepper, to taste
  • 1/4 cup chopped parsley, to garnish

Prepare your vegetables. After slicing your leeks, be sure to place them in a colander and rinse them well under cool running water to remove any dirt and sand that may have collected between the leaf sheaths. If there's a lot of dirt, place sliced leeks in a bowl of cool water and gently swish the leeks around to dislodge any unwanted remnants. Drain water by gently tilting the bowl with one hand and holding your hand over the leeks with the other so they don't fall out, or simply drain into a colander. Repeat until leeks are clear of dirt and sand. Here is a good tutorial from, The Kitchn, on how to wash and prep your leeks. Lastly, another method you may try is this: Slice off the root and the dark green parts. Slice in half vertically. Run under cold running water, opening up the layers as you rinse. Lay on flat surface and slice thinly hortizontally. 

In a large dutch oven or stock pot, heat water/oil over medium to medium-high heat, add leeks, carrots and celery, saute for 5 minutes. Smells delicious already! Add garlic and spices, saute for 1 minute more or until fragrant. Add tomatoes, broth, potatoes, cabbage and beans, bring to a boil, cover, reduce heat to low and simmer for 30 minutes, until potatoes and cabbage are tender. Taste for seasoning adding salt & pepper as needed. 

Serve topped with parsley and a serving of socca or crusty bread. Enjoy!

Serves 6 - 8.

Notes: 

As noted above, change the herbs to whatever you have on hand. You could also use an Italian blend seasoning if you like. I also like to add in a sprinkle of red pepper flakes.

I would suggest using the biggest pot you have for ease, this makes quite a bit of soup.

If leeks are not available, sub in 1 medium onion, diced.

Mirin & Maple Tempeh Stir Fry

Mirin & Maple Tempeh Stir Fry

 This is a wonderfully sweet and nutty flavored dish. The tempeh and buckwheat noodles lend to nuttiness and the marinade that was inspired by Nigel Slater gives to the sweetness. I happen upon Nigel's website and found this recipe for a marinade that he uses and thought it would make for a nice tempeh stir fry. I added the tamari and red pepper flakes for my own taste and just pretty much used the ratio of mirin to maple syrup from his recipe as a guide. You could possibly even add some grated ginger or garlic too. I was really happy with the outcome and the way everything came together in taste, color and textures. It's a simple dish that delivers in flavor, protein and other healthy nutrients that we can all use more of!

Mirin & Maple Tempeh Stir Fry

Now let's talks about mirin for a moment. I've had my eye on recipes containing mirin but was so turned off by the product because I didn't research online first to find out more about it. Instead, while at the grocery store I made my assumption from the first bottle I picked up and happily put back because it contained corn syrup and other ingredients I prefer to stay away from. Months later I finally find there is a big difference in the way mirin is prepared. The real deal, like the one pictured above, is a traditionally brewed rice cooking wine that doesn't contain added sugar or synthetic enzymes. It’s also known as Hon-Mirin. Very commercial brands use corn syrup and preservatives and are known as Aji-Mirin. They may have their reasons for using corn syrup and preservatives but I will choose the ones that are free of these ingredients. Be sure to read the labels and find, Hon-Mirin, as it will give you the best flavor and add luster to your dishes. Here's a little article from the New York Times about mirin for further reading: Searching For The Real Mirin - Catching an ElusiveJapanese Flavor

If you can't find this type of mirin in the store, you can order it onlineor you can substitute with dry sherry or sweet marsala if you must. Or you can dissolve a small amount of pure cane sugar in a little white wine or sherry, about 1/4 teaspoon of sugar to 1/4 cup wine. These are clean substitutes for hon-mirin.

Mirin & Maple Tempeh Stir FryMirin & Maple Tempeh Stir Fry

We're going to start with the tempeh first. Tempeh is one of those soy products that is good for you and can be eaten in moderation, a couple times a week. Tempeh is fermented and holds all kinds of healthy attributes along with 13 - 16 grams of protein per serving. I like to steam my tempeh before doing anything to it. Because I don't have a double broiler or bamboo steamer, I've made my own steamer by using a colander and medium size pot with lid. It works perfectly well. If you choose this route, you can reuse the pot and colander for cooking your buckwheat noodles. Steaming your tempeh will soften it nicely and the marinade will absorb a bit better. Steam for 10 minutes or so.

If you can't find tempeh in your usual grocery store, ask the store manager to consider carrying it. This is how change begins on a small scale and it never hurts to ask as they are there for you!

Mirin & Maple Tempeh Stir FryMirin & Maple Tempeh Stir Fry

After steaming your tempeh, mix your marinade in a large bowl and add the tempeh, let set for 1 - 4 hours at room temp. Reserve the marinade.

Mirin & Maple Tempeh Stir Fry

Bake your tempeh...
I know what your thinking this is a stir fry! Well, you'll just have to trust me. :) 

Mirin & Maple Tempeh Stir FryMirin & Maple Tempeh Stir Fry

Dice your veggies of choice, these just happen to be on hand from my last recipe. Feel free to use whatever vegetables you like, have handy or need to be used up. Other options are bell peppers, broccoli, sugar peas, zucchini...these are what come to mind in a pinch but use whatever your preference is or sounds good. They will be stir fried, or sauteed, until al dente or your choice of firmness and then mixed with the soba noodles if using those. (My favorite wok is the el cheapo carbon steel wok for around $20! It heats up quickly and cools down quickly so your food cooks just right and stops cooking when you remove it from the heat. Just be sure to season your wok well. Here's a great article on the subject: When Cheaper is Better)

Mirin & Maple Tempeh Stir FP7096187ry

Mirin & Maple Tempeh Stir Fry 

Ingredients
  • 8 oz package tempeh (I used a five grain tempeh)
  • 1 tablespoon sesame oil, coconut oil or olive oil
  • 1/3 red cabbage, thinly sliced
  • 2 -3 large carrots, peeled and thinly sliced diagonally
  • 2 -3 scallions, thinly sliced
  • sesame seeds, garnish
  • cilantro, garnish, optional 
  • 8 oz. package soba noodles, or rice would fine too (I ♥ these 100% buckwheat noodles)

Marinade
  • 1/3 cup mirin
  • 3 tablespoons pure maple syrup
  • 3 tablespoons warm water
  • 2 tablespoons tamari, bragg's aminos or soy sauce 
  • 1 teaspoon red pepper flakes, or to taste

First start by steaming the tempeh. Use a double broiler, bamboo steamer or do like I did above by using a pot and colander. Bring water to a boil, cut tempeh into sticks about 1/4 inch or so, place in choice of steamer, steam for 10 minutes. This will soften and swell your tempeh a bit helping it to absorb more marinade.  

In a large bowl, mix together the marinade, add the tempeh and let set for 1 to 4 hours at room temp, turning every so often. Reserve marinade for later.

When ready, turn oven on to 400 degrees. Bake tempeh on a cookie sheet or in a baking dish for 25 minutes, turning once in between. 

Cook your soba noodles according to package. 100% buckwheat noodles take 8 minutes to cook while the wheat and buckwheat soba noodles only take 4 minutes to cook. Drain and rinse well under cool water. Set aside. If using rice, cook about 1 dry cup and set aside.

In a wok or large saute pan, heat oil and add your cabbage and carrots, cook for about 3 minutes, add scallions, a spoonful of marinade and cook another 2 minutes or until desired firmness (I like mine al dente). Add in the soba noodles and cook for another minute or so until soba noodles are gently warmed. 

To serve, place noodles and veggies in serving bowl and top with a few strips of tempeh. Add a few large spoonful's of marinade over the noodle/veggie mixture and tempeh, top with sesame seeds and a few extra scallions. If using rice, serve rice in serving bowl and top with veggies and tempeh, drizzle with marinade, sesame seeds and scallions. 

Serves three but more likely two!

Enjoy!


Summer Rolls + Two Dipping Sauces

Summer Rolls + Two Dipping Sauces

Well hello again, I have missed you terribly! A lot has happened in the last couple weeks. After my last post Soba Noodles with Tofu, Broccoli & Carrots, I left for vacation to the beautiful Kings Canyon. The area we visited is located in the eastern sierra's located between Mammoth and Bishop just off the 395 called Rock Creek Lake. It's gorgeous up there with clean air, nice temperatures and nature all around. How does it get any better than that? You can see many of my pictures here. In that time, the 4th of July also came and went. I extreme cleaned the house, you know the unclutter, going behind closed doors and rearranging the furniture kind...feels good to be done with that! I did all those things I have put off doing while focusing my energy on this blog the last year. Speaking of which, The Simple Veganista also turned 1 on July 1st. I can't believe it's been a year already. I really wanted to do a special post for this occasion but it just didn't happen so it was a quiet celebration. When I first started this blog I had no idea where things would go but thanks to everyone who has a love for clean vegan food...this blog has done remarkably well in that short amount of time and I thank you all for following along with my passion. I intend to keep it going as long as it stays fun for me. I love all the aspects of being here...from testing and preparing the food, taking pictures, editing, writing (a few of these I'd like to improve on), sharing, getting feedback from everyone. It's truly fun for me and I'm so happy to be a part of your lives and hope you get lots of inspiration for clean, healthy eating habits along the way. And remember, that's all it is...creating NEW habits and making them healthy habits! Cheers to another year of creating those healthy habits that stick... 

So without further ado...let's eat!

Summer Rolls + Two Dipping Sauces

Summer, spring or salad rolls, known as Goi Cuon in Vietnamese, are fresh, versatile and so easy to put together. You can use all kinds of vegetables to suit your taste...make them simple with just a few ingredients like the first picture or add more for a variation and rainbow effect like the picture above. I love these rolls and you can be sure that this is the first of many I will like to try out and share. The recipe today is a very basic, all around summer roll. Nothing complicated, everything should be readily available and easy to find. For a great tutorial on rolling a closed end roll like the image just above (they were cut in half) go here: How to Roll Fresh Vietnamese Spring Rolls – A Photo Tutorial

Summer Rolls + Two Dipping SaucesSummer Rolls + Two Dipping Sauces

You can find rice paper in the Asian section of your grocery store. There are different shapes and sizes so if you're new to this be sure to experiment with a few to see what works best for you. 

I have included two different dipping sauces because some of you may be allergic to nuts. One will be a peanut or almond butter based dipping sauce and the other will be rice vinegar based. A sauce for everyone here. Both are excellent. I love my peanut sauce but was very pleased with the vinegar based sauce I adapted from Martha Stewart. Even though I'm not much of a vinegar lover...it was delicious! 

Summer Rolls + Two Dipping Sauces

Summer rolls are commonly filled with a few herbs like mint, cilantro and/or Thai basil. Feel free to use one or a combination. I find in these rolls that they all taste great together. If you can't find Thai basil, regular basil will be just as good! I especially love the basil with the peanut dipping sauce...the flavors pair so well.

Summer Rolls + Two Dipping Sauces

Next you can choose from a variety of greens to add to your rolls. Use one or a combination if you like. Depending on what style roll I'm making, I may use two types of greens.

Summer Rolls + Two Dipping Sauces

Lastly, choose your veggies and cut them into thin strips by hand or using a julienne tool. These are just a few of the veggies you can use. Try adding avocado, green onions, bean sprouts, etc. Many recipes for these rolls also use rice noodles, and you can too, but I prefer a roll full of veggies instead having one or two extra if needed. I can eat two or three of these and be completely satisfied for a few hours. 

Adding in some sliced tofu is an option. I do like to add it to my rolls when not using the peanut sauce as it adds some protein to the meal. 

Summer Rolls + Two Dipping Sauces

Summer Rolls + Two Dipping Sauces 

Ingredients (2 - 3 servings)
  • 6 rice papers (preferably the circular sheets)
  • 2-3 medium carrots, cut into match sticks or 1/4 inch sticks
  • 1/2 cucumber, cut into match sticks or 1/4 inch sticks
  • 1/2 bell pepper (yellow, red and/or orange), thinly sliced
  • 1/4 red cabbage, thinly sliced
  • greens of choice: leafy lettuce, pea shoots, spring salad mix or micro greens
  • radishes, thinly sliced (optional)
  • organic tofu (firm or extra firm), sliced (optional)
  • mint, small handful of leaves
  • cilantro, small bunch of sprigs
  • basil, small handful leaves

Sweet Chili Sauce (2 servings)
  • 1/4 cup unseasoned rice vinegar
  • 2 tablespoons tamari or soy sauce
  • 2 tablespoons warm water
  • 2 tablespoon maple syrup
  • 1 clove garlic, minced or grated
  • 1 teaspoon red pepper flakes, or to taste
  • juice of 1 lime

Peanut Sauce (2 servings)
  • 3 heaping tablespoons peanut or almond butter
  • 1 tablespoon tamari or soy sauce
  • 2 tablespoon maple syrup
  • 2 tablespoon warm water
  • 1 - 2 tablespoon rice vinegar, optional
  • juice of 1 lime
  • 1 teaspoon red pepper flakes, optional

Mix your dipping sauce together first, let set so the flavors can mingle. It will taste much different after a few minutes. Taste for flavor before serving.

This summer roll direction will be for the open end roll as shown above. For the closed end roll please see the tutorial here

Fill a large shallow bowl 1/2 way with warm water...a large pie dish works great for the circular rice sheets which is what this recipe will use. Making one roll at a time, dip the rice sheet into the water making sure to get both sides and all edges, no need to let it soak until completely soft. Lay on a flat surface and fold in half, the rounded side will be the top and the flat side the bottom. The paper will still seem a bit stiff but will keep absorbing the water and soften as you layer your veggies. In the center, layer your ingredients...greens, herbs, tofu and veggies. Fold the end corner over the layer of veggies, give a nice tuck and roll. 

Serve with choice of dipping sauce. 

Enjoy!


    Cucumber Salad + Peanut Citrus Dressing

    Cucumber Salad + Peanut Citrus Dressing

    As we head into summer and the temperatures begin to rise here in Southern California, I find myself craving salads more and more. This is a refreshing salad of cucumbers and fresh vegetables with a wonderful peanut citrus dressing that will have you tipping the bowl for every drop (I know I say that about all the salad dressings but it's true...you'll see!)

    Originally I wanted to create cucumber noodle salad for this recipe but quickly decided that I would rather keep this as easy as possible without having to use too many tools. The only tool I do recommend for this recipe is a microplane for grating your ginger and garlic. It's a great tool for any kitchen and will come in handy over and over again.

    Bring on the warmer weather and let's beat the heat with this easy and flavorful Thai inspired salad!

    Cucumber Salad + Peanut Citrus Dressing
    Cucumber Salad + Peanut Citrus Dressing
    Cucumber Salad + Peanut Citrus Dressing
    Cucumber Salad + Peanut Citrus Dressing

    Cucumber Salad + Peanut Citrus Dressing

    Salad 
    • 2 1/2 cups English cucumbers, sliced and quartered
    • 1 cup carrots, sliced
    • 1/2 red bell pepper, diced
    • 2 scallions, thinly sliced
    • 1/4 head of purple cabbage, sliced
    • handful cilantro, roughly chopped
    • handful cashews, for garnish
    • red pepper flakes, for garnish (optional)

    Peanut Citrus Dressing
    • 3 tablespoons orange juice, lime juice or lemon juice, + more as needed
    • 3 tablespoons raw or natural peanut butter (almond or cashew butter is great too)
    • 1 tablespoon tamari, bragg's liquid aminos or soy sauce
    • 1 tablespoon pure maple syrup
    • 1/2 garlic clove, grated
    • 1/4 - 1/2 teaspoon fresh ginger, grated
    • pinch of red pepper flakes or 1/2 teaspoon sriracha hot sauce (optional)

    In a small bowl, whisk together the ingredients for the peanut citrus dressing, set aside allowing the flavors to come together. Then before adding the dressing to the salad, taste for flavor adding anything extra you might like. For a thinner dressing add 1 or 2 tablespoons citrus juice or water. To make it thicker add a tad bit more nut butter.

    Prepare your salad ingredients. Check your dressing for flavor. In a large bowl combine the salad mix with the dressing, toss well and serve. Top with cashews and red pepper flakes. Serves two.

    Notes for the dressing: Use the orange juice for a less tangy dressing. I used orange for this recipe and have also used lemon as well. Both were great, and I know the lime will be wonderful too! You can also lessen the amount of juice replacing it with water. Add in some citrus zest of choice if desired. And if you're a vinegar lover, try adding a splash or two of rice vinegar!

    Notes for the salad: Try tossing in a cup of cooked quinoa after mixing for a more nutritionally balanced profile.

    Recommended tool for grating as mentioned above: Microplane

    Enjoy!


      QUICK & EASY CHICKPEA TACOS

      QUICK & EASY CHICKPEA TACOS

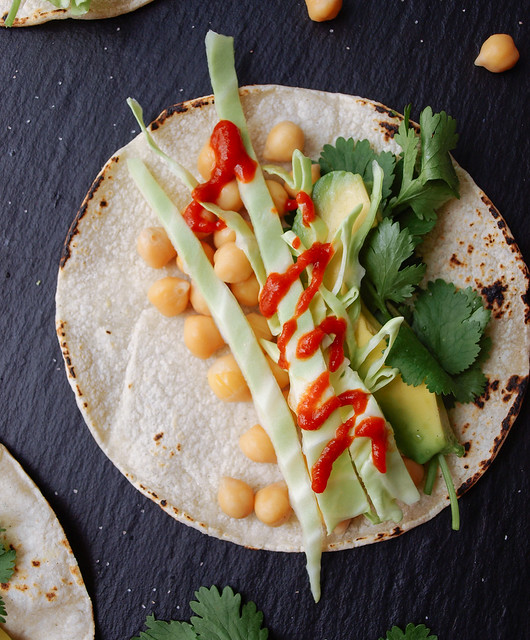
      I have been eating these tacos on a fairly regular basis. I shared a similar version of this on Instagram and Facebook about seven months ago (my how time flies!). It went over very well, especially on Facebook! I don't know why it took me so long for but I finally decided it was time to put this simple taco here as a valuable veggie resource. They are so quick and easy to pull together. They can be eaten as a snack or a meal. Usually I skip the cabbage and cilantro if I don't have it on hand. I love it simply with chickpeas, mashed avocado and sriracha but for the recipe I decided to add a few extras for your consideration making it a heartier taco. Chickpeas are one of my favorite beans and are about the most versatile bean in existence! They work well here served at room temp so there's no heating involved making your taco preparation speed along. Of course, if you prefer your beans heated, by all means heat them up. These tacos have been a useful creation and a complete meal to boot. I hope you enjoy them as much as I do! Cheers :)

      QUICK & EASY CHICKPEA TACOSQUICK & EASY CHICKPEA TACOSQUICK & EASY CHICKPEA TACOS

      QUICK & EASY CHICKPEA TACOS

      Ingredients
      • 1 1/2 cups cooked chickpeas (garbanzo beans) or 1 can (15oz.), drained and rinsed
      • 1/4 head green cabbage, shredded
      • avocado, sliced
      • cilantro
      • corn tortillas, warmed
      • sriracha, sambal oelek or your favorite hot sauce
      • lime wedges, to serve
      • mineral salt

      I'll let you do the measuring on most of the ingredients. I usually eat about 3 of these tacos at one sitting...sometimes 5. I will have left over chickpeas and cabbage with both of those amounts. If serving 7 or more tacos, add a bit more chickpeas to your list just to be on the safe side.

      Warm your tortillas. I do this carefully on the stove top over an open flame to give it some charring on the edges.

      Layer your tacos with chickpeas, cabbage, avocado and cilantro. Top with mineral salt, sriracha and a squeeze of lime. You may also opt to mash some avocado as your first layer and then add the chickpeas, cabbage and cilantro. This will help hold the chickpeas in place a little better.

      So quick and easy...enjoy!


      I'd love to see your masterpieces!
      #thesimpleveganista